3 New Elf on a Shelf Ideas from the Cricut Design Team
The Cricut Design Team is such a creative group! Check out these three fun Elf on a Shelf ideas:
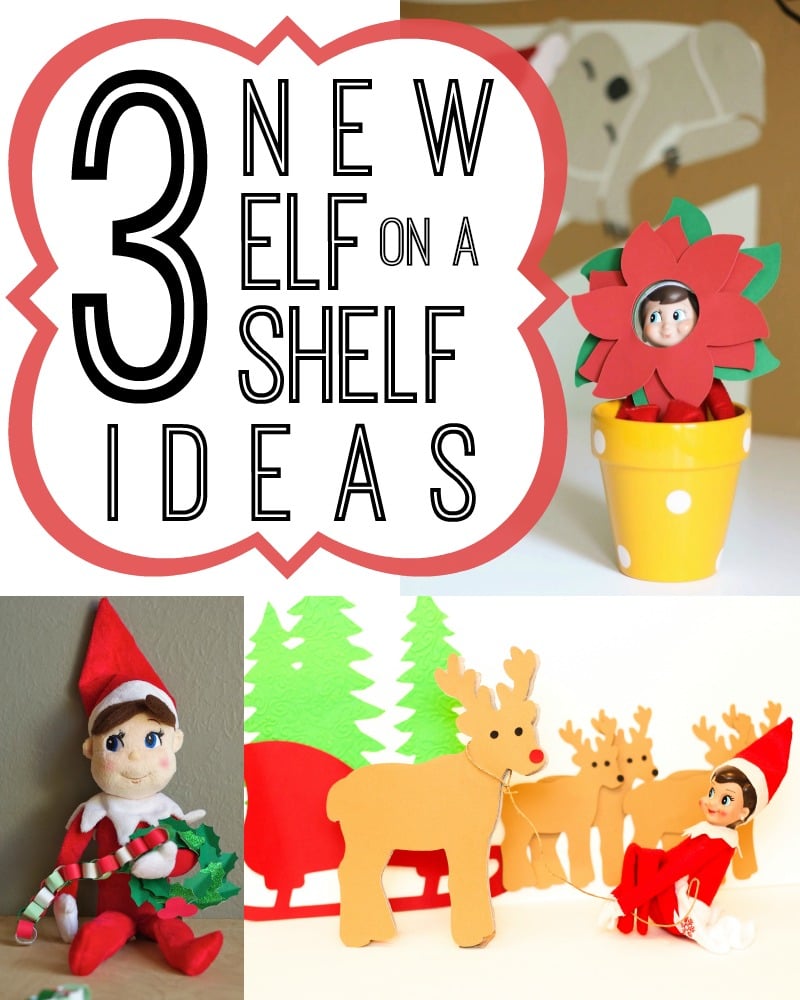

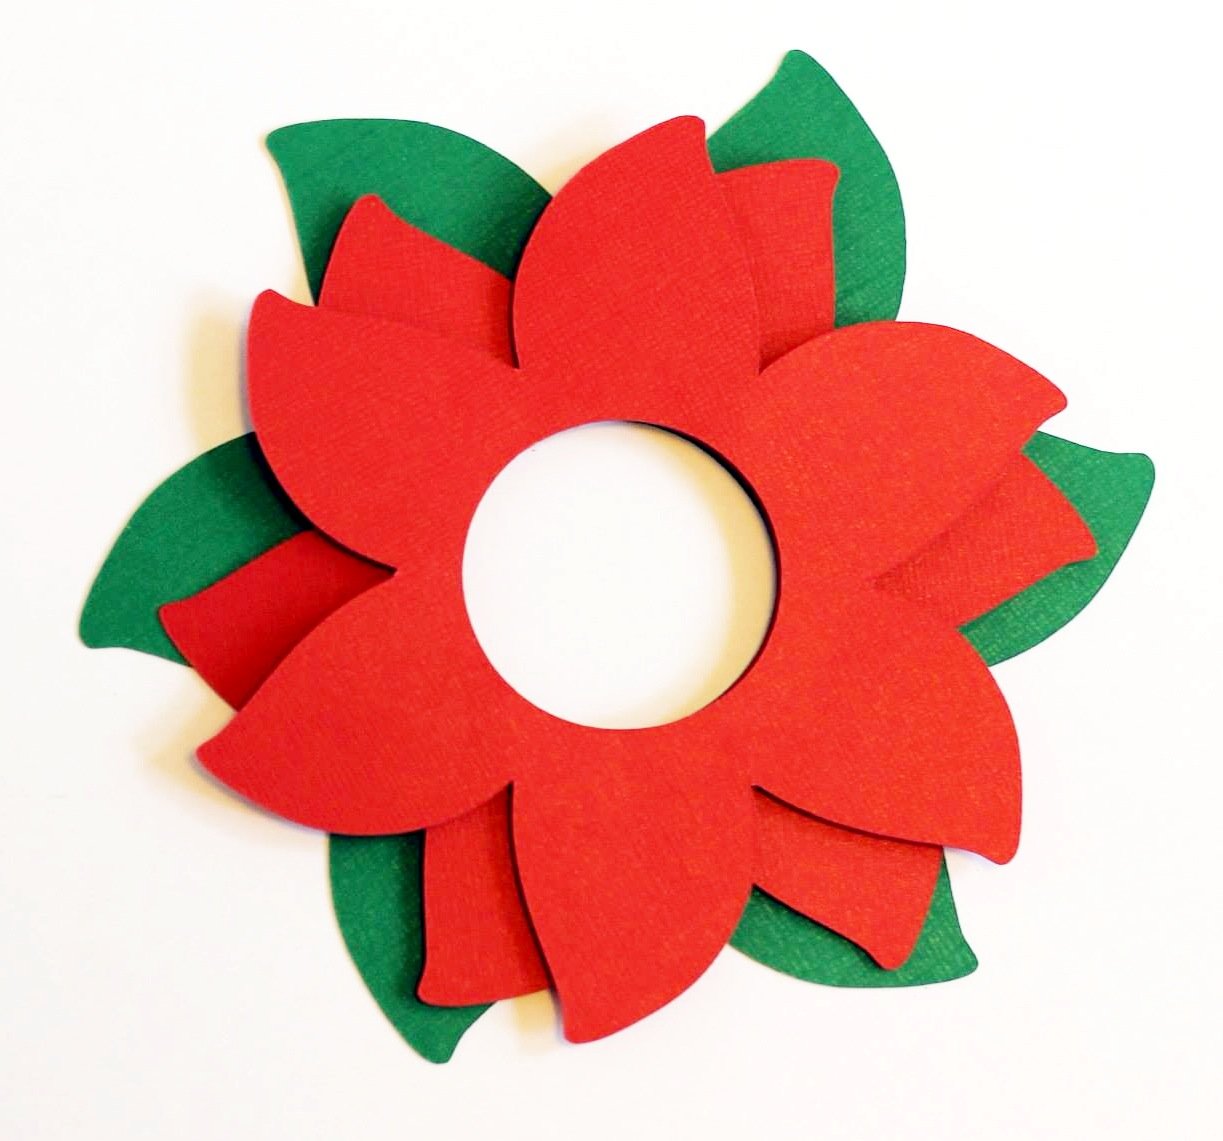
Elf on the Shelf Poinsettia

 |
 |
Supplies:
- Elf on the Shelf
- Adhesive
- Red and green paper
- Small flower pot
- Winter woodland cartridge
- George and Basic Shapes cartridge
- Download the hand-cut templates: red poinsettia template, green poinsettia template
Instructions:
- Use Cricut Craft Room to place the circle in the middle of the poinsettia shape. Cut two 7 inch poinsettias with 2.5 inch circles out of red paper.
- For the outer leaf, use the same design with the flower cut at 8.5 inches.
- Arrange and adhere the three layers so that you can see each petal.
- Place the flower around Elf’s head (using clear tape, if needed) and arrange him in the flower pot.
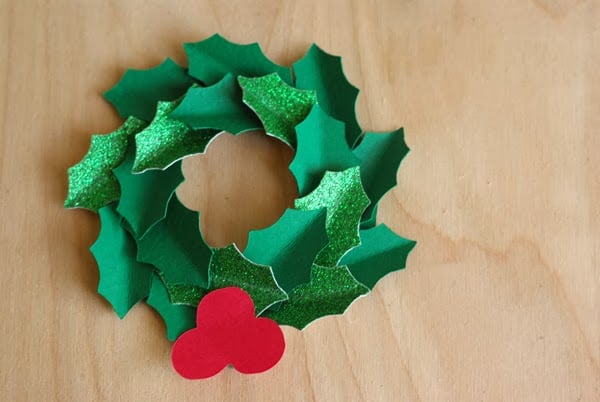
Elf on the Shelf Decks the Halls

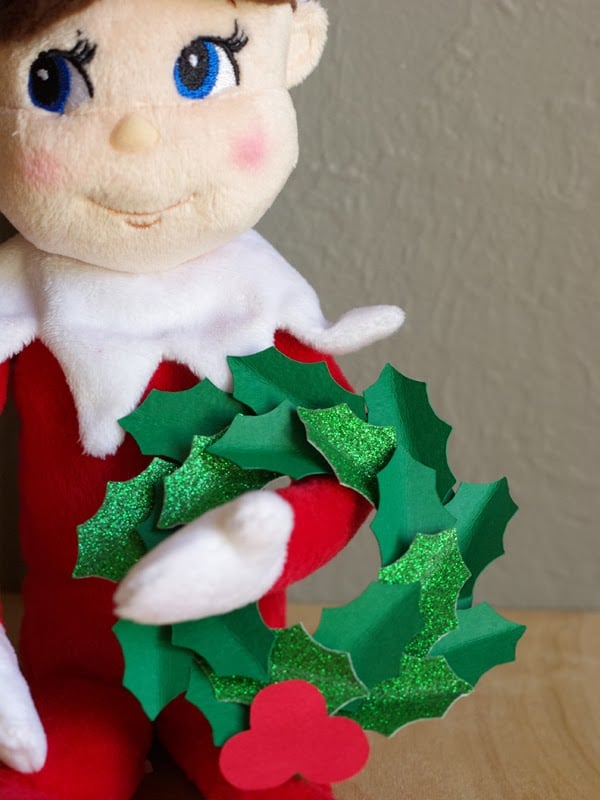
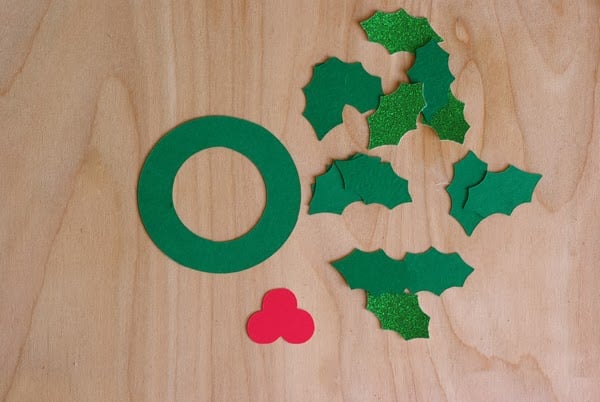
Supplies (hand-cut templates can be downloaded here):
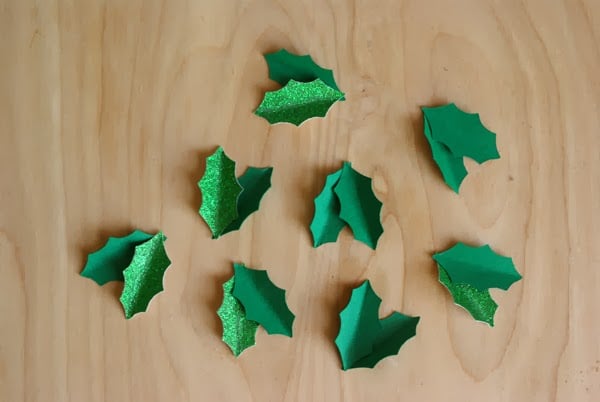
- 18 holly leaves (Close to My Heart – Art Philosophy)
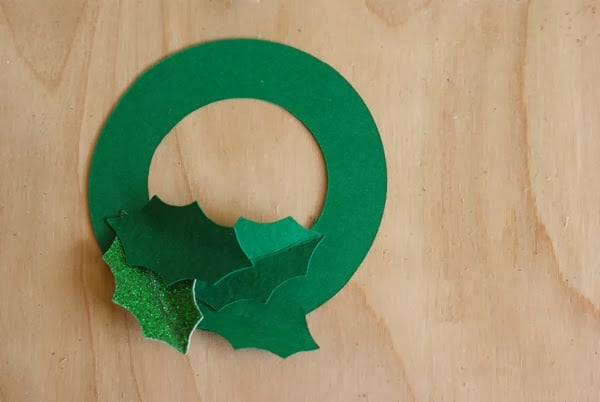
- 1 wreath form (3D Pinwheels)
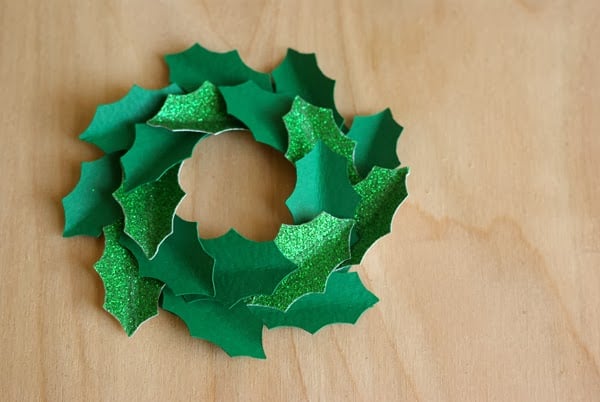
- 1 group of holly berries (George – 3 circles welded together)
- glue dots
Instructions:
- Cut out all your pieces. You can use a mixture of solid green and glittered green for the holly leaves.

- Fold the leaves down the middle and glue them together in pairs with glue dots.
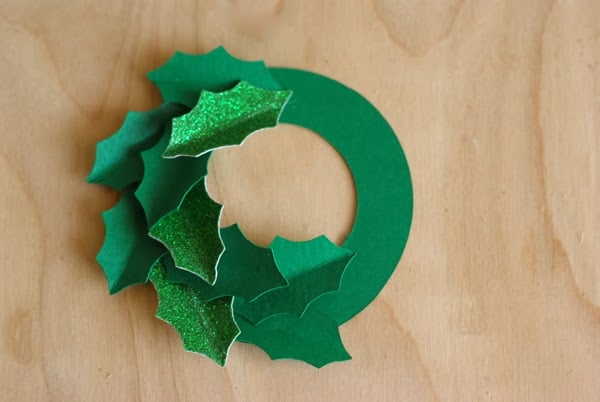
- Start with one pair of leaves and layer the pairs one after another around the wreath.
- Finish the wreath by attaching the berries at the bottom of the wreath.
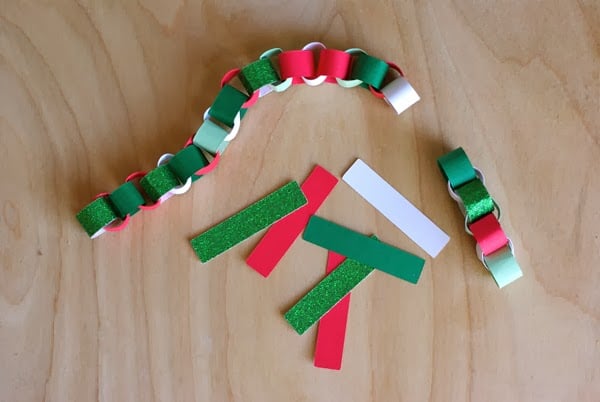
- Now for Elf’s classic paper chain. This mini version uses rectangles that are 2 1/2 by 1/2 inch (these are also included on the printable template). Start making the first loop by attaching the ends together with glue dot, then just continue to add additional loops to make a long chain.

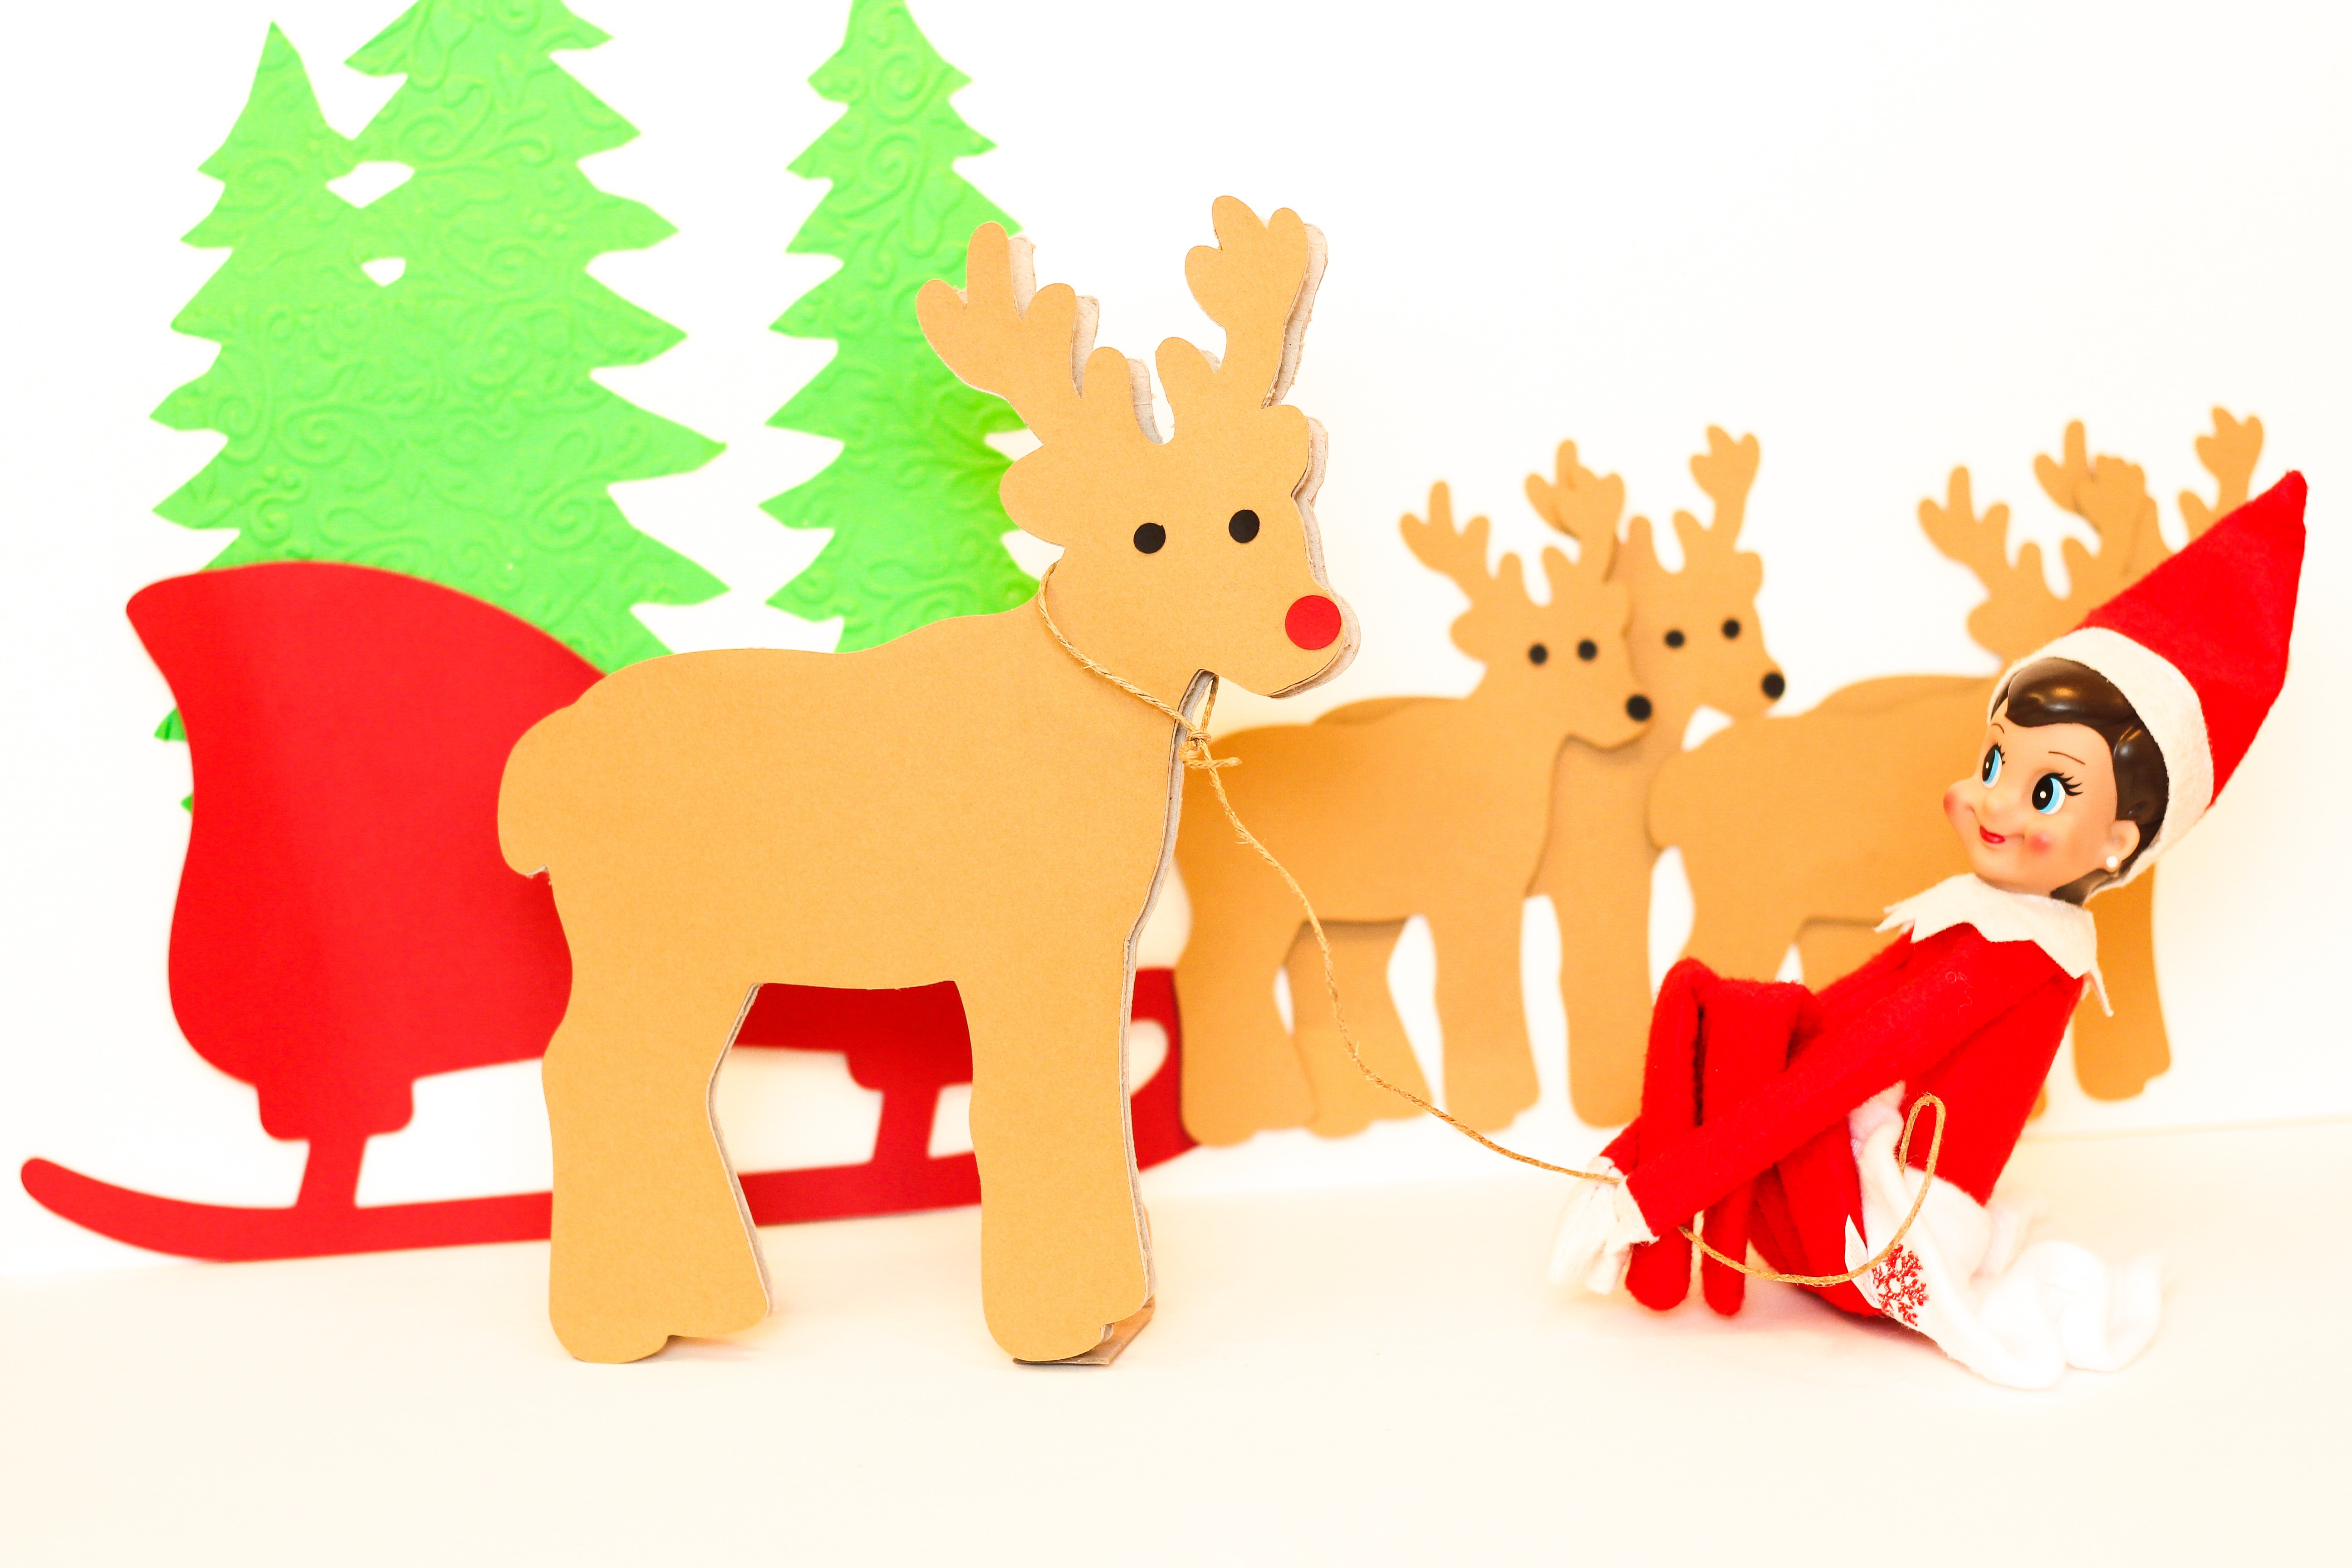
Elf on the Shelf Reindeer Project
 |
 |
Supplies:
- Brown, Red, and black cardstock (if you have red and black markers you can just use them instead of the red and black cardstock)
- Cereal box
- Glue gun
- Glue stick
- Scissors
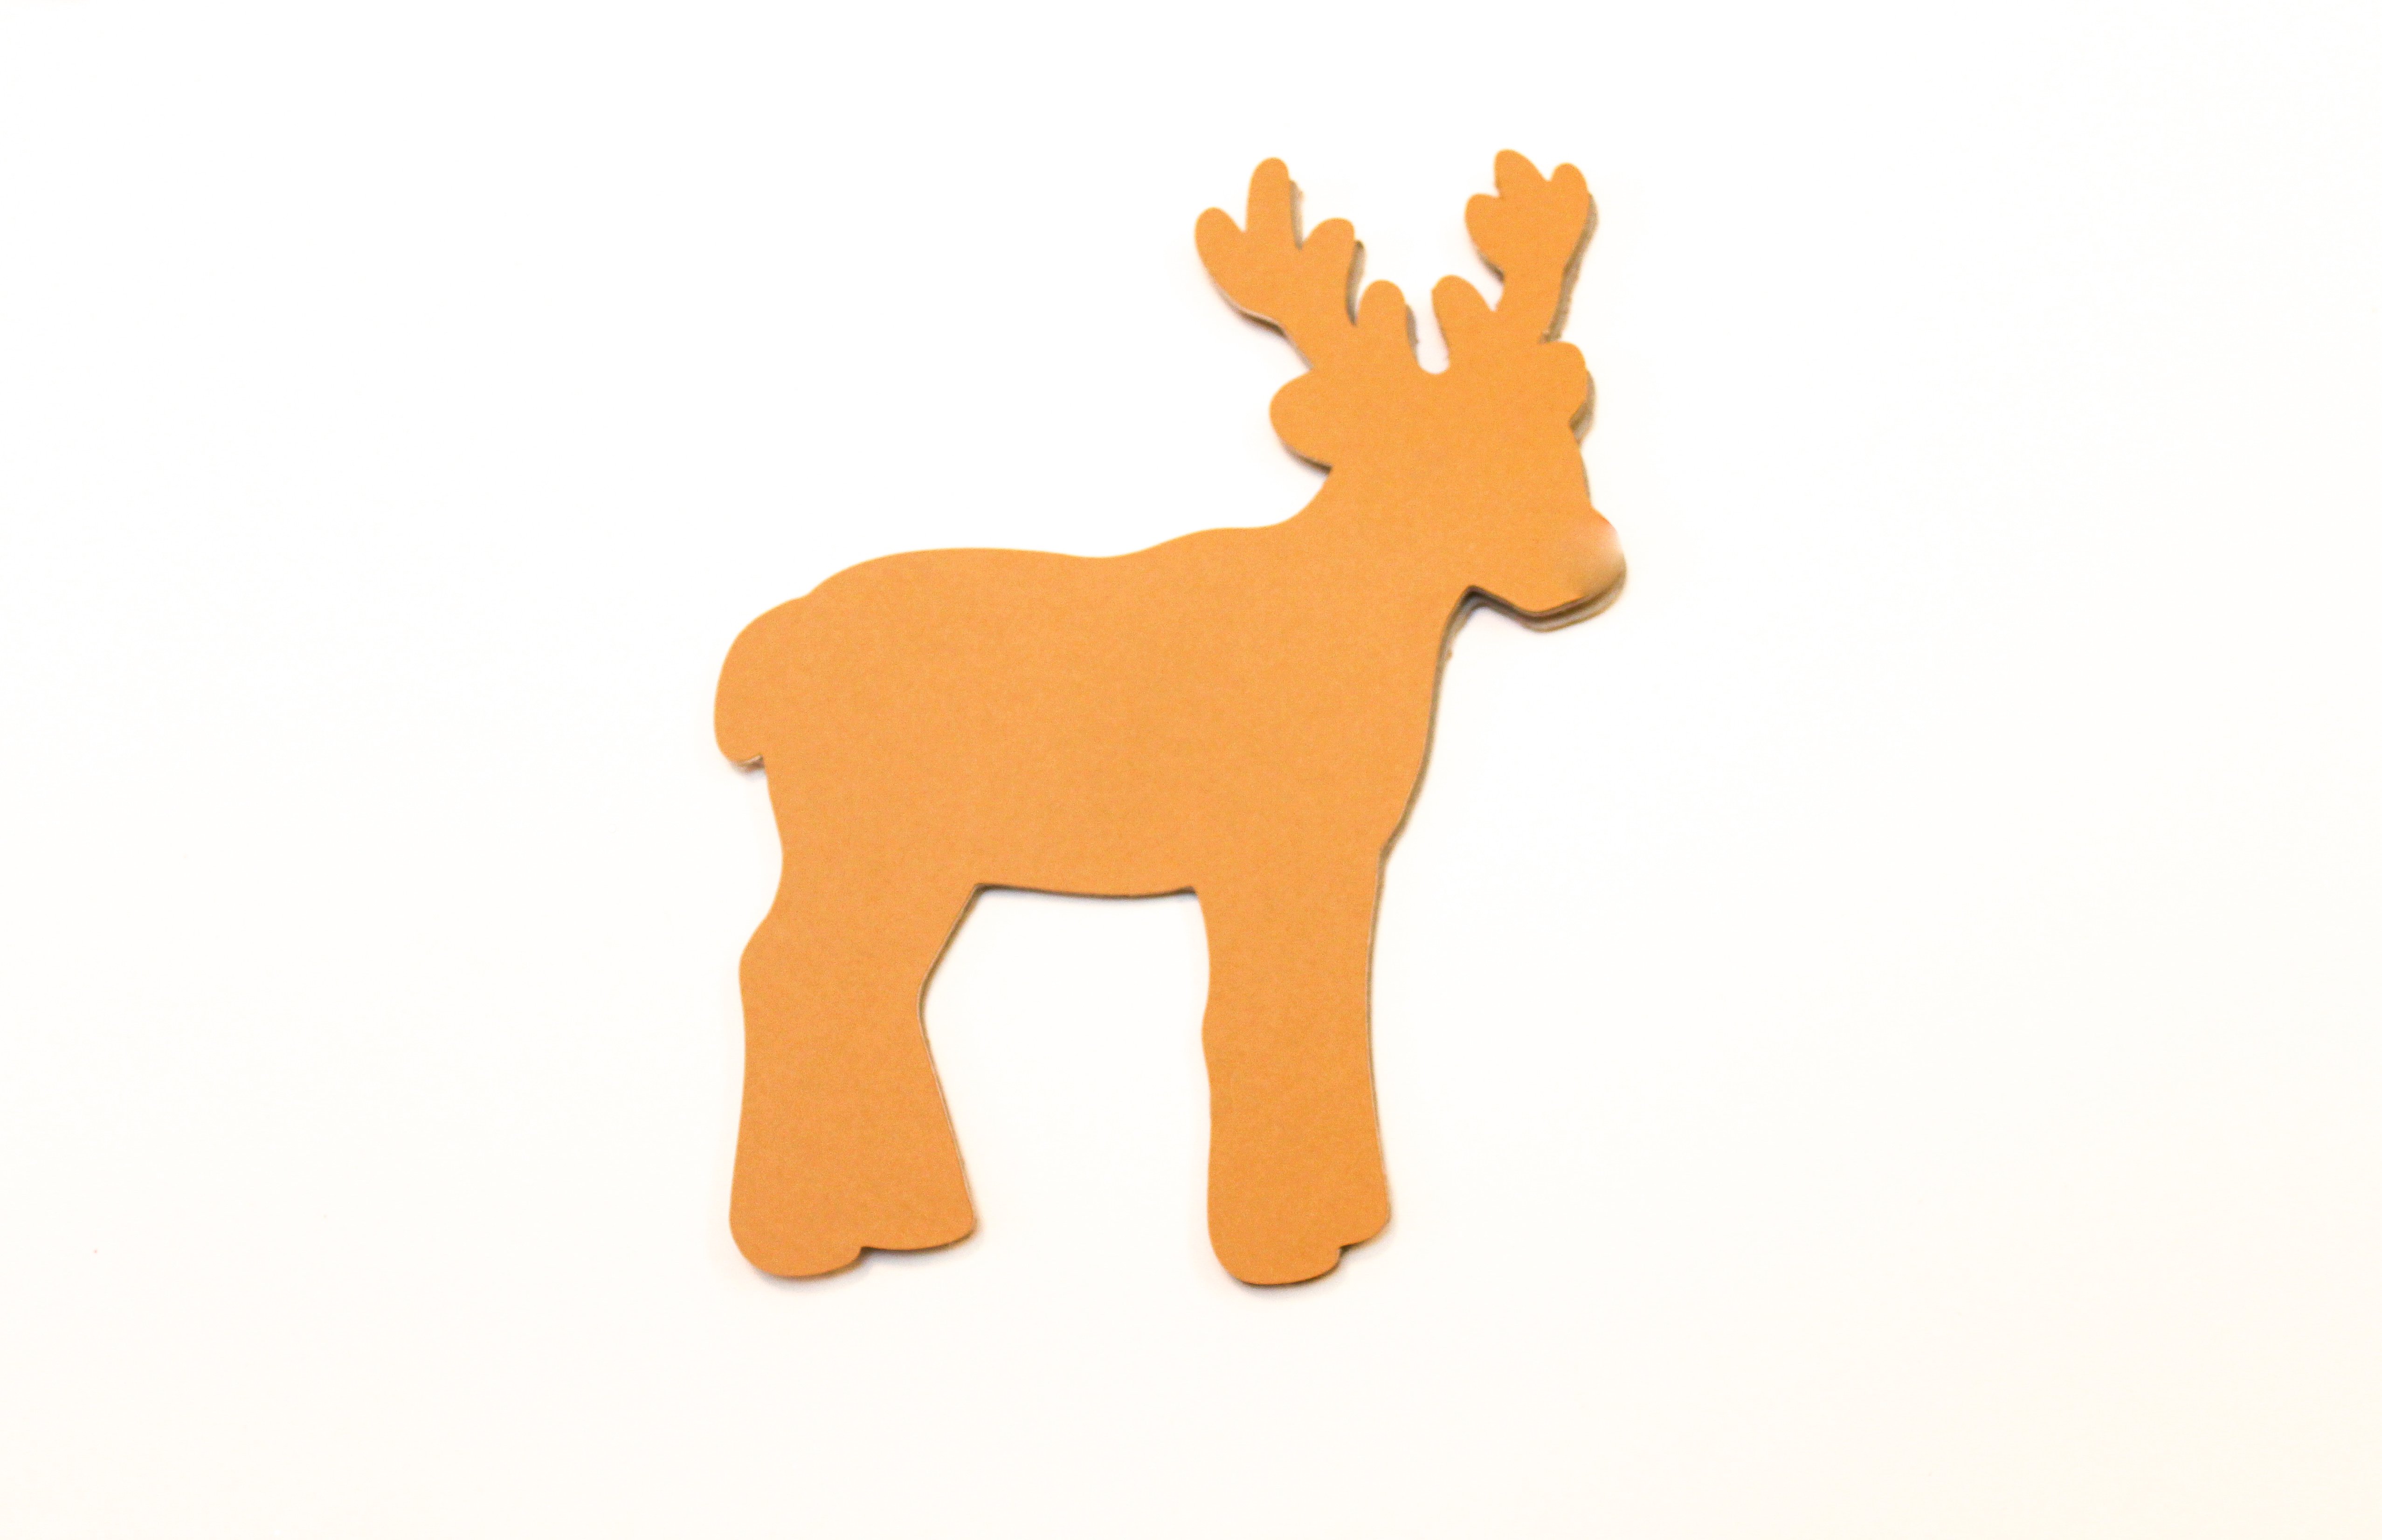
- Reindeer template (download here)
Instructions
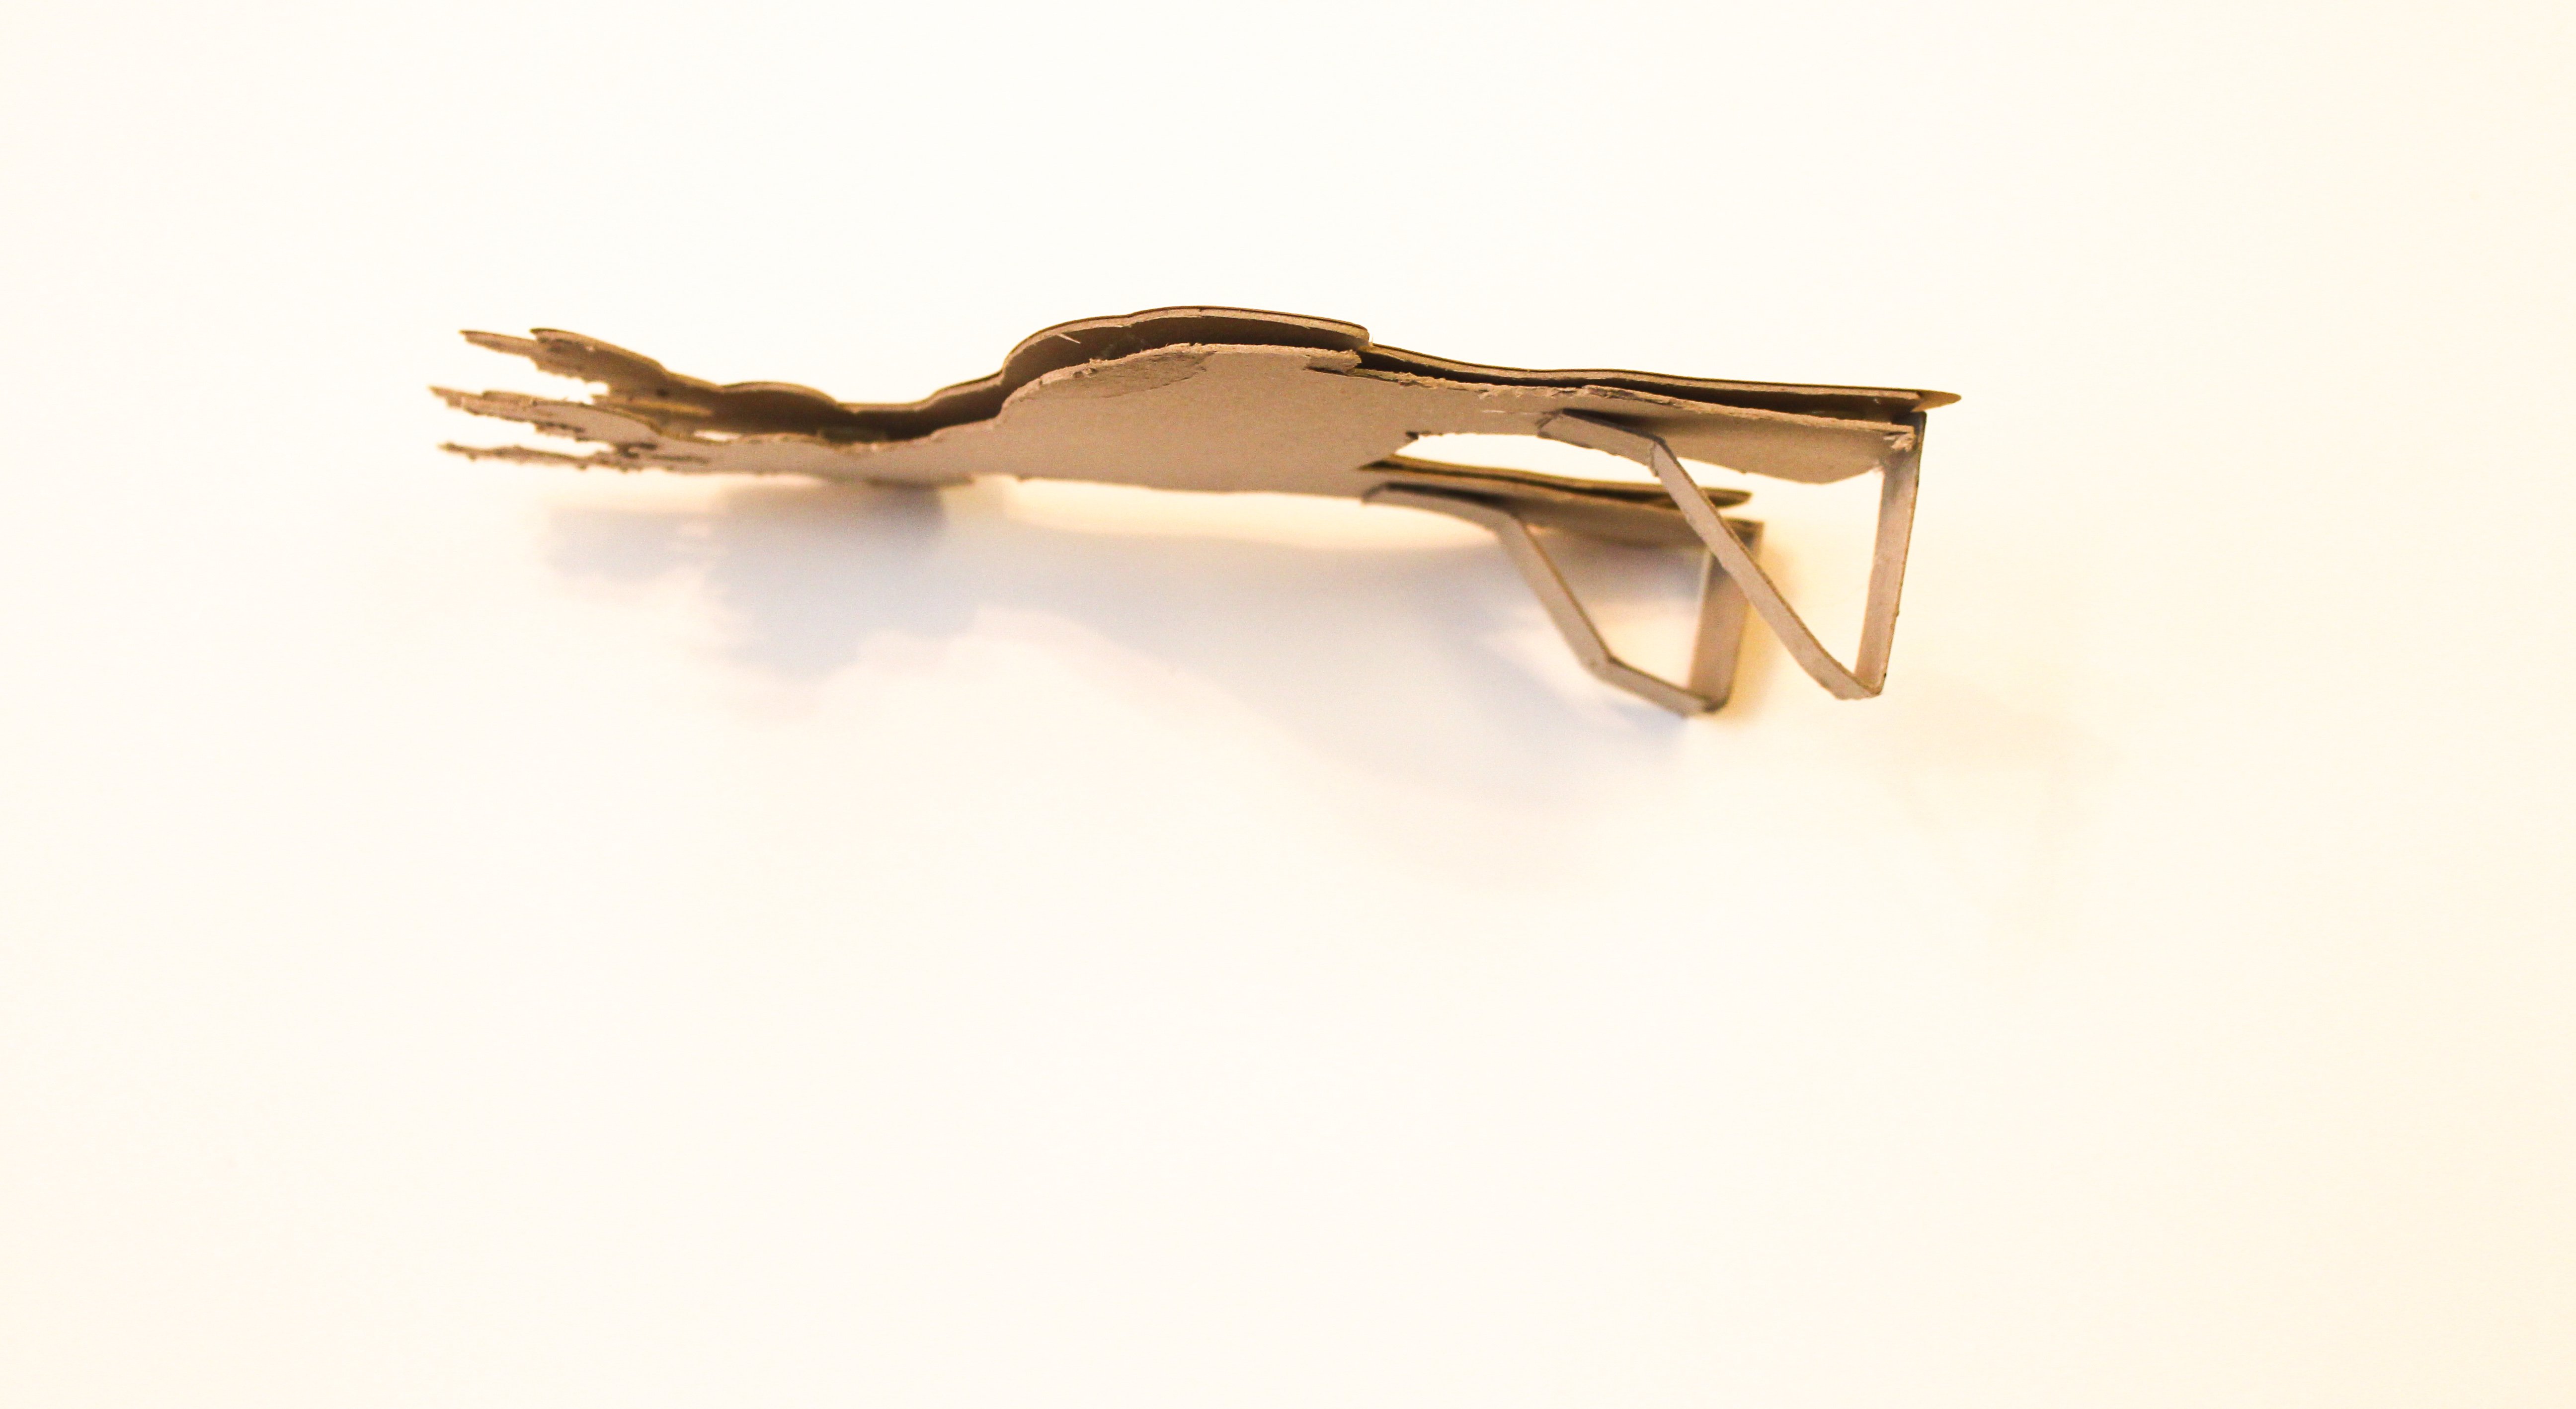
- Using the provided template, cut out two reindeer out of the cereal box and one out of the brown card stock.
- Take your glue gun and with a thick layer of hot glue, glue both cereal box pieces together but do not press down too much. You need a little gap between both pieces so it can be strong enough to hold the Elf.
- With the glue stick, glue the box reindeer and the cardstock reindeer together.
- If you are using cardstock of this step cut out two small circles out of the black cardstock for the eyes and one bigger circle out of the red for the nose. Using the glue stick glue them on the reindeer. If you are using markers just draw the eyes and nose on.
- With the remaining cereal box cut out two strips two and a half inches long by about half an inch wide.
- Take your glue gun and glue them to the back of the reindeer and the bottom of the leg for support. (See picture)
- Place your elf of the reindeer you just created and you are all set!


