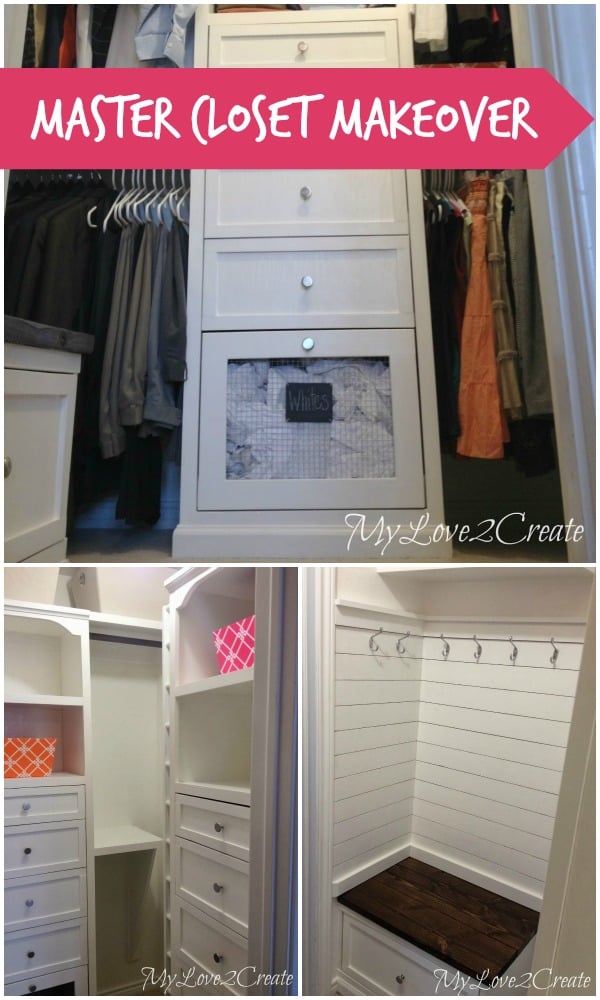
Amazing DIY Master Closet Renovation
The master closets in newer homes are often so large and have so much potential… but the inexpensive wire shelving just doesn’t always look amazing, and it doesn’t always work for all of the stuff that you need in a master closet either! Paying for a professional to design and install a new closet system can cost as much as an entire room makeover, so many DIYers (including me and Justin!) are coming up with our own closet solutions to save some cash while still getting the custom closet of our dreams. I love all of the features — like storage towers with drawers and laundry hampers, plus a mudroom-style bench area with hooks — that our guest today packed into her new master closet:
Not sure what features you want in your dream closet? Try some of these on for size (and read below for all the details on how Mindi created her closet storage towers with laundry hampers, plus the mudroom-style bench!)
DIY Master Closet Renovaton
by Mindi from MyLove2Create
Hello! My name is Mindi at MyLove2Create. The name of my blog basically says it all, I truly love creating things. It is a thrill for me to repurpose and upcycle things that others would throw away, just like when I turned an end table into a desk. Since I am a busy wife and mother of six kids, I have to do things on the cheap.
I strive to provide thrifty projects that make life easier, more beautiful, and unique. A couple examples include my DIY Corner Fruit Tower and my Desk and Hutch Makeover. If I help to spark the desire to create in others than I have truly accomplished my purpose!
Let’s take a look at my Master Closet Makeover!
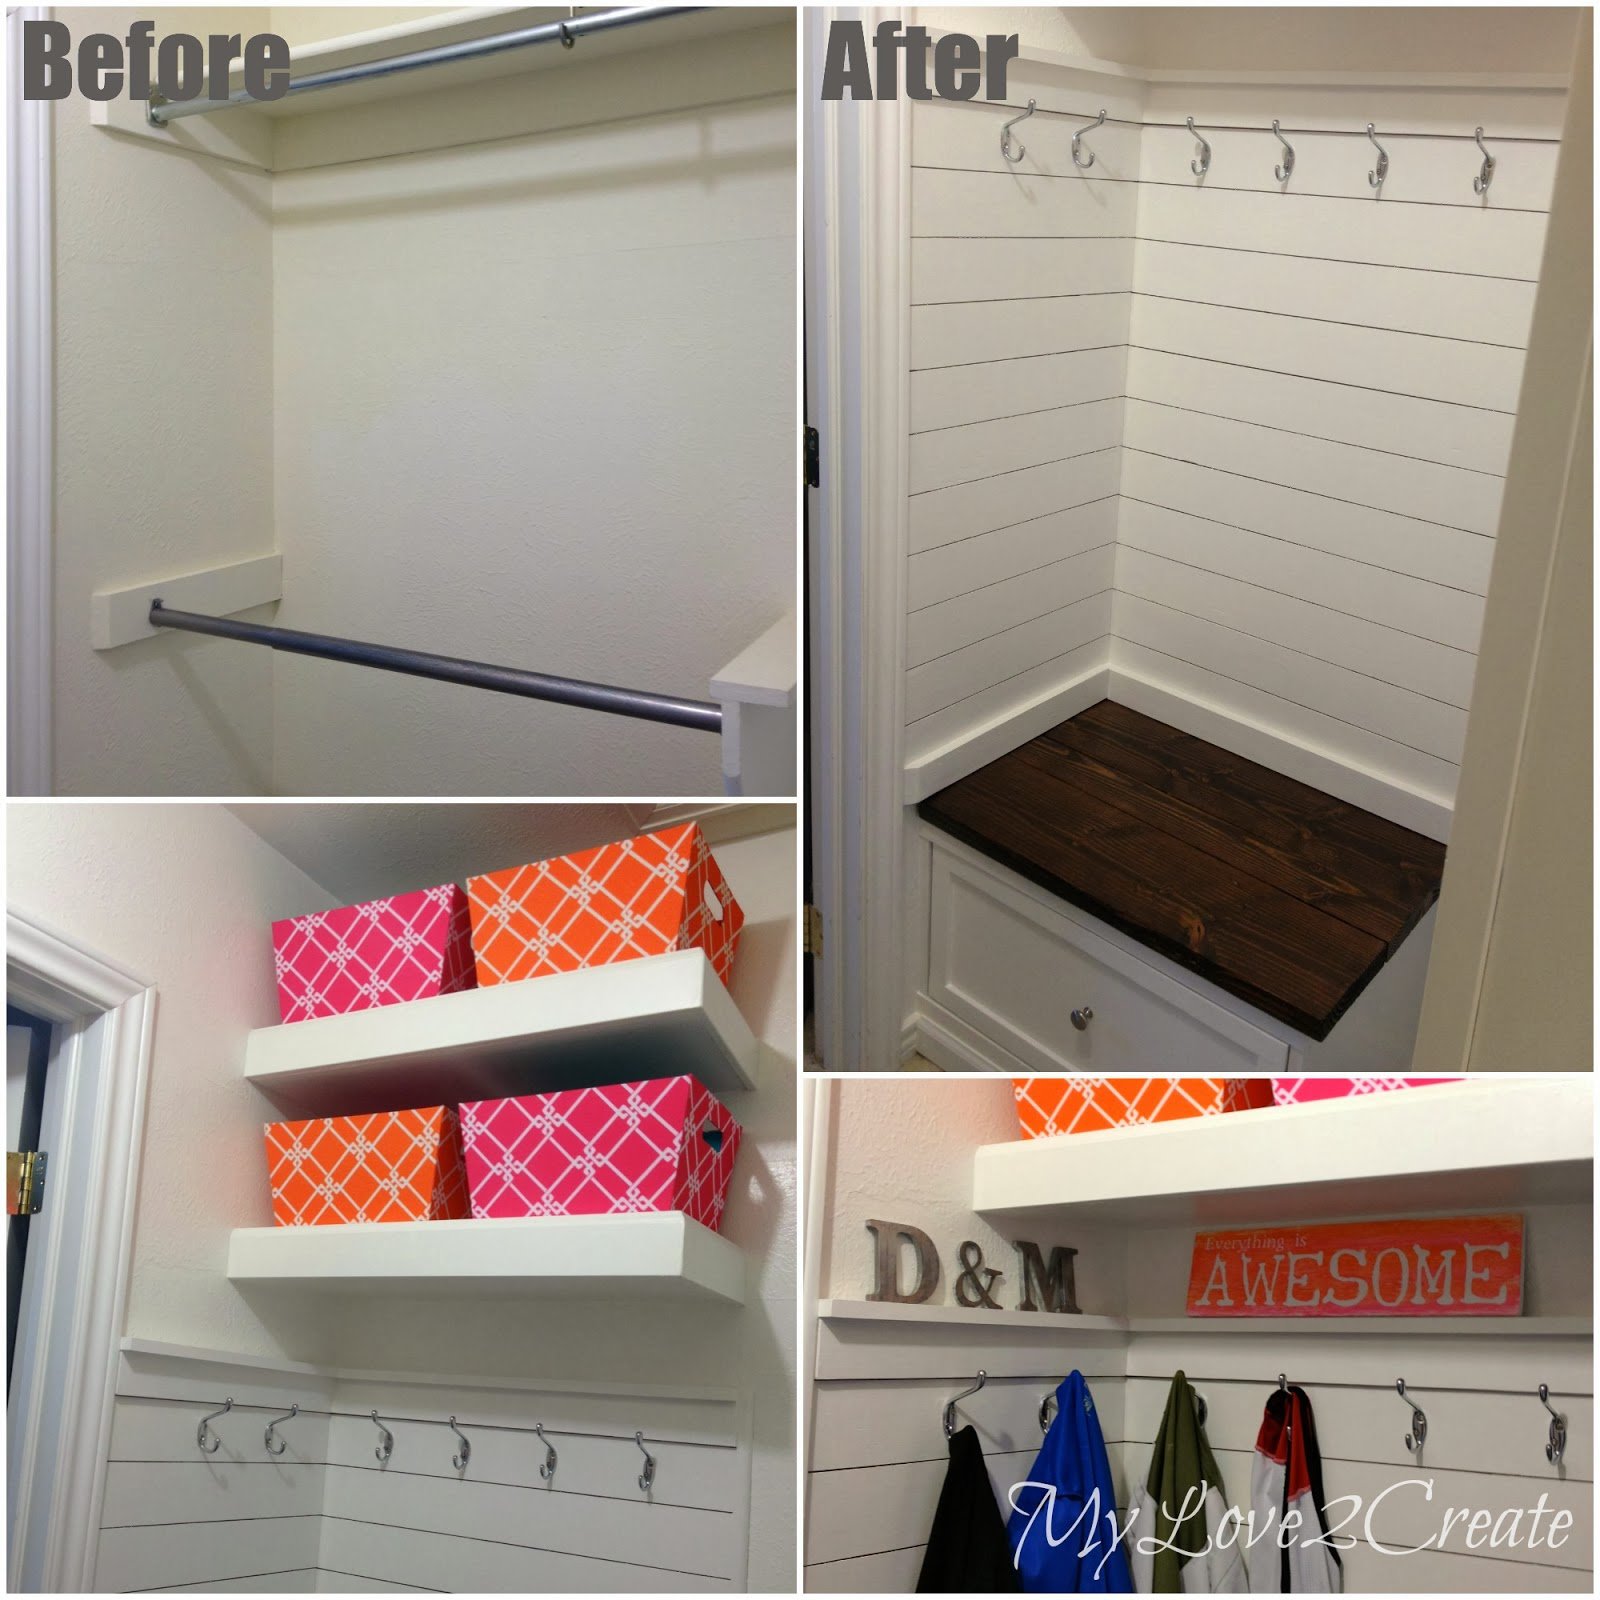
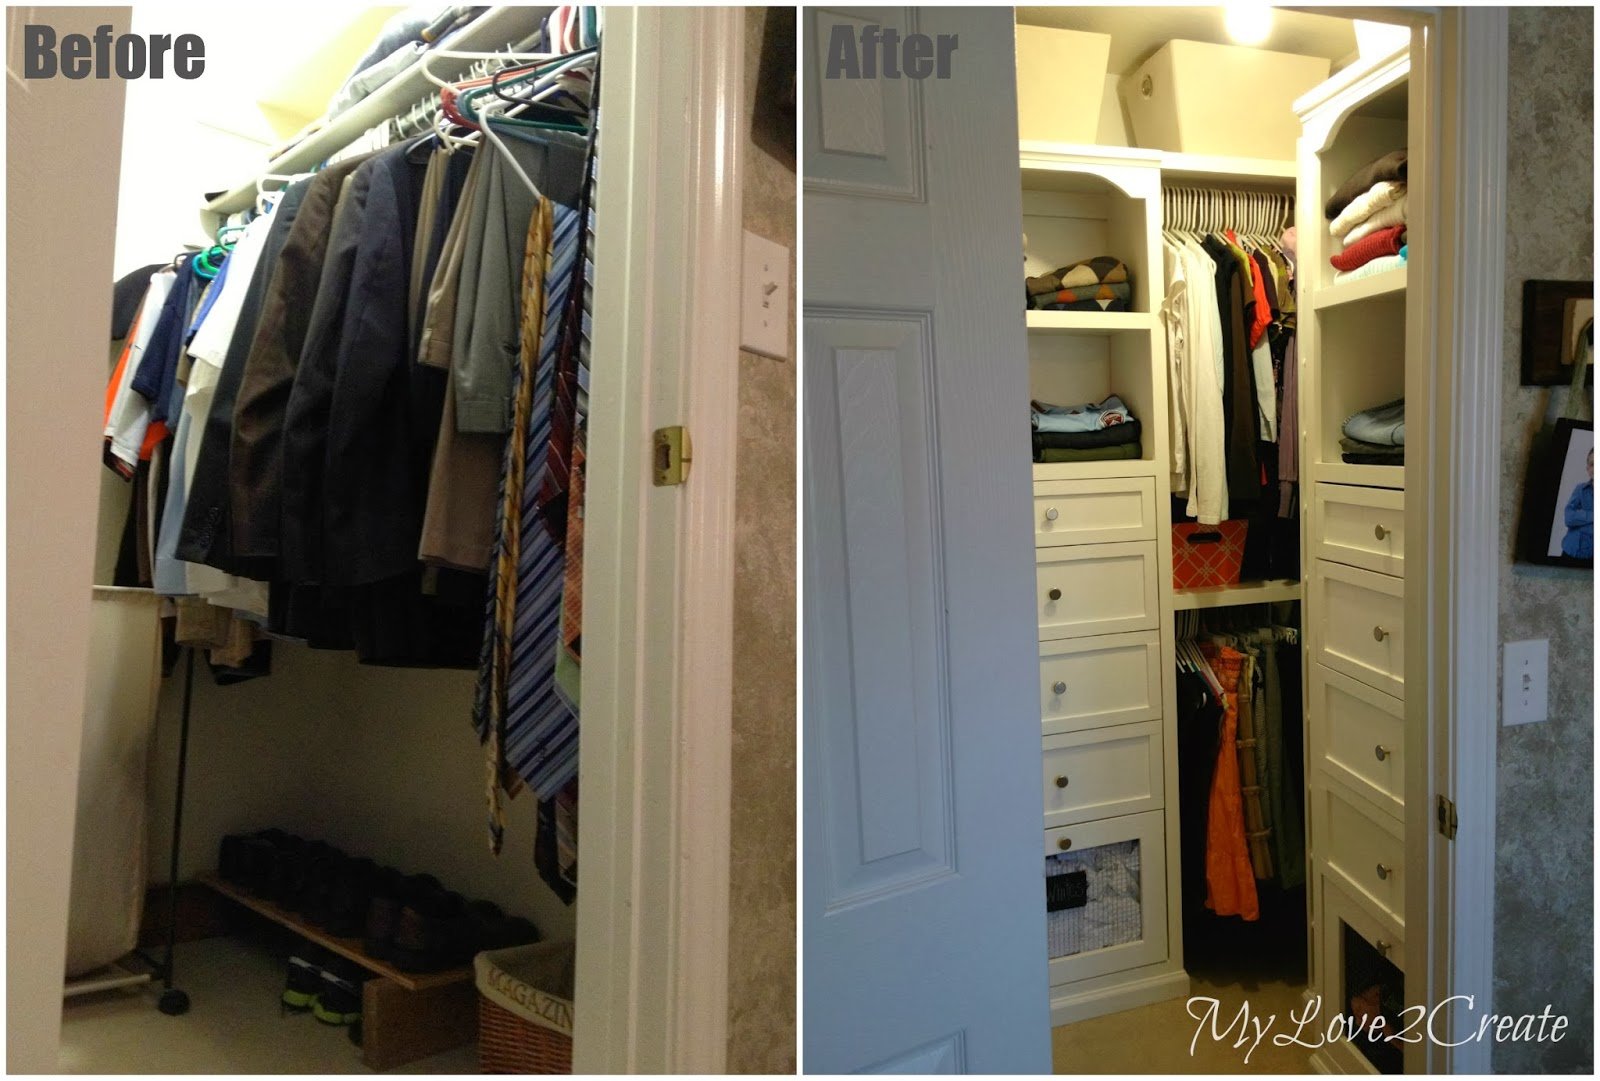
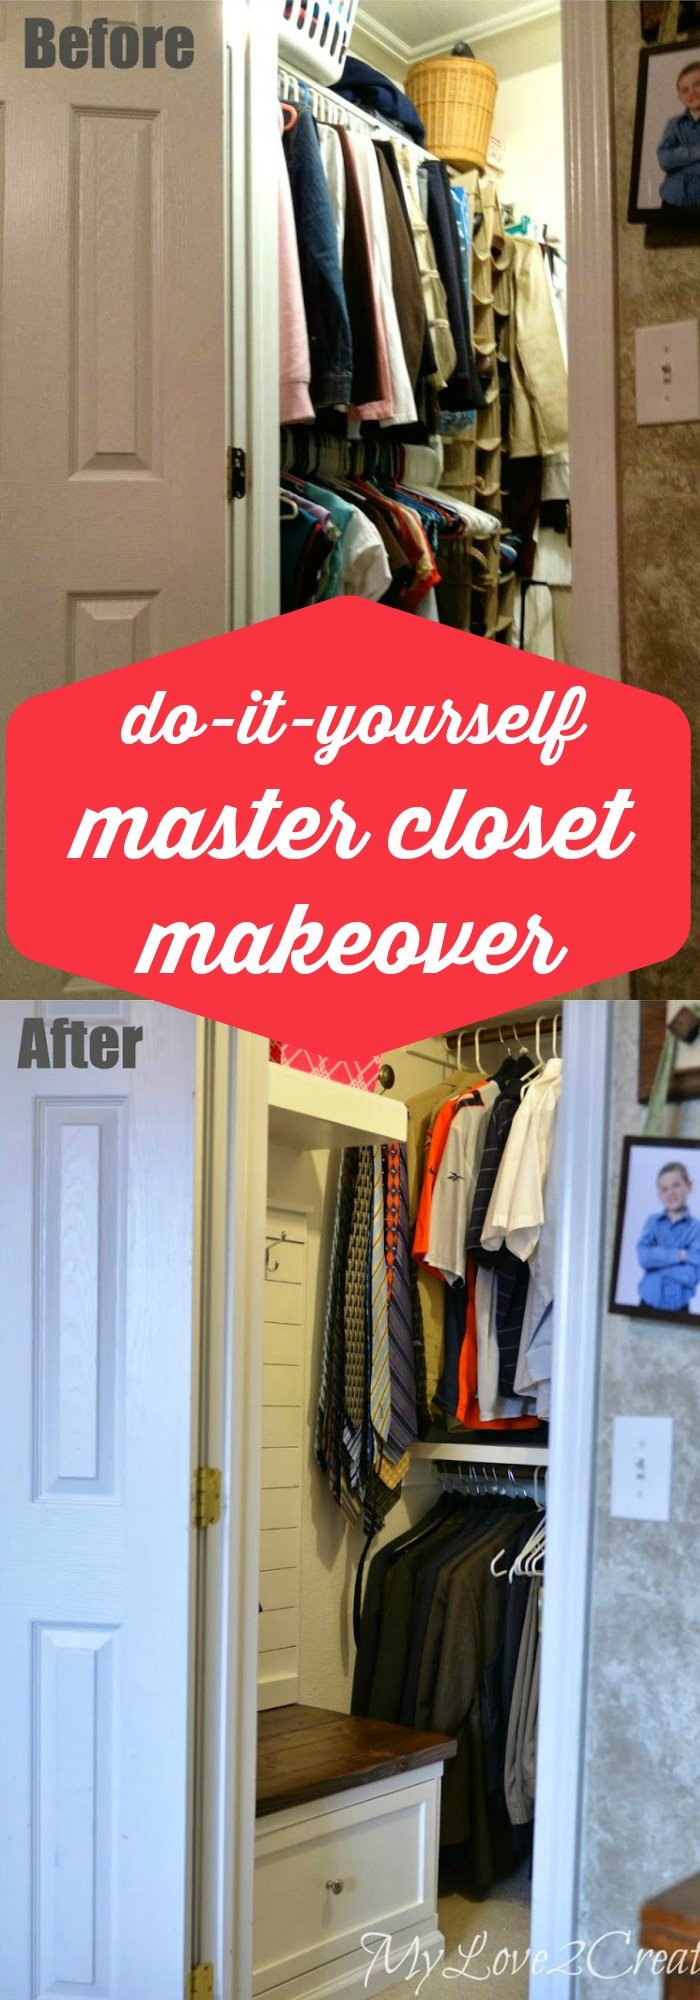
I have been wanting to make my closet into something beautiful and much more useful, for the longest time! I finally decided to just do it, it was a lot of hard work but so worth it. I love it! I think you need to see a before to appreciate this…
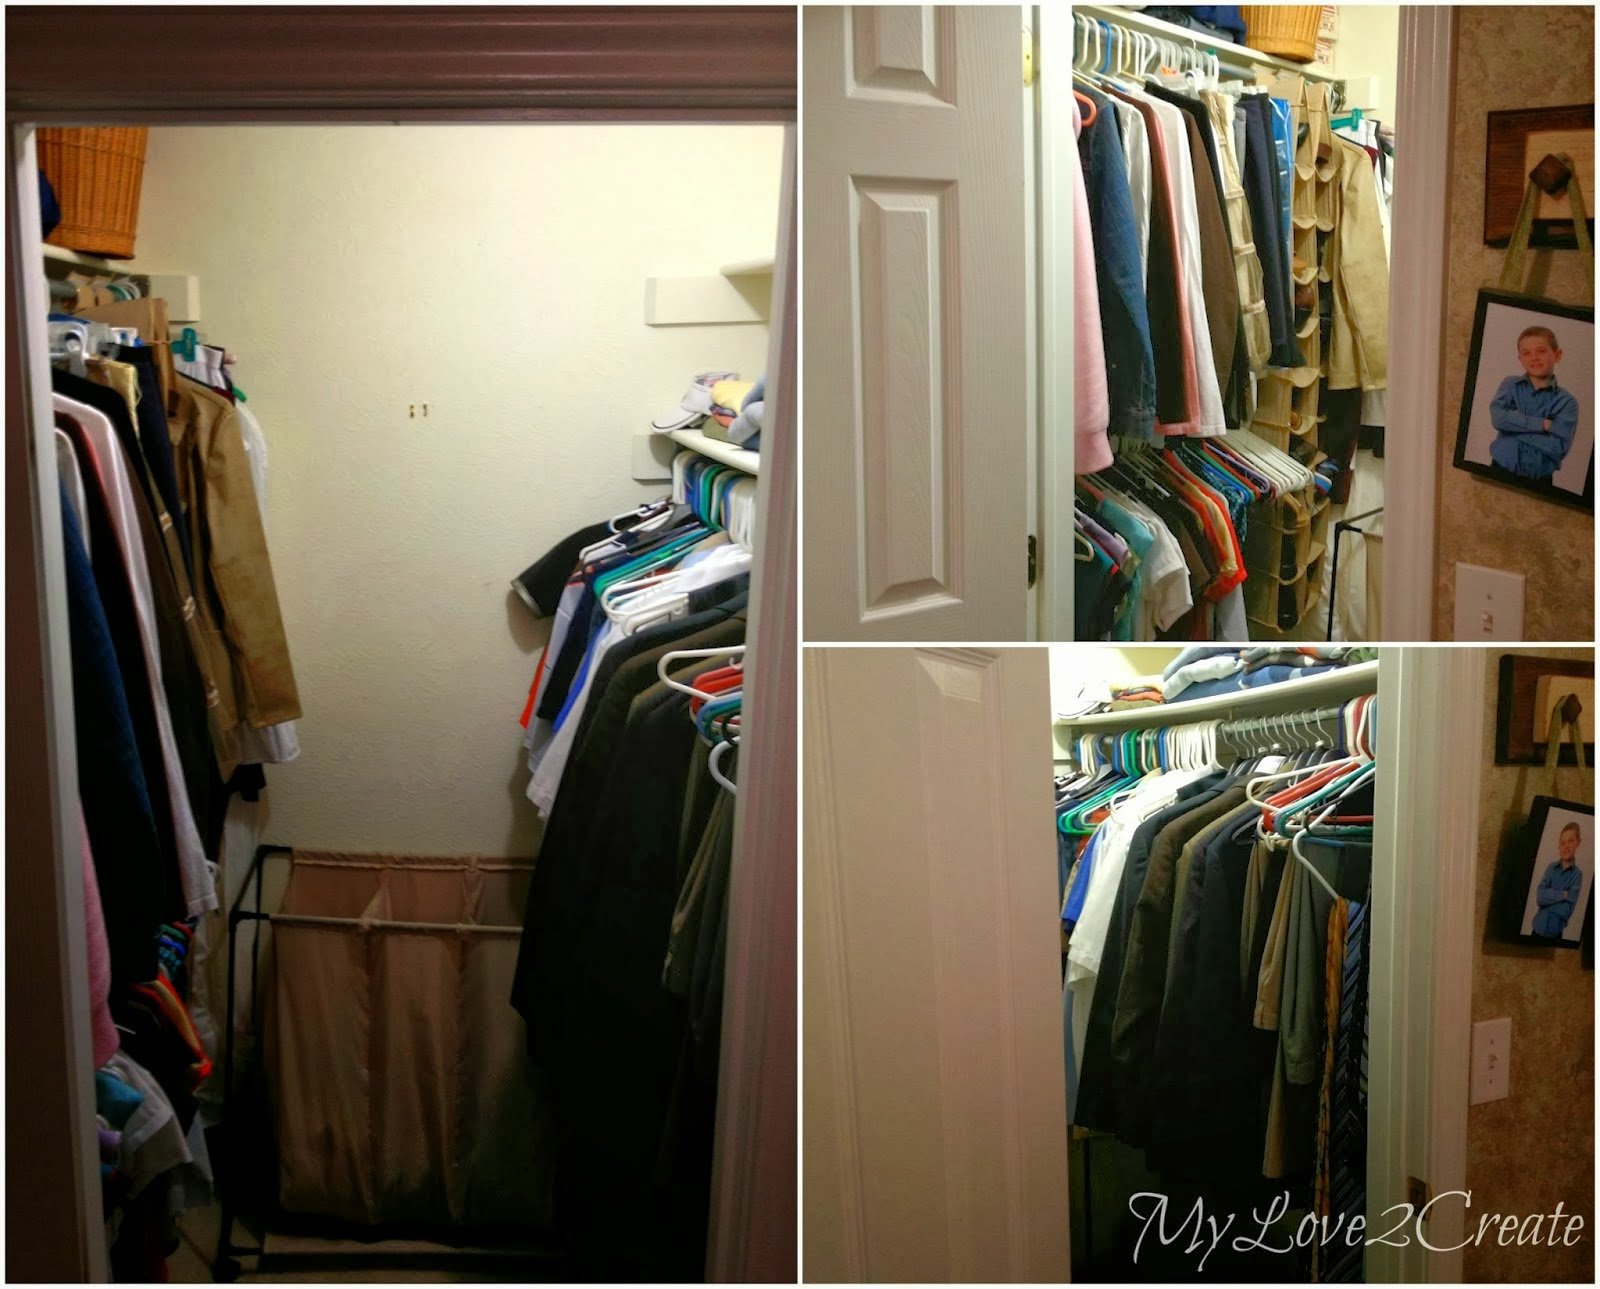
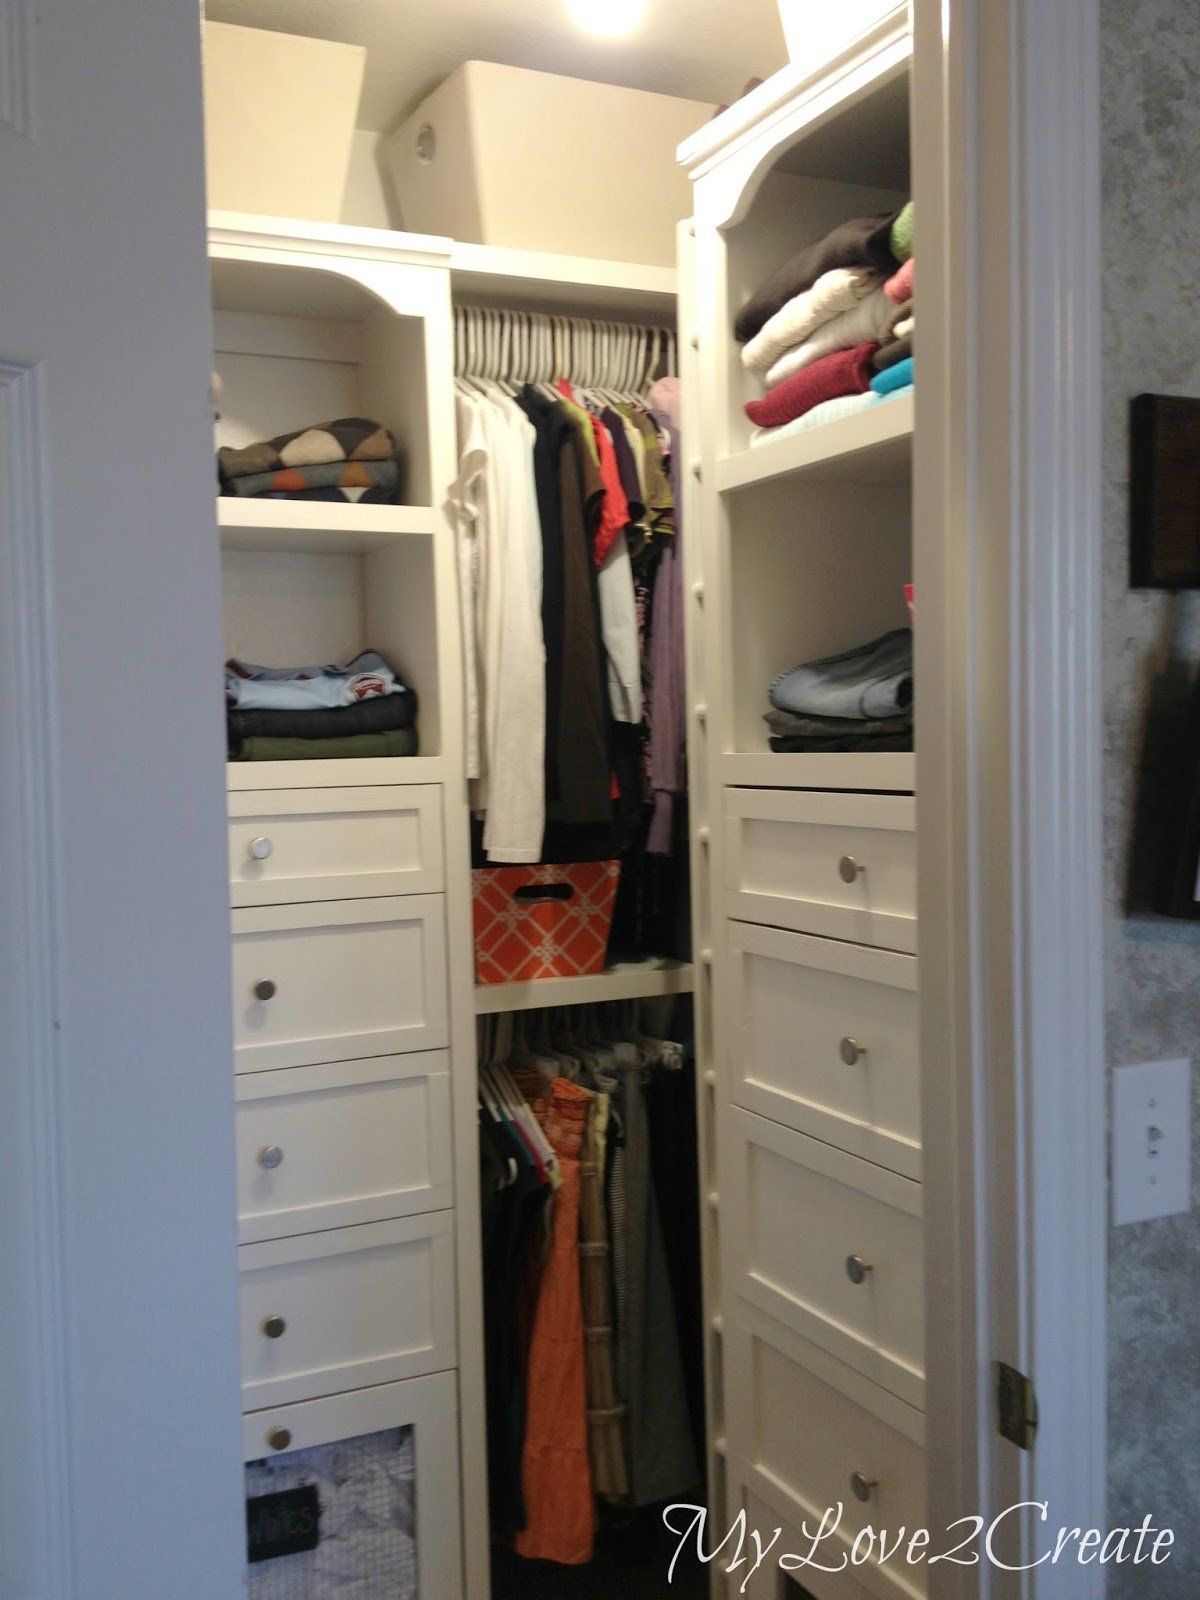
Yep, not much to look at. And here it is now…

So much better!
Do you want to learn how I did it? Ok, let’s get to it!
See another great closet transformation with this tutorial for a custom DIY closet organizer.
To start, I did a ton of research on closets. With several ideas in mind I measured my closet and came up with a plan. I decided to use The Closet Tower Plans from Ana White, and modify them to my liking…
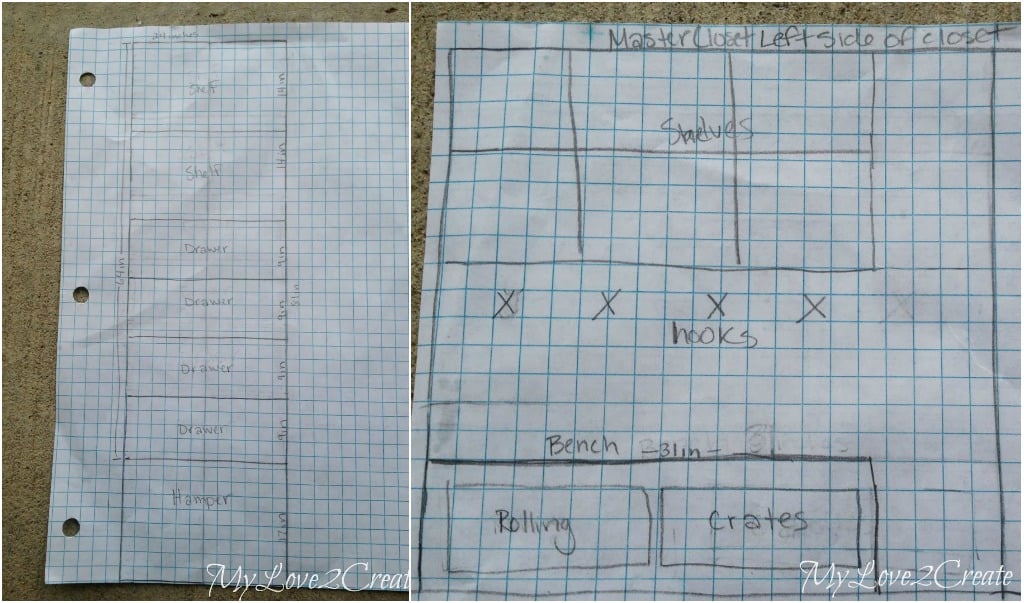
On the left are my tower plans modified from Ana’s plans. In the right photo above is the mudroom type area. I really wanted a place to have hooks for easy access to things, and more storage options.
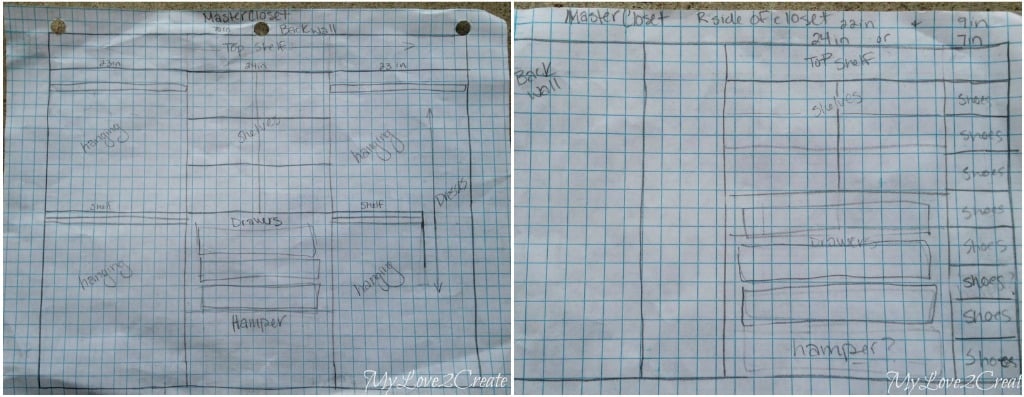
These are the plans for my back wall (left) and the right side of the closet (right). In the plans I put the shoe shelf on the right, but ended up building it on the left, a much better choice for easier access to my clothes that would be hanging on the back wall. I used Easy Closets free design tool to help me get an idea of how I could use my space. I simply plugged in my closet measurements and it gave me different options for my space. I am a visual person so this was huge for me to “see” different layouts.
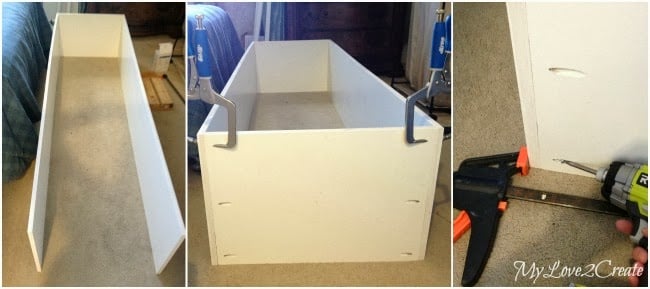
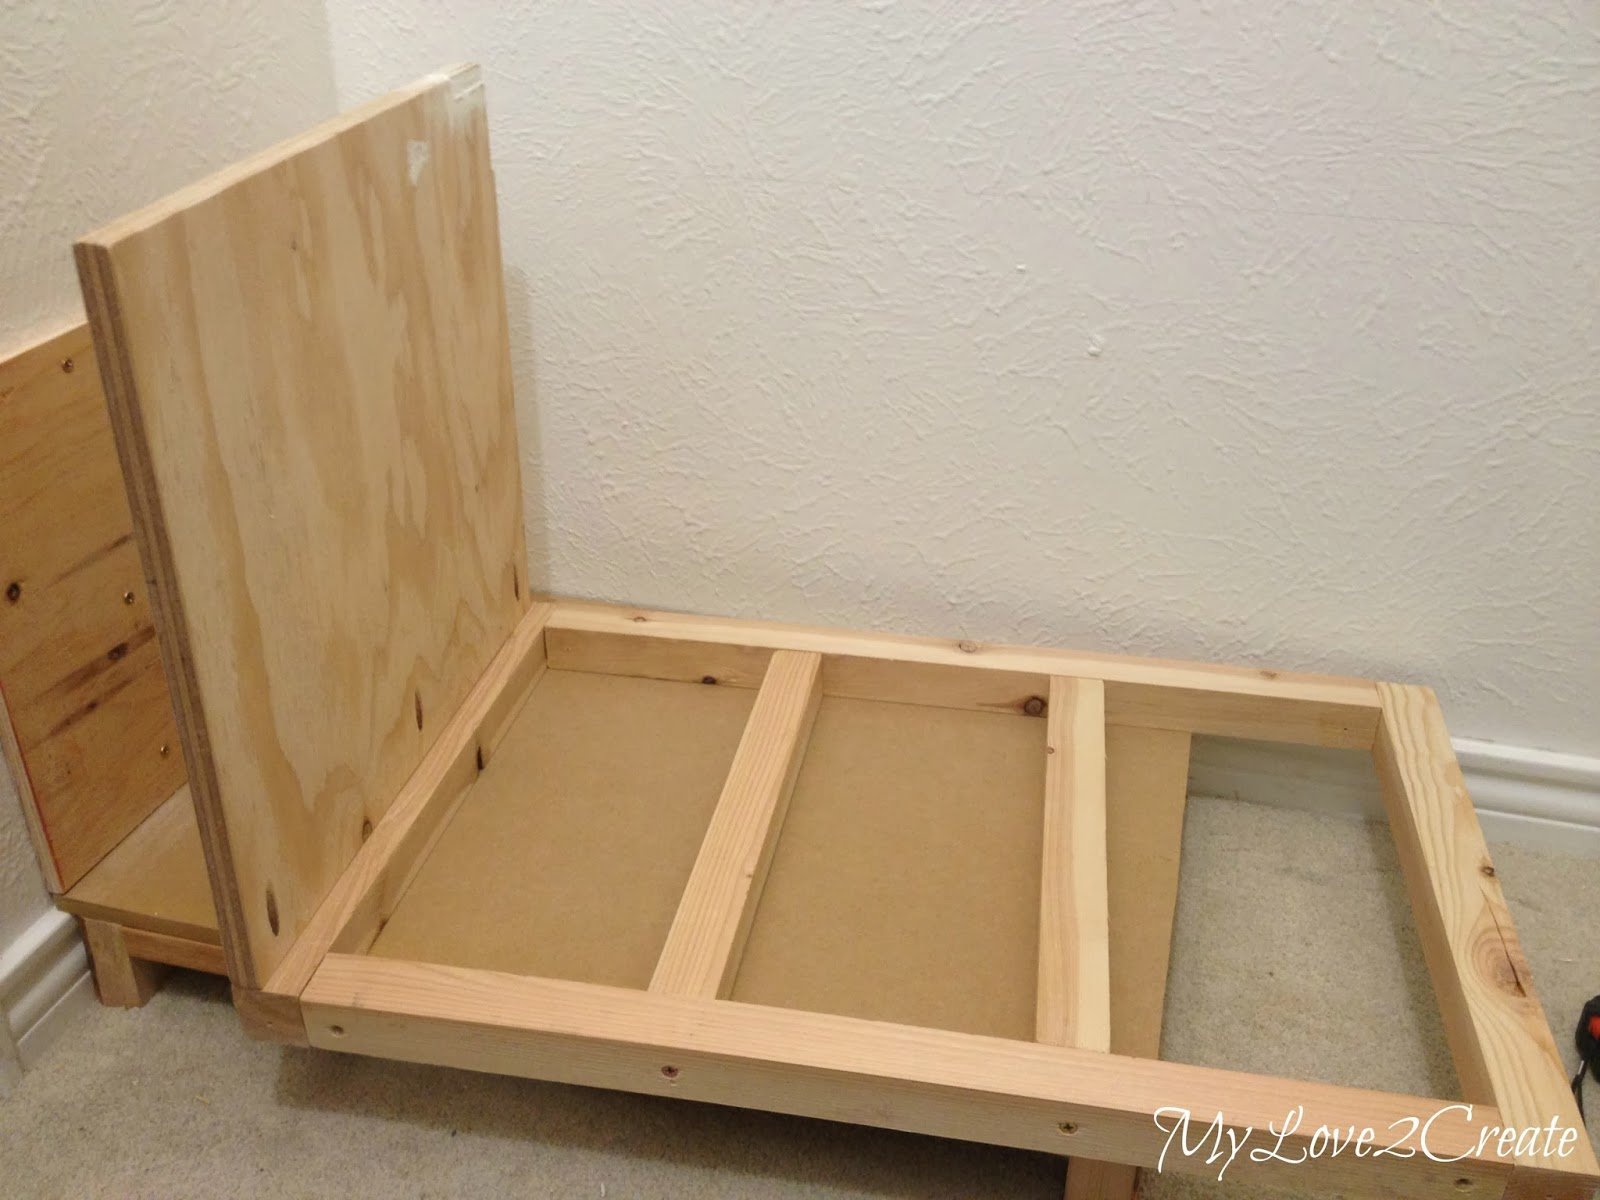
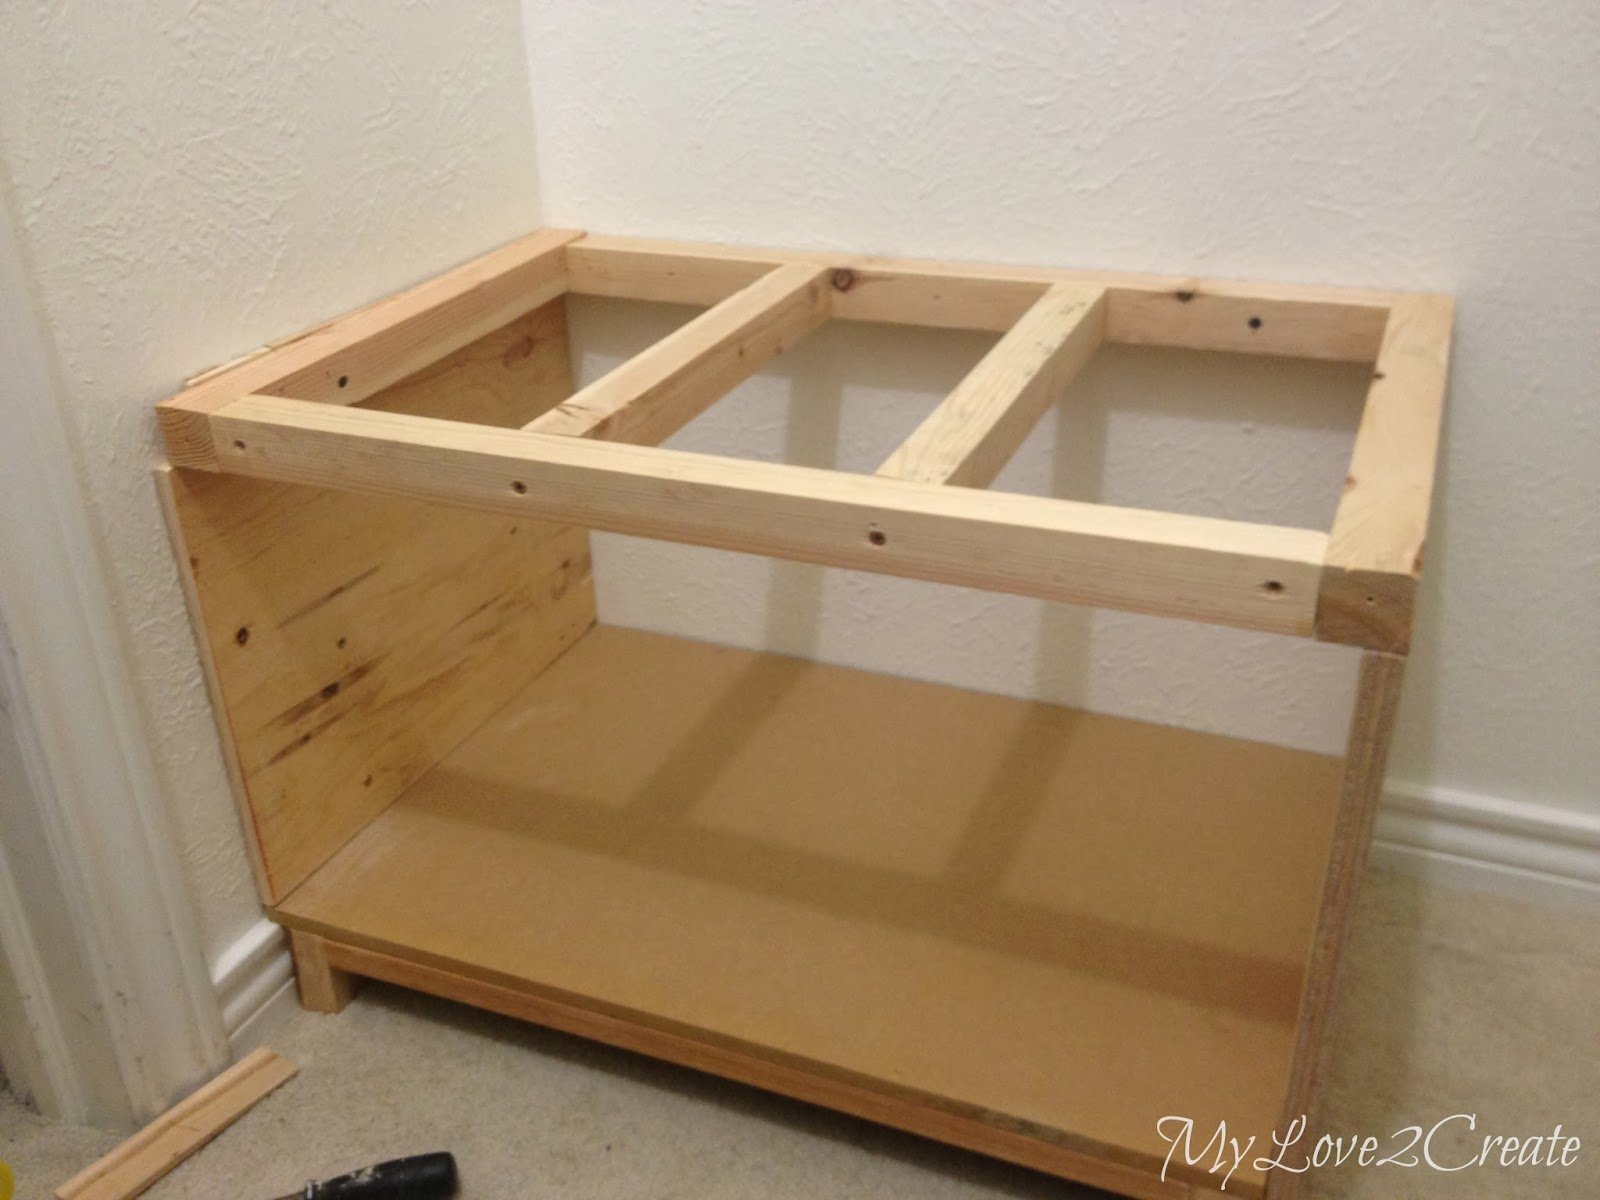
Once I cleared out my old closet, I started building my two towers. It makes all the difference to prime and paint your boards FIRST, then build. Trust me! I built both boxes for my towers using pocket holes. (love)
Then I marked where the shelves needed to go and attached them.
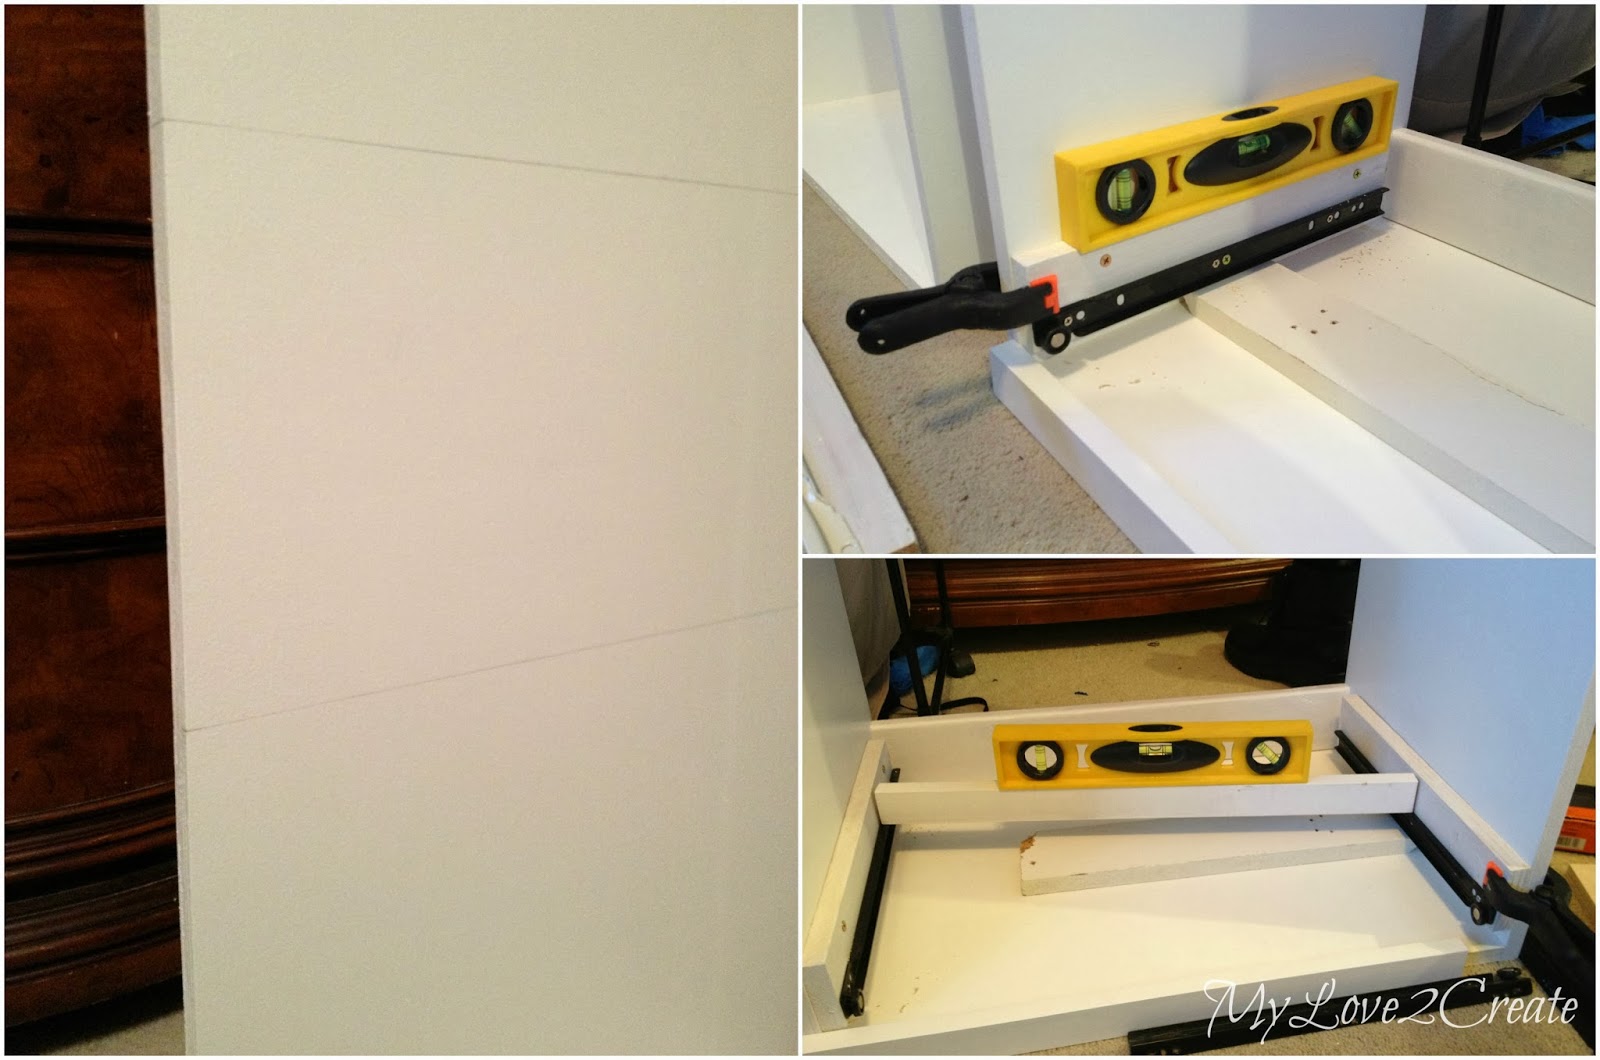
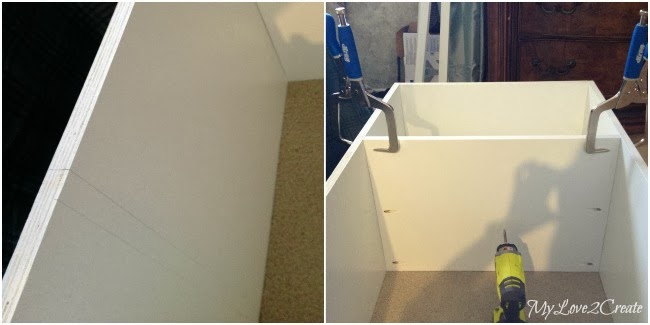
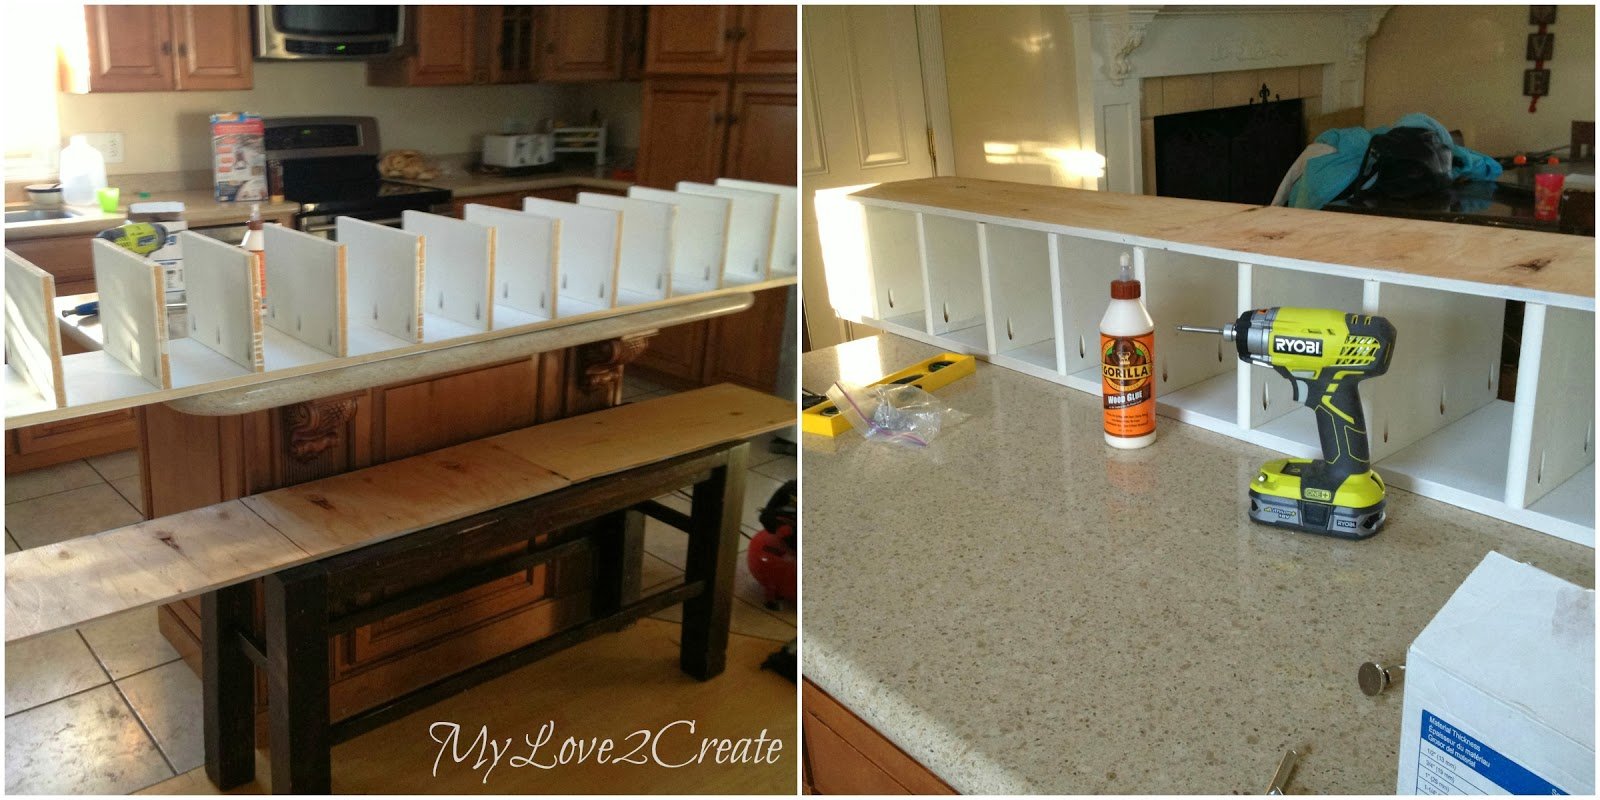
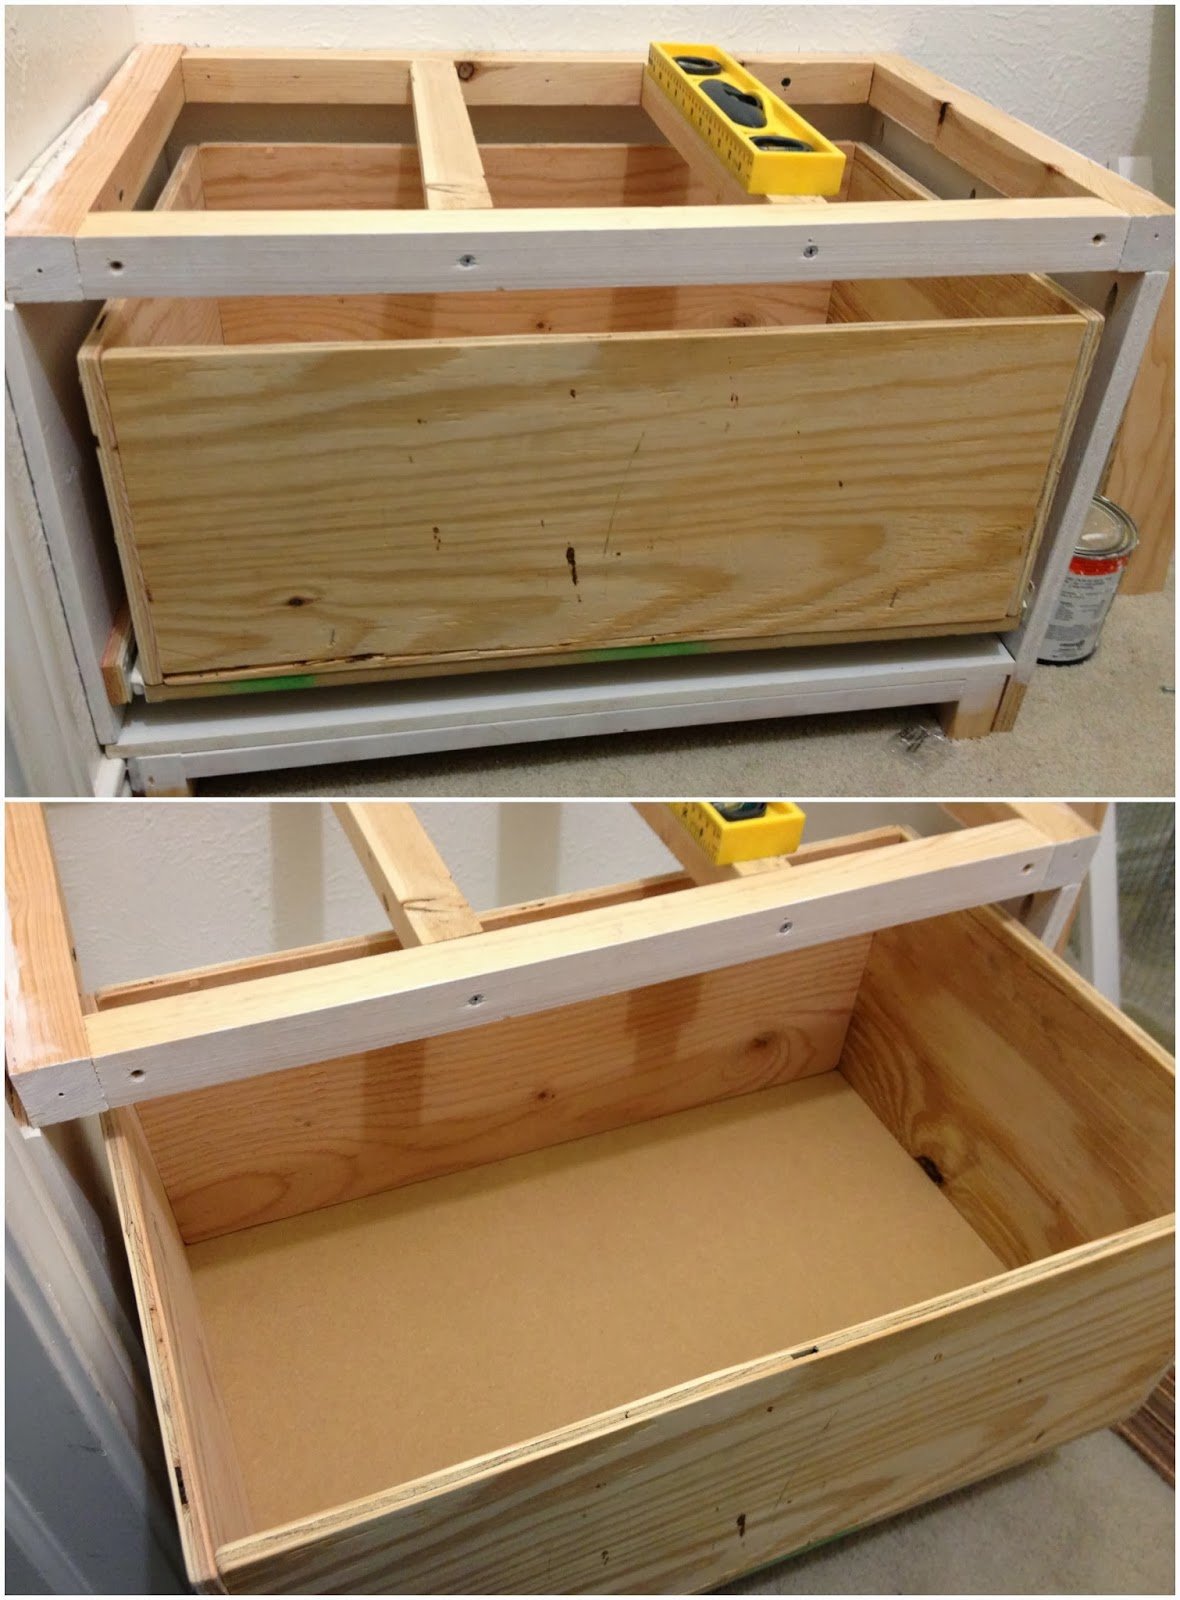
My husband and I wanted a lot of drawers, so I started adding the drawer glides. I measured and marked where each glide needed to go on both sides of each tower. Then I started installing them checking for level as I went.
You can see that they were placed right on top of each line. Let me tell you ten drawers is A LOT!!

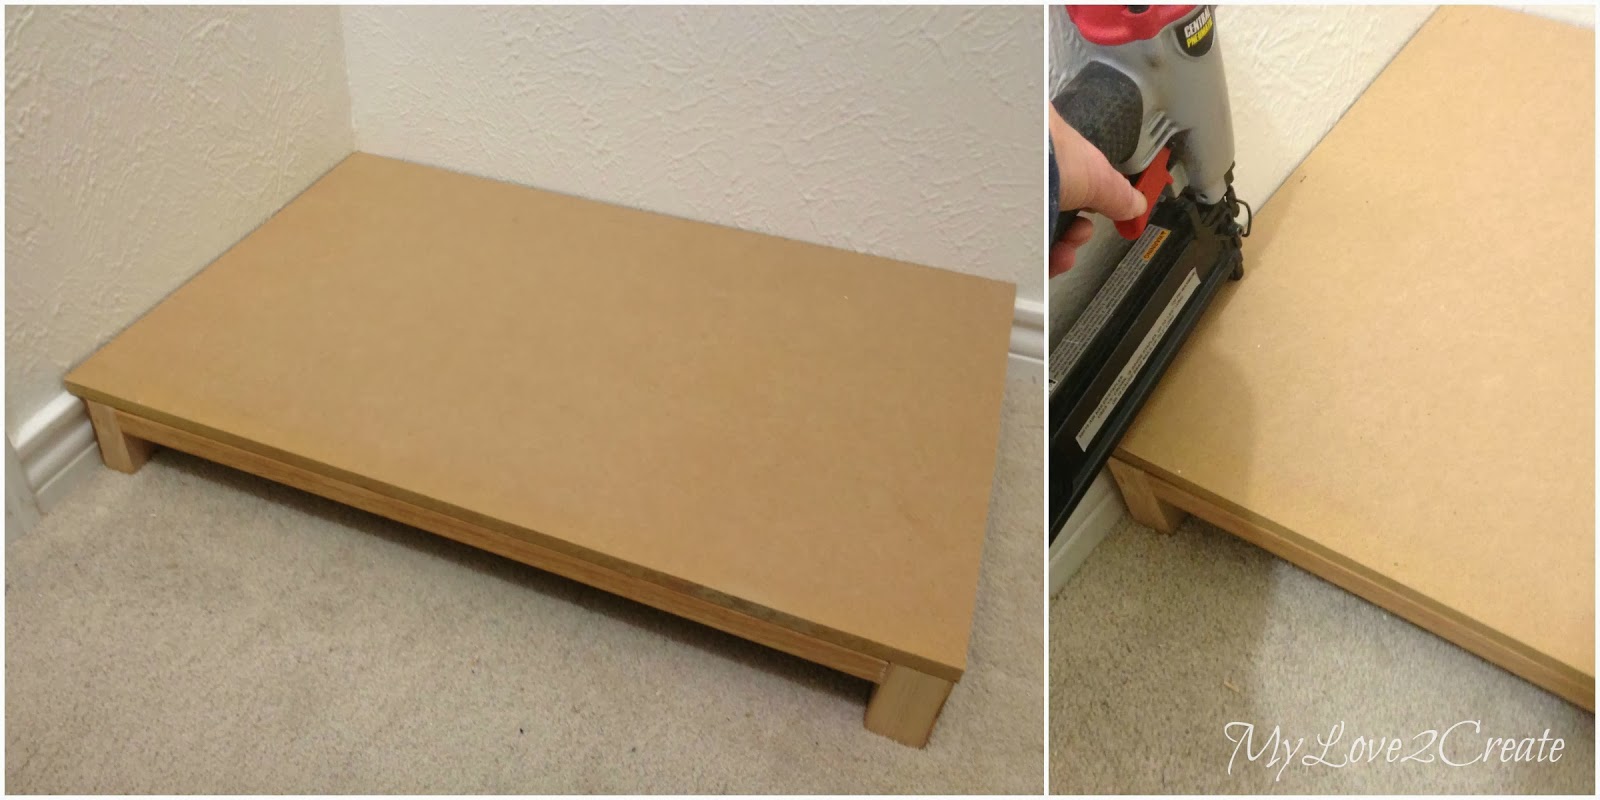
Each tower had a base screwed onto the bottom…
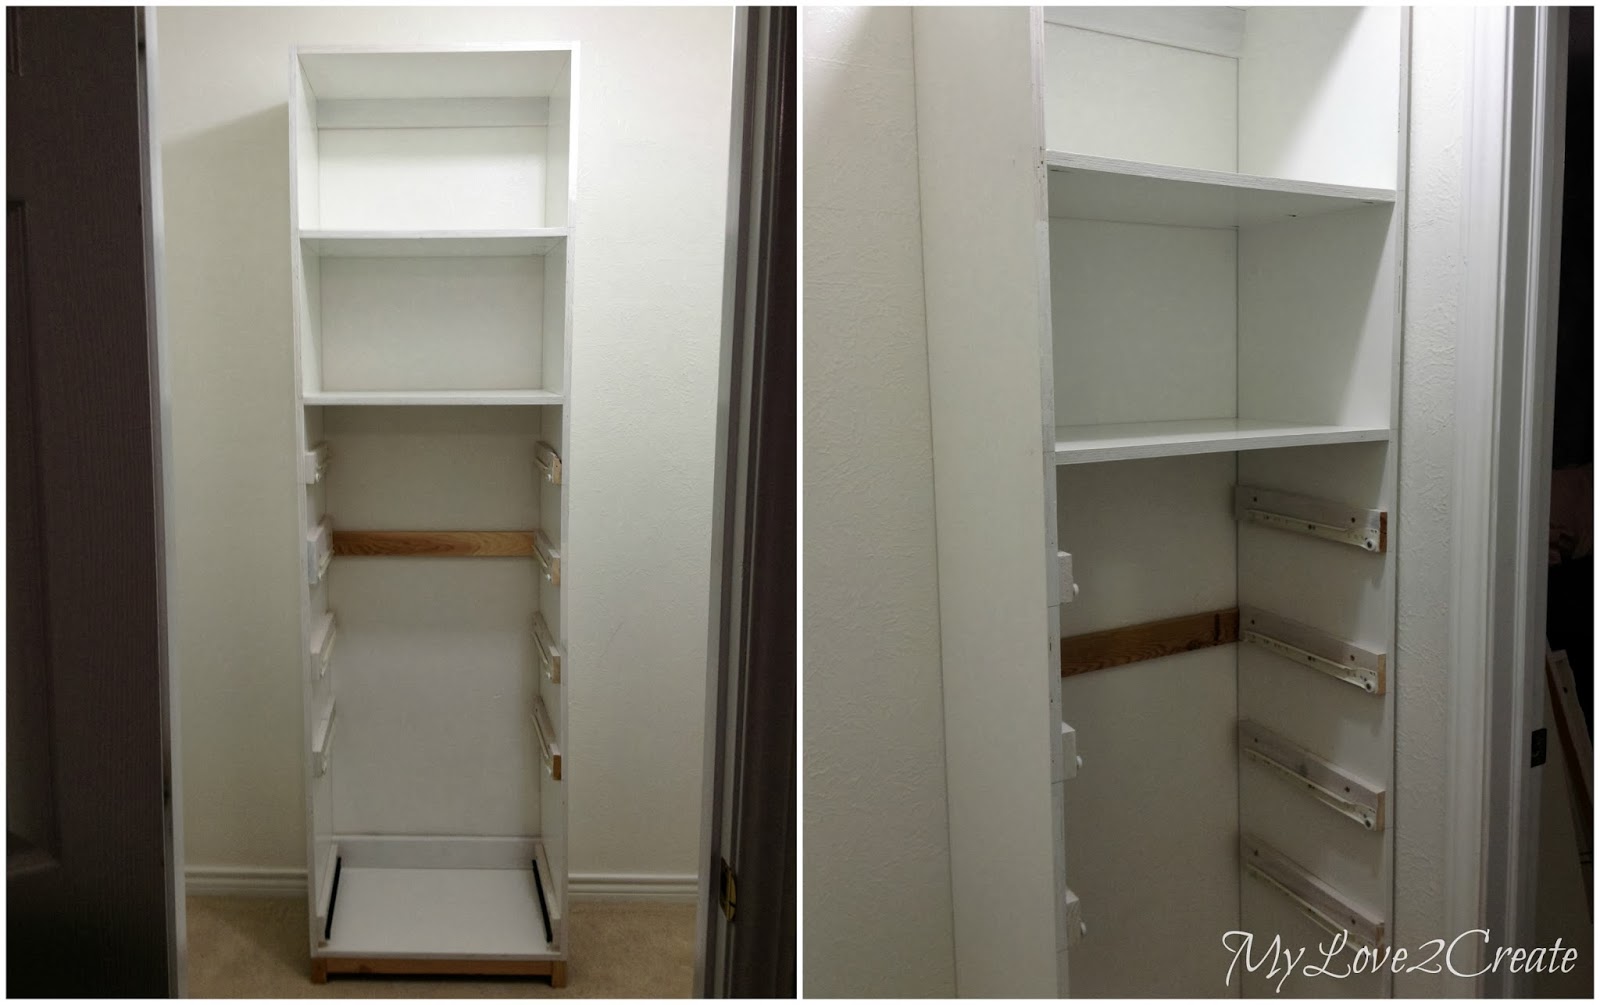
…and they were installed in the closet!! Please note that I added support pieces (three) on the back of each tower. The top and bottom ones were in the plans, the middle one was an after thought, that is why it isn’t painted.
Once I had the two towers where I wanted them, they were secured to the studs in the wall, screwing through my support pieces. In places where the wall wasn’t even I used shims.
Next up, building drawers! This wood above I got from the free section of craig’s list. It was used to build a lot of my drawers, after I used all the left over plywood I bought for my towers. It saved me a ton of money too!
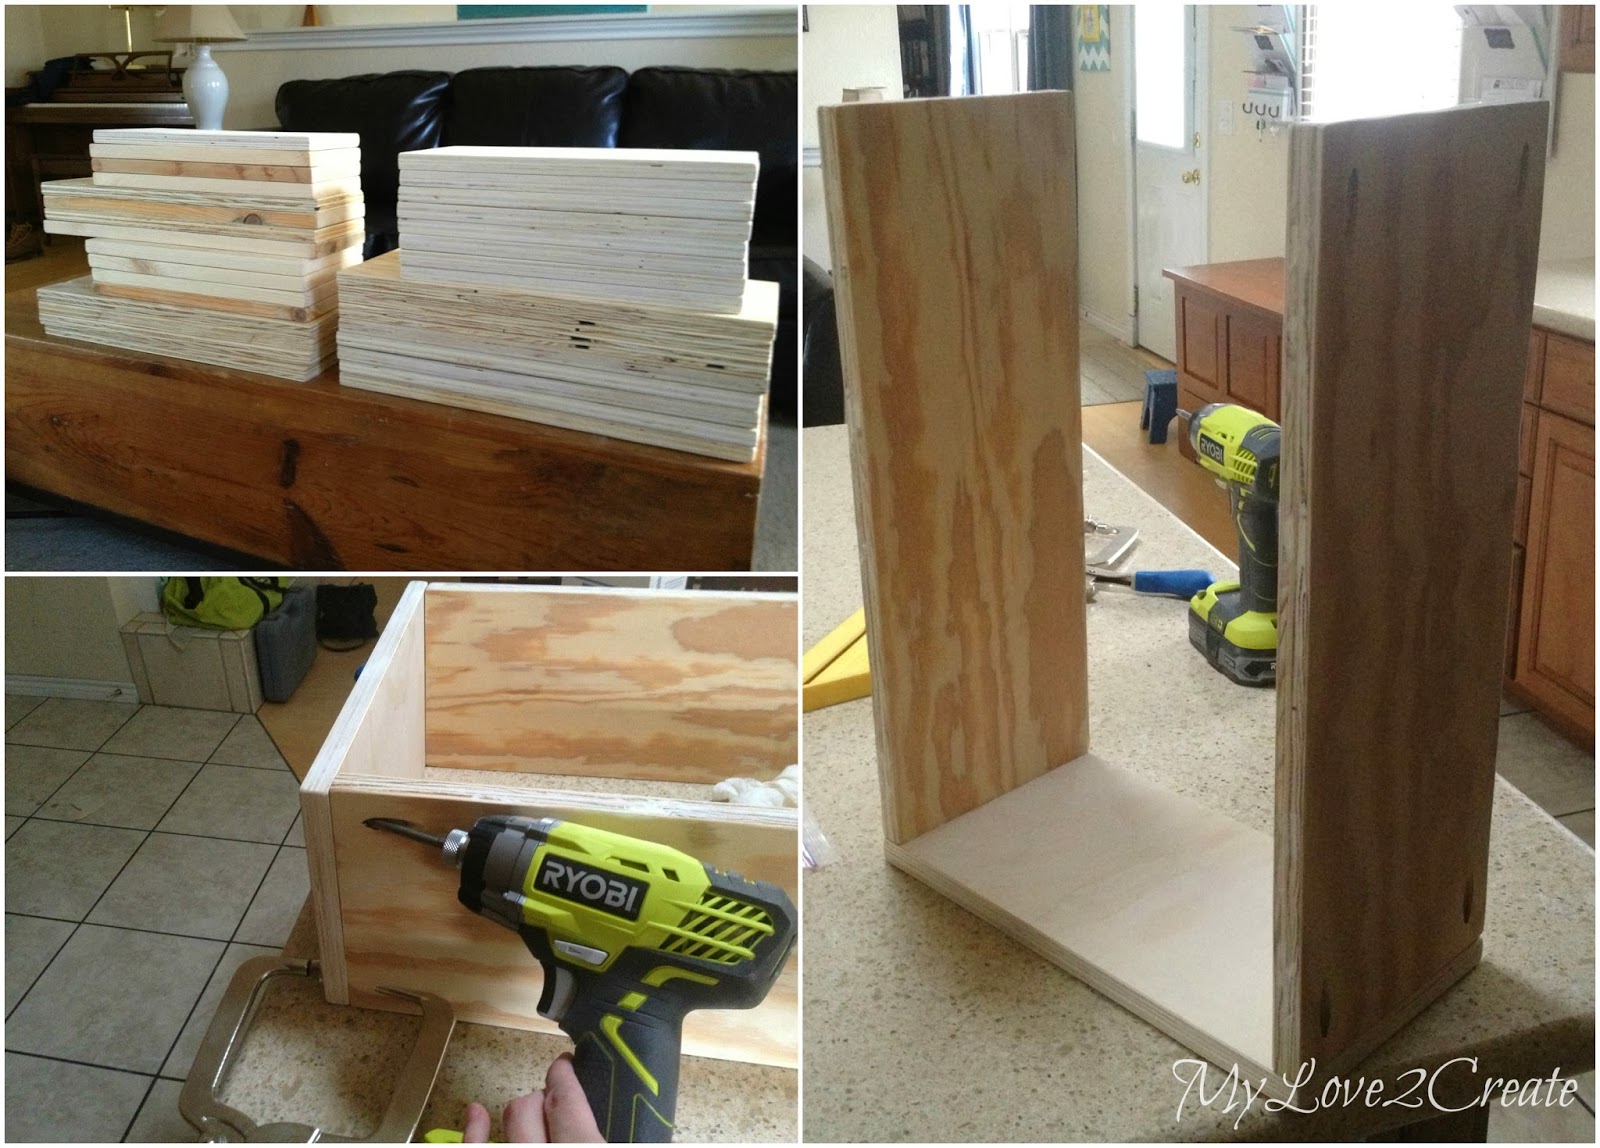
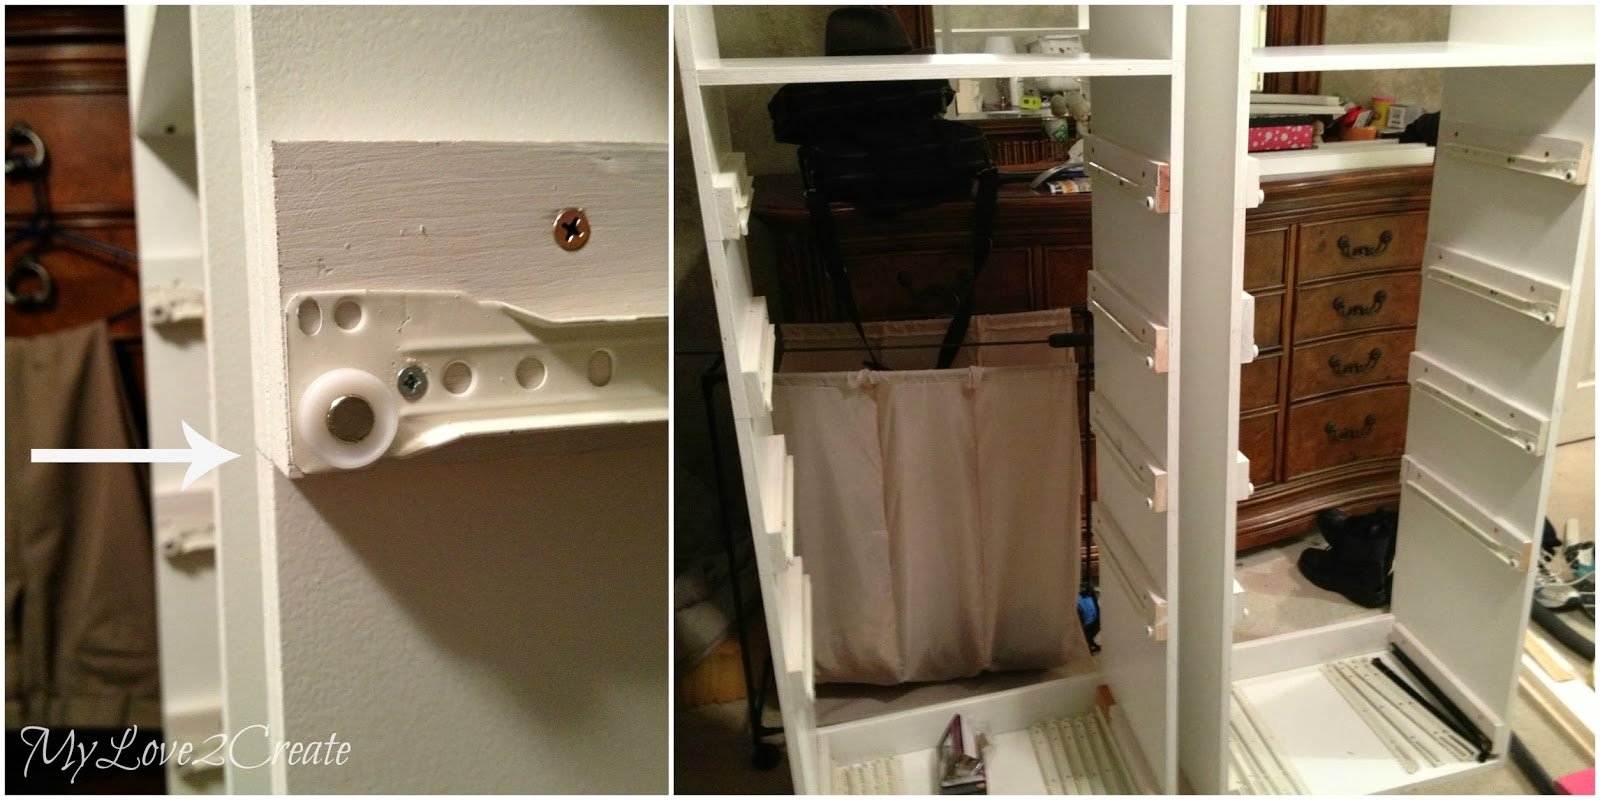
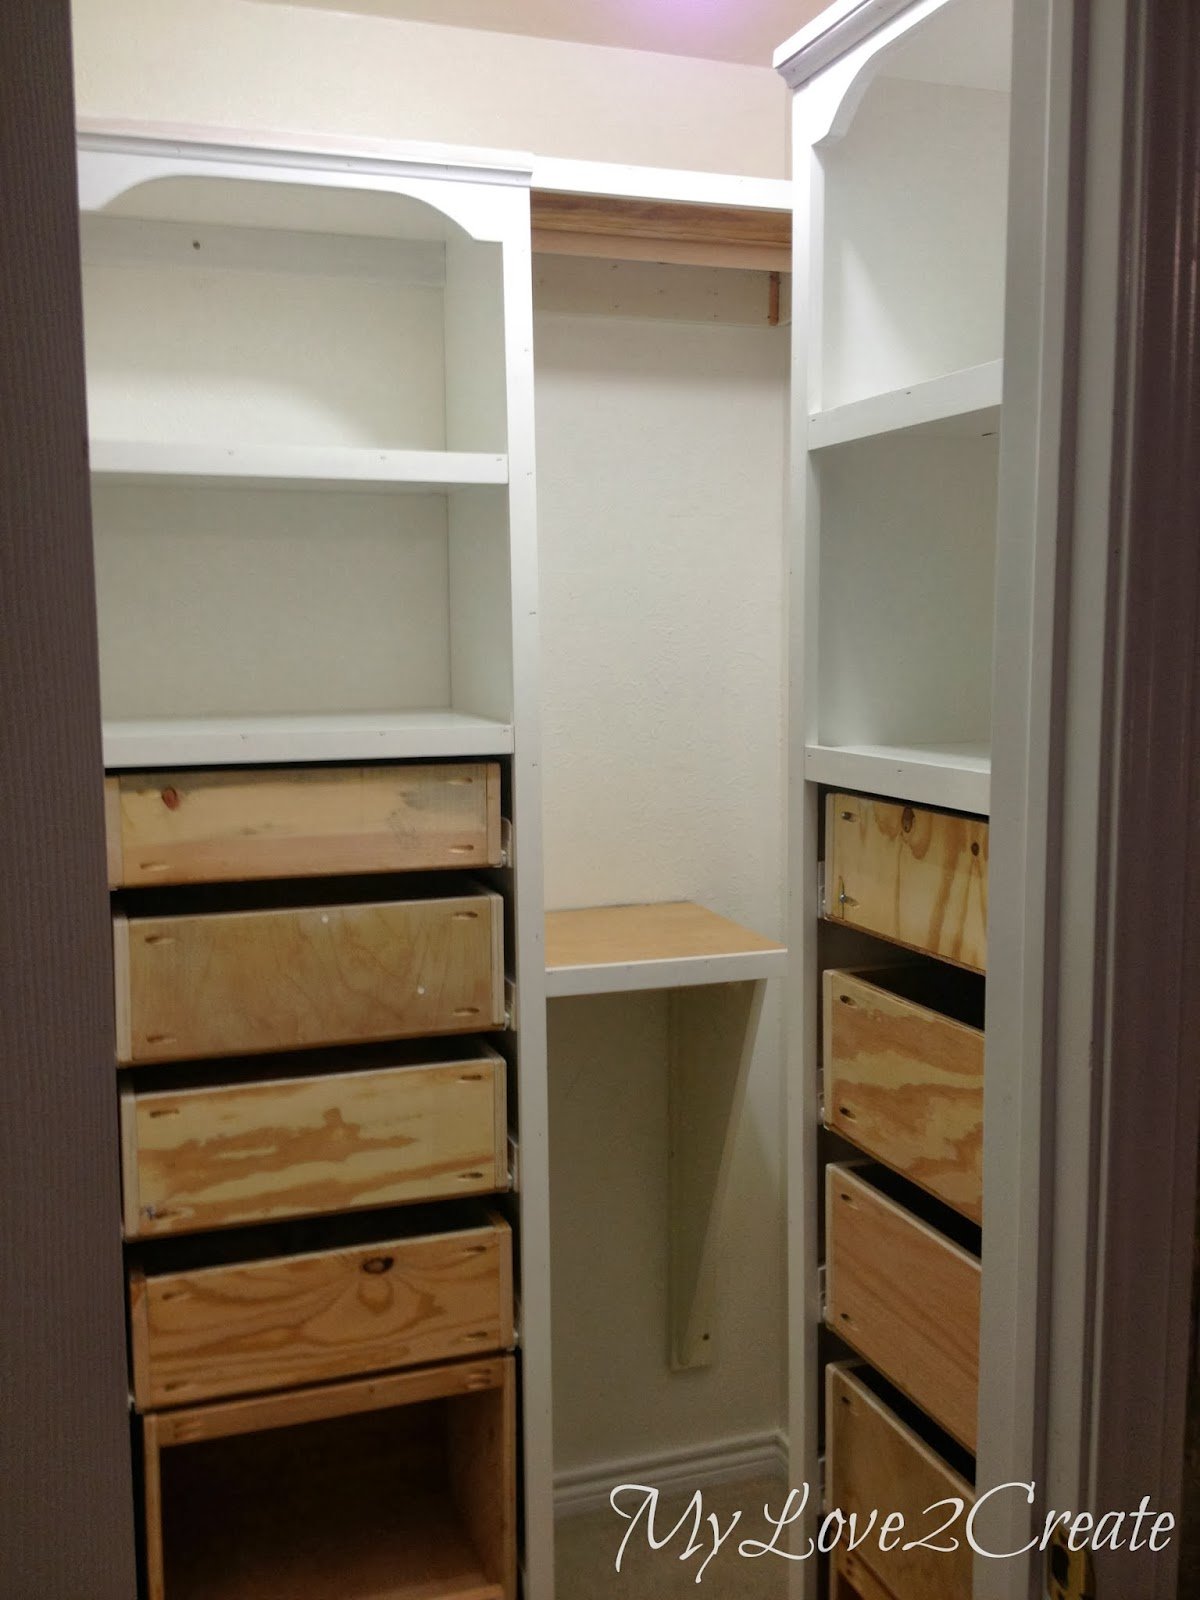
Here is all my wood cut, sanded, and pocket holes drilled. Time to build! Once they were built I added bottoms out of 1/4 in plywood (free wood I had gotten thankfully), with glue and nails, and then I installed the drawer glides on the bottom of each drawer. Here they are in the tower!!

And my awesome little helper!
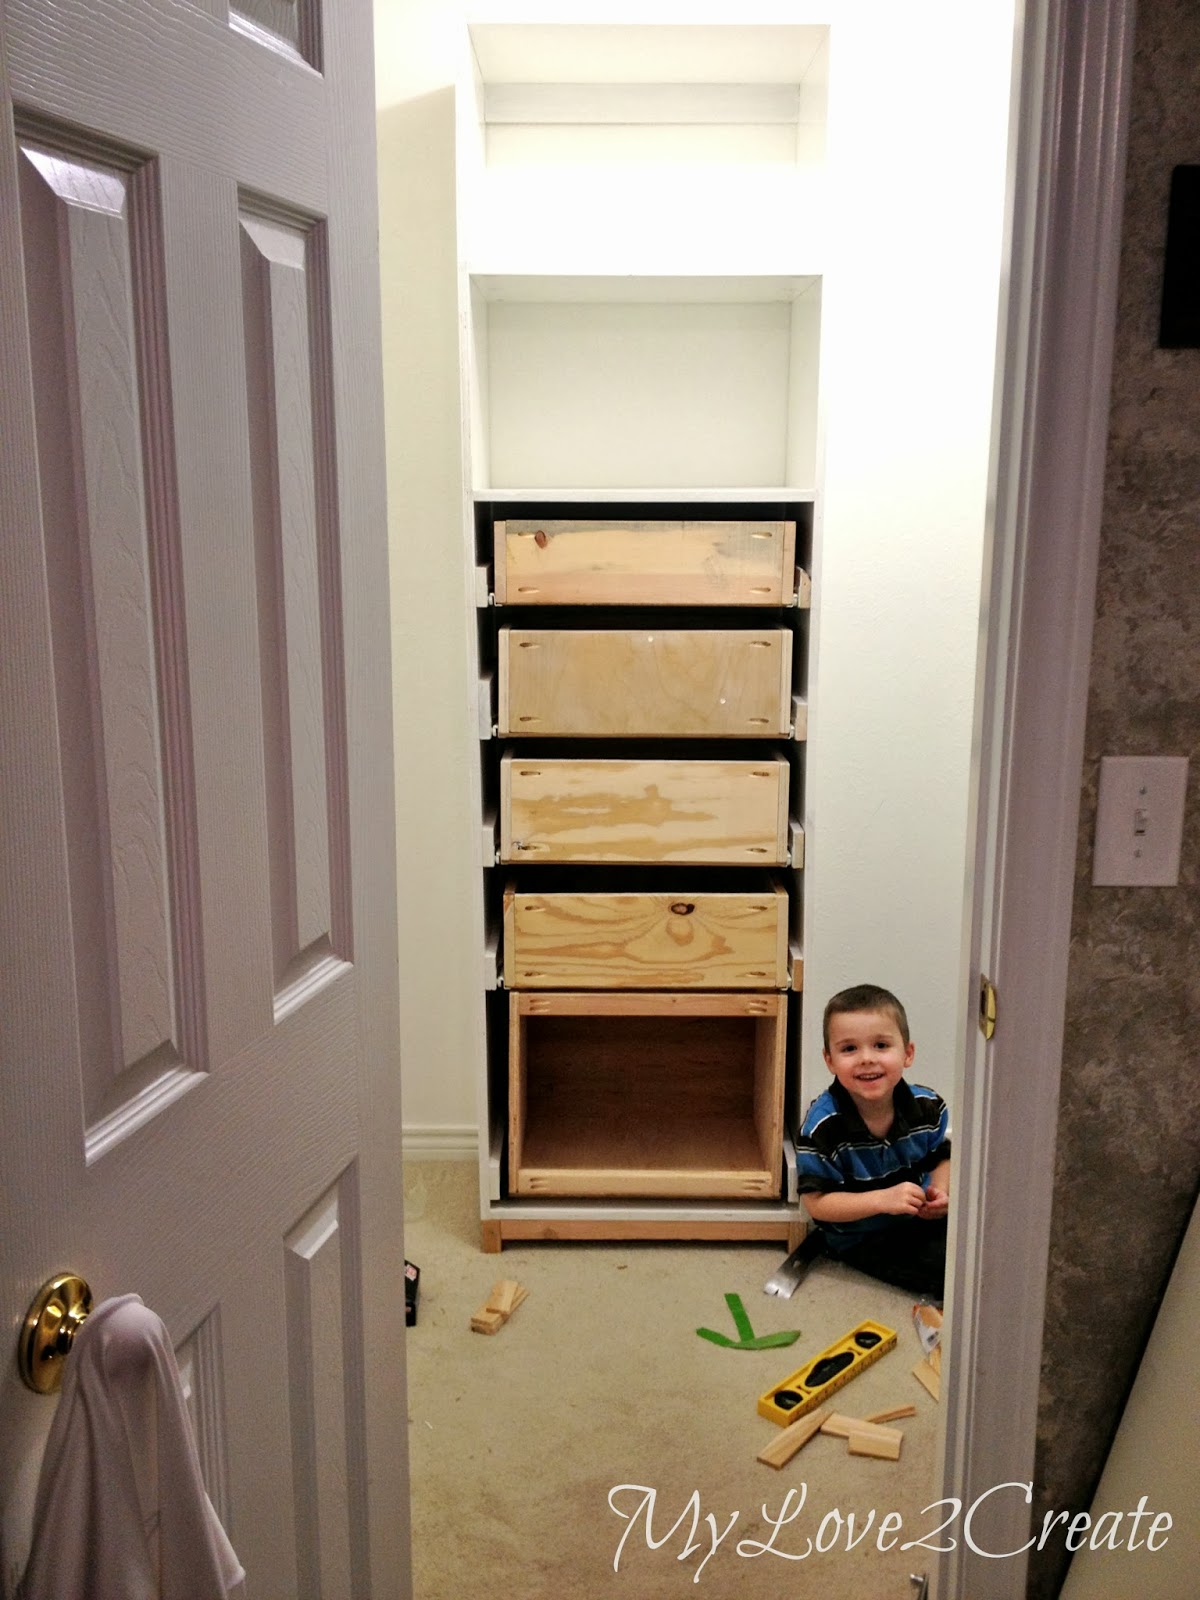
Isn’t he cute?! Wait a minute, one of these drawers is not like the others…my hamper drawers (on the bottom) were built this way…
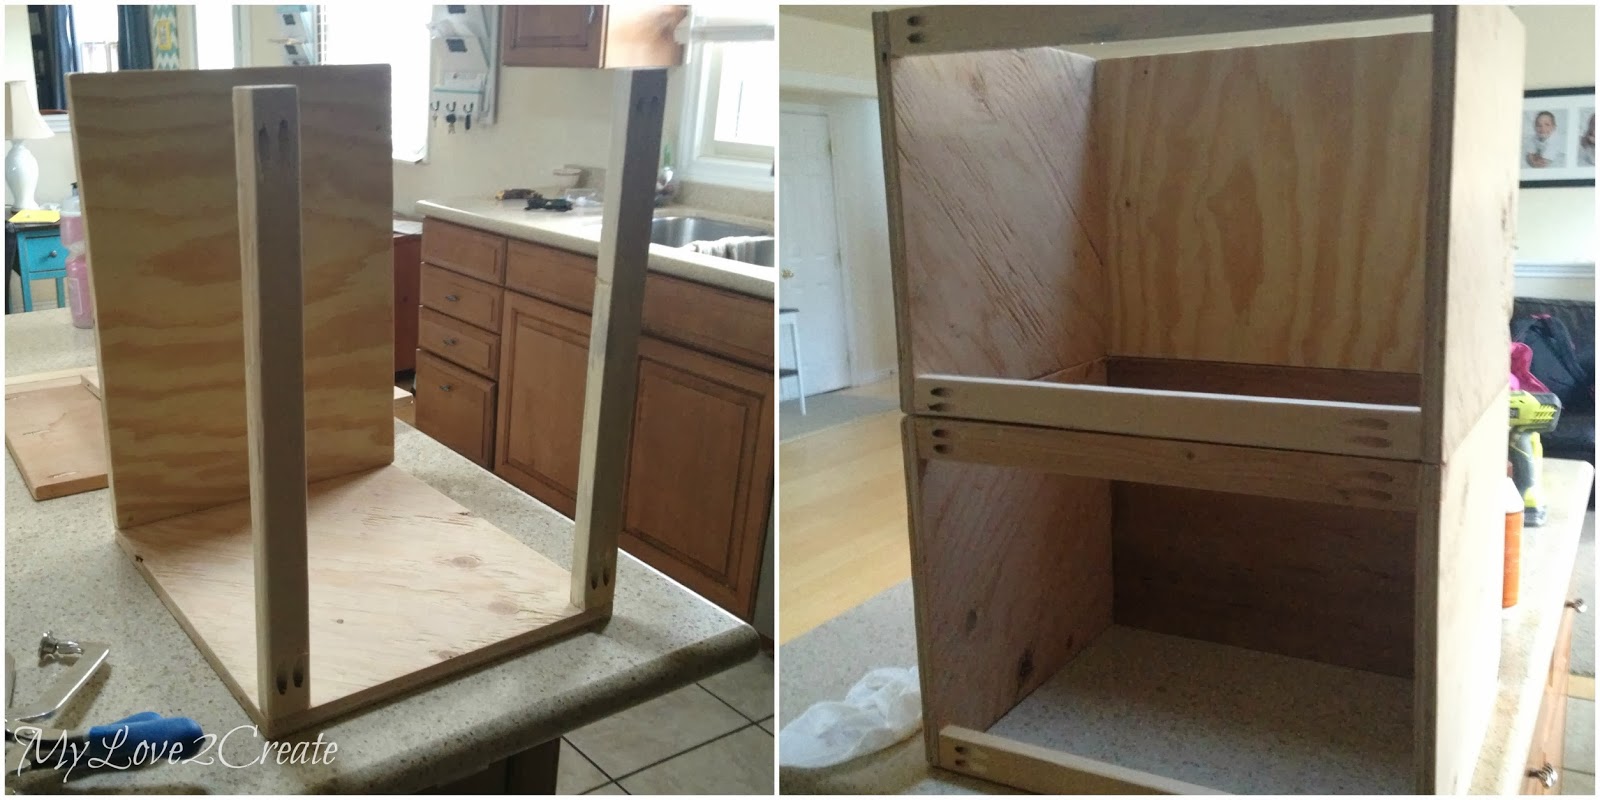
These were my own design, because I wanted the fronts open. So I just added one side without plywood but 1×2’s on the top and bottom instead.
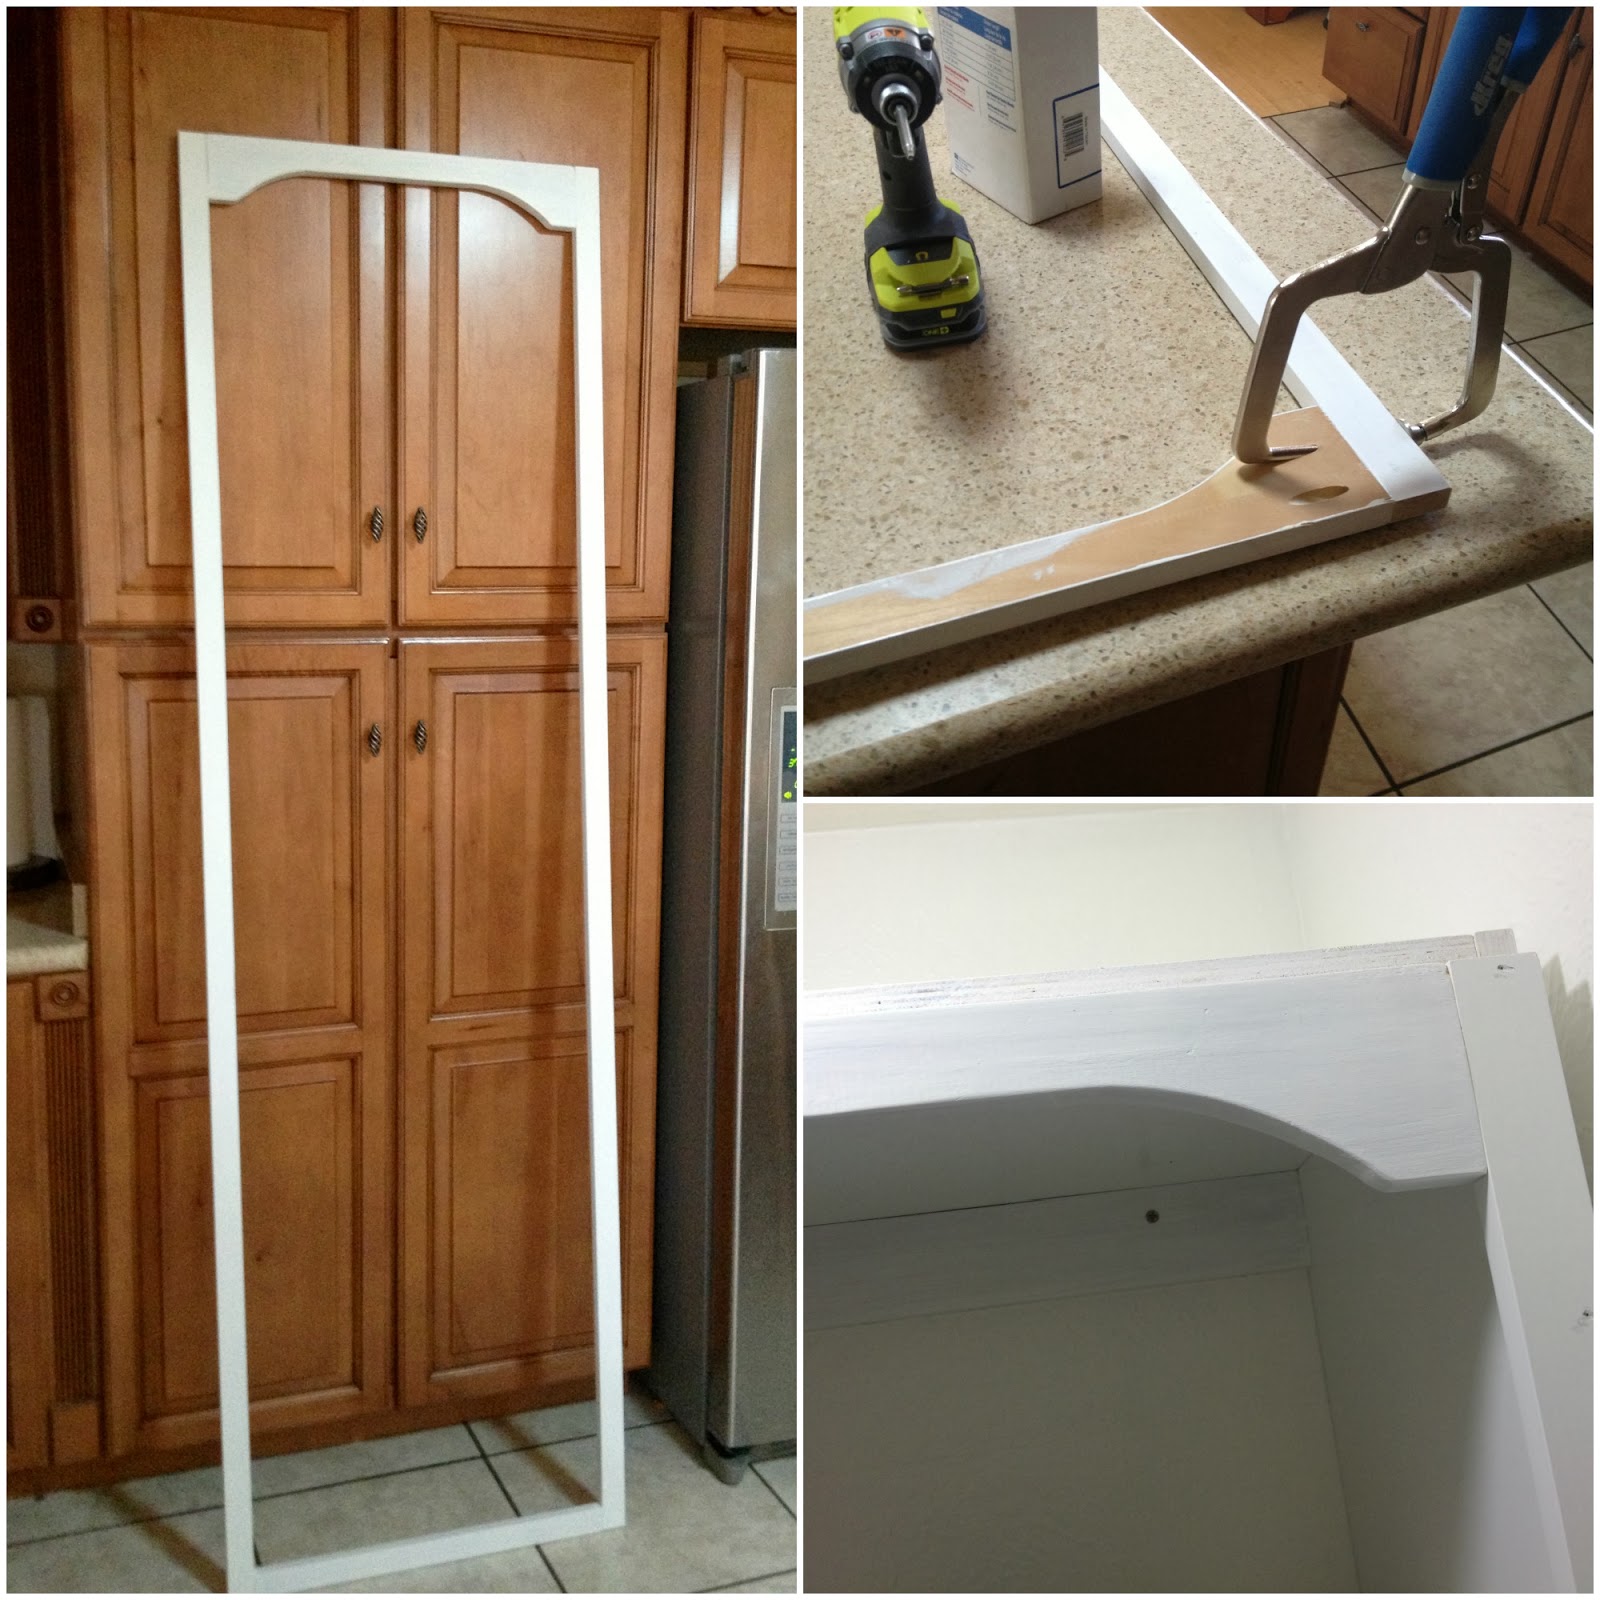
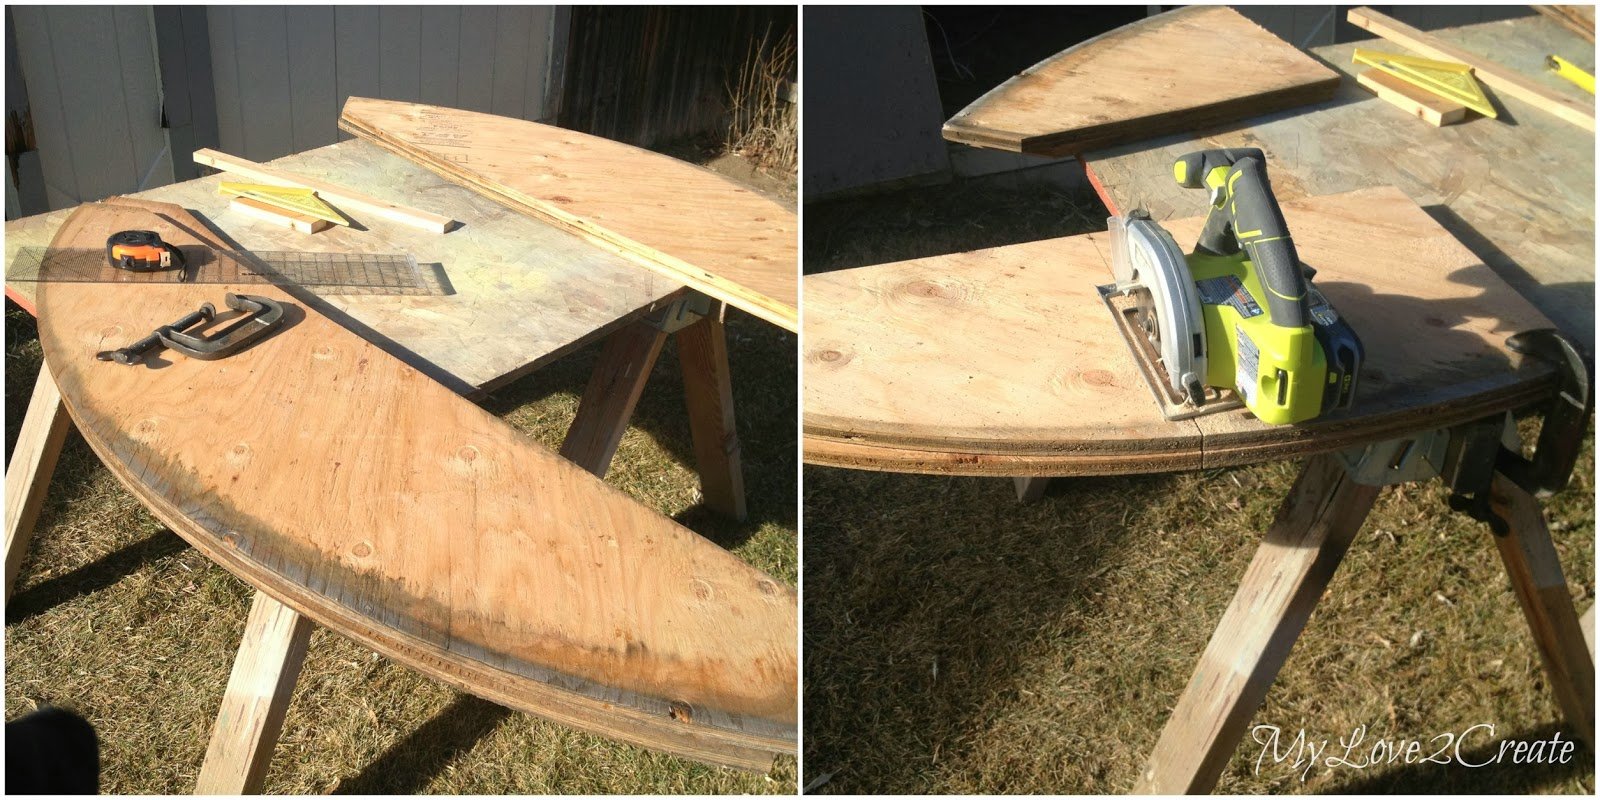
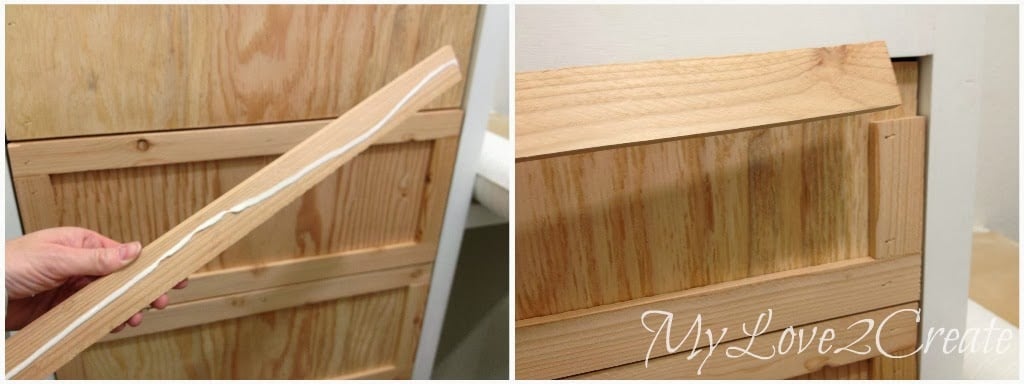
Next I added trim for my towers, this is what makes them look nice! I cut the top 1×4 pattern with a jig saw. Once the trim was built, it was simple to nail the face trim onto the front of the towers.
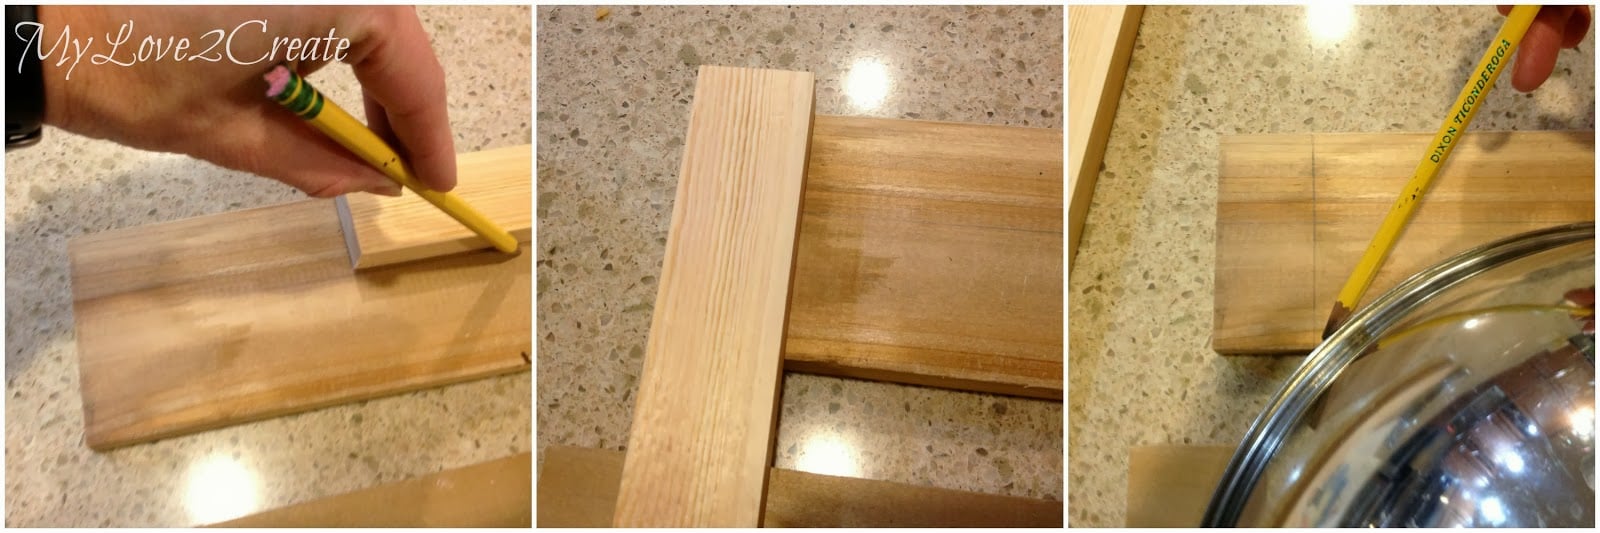
To draw the pattern for the top 1×4, I used a 1×2 board and drew lines on the top and sides. Then I got a bowl and traced a curve on each side. I cut both trim boards at the same time and sanded them together as well to make sure they were exactly the same.
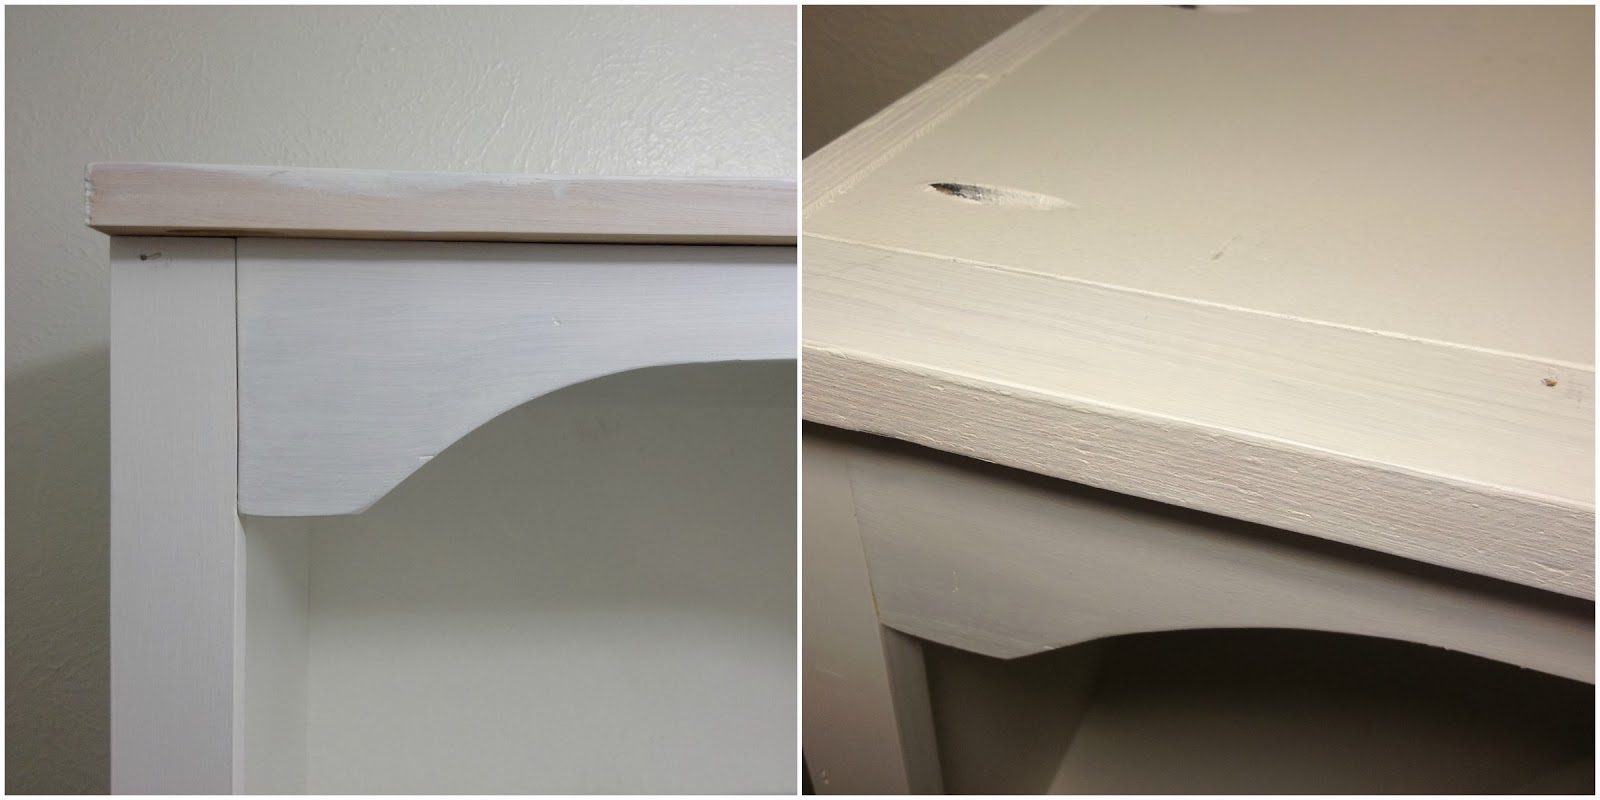
A 1×2 for top trim finishes it off.

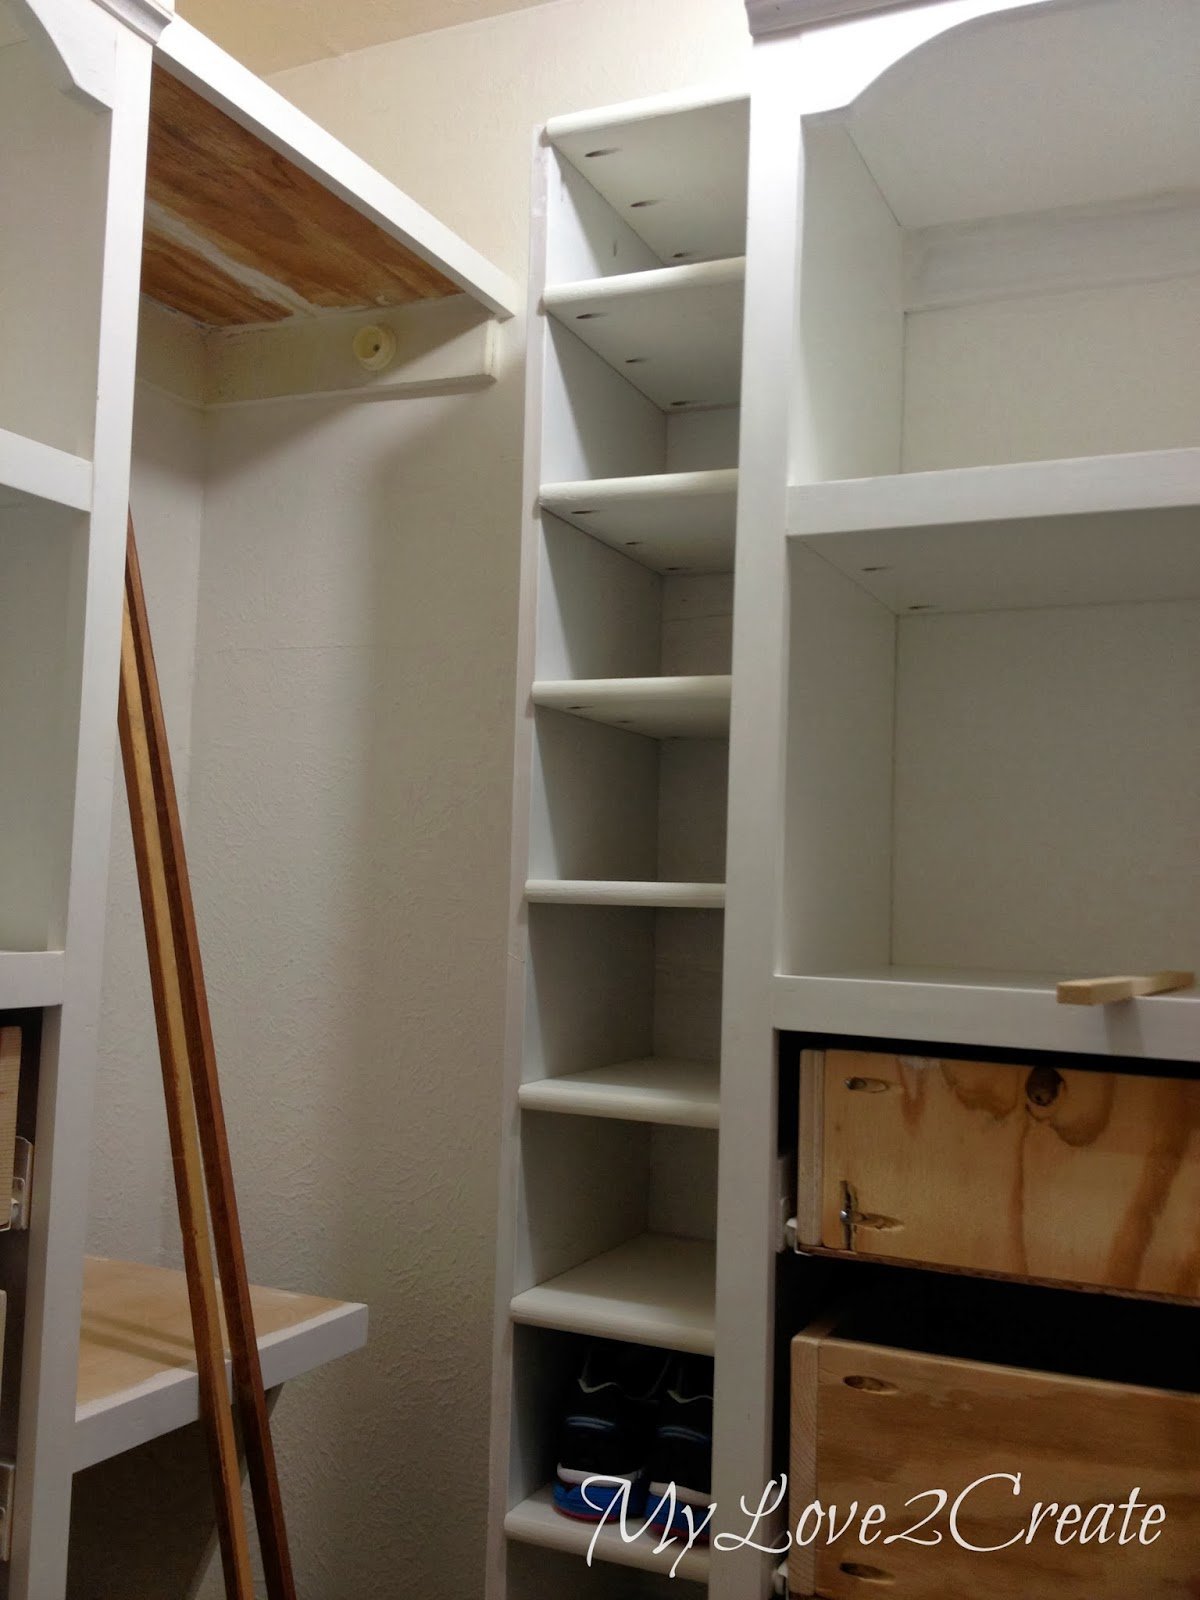
As you can see I added shelves above my hanging rods, which gives me more storage space. I reused the shelf support boards (the 1×4’s drilled into the wall) and the actual shelf boards from my old closet. On the other side I did a half shelf on the bottom so I could have long hanging dresses.
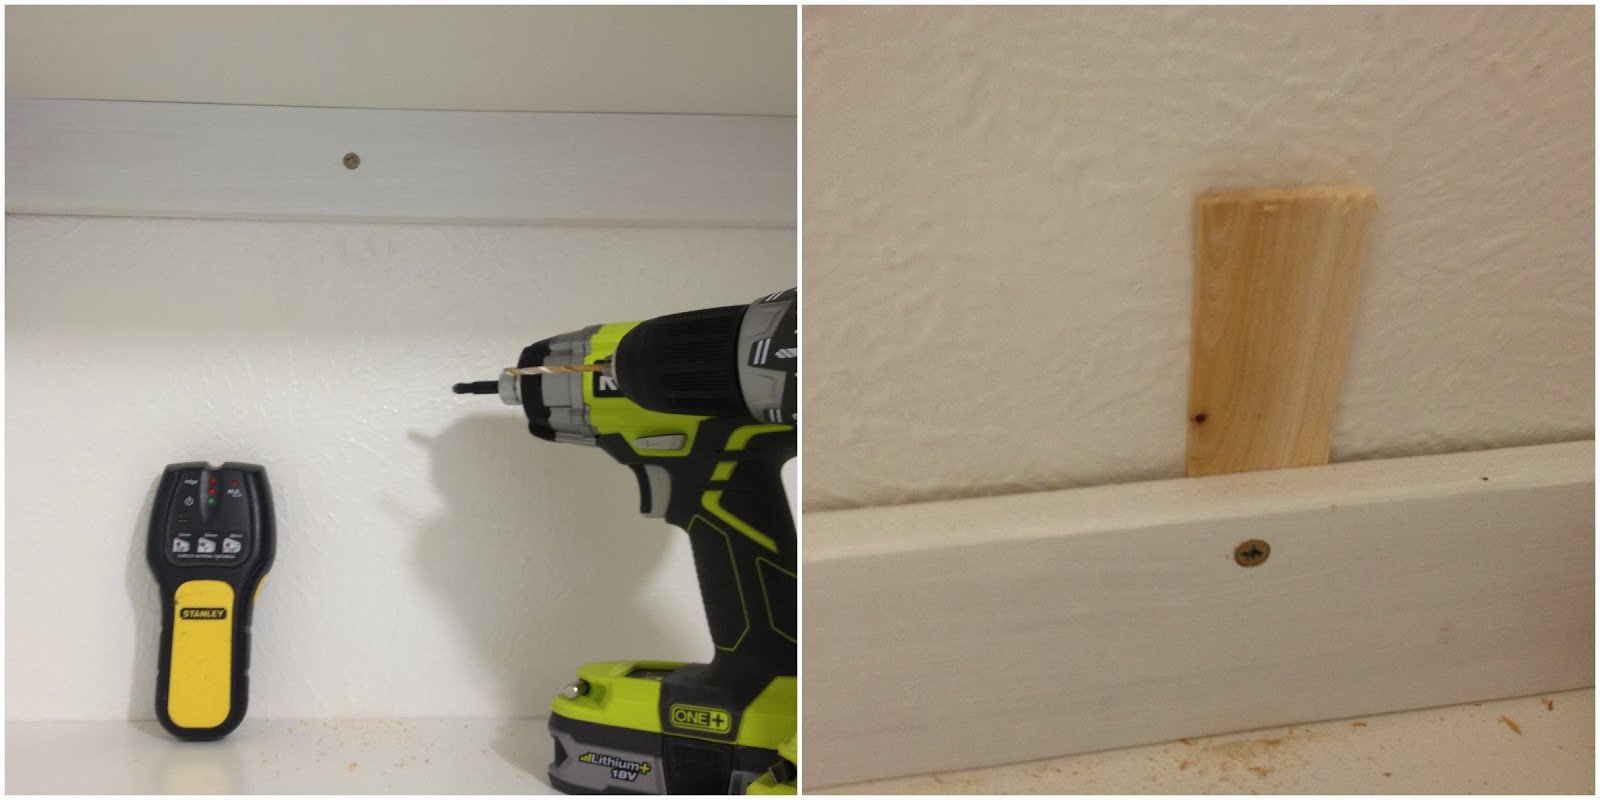
This divider was in the original closet, I cut it down a bit, and re-installed it by drilling into the stud in the wall. The shelves on this side were made from free plywood scraps.
It is looking good!! The trim really makes a difference, you can see I added 1×2 trim in front of the shelves too. I bought the cheap plastic rod holders and a long rod piece I cut to size for each spot to install my closet rods.
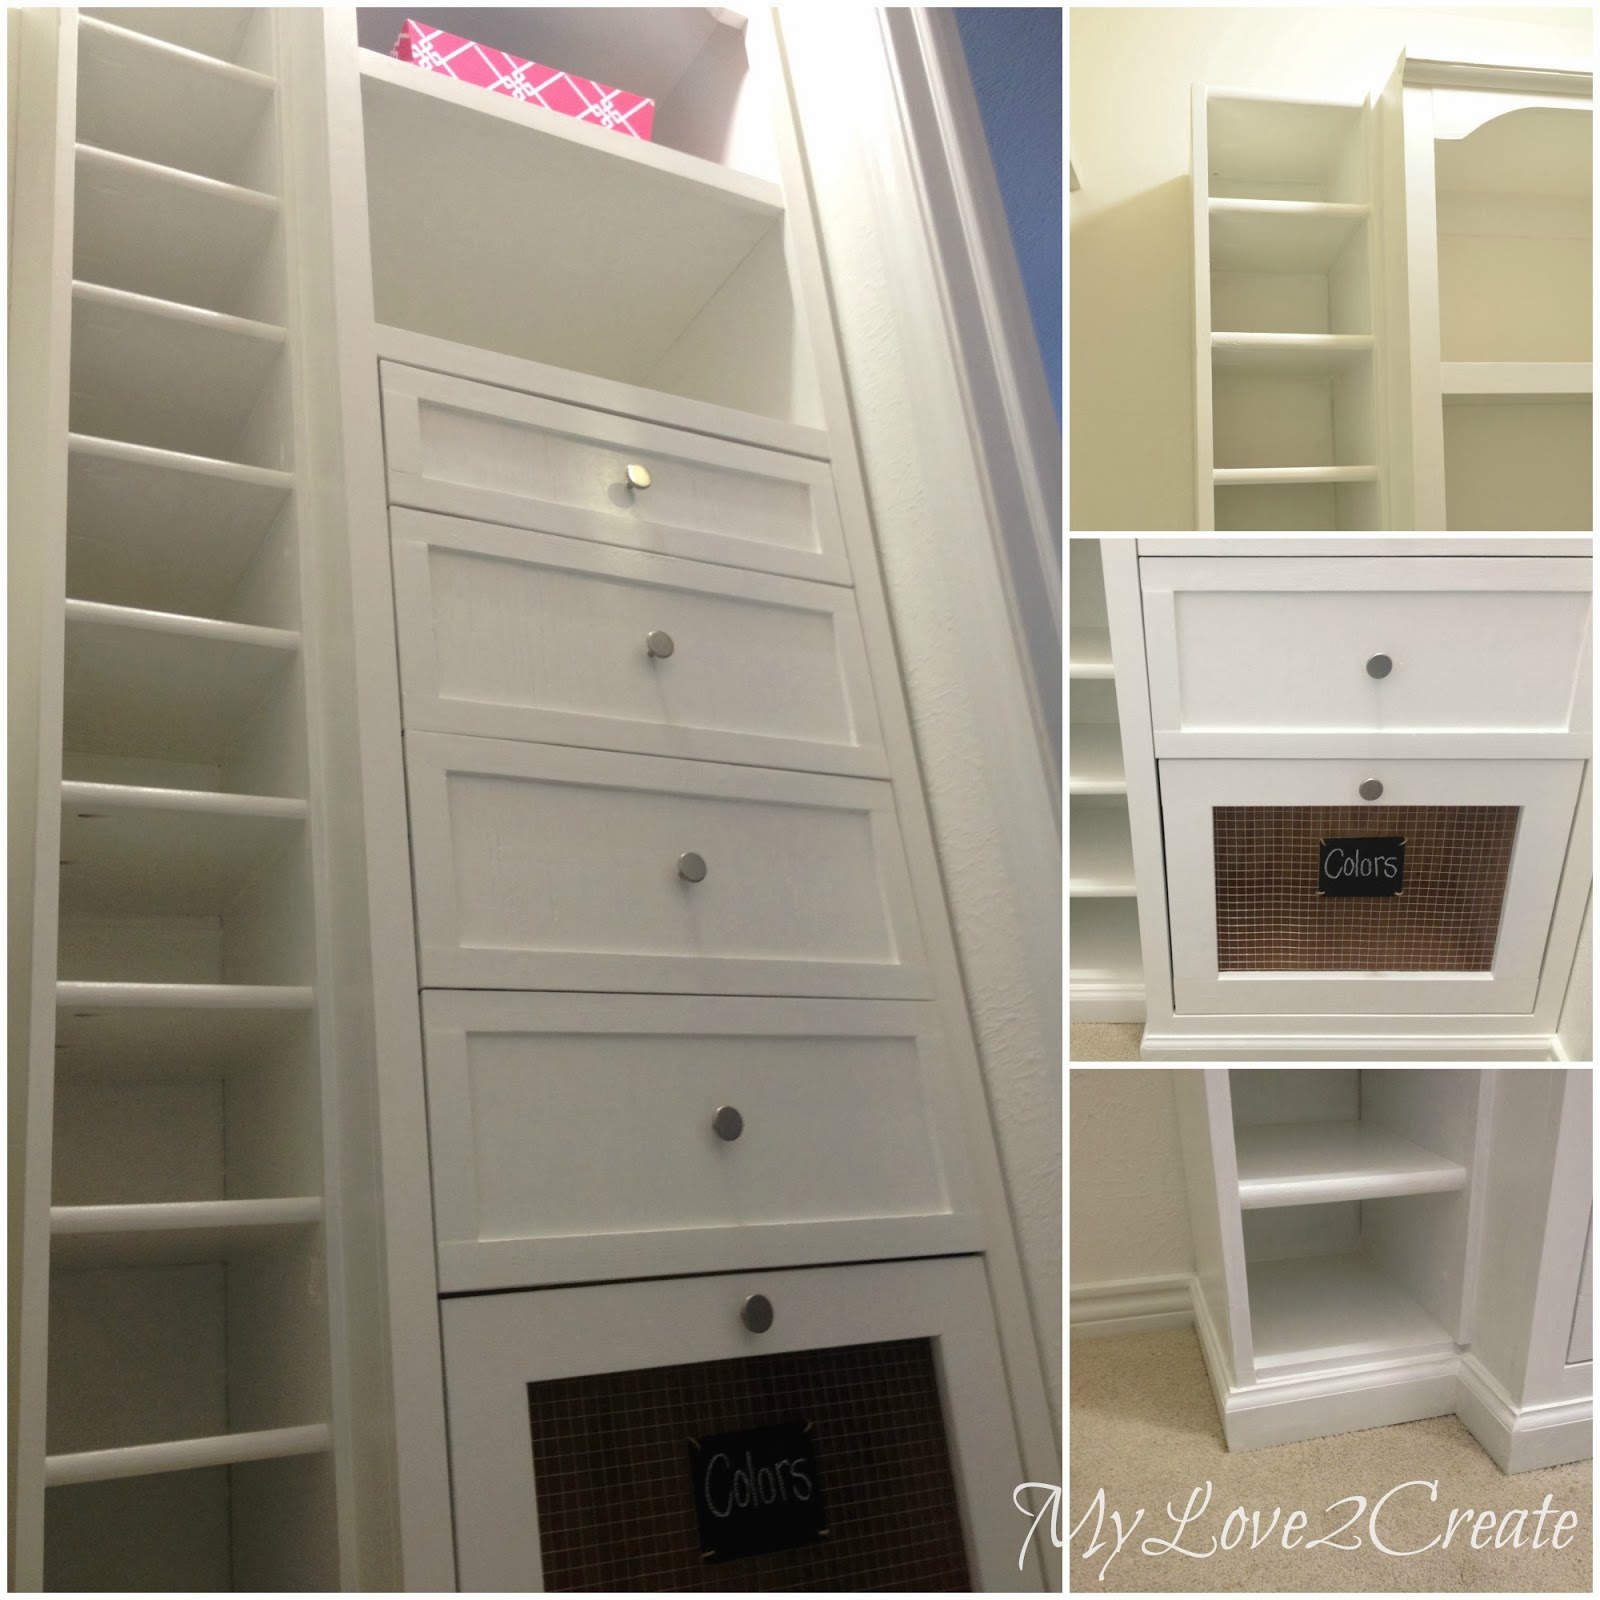
The shoe shelf was next for me to build. I measured my shoes and got the size I wanted to build my cubbies. All the dividers were cut from one of the shelves I got out of my closet, it was nice they were already primed! The other boards were out of my scrap wood pile, I was working on a tight budget so I was making it work with the wood I had. I used gorilla glue and pocket holes to attach the shelves, then I nailed and screwed in the other side piece.
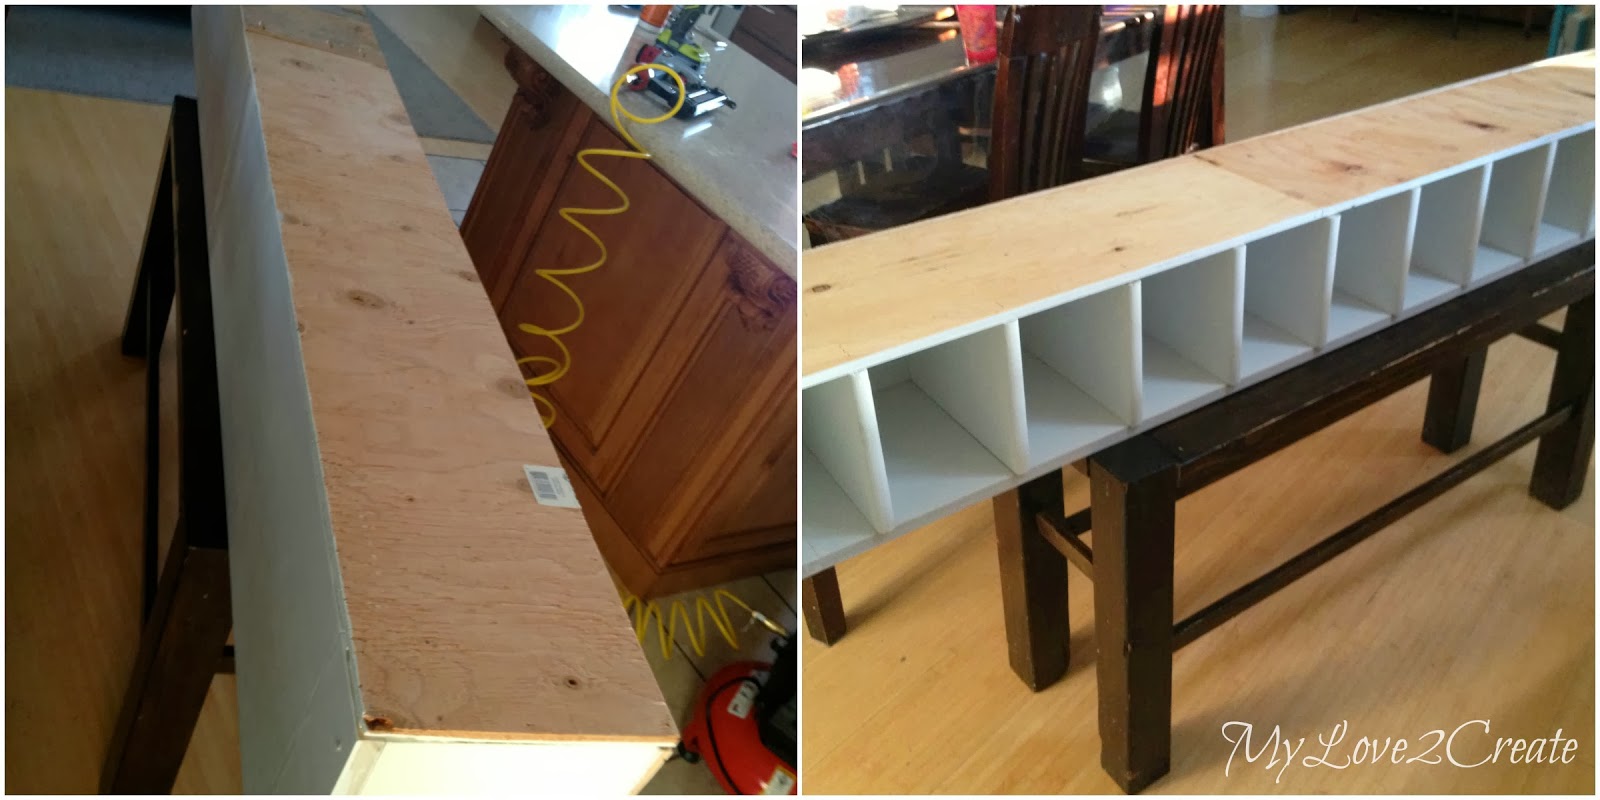
After I glued and nailed on the back, it was ready for a base so it could be installed.
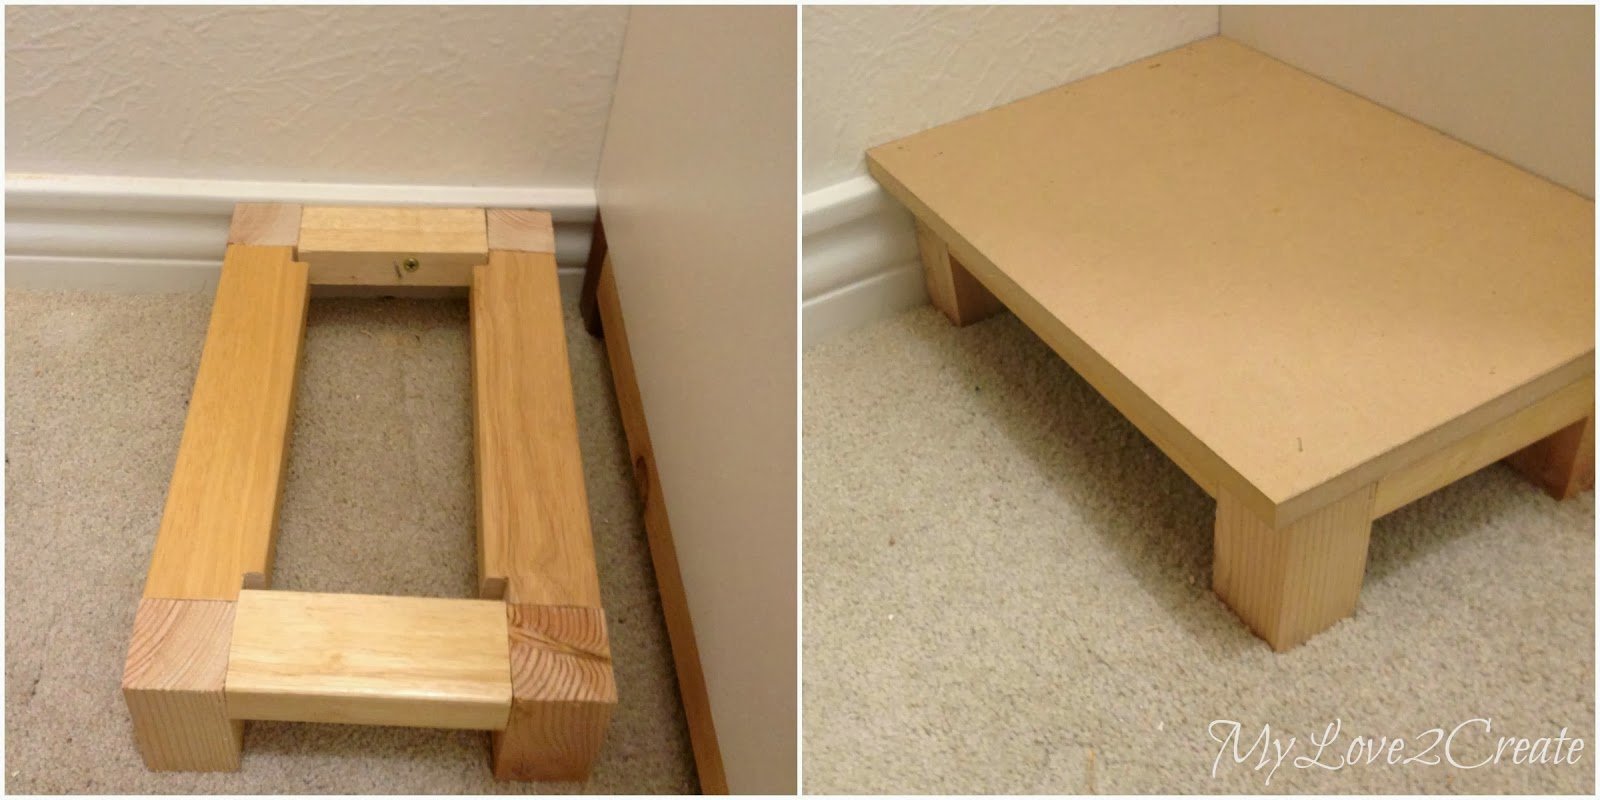
Here is the base I built with scraps. I screwed it into a stud in the wall, and nailed on a scrap of mdf.
I set the shoe shelf onto the base and secured it to the base, tower and wall with screws and nails. Those long wood pieces on the left will trim it out. Look my shoes fit!
On the other side of the closet I added a base for my bench.
I didn’t have an actual plan for the shoe shelf and bench, so I was making it up as I went along. I nailed the mdf into the trim on the wall as well as the base.
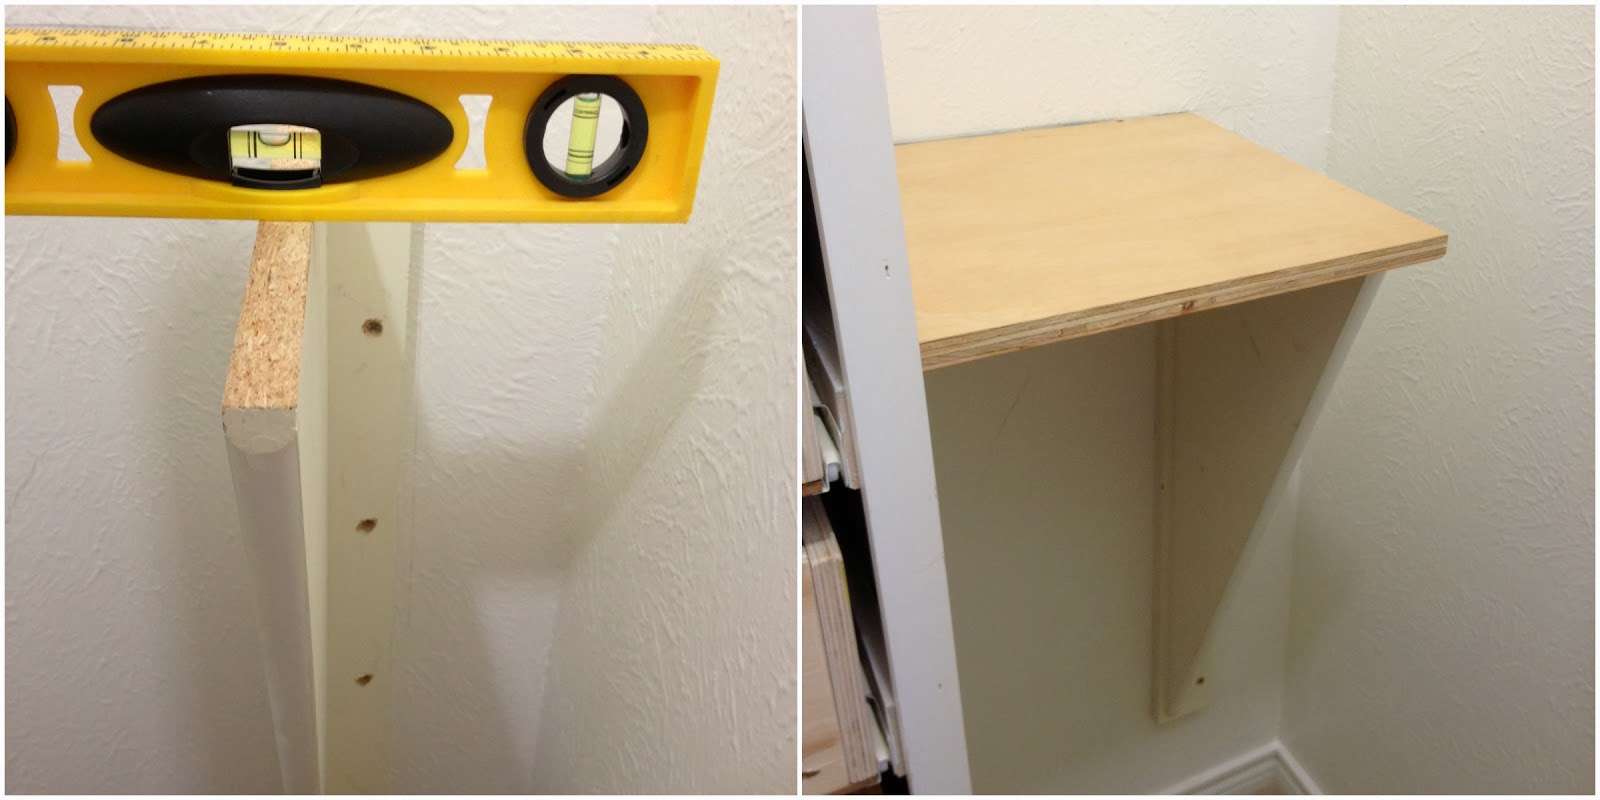
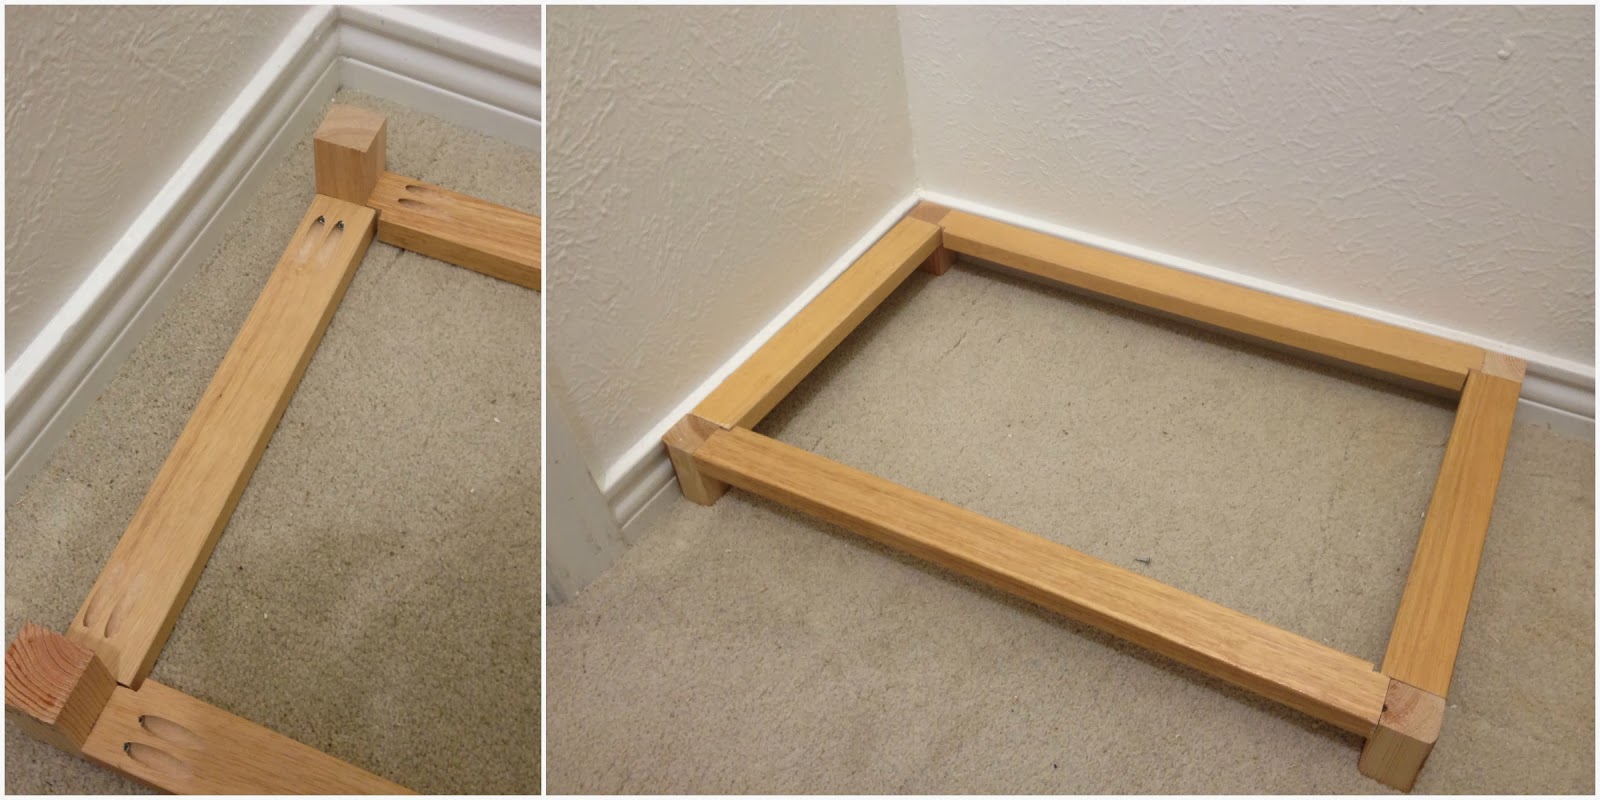
I screwed a support board for the bench into the wall (on the left), and then built the top and added a side support with pocket holes.
Then I flipped the whole thing over and secured it to the wall and base. You can see on the left that my wall is totally uneven and I had to use shims to fill in the huge gap!
This bench was getting a drawer too, here it is installed. This drawer was giving me headaches, it did not want to go in straight!
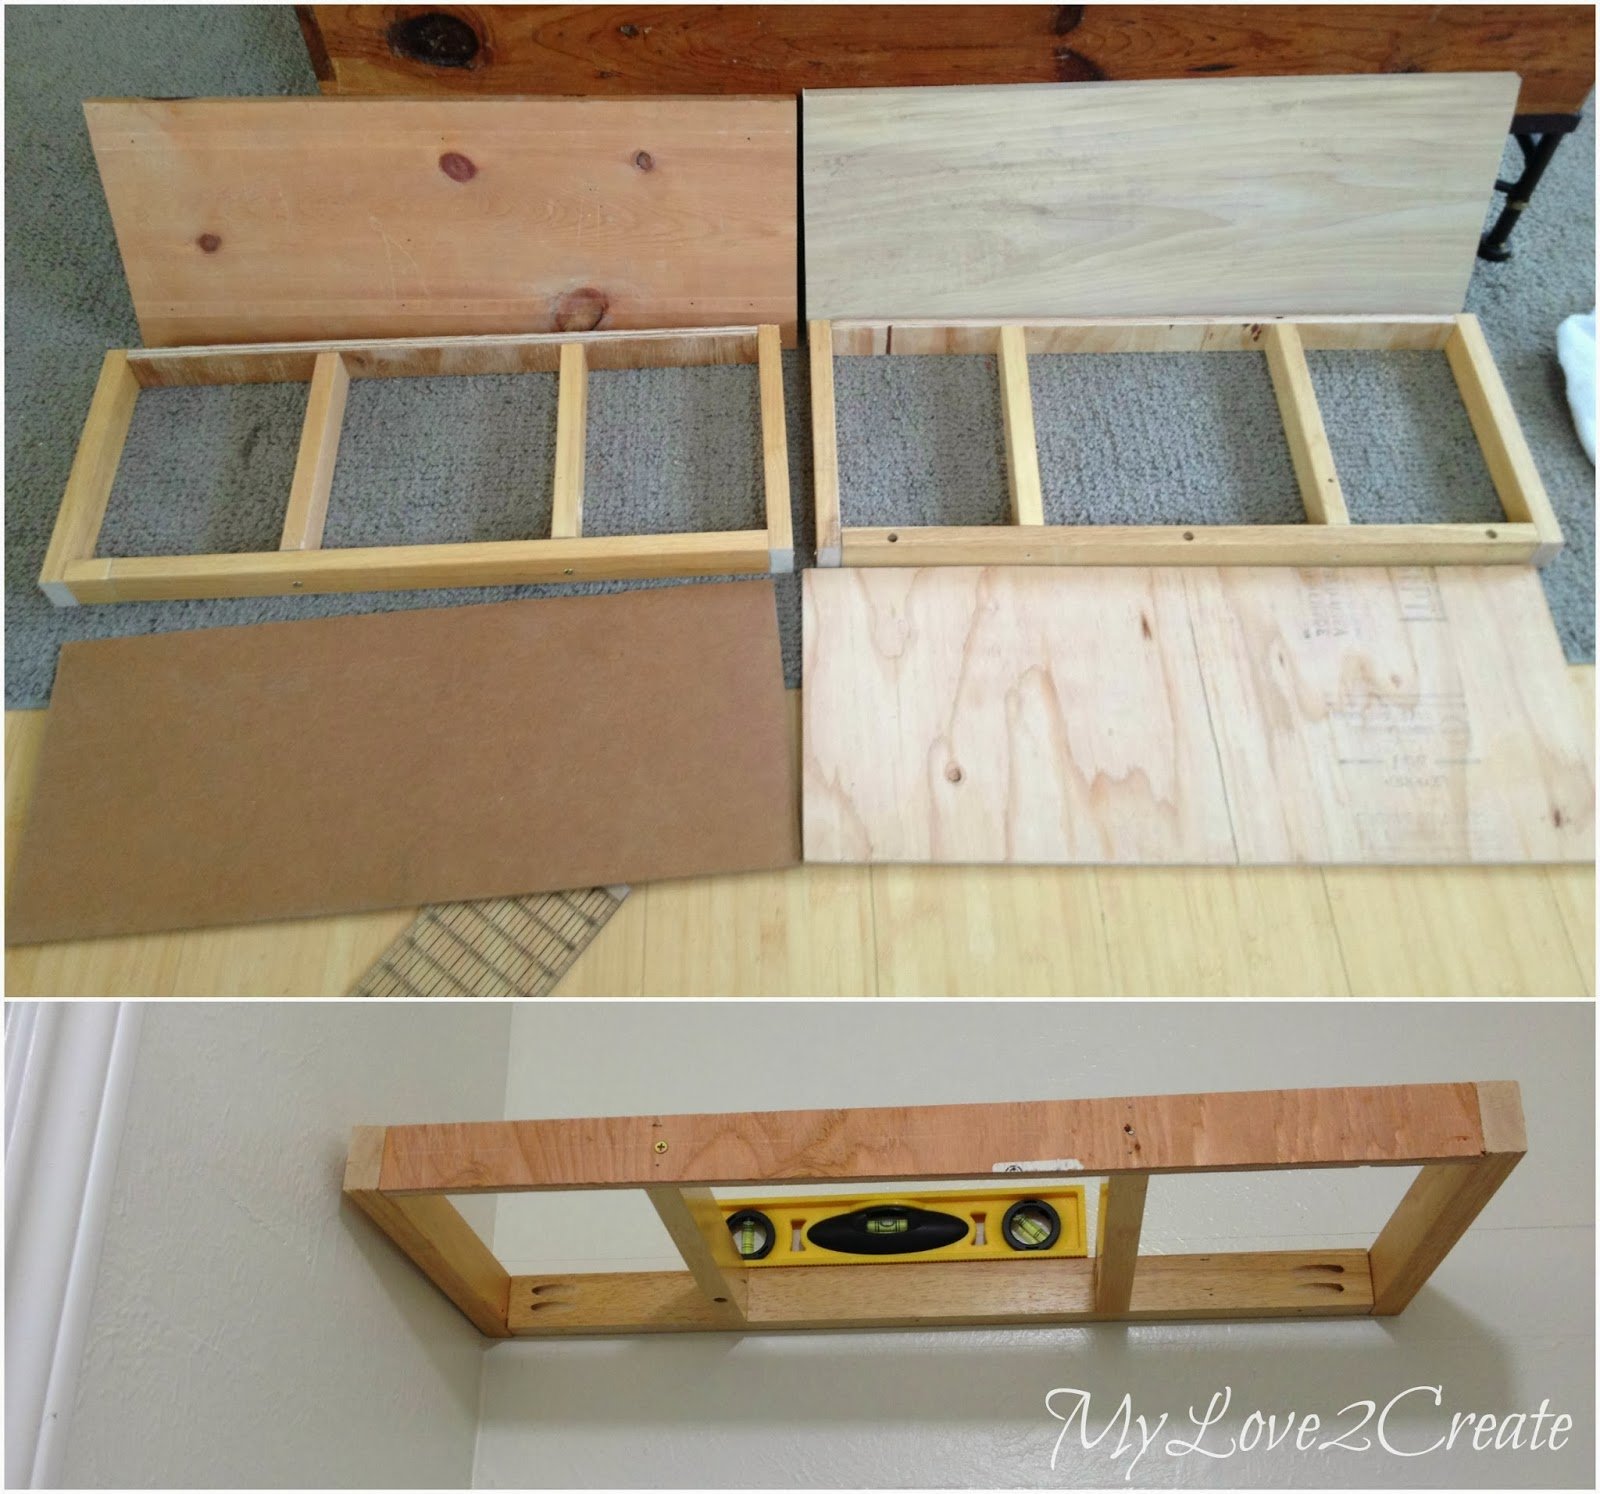
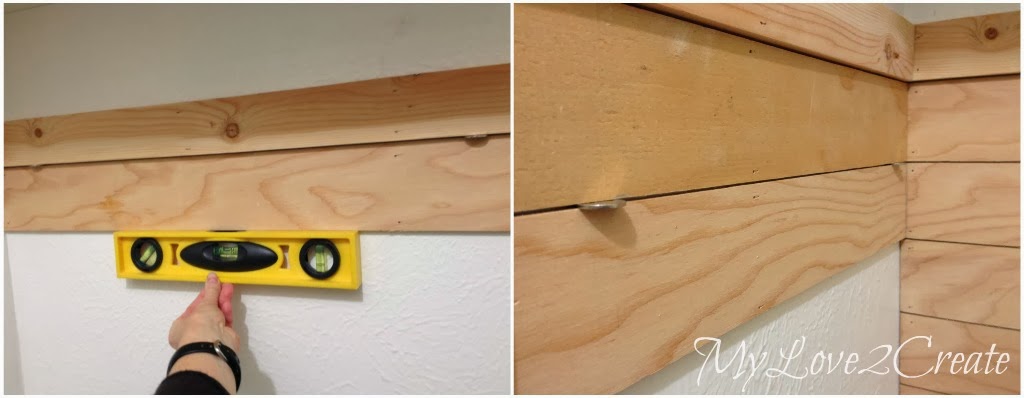
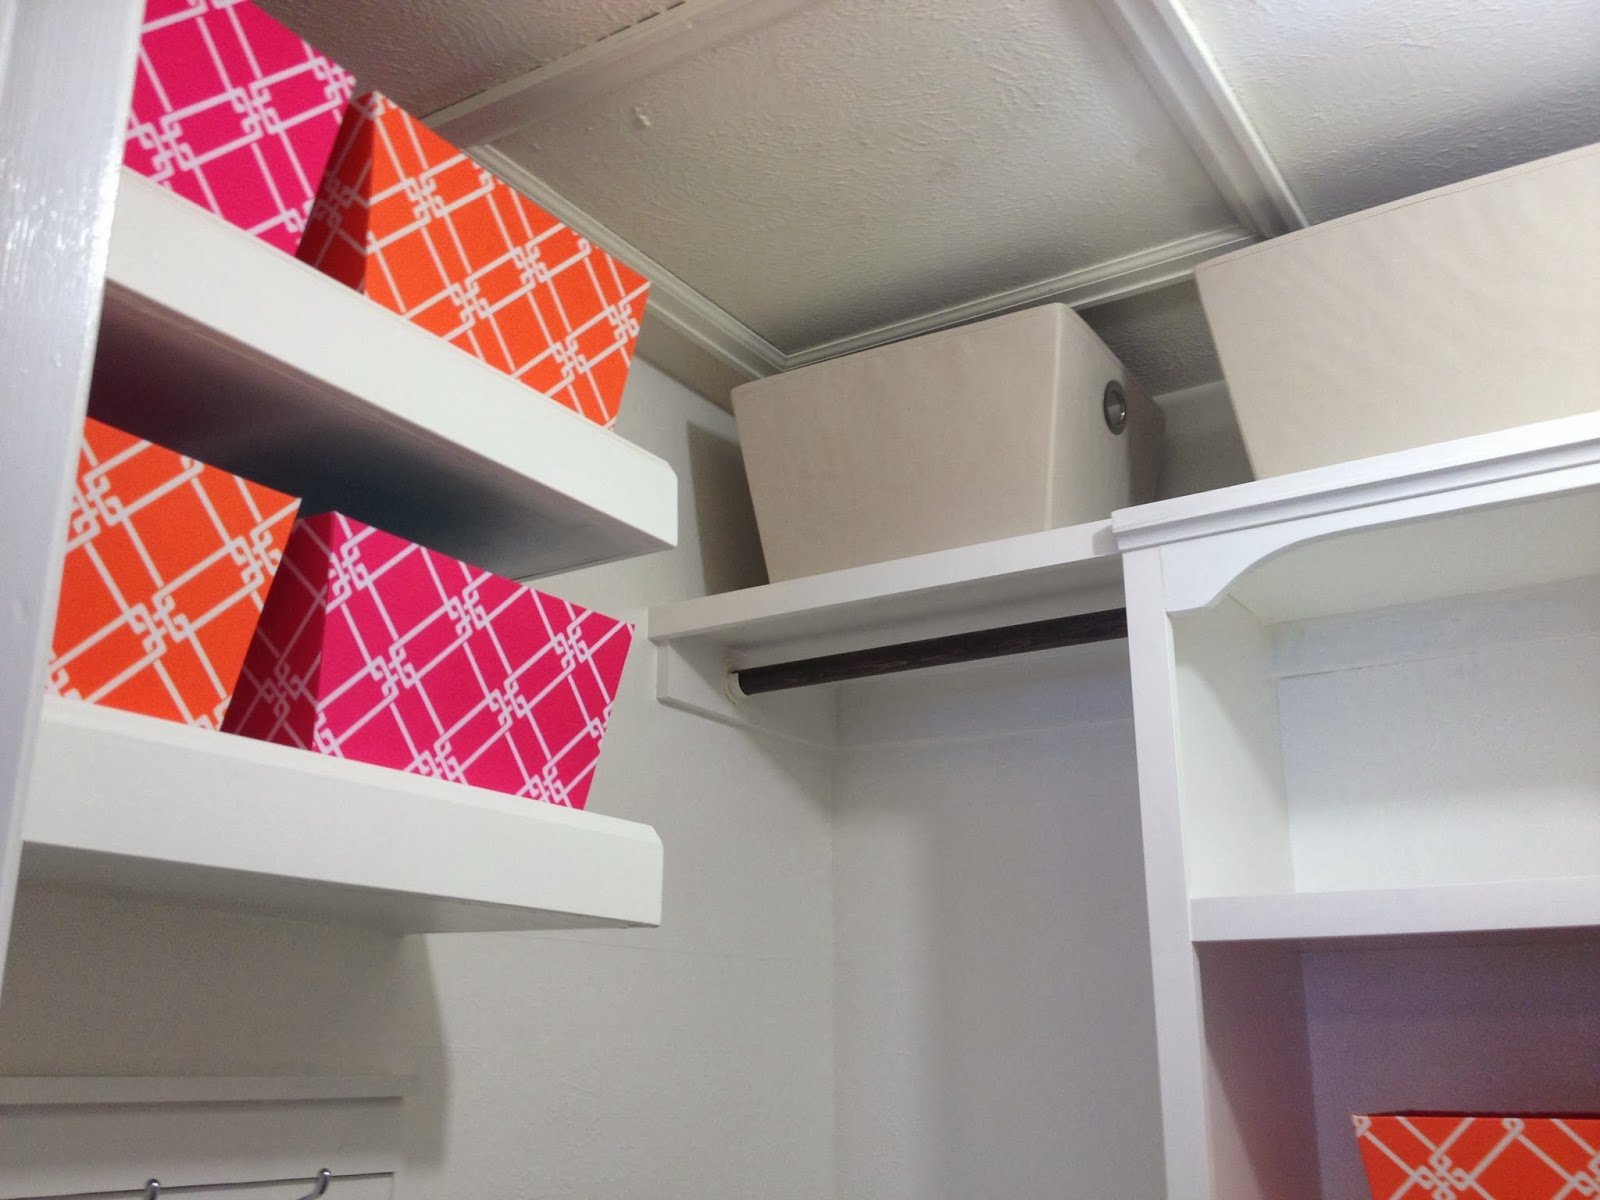
I also built, with more scraps, (Are you seeing a pattern here?…I have a ton of free wood I have collected) the floating shelves. I built a support frame for each shelf and cut a top and bottom piece. Then when I went to put it on the wall I really saw how uneven the wall was! (this is the same wall as the bench.)
To make this part easier since I was doing this alone, I made sure it was level and used my nail gun to nail it in place first, then I went back and screwed it into the studs. This is good trick to remember.
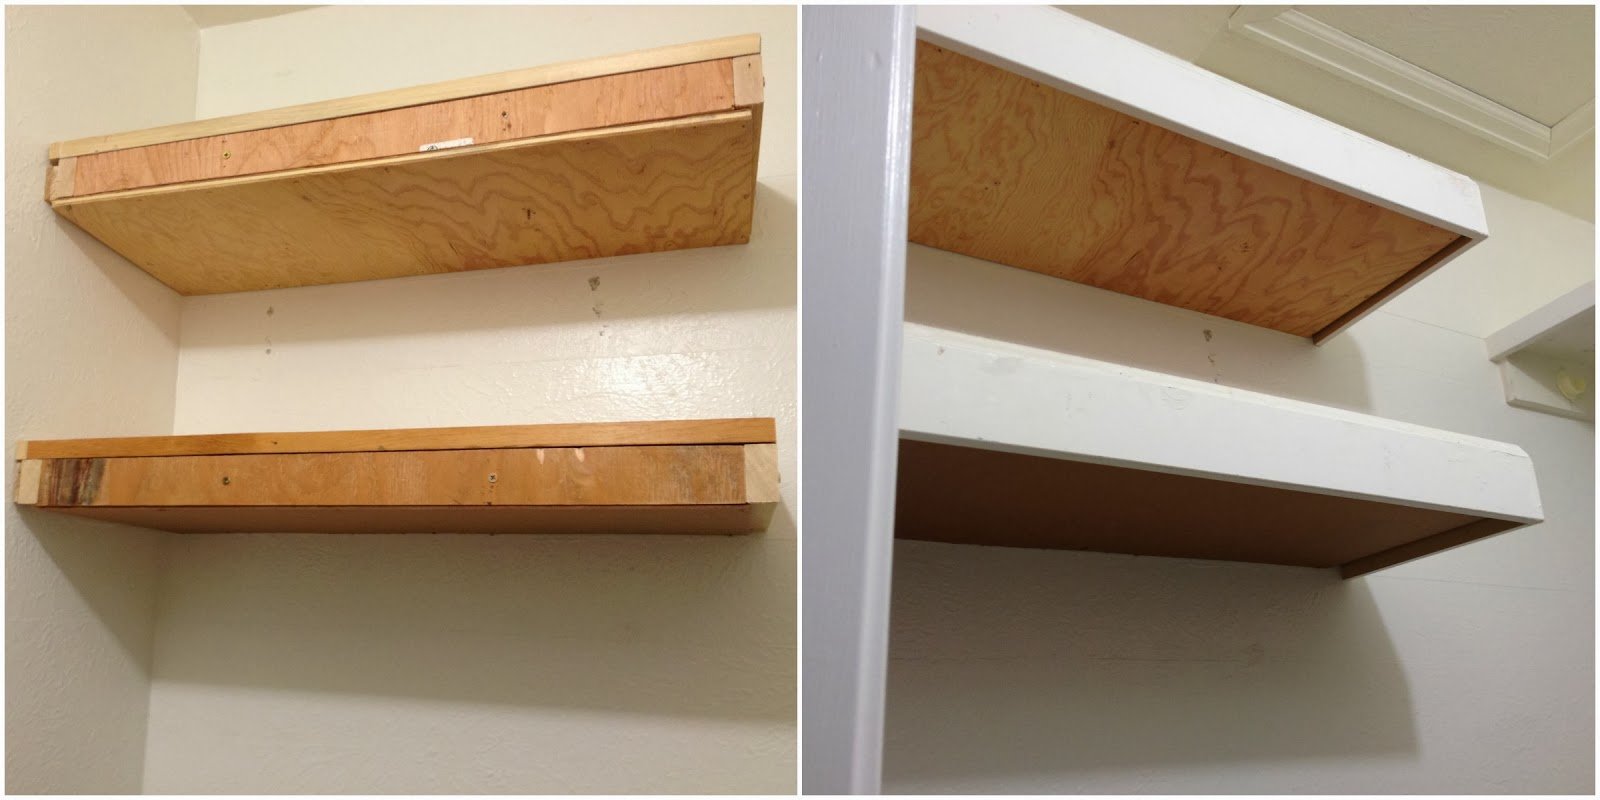
I added my top and bottom pieces and several shims to make it flush with the “I cave inwards a whole have inch” wall. Now for some trim. I used some free base moulding to wrap around my shelves. After I nailed it on I really liked it, but the bottoms looked horrible! After stewing over it for a while I came up with a brilliant idea…
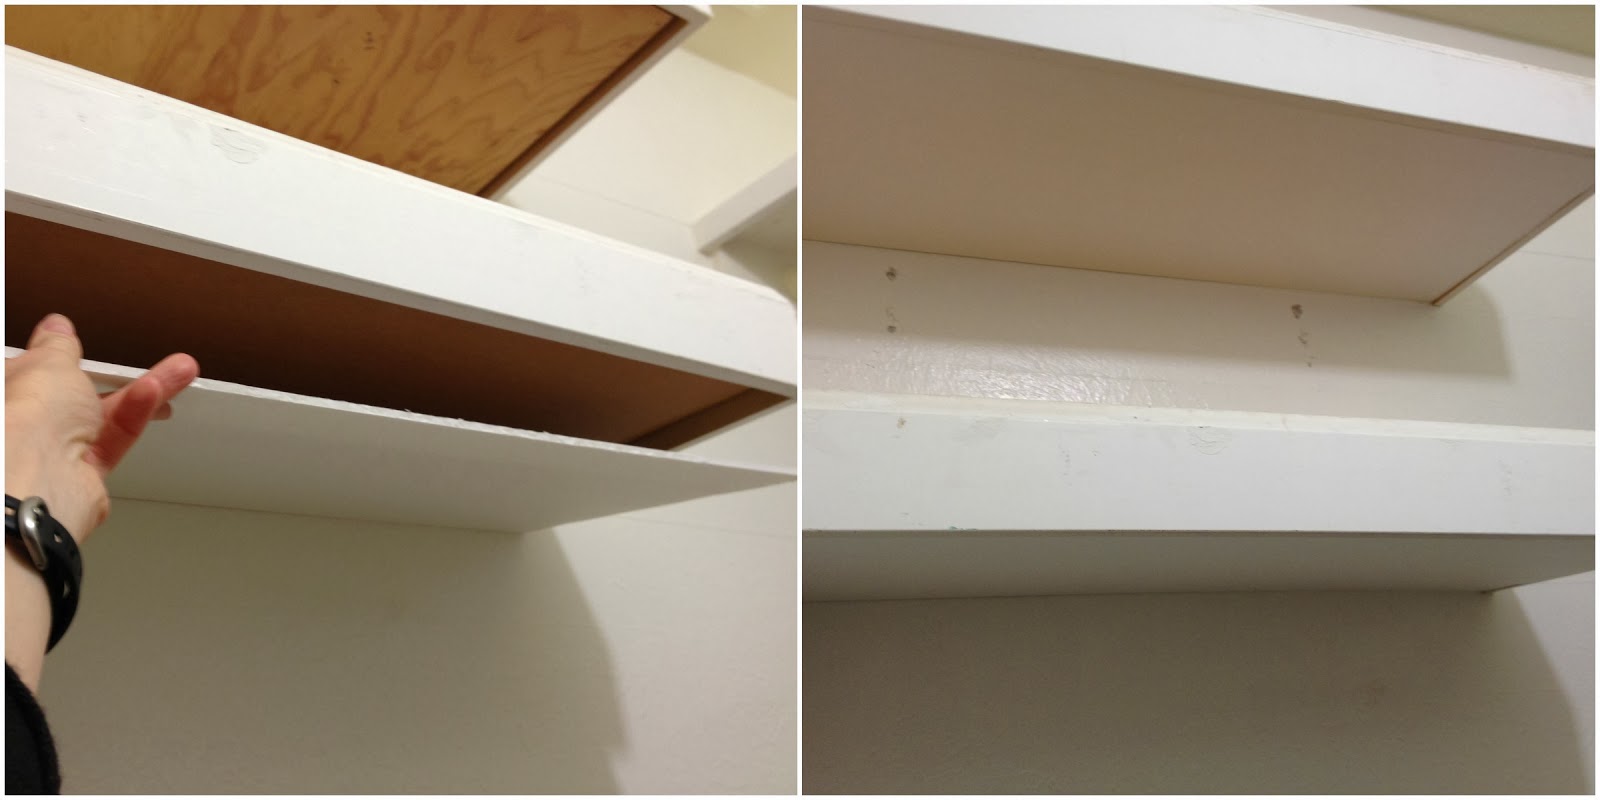
I measured and cut foam core then hot glued it in place! It worked perfect to cover up the uneven wall and shims, and finish out the shelves. You may think I am crazy, but it worked, and it hasn’t been a problem!
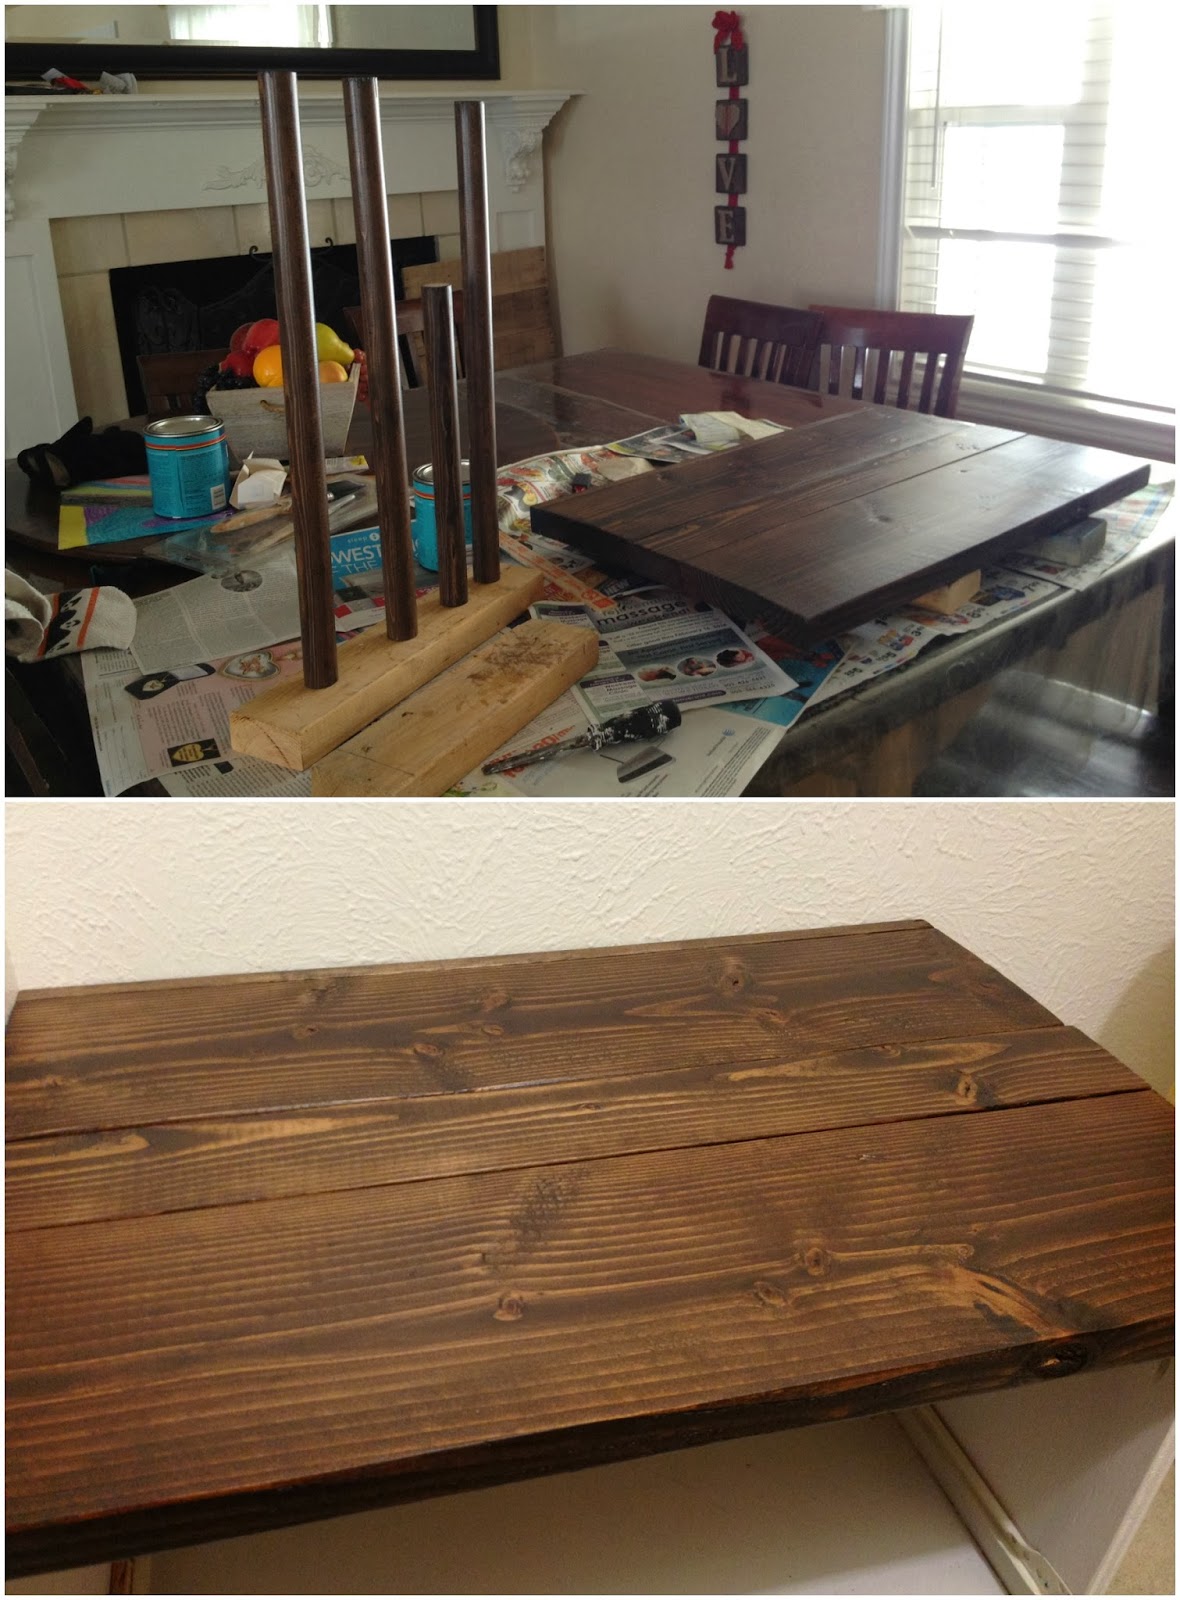
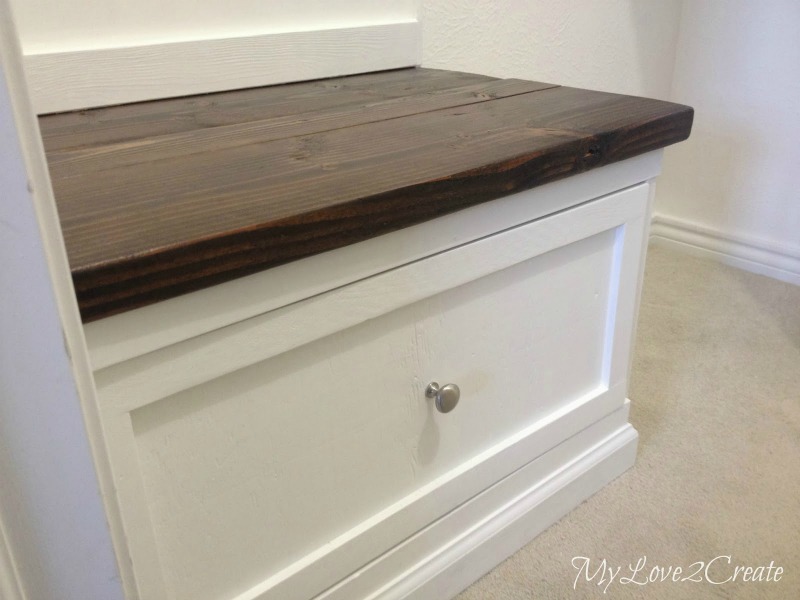
I built a bench top using pocket hole screws to attach the boards together. Then I stained it with Rusteolum Kona, sealed it with three coats of poly, sanding with 400 grit between coats 1 and 2. I also did the closet rods as well, I love the look of the dark wood! *I always use wood conditioner before I stain to ensure a nice even, non blotchy, stained finish.
Now to finishing the drawers,
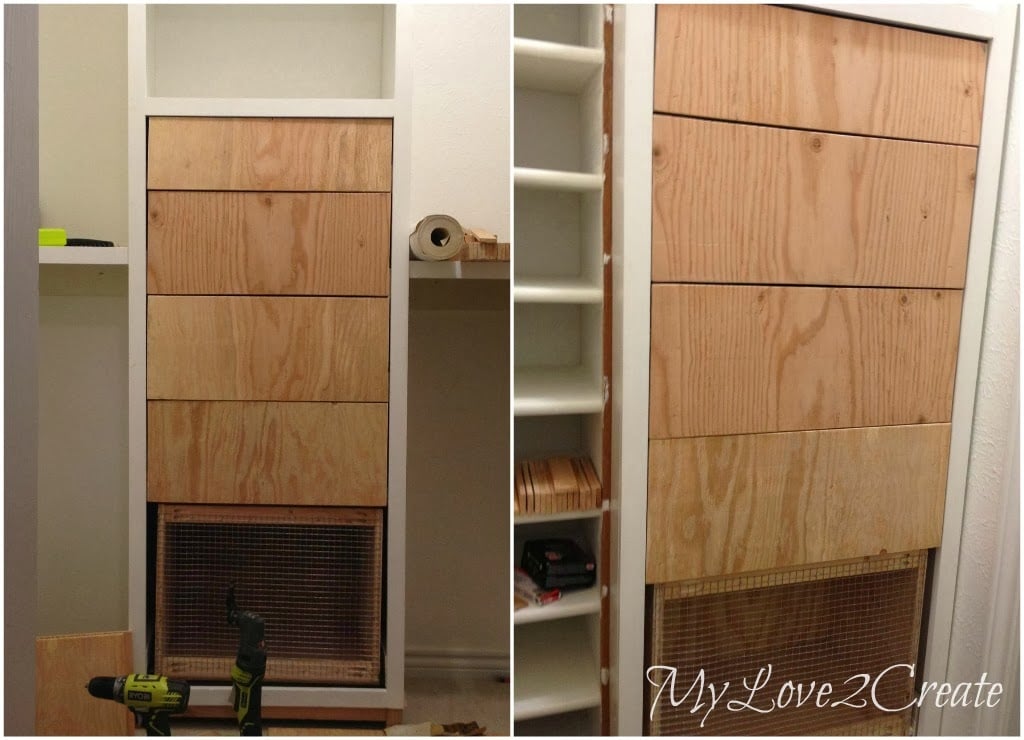
For my drawer fronts I had to get creative. I needed a 3/4 inch thick drawer front but all I had was half inch plywood. I went ahead measured and cut for each drawer front. To attach the drawer fronts, I stared at the bottom just above the hamper drawer, and glued each piece and held it in place while I nailed it onto the actual drawer. I did this for all 8 drawers in the towers, leaving a small gap on all sides.
Then using scrap lath pieces that I had cut to size and sanded, I glued and nailed them on each drawer front. I got these lath pieces in a bundle for $1 at the Restore. This trim pulled the drawers flush to the trim on the tower, perfect! And, made them look very finished too!
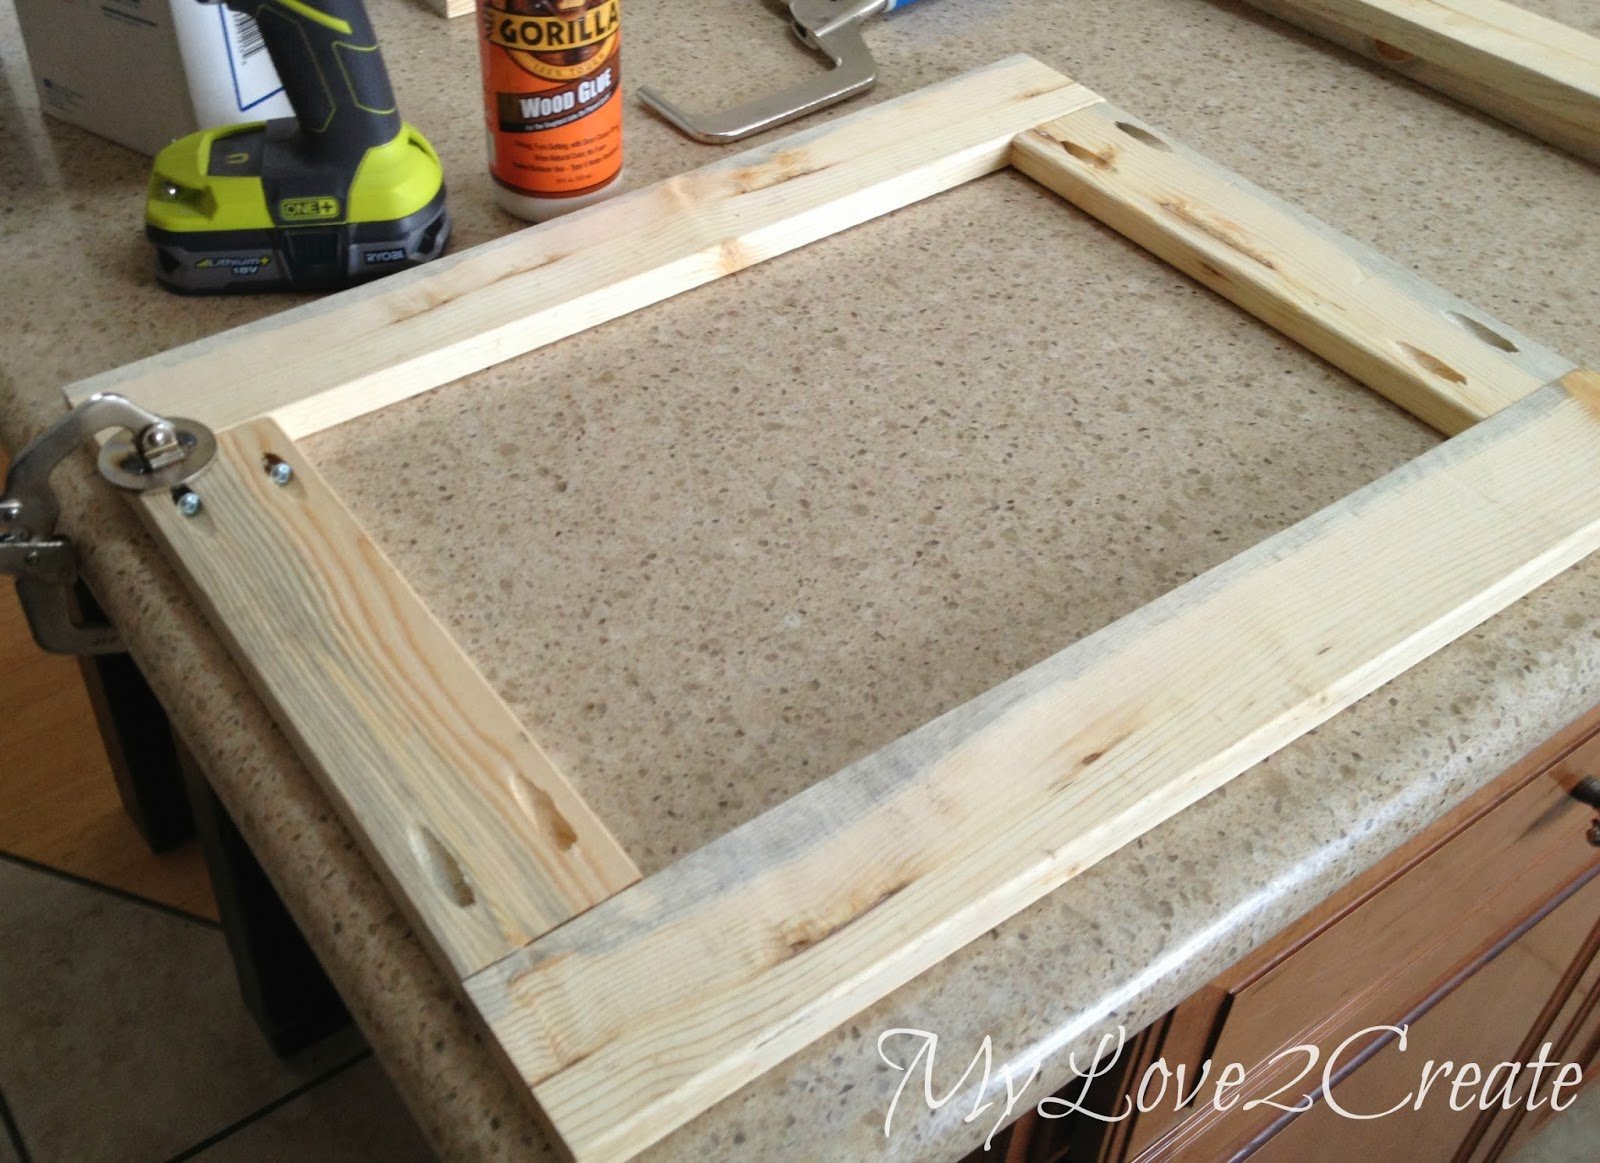
For the hamper drawers I made a face frame from 1×3’s with pocket holes.
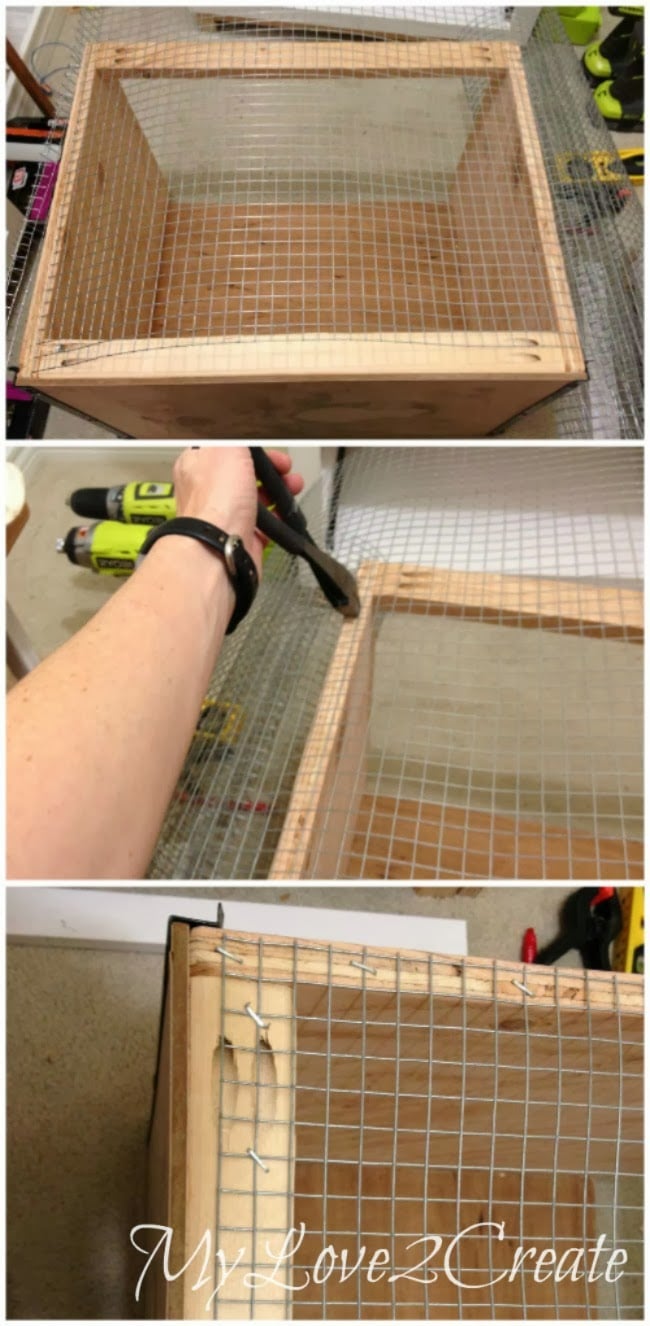
Then I used hardware cloth (which you can buy at any hardware store) to cover the fronts of each hamper drawer, and stapled them in place. All I had to to now was add the face frame to the front.
I simply held it in place and nailed it on!
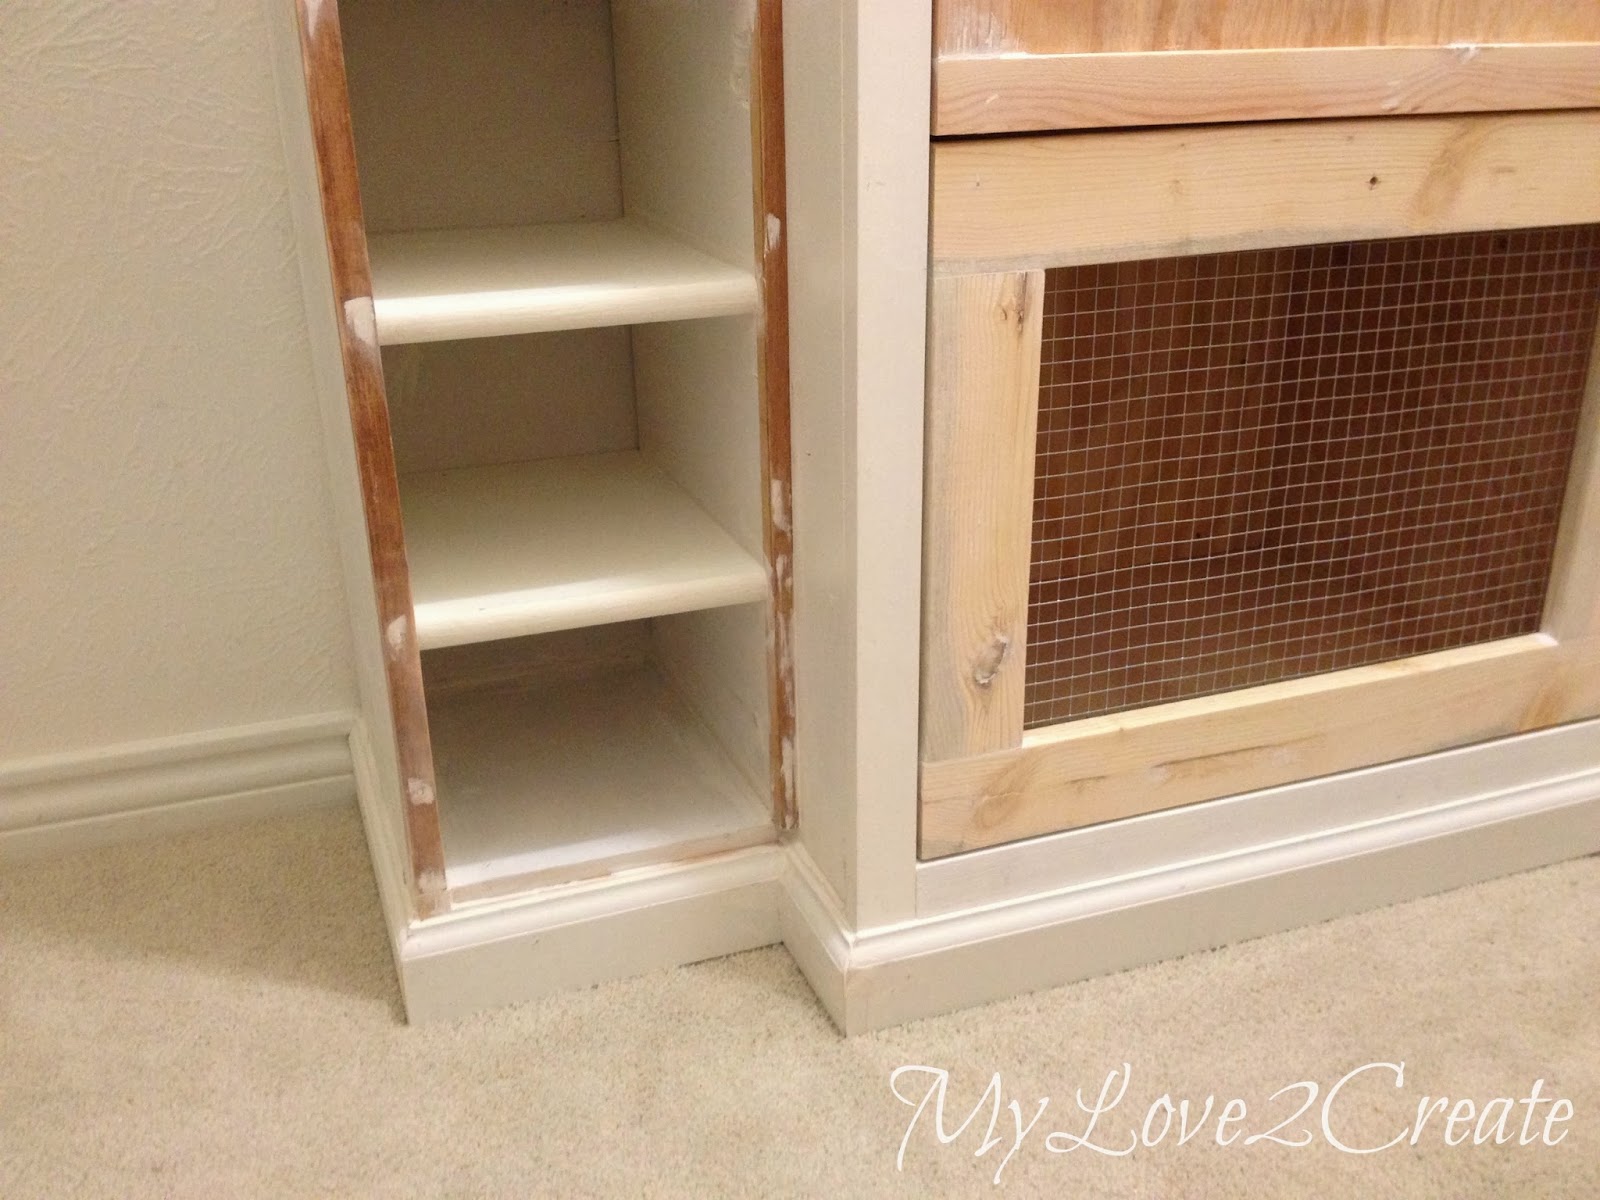
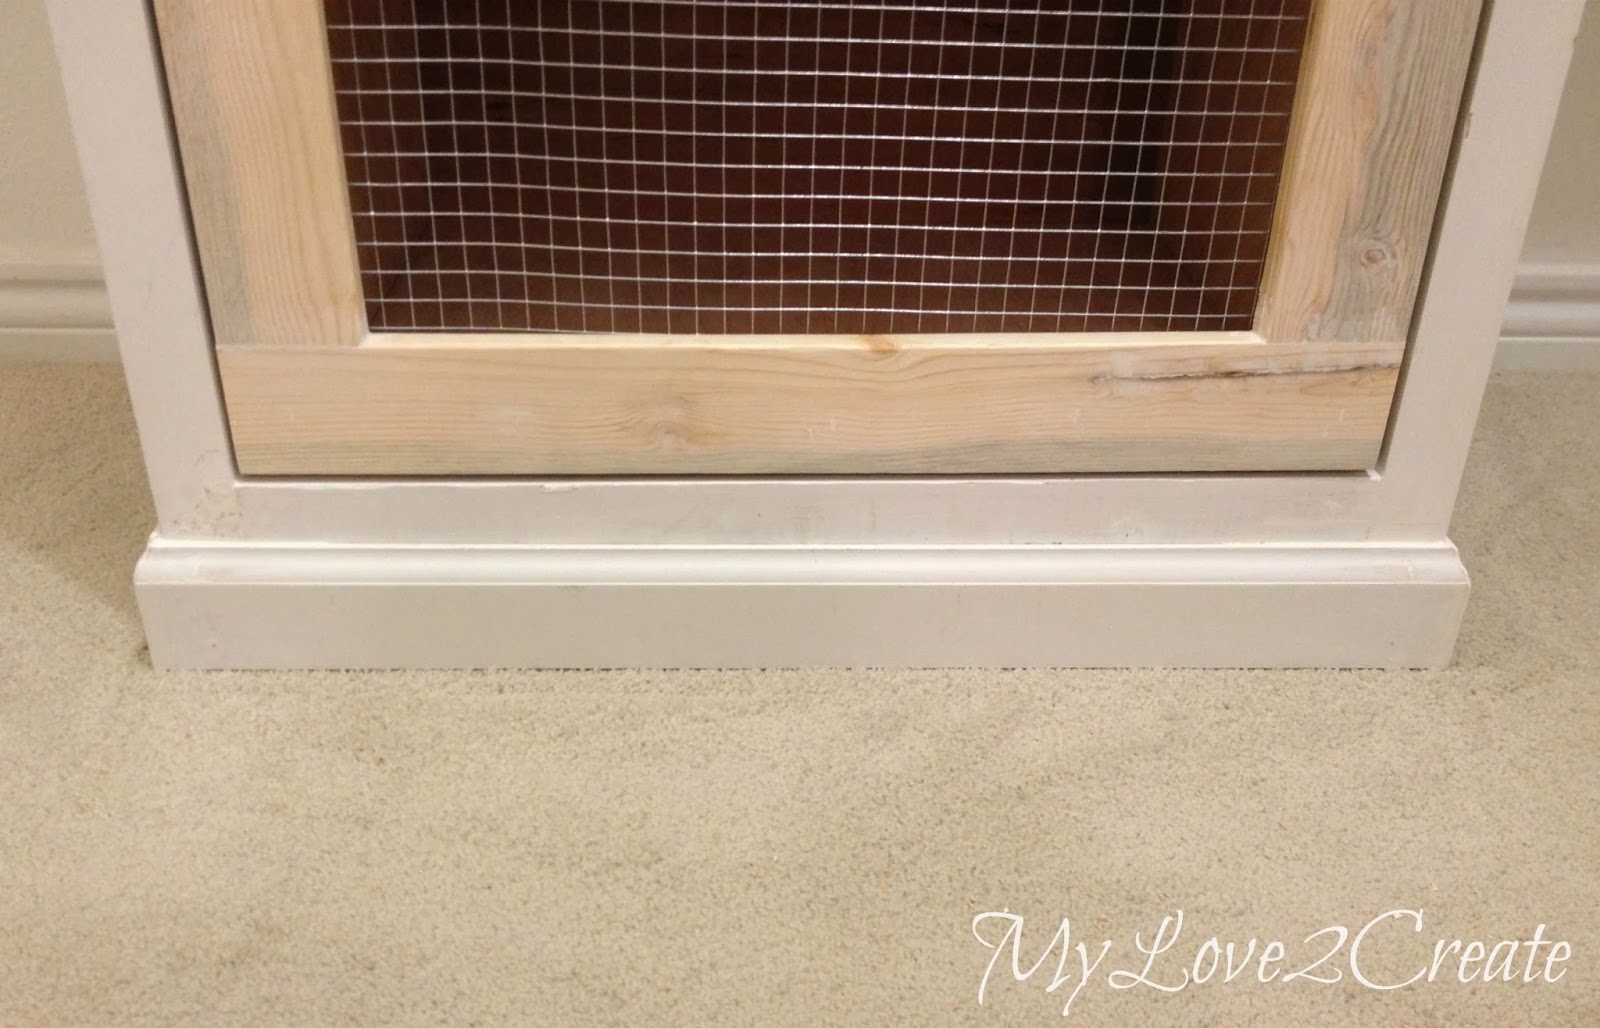
Don’t the hampers look awesome? I also pre-drilled holes for all my knobs, and screwed each drawer face on from the inside of each drawer. Better safe than sorry! I added trim to the bottom of my towers and around my shoe shelf. I added the long scrap wood for the front trim on my shoe shelf as well, it still needs to be primed and painted. Then I caulked everything, so it would look professional. It is getting close to being done!
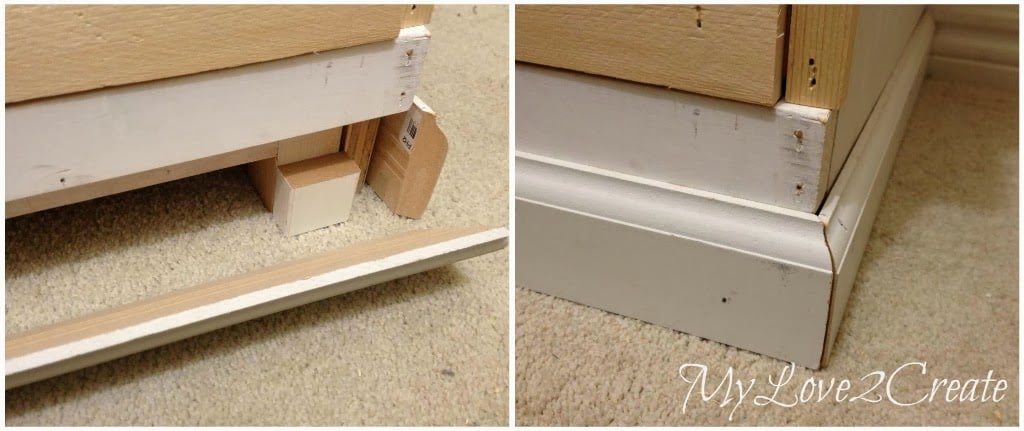
Here is a shot of me adding trim to my bench. I used blocks of wood to help the trim stay securely in place. The bench drawer front was made the same as the other drawers and I trimmed it out the sides with more scrap pieces.
Last up is the plank wall!
I really wanted to do something fun above the bench and decided on a plank wall. The decision was easy for me when I remembered I had previously bought a piece of 1/4 plywood from the cull bin, at Home Depot for .51 cents. At the time, I had it ripped into 3.5 inch strips for maybe doing a plank wall somday…it was perfect. I nailed two 1×3 top boards into the studs and then checking for level and using nickels for spacing I nailed on my planks.
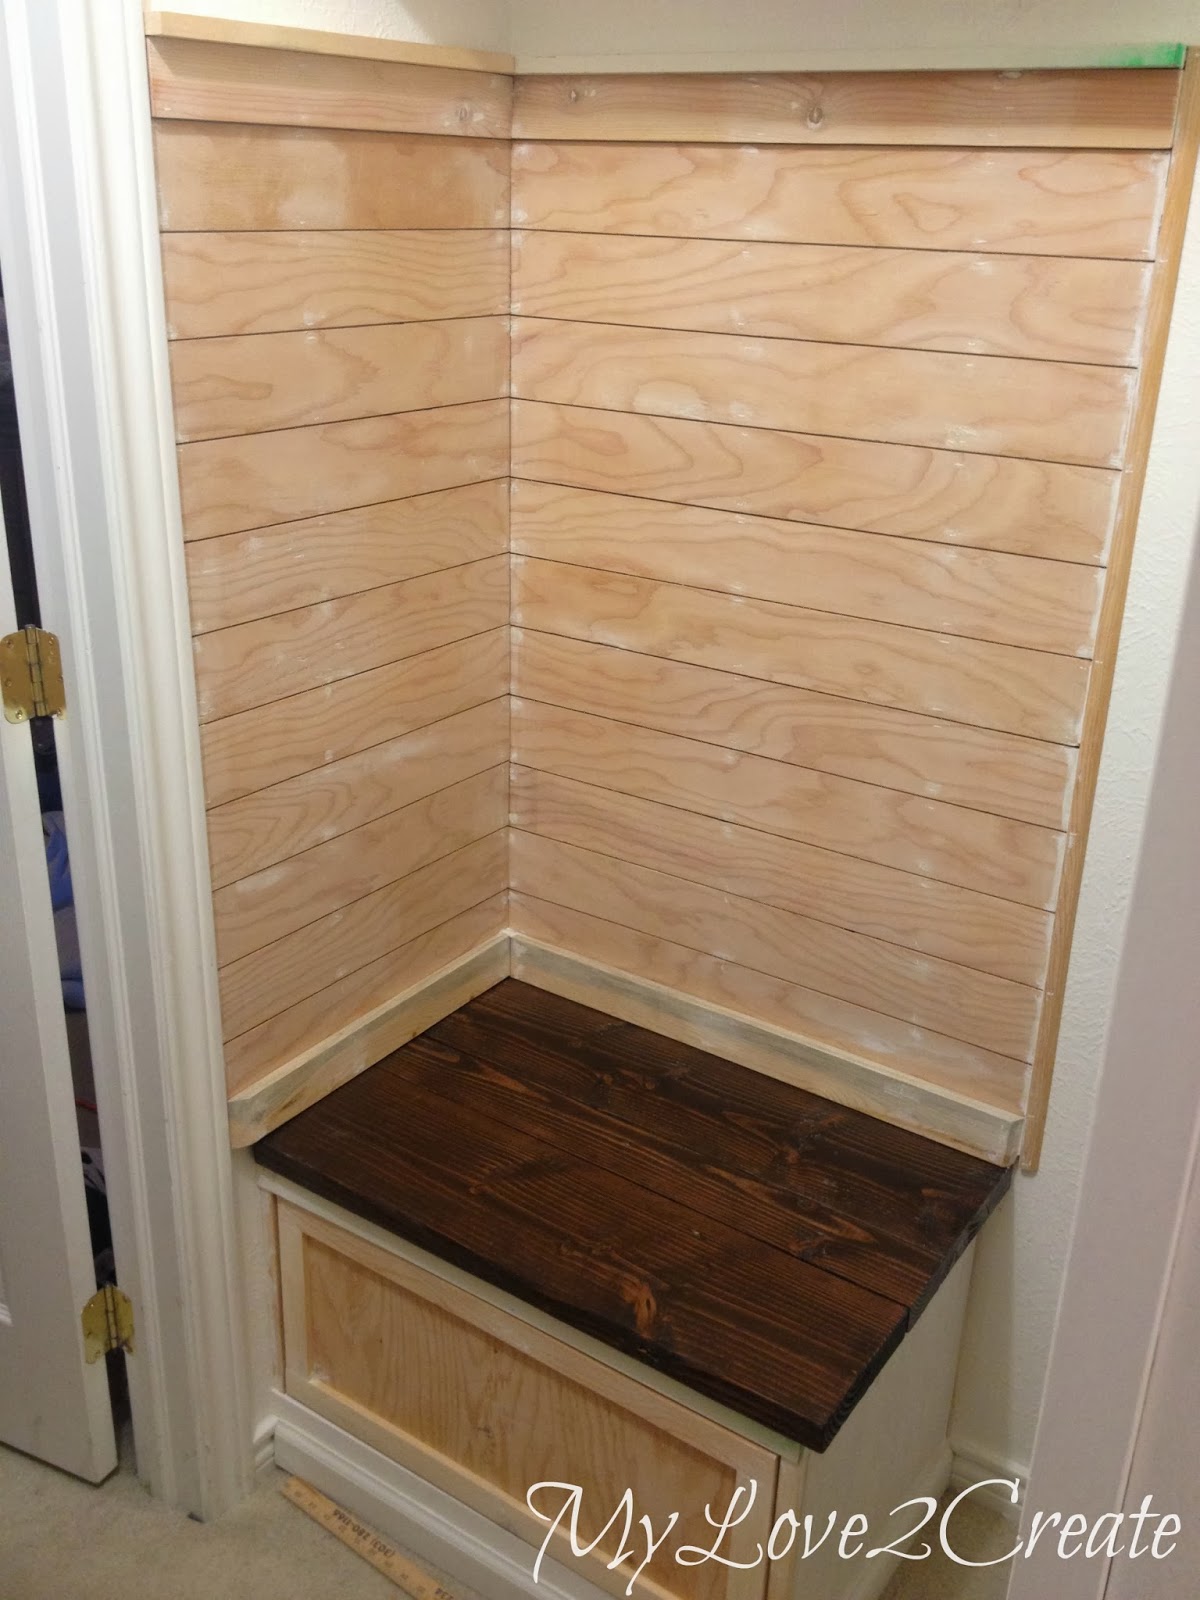
It was really easy! I added more 1×3 trim to finish it off at the bench seat and a piece of scrap rounded moulding for the edge. I filled in all the holes and sanded smooth! Oh, and I decided to add a 1×2 shelf on the top too.
It is ready for paint people! I actually used a semi-gloss Behr mis-tint in white. It was only $7 for the whole gallon, and I can’t believe I found it, I had been saving it for a project like this.
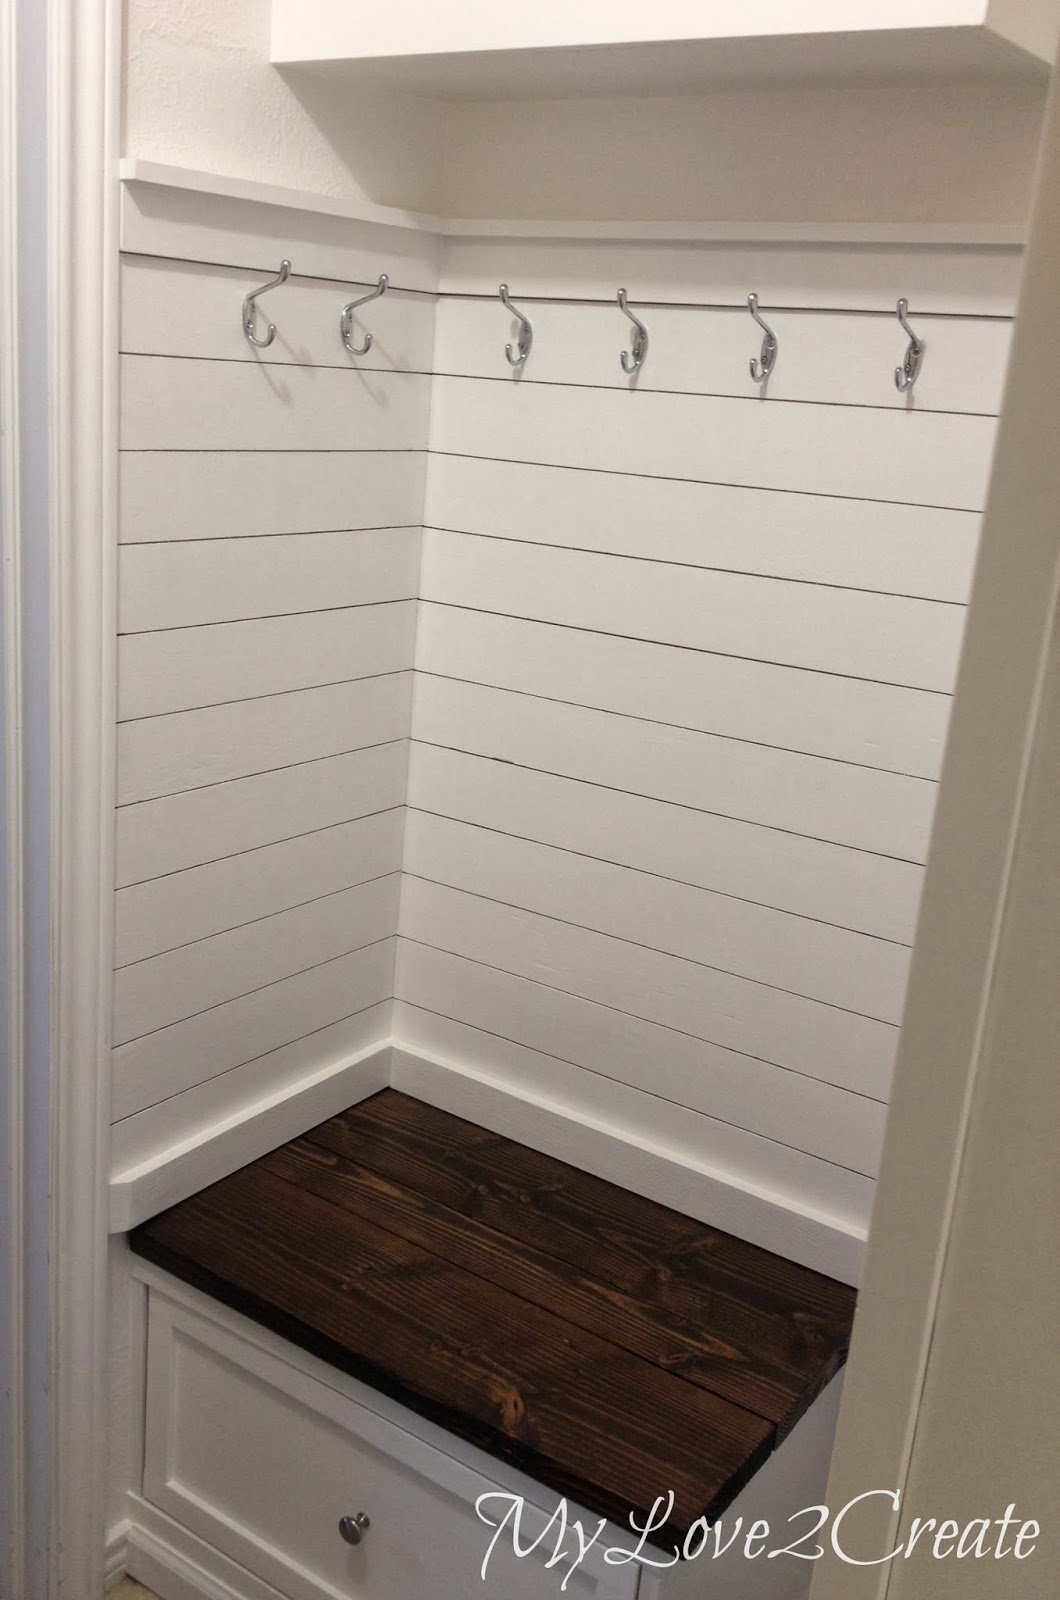
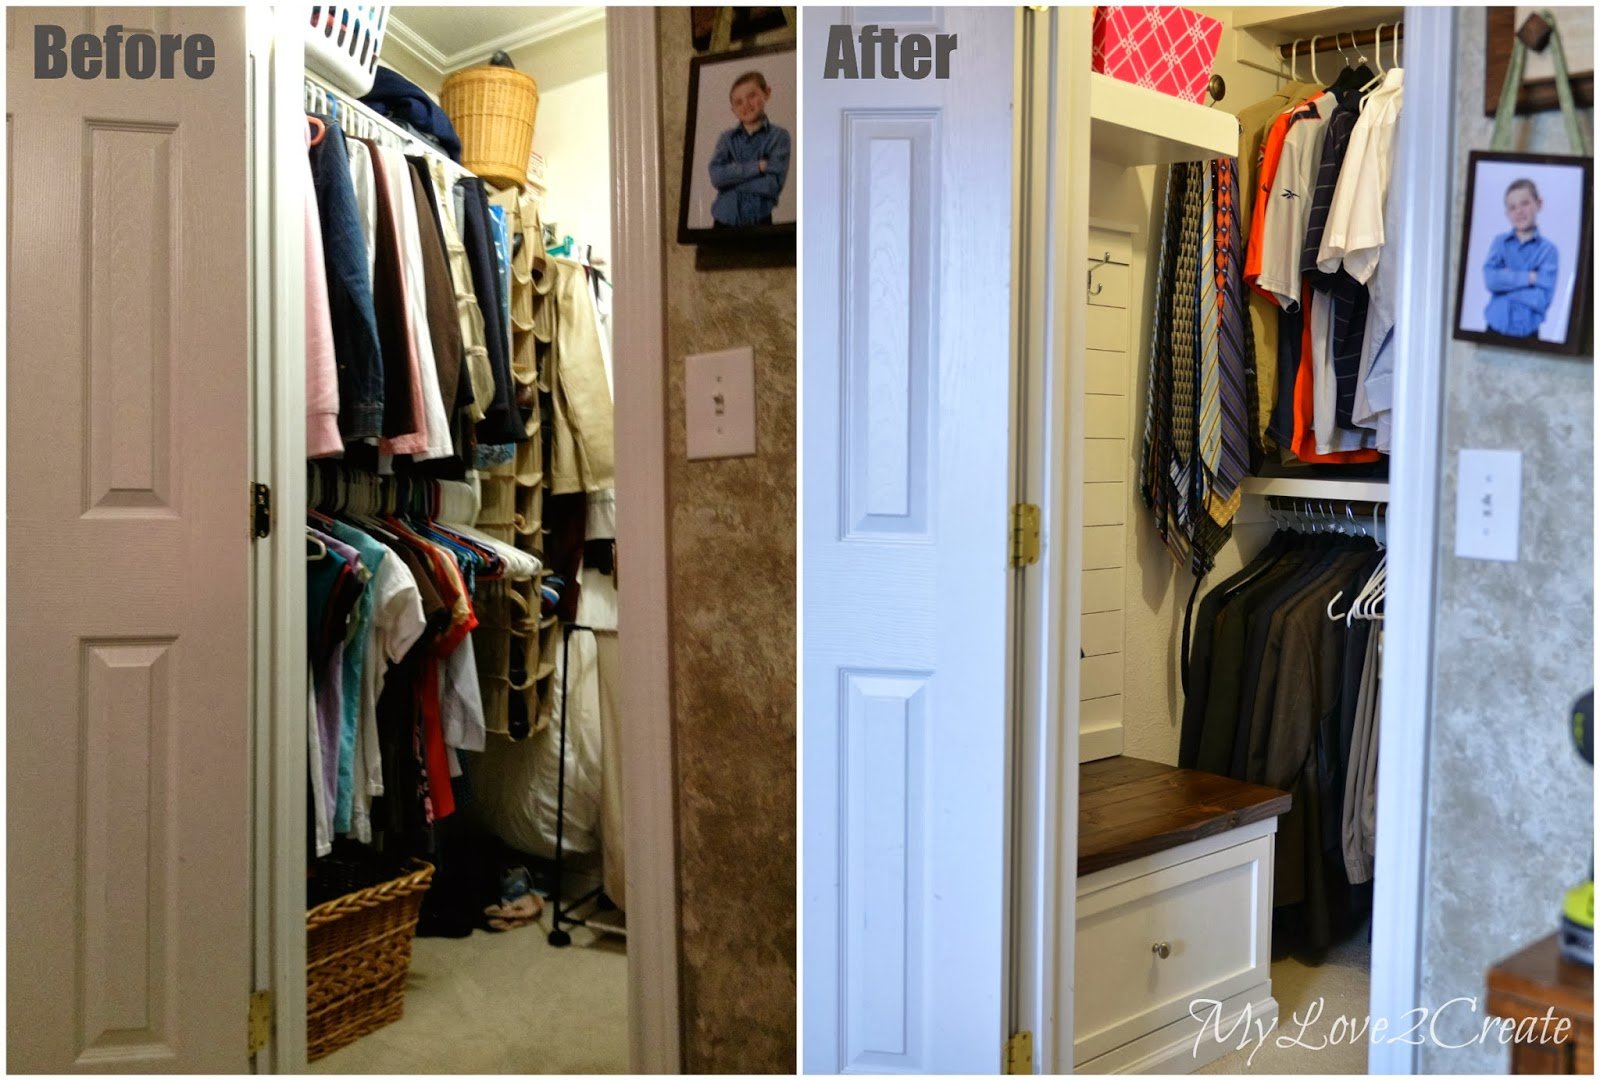
Here is the after of my bench area, painted and hooks added. Eeek! I love it!
This little corner packs a punch with lots of storage and the hooks have been great for hanging up workout clothes, jackets, pj’s, you name it!
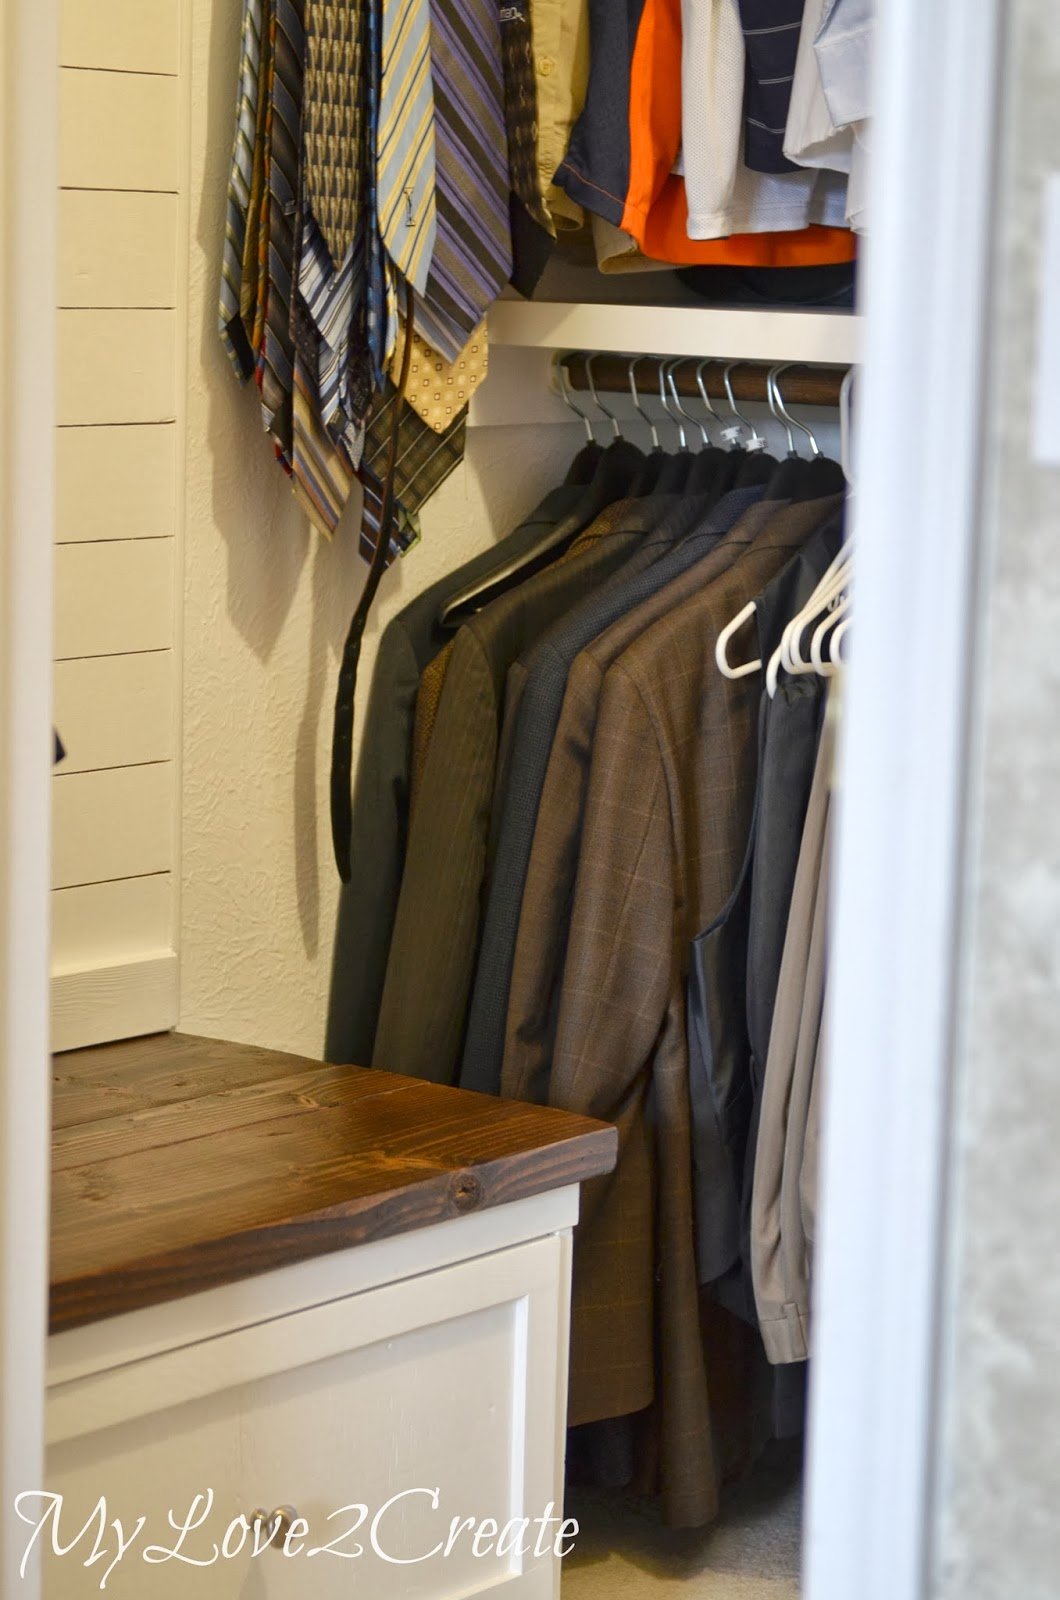
My husband’s suits fit nicely, and to hang his ties…
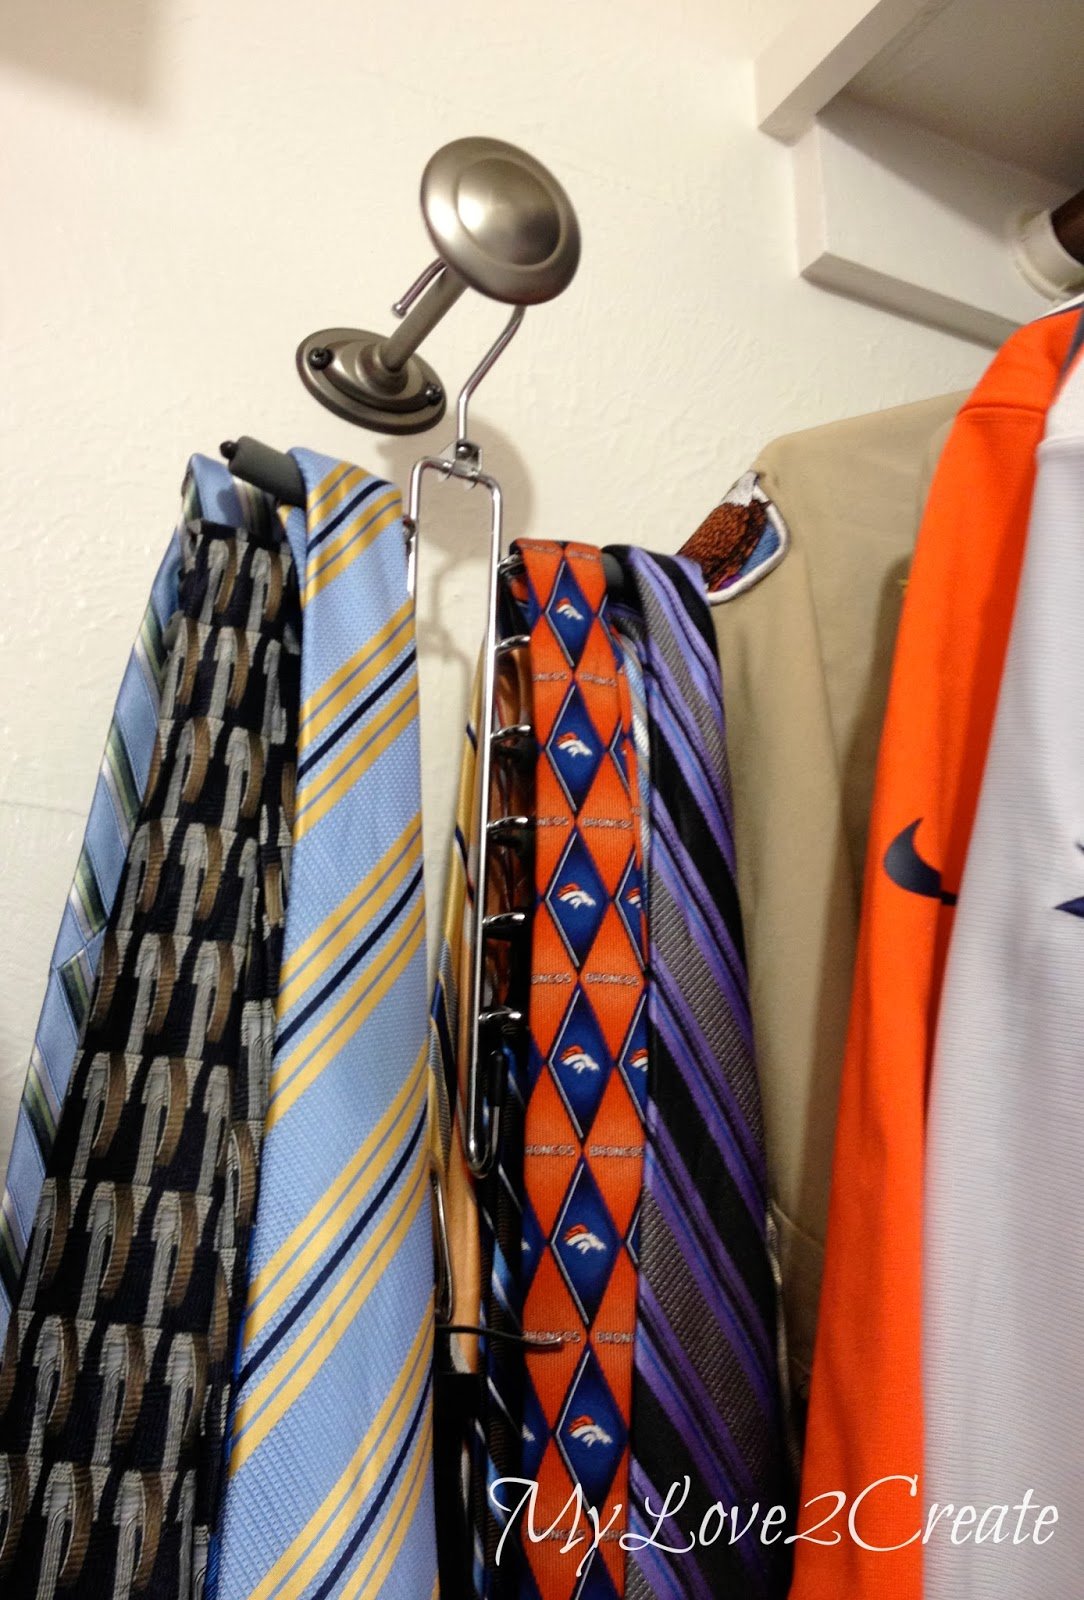
This curtain tie back that I had gotten (brand new) at the thrift store for super cheap worked perfect!
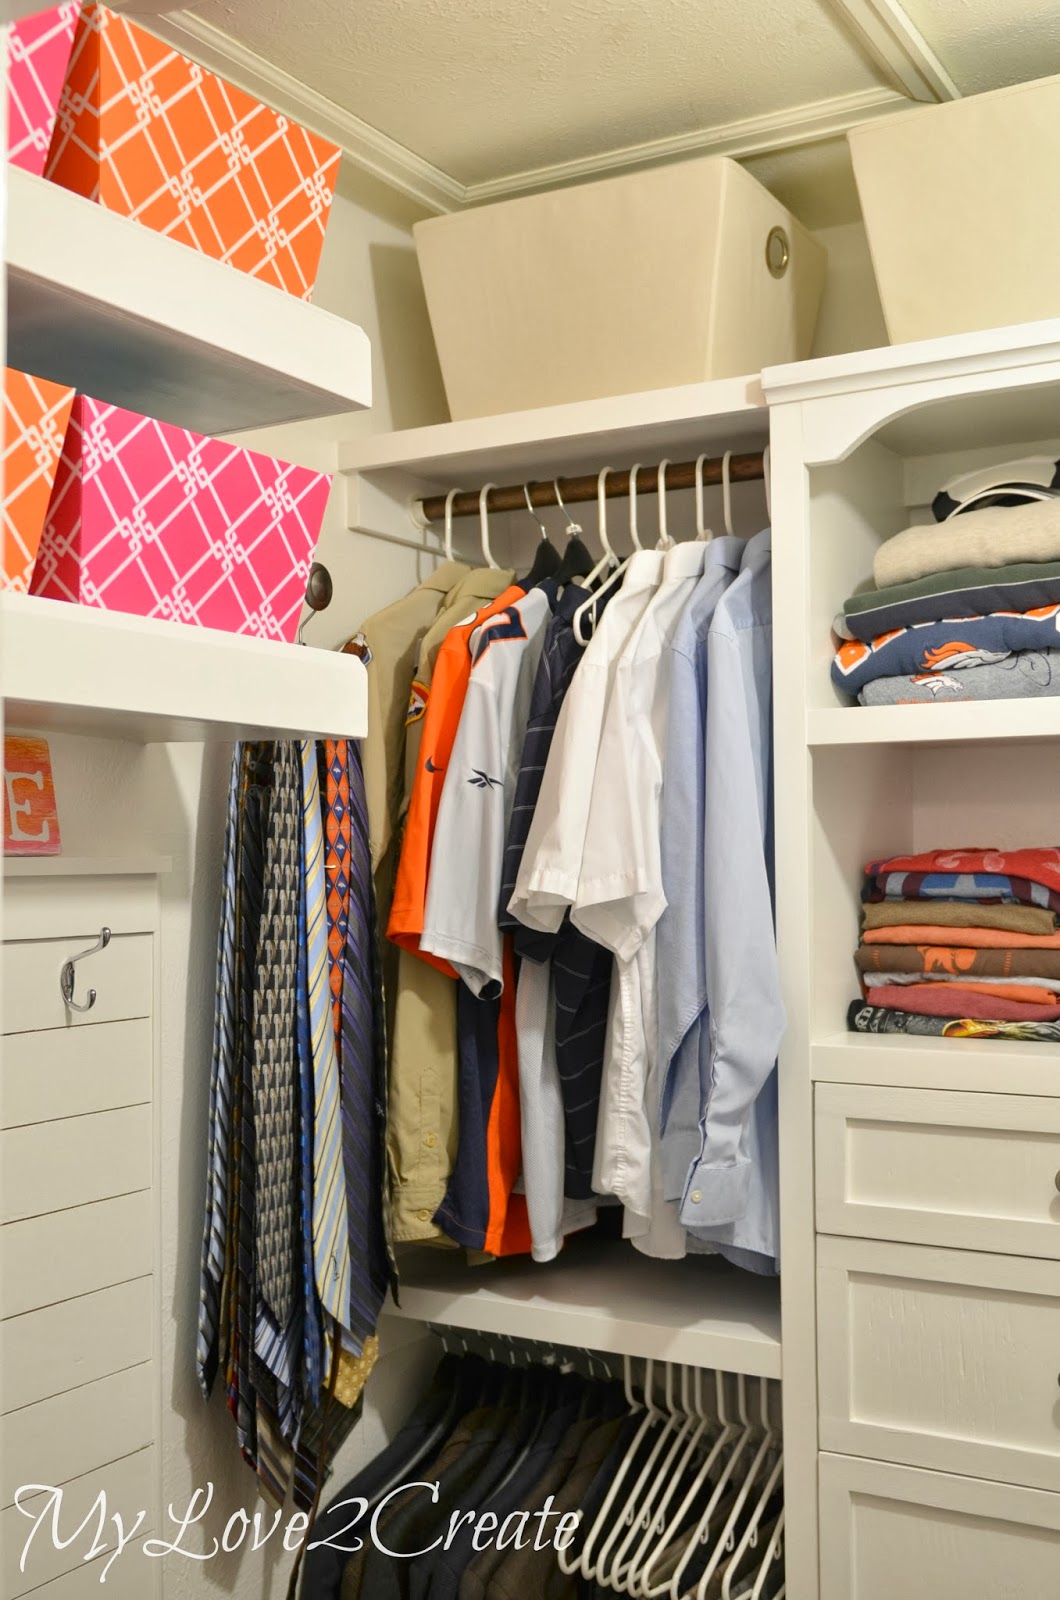
Here is a top view of his side.
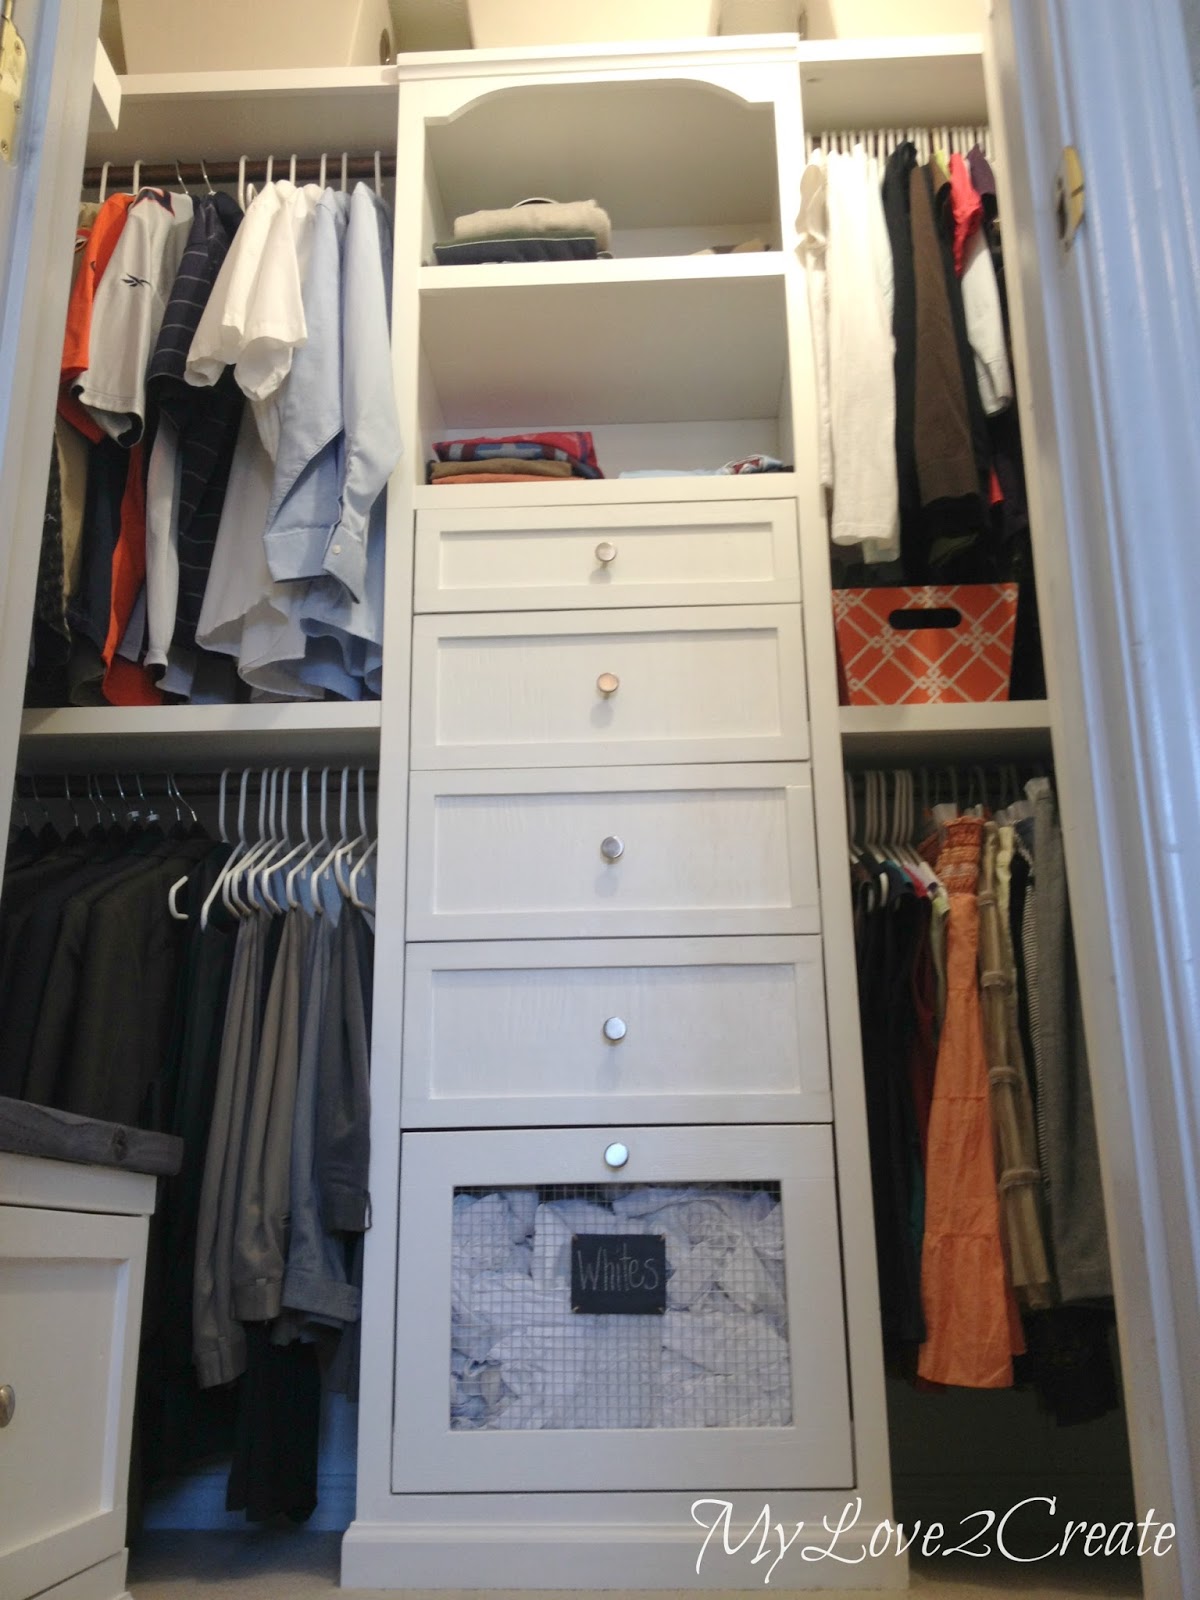
The tower on the back wall is his and then my clothes hang on the right.
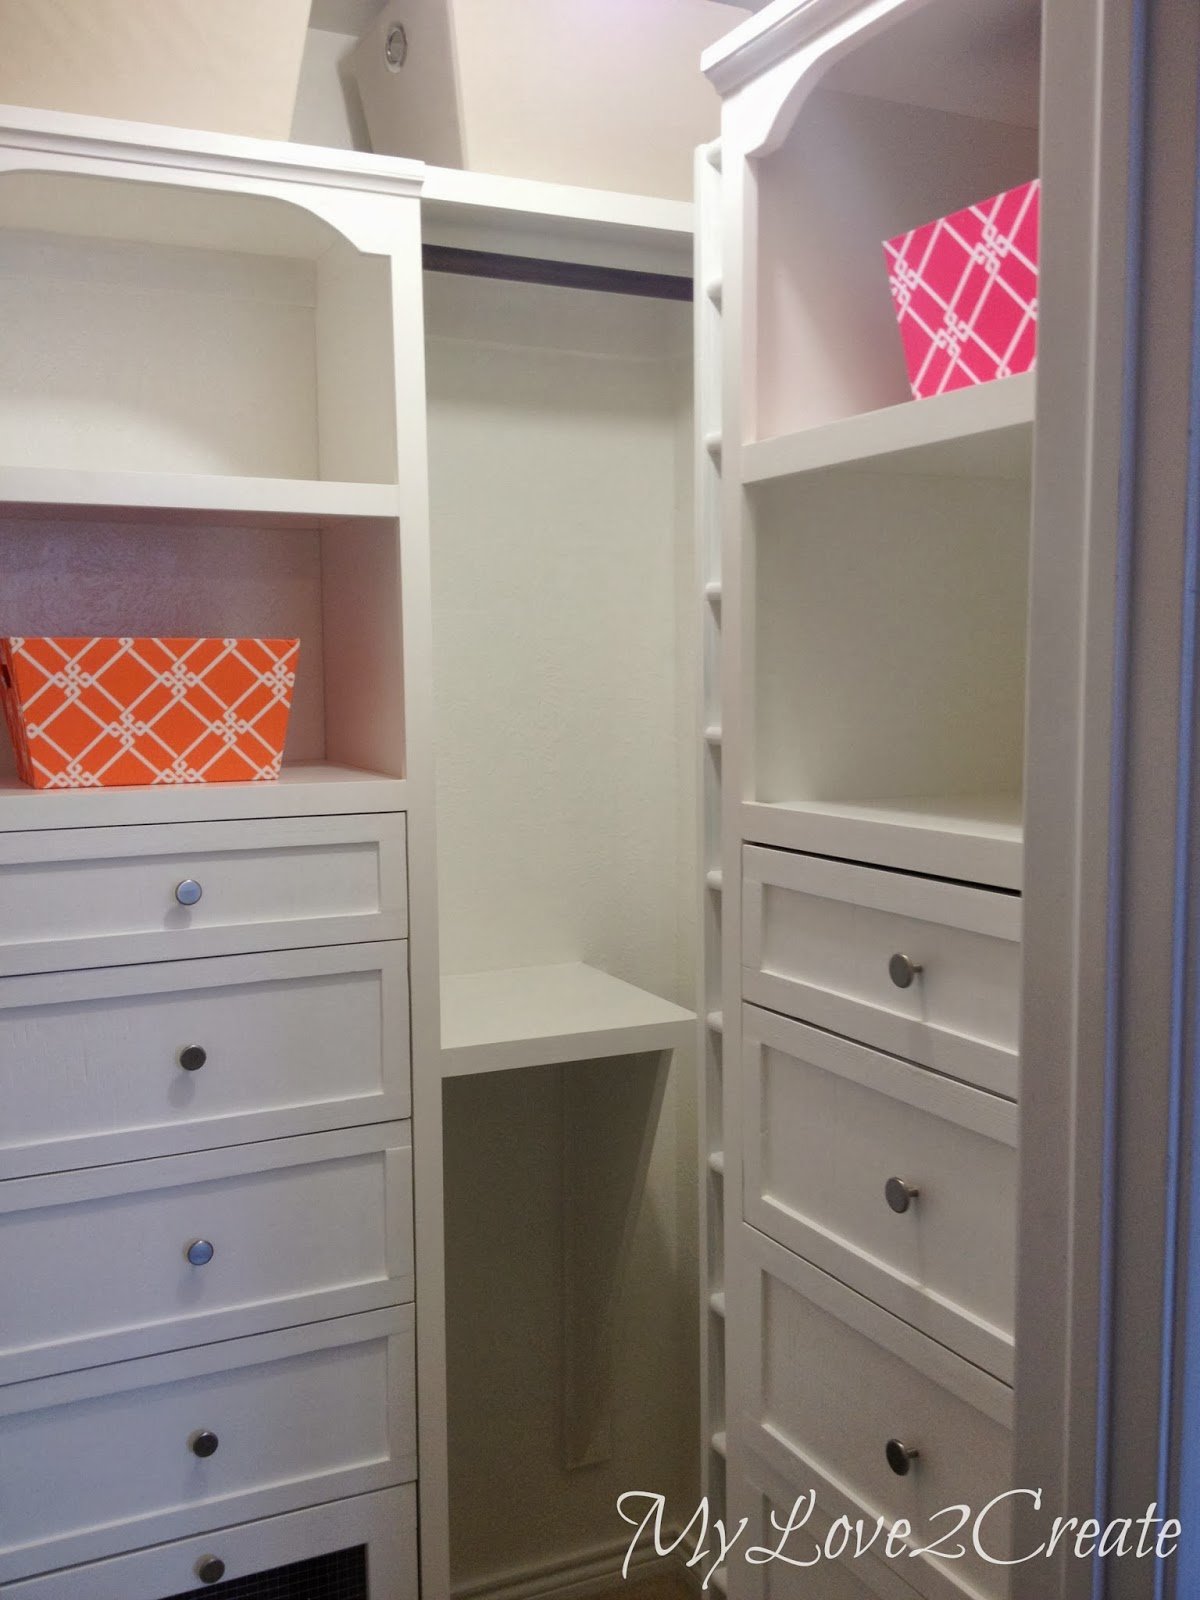
My tower is on the right when you walk into the closet. I love having shelves for sweaters and pants! In the old closet I had nowhere to put them, and my shelf was way to high to reach so they would end up on the floor, not anymore!
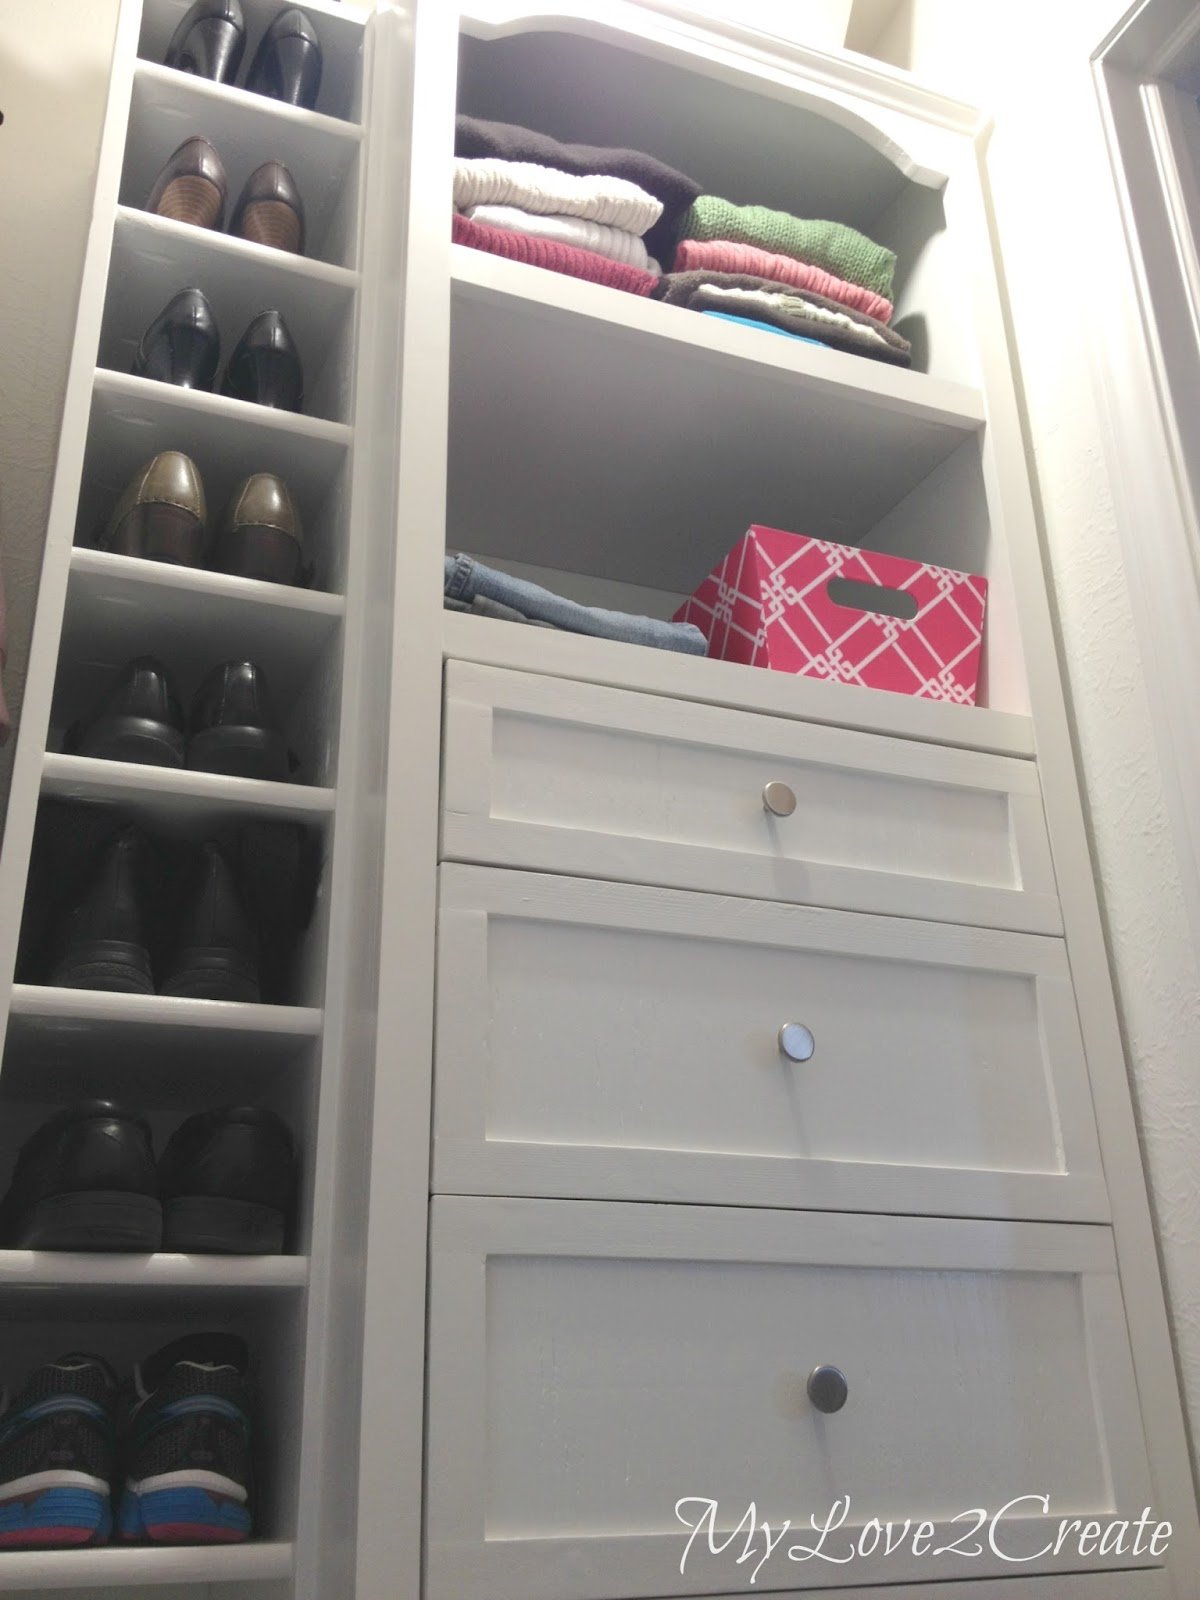
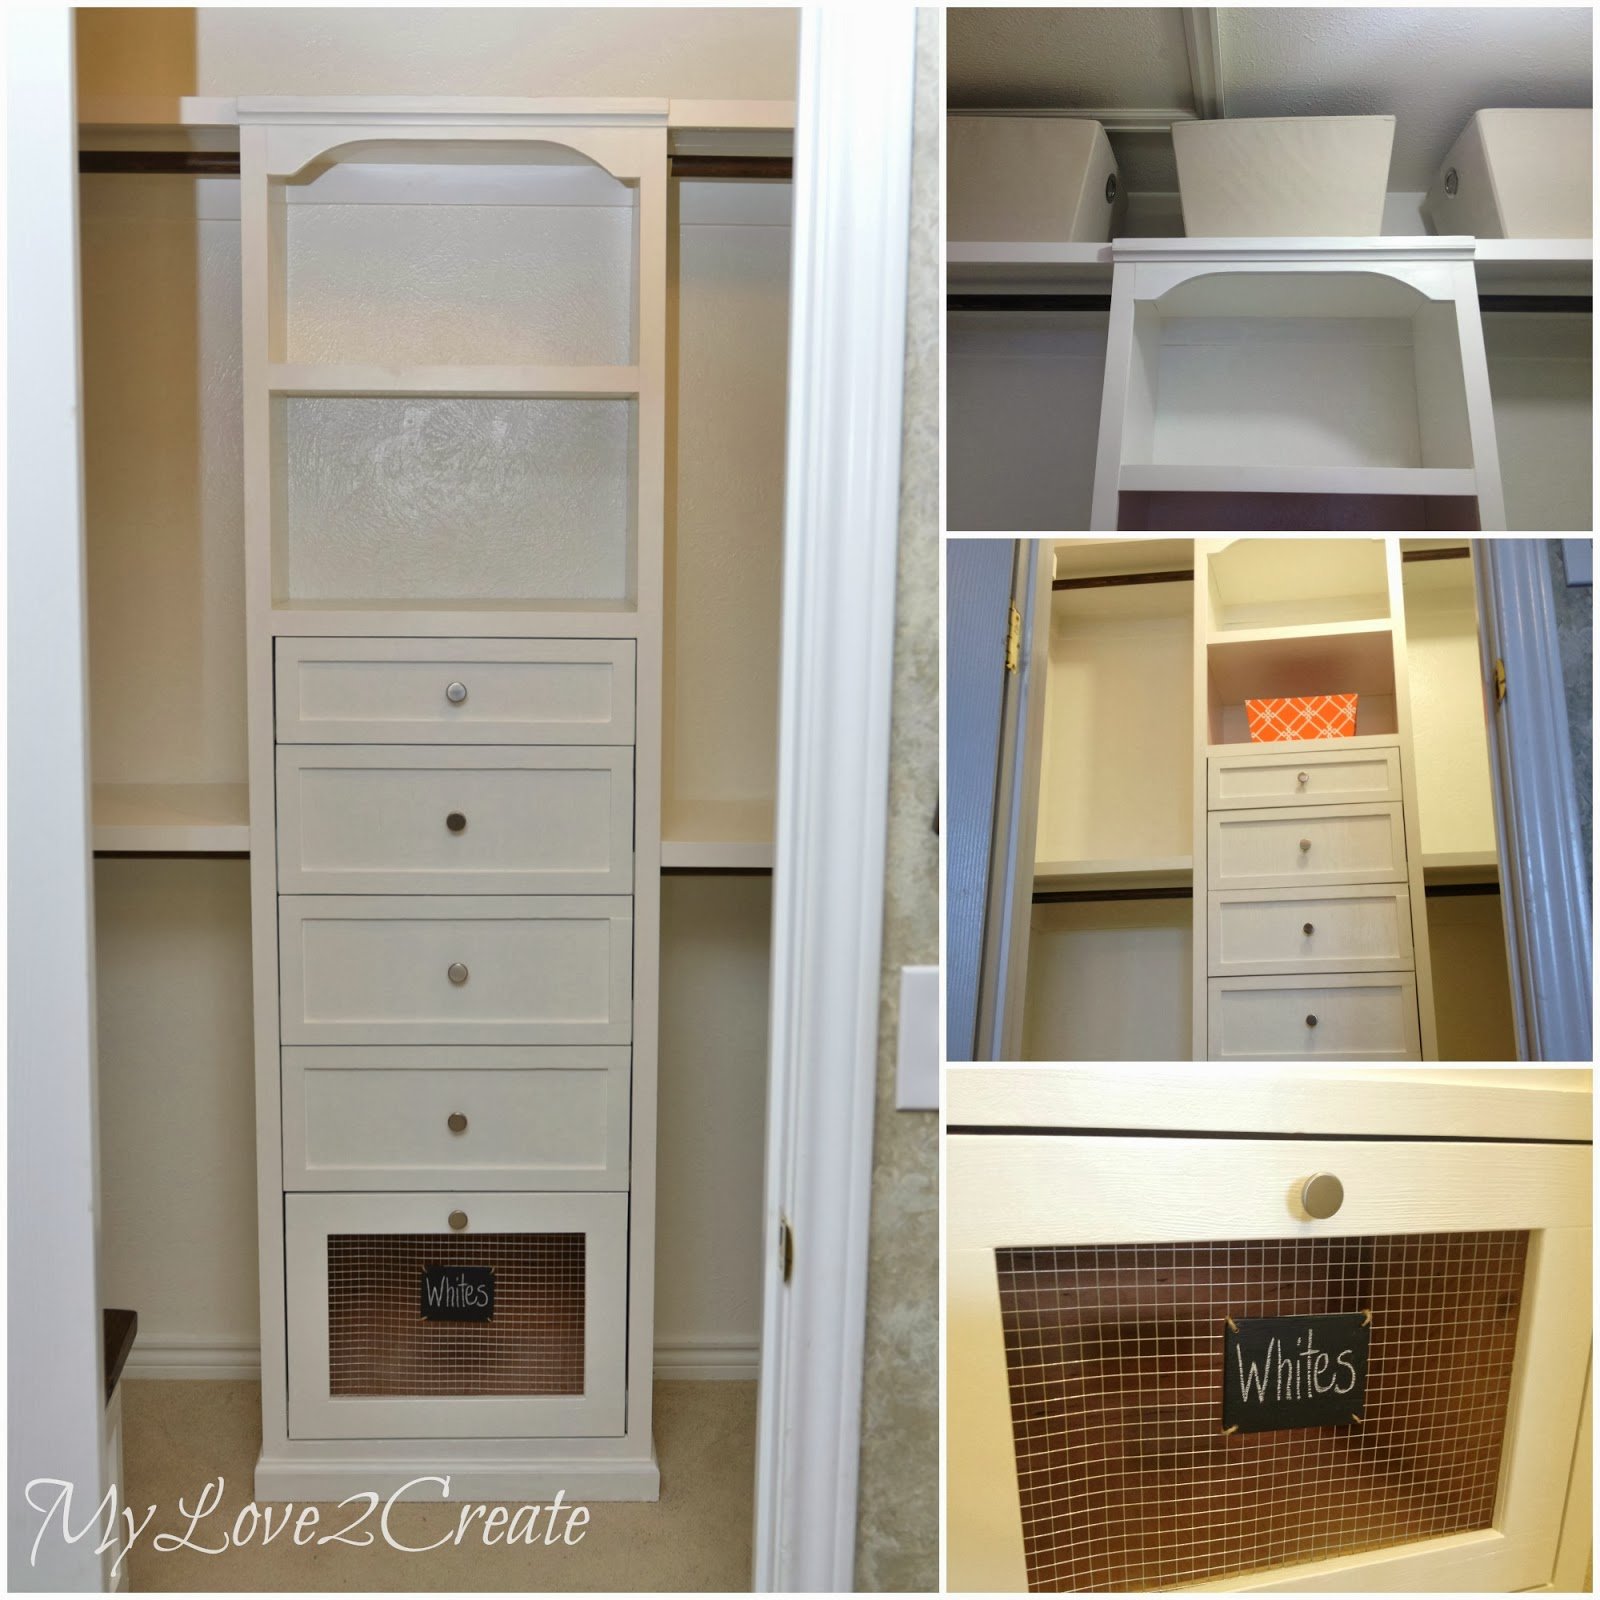
Here is the shoe shelf! I store my off season shoes in the bin on top of the tower, it is so nice to have!
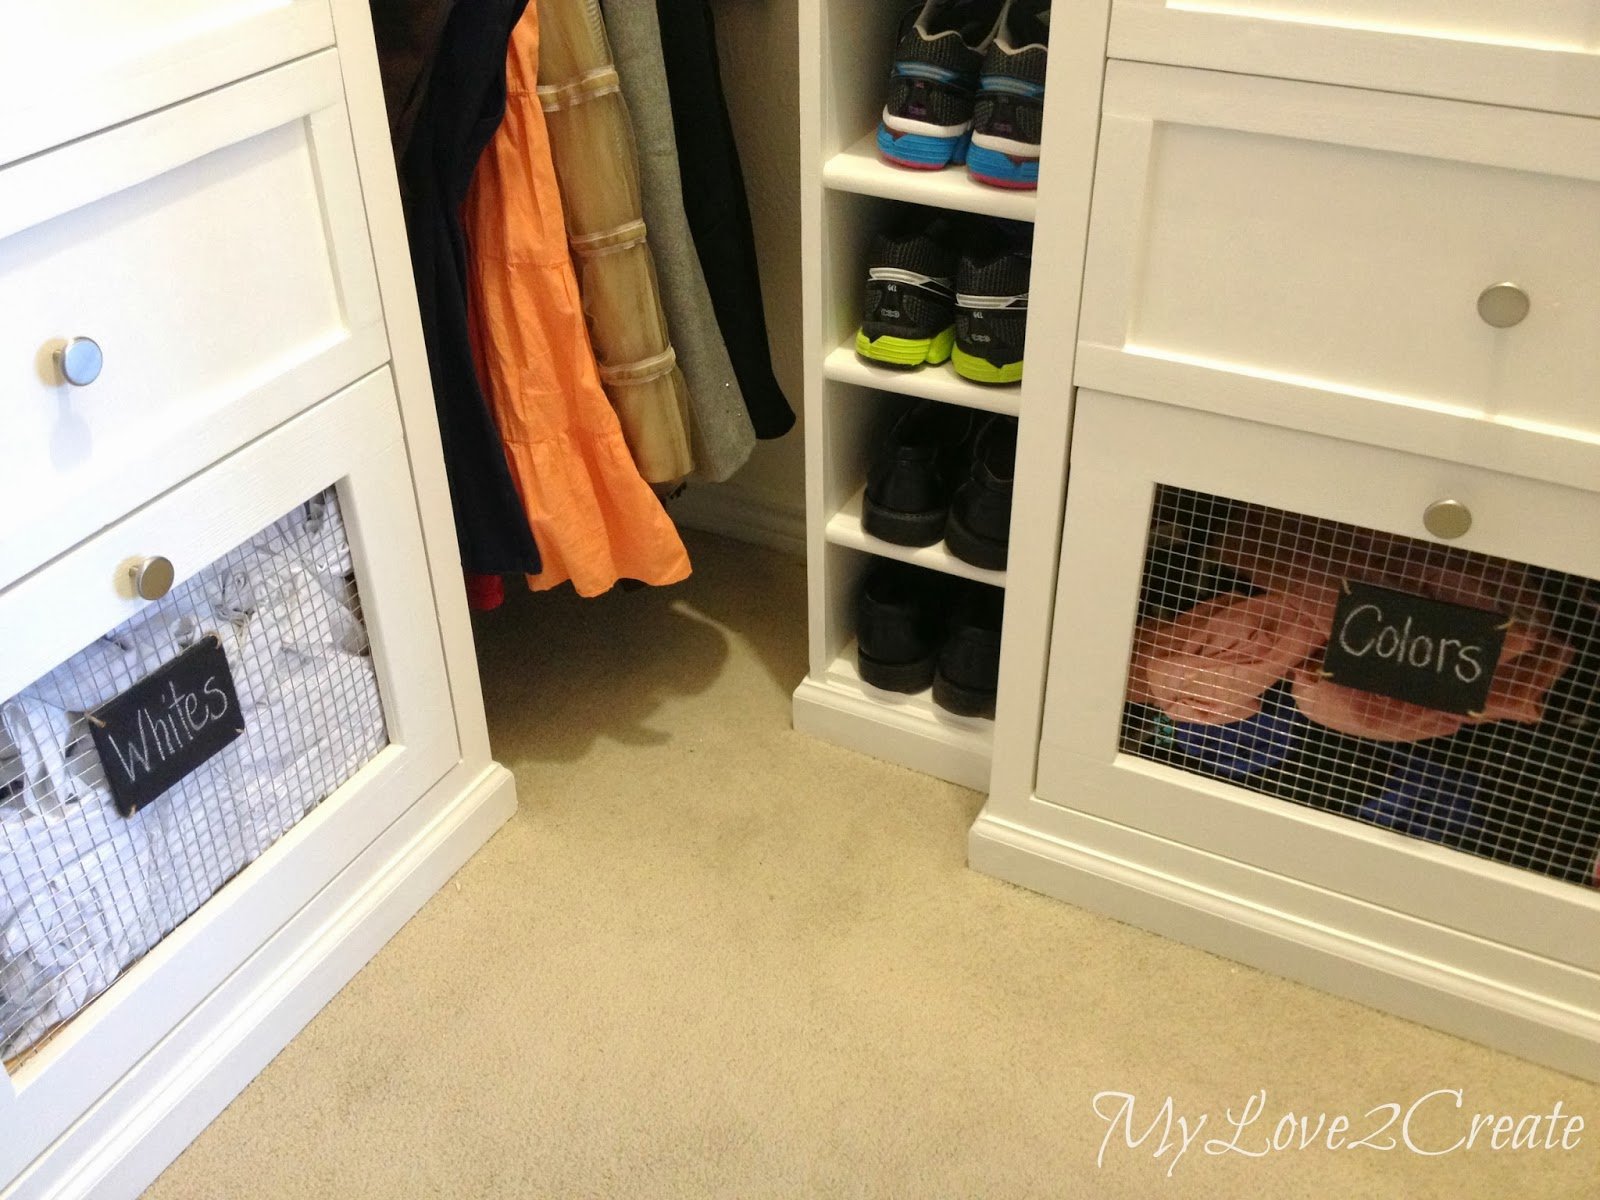
Each Laundry hamper holds a full load, and as you can see it is time to wash! Do you like my chalkboard labels? I couldn’t resist adding a little cute factor! It is great to have the hardware cloth fronts, one of my favorite parts of the closet.
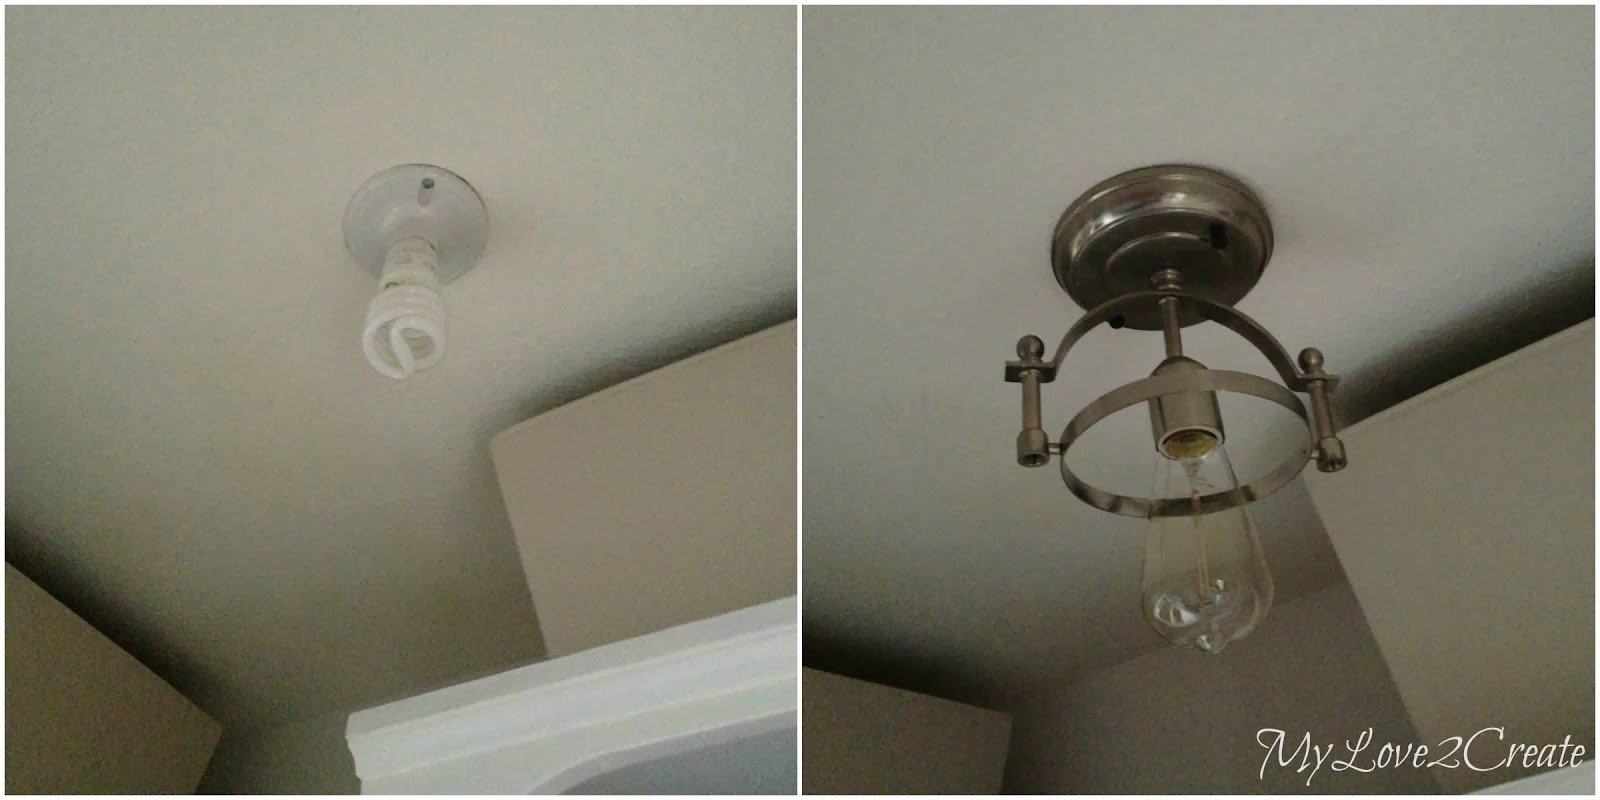
I also switched out my light fixture. I got this new one at the Restore for $1 a while back, can’t beat that!
Are you ready for how much this baby cost me? Now, you have to know that most of this closet was done with reclaimed materials, I could not have done it otherwise, I only had a tiny little budget!
I also want to point out that I am not including things I had purchased previously and used, such as the paint, light fixture, one 14″ drawer slide, screws, spackle, plank wall (like .51 cents makes a difference, lol), hooks, and a TON of scrap/reclaimed wood (I am a craig’s list free section addict), metal “hardware cloth”, paint brushes/supplies, one knob, etc… They were things I already had on hand, but still got a good deal on, or got for free.
Supplies I bought:
- Two Sheet of pine 4×8 plywood (for the two towers)- $77.94
- Kilz primer- $16.98
- 6 1×2’s primed- $17.58
- 9 14″ drawer slides @$5.48 each- $49.32
- 8 foot Closet pole- $8.32
- Pole sockets 4@$1.48- $5.92
- Caulk- $2.98
- 3 1×3 furring strips@$2.12- $6.36
- 1 16″ drawer slide- $5.98
- 10 knobs plus 10 longer screws-$13
- and approx. $16 in taxes…
For a total of: $220.38 in building supplies
Plus
- Six patterned baskets on clearance, 2 for $12.99 – $38.97
- 4 tan baskets @ $9.99- $39.96
- and $6.43 in Tax
(This money was some I earned and I used it to splurge on cute baskets =) (all baskets were purchased at Garden Ridge)
For a total of: $85.36 on cute/practical stuff
Grand total spent: $305.74!!!!…..AND, a lot of hard work! Not bad eh?!!
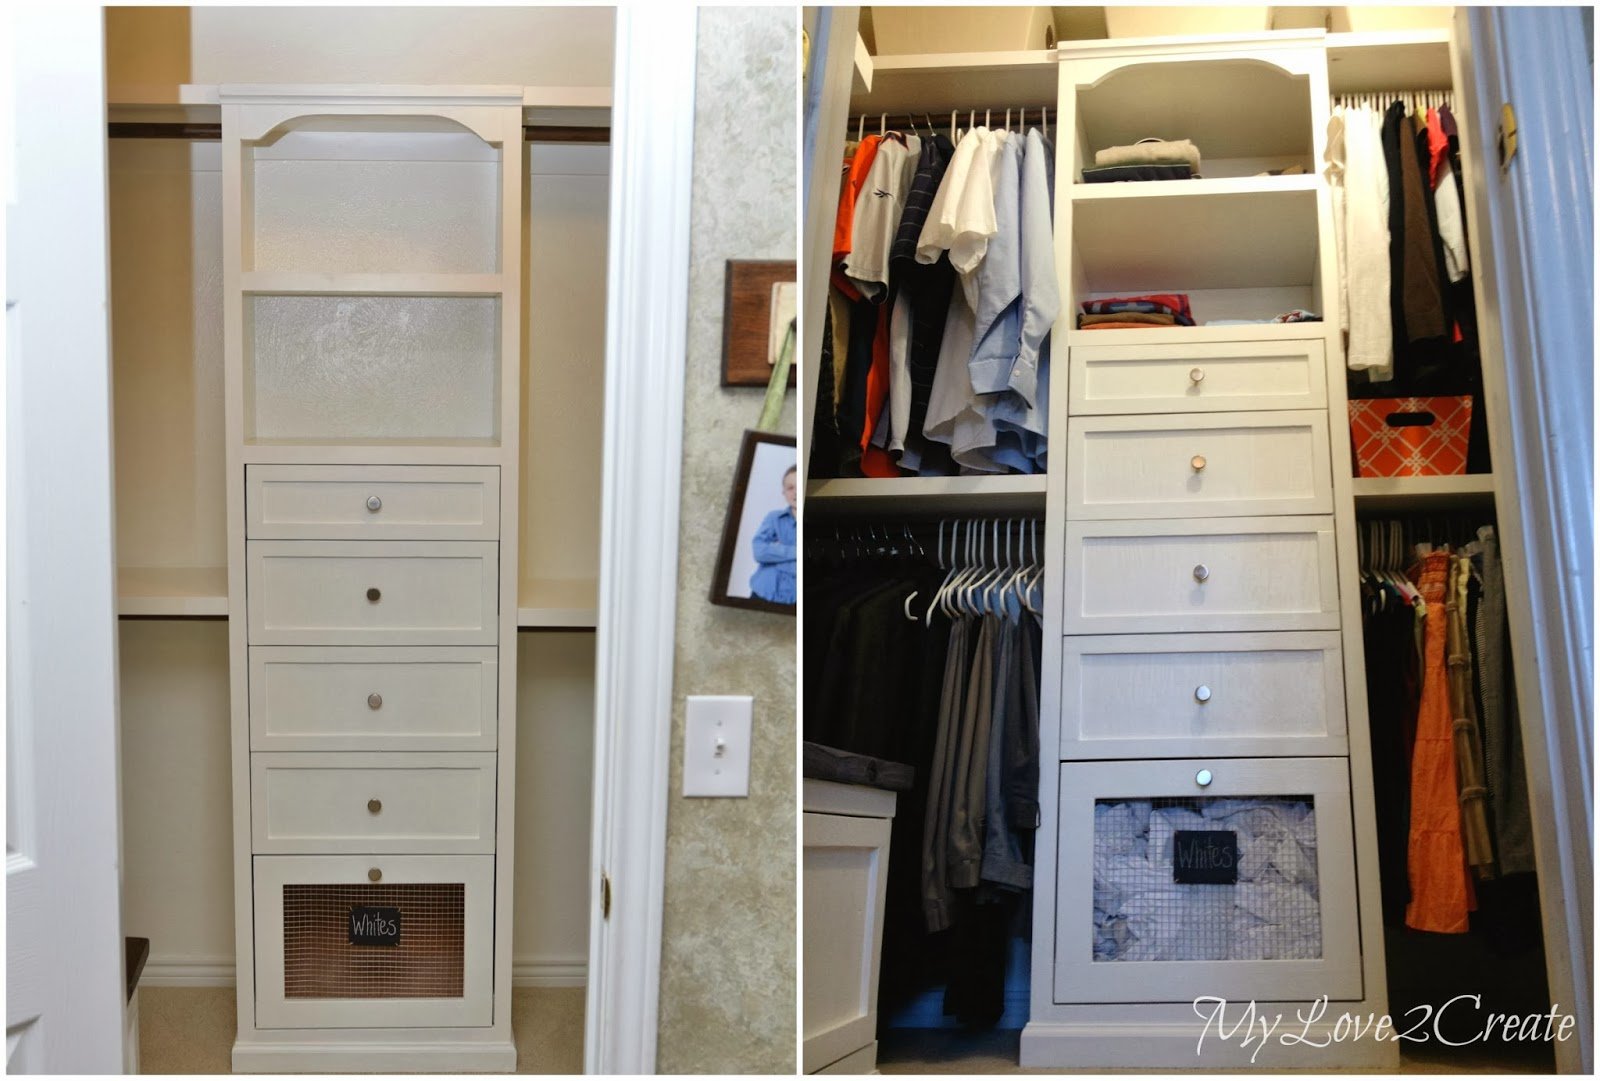
Might as well show you a few more shots, the one above is looking in the right of the closet.
And here is a shot looking in on the left.
From the front.
The bins are great to keep things organized, and clutter free.
And that is it! This was a big project for me and I learned so much just by doing it. It really was worth it. My husband and I are LOVING it, and I get a happy feeling every time I walk inside! If you are on the edge about doing a closet makeover, stop second guessing, and JUST DO IT!!
Hugs,
Mindi
—————————
Thanks so much for sharing all the details with us, Mindi! I love all the features you included and how many reused materials you were able to use to save money in building!
Visit Mindi at MyLove2Create for more great furniture makeovers (like this nightstand) and DIY building projects like this super-smart laundry crate (built from old deck wood!) and these easy-to-build and sturdy storage shelves.
Lorene has been behind the scenes here at Remodelaholic for more than a decade! She believes that planning projects and actually completing them are two different hobbies, but that doesn't stop her from planning at least a dozen projects at any given time. She spends her free time creating memories with her husband and 5 kids, traveling as far as she can afford, and partaking of books in any form available.


Great job Mindi, it looks fabulous.
Thank you so much Amy!
Thank you so much for letting me share my Master Closet Makeover on your blog!
Thanks for visiting, Mindi!
Fan-Dang-Tastic!! Killer price too. Love it!
JaG
Lol! Thank you! I loved the price too!
Beautifully done! Would you mind sharing the dimensions of your closet for a visual reference? We are planning our closet make over, too. Thanks.
Thanks Bridey! Yes, the back wall is 70 inches (5.8 feet) and the side walls are 58 inches (4 ft. 10 inches) Not very big, but it is such a better use of space now! Good luck with your closet!
I can’t believe you built your closet yourself!!! It’s awesome!! You totally rock!! I love the hamper and shoe shelves. Awesome job!!
Thank you so much Crystal, you are sweet! I love the hampers and shoe shelf too! They totally make me happy every time I use them!
Absolutely LOVE this transformation!!! I LOVE LOVE LOVE the bench area! The hooks, the stain, the location – it is all great!!
Thank you so so much Katie!
A very nice job well done! That is a great idea and design. Love it. And Yes, I can tell that the great efforts have been paid off! 🙂
Thank you Randy! I appreciate it!