Anthropologie Inspired Dresser Redo
I love this party link! I think it is especially genius because if you have a piece that you don’t want to totally refinish, you might just be able to amp it up with a stencil. but so you know, Kate from Twenty-Six to Life who created this piece did sand and stain the dresser, and I love the way it turned out, check out her post:
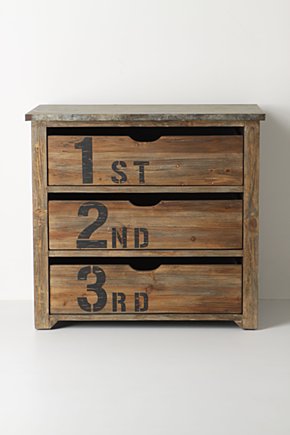
When I saw this dresser (forever ago), I knew Anthropologie was just daring someone to DIY something similar. So of course I did tried.

For those of you who just scroll to the after, here it is!
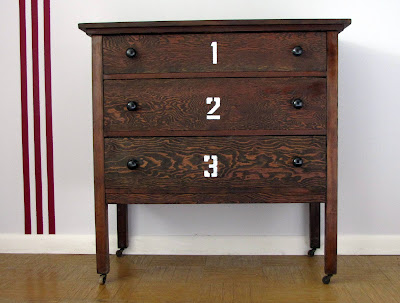
I will be the first to admit that it didn’t turn out quite like I had anticipated. It looks very different from my “inspiration piece” and that’s largely due to the fact that I used what I already had. I wasn’t really willing to go buy a lighter stain, or black paint, or create or buy different stencils. I had the dark stain, white paint, and hammer spray paint for the knobs already. So I used them. I hope none of you mind the differences, but if you do, here’s a consolation prize.
And for those of you that like a little tutorial, here’s what I did:
1. Of course, like with anything, I sanded. And sanded and sanded and sanded. I hate sanding, but it’s a necessary evil. It got rid of that awful orangey hue.
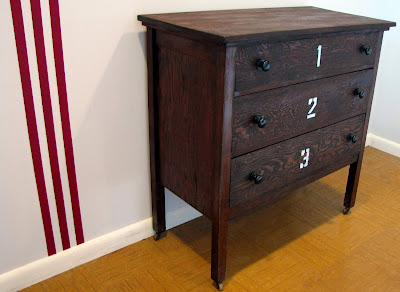
2. Stain. This time I only used one coat. This was were the changes from the anthropologie dresser started. Originally, I meant to get a lighter stain so I could do black numbers, but when the time came I was feeling lazy and cheap wasn’t thinking and used a dark stain. C’est la vie. I just switched it up and went with white numbers.
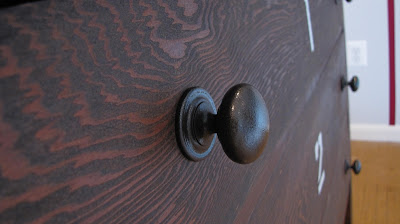
3. Spray. The formerly brassy knobs got new life with hammer black spray paint. It’s the same stuff I used on those white dressers I did before.
5. Stencil. I used cheapo stencils centered on each drawer and filled them in with white paint I already had.
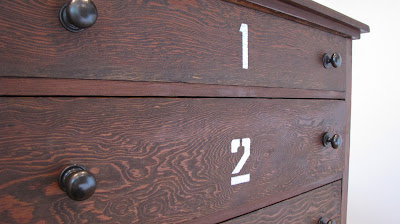
I know it’s not perfect. My OCD is kicking in looking at these photos and that “3”, but I guess it’s all part of the learning process. Maybe in the future I’ll rough it up a little and it’ll become less noticeable. For $25, I’m going to try to enjoy my new piece of furniture and try not to stress about any imperfections.
for a whole new dresser!
Cassity Kmetzsch started Remodelaholic after graduating from Utah State University with a degree in Interior Design. Remodelaholic is the place to share her love for knocking out walls, and building everything back up again to not only add function but beauty to her home. Together with her husband Justin, they have remodeled 6 homes and are working on a seventh. She is a mother of four amazing girls. Making a house a home is her favorite hobby.


>Wow! Thanks for highlighting my project! 🙂
>I really love how the dresser turned out! You did awesome with the things that you had. I actually like it better than the original one! 🙂
>Well, I think it looks great. Imperfections are like beauty marks.
>I think it's adorable! I just posted about an Anthropolgie inspired shirt. https://homemadeginger.blogspot.com/2010/10/anthropologie-inspired-tee.html
>I love this, I just bought two dressers from Ikea for my sons room… for new dressers @ $29 I couldnt pass them up. I was shopping criagslist faithfully but everything I saw that I liked on craigsist was always gone by the time I got to it 🙁 . But I was itching for something to do in his room! So now I have the dressers and thanks to your tutorial I know what to do with them.. ill be subscribing! Thanx!!