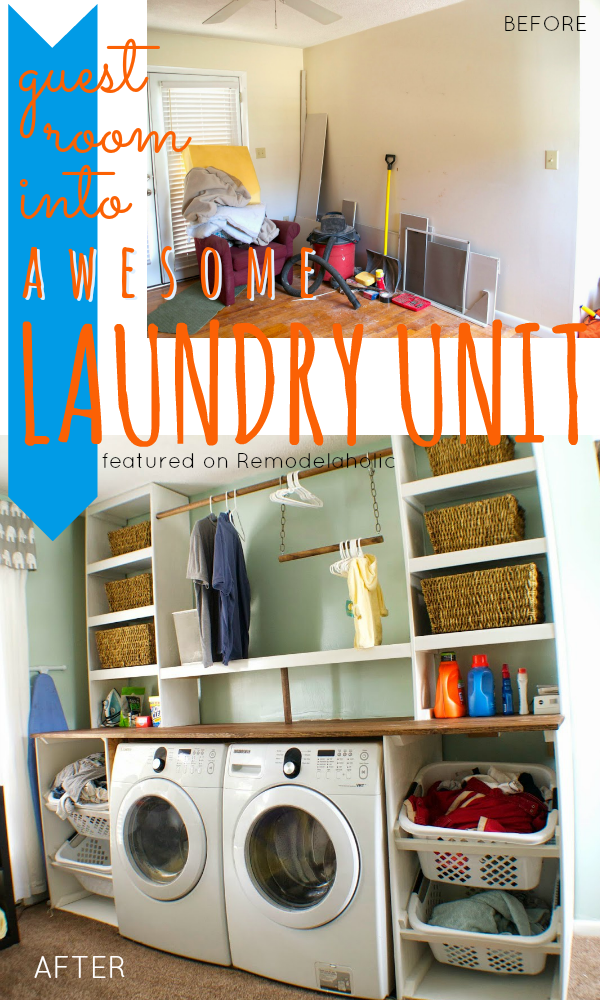
Like I mentioned here, we are in the process (sorta) of moving the laundry room in our house from the end of the kitchen to a different spot. It will be great when it’s finished, but it’s a lot of work! So I am really inspired when I see laundry rooms being moved to make them bigger, more functional, and just better. CK and Nate (remember them from their amazing closet-turned-bathroom?) moved their laundry room from a detached garage into a bedroom , which is now their son’s nursery. And then they built an amazing laundry unit with lots of shelving for storage, a double hanging rod, plus tilted laundry baskets to make sorting and doing laundry easy!
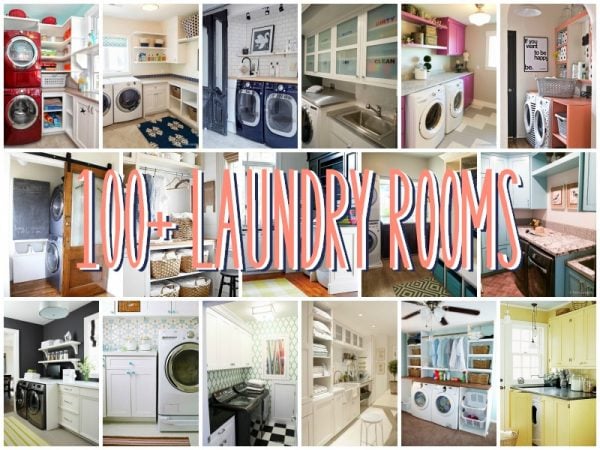
Check out our post with more than 100 (yes, one HUNDRED!) laundry room ideas for more awesome inspiration, and here’s CK and Nate to show you how they built their super-duper laundry unit.
Hello Remodelaholic readers! We’re CK and Nate and we’re back today from Seesaws and Sawhorses to share another project with you. We are both sciency academics so remodeling our home and sharing our DIY projects is our creative outlet (although we use our job skills with every project!). Nate’s super handy so I can throw out basically any crazy design idea and he finds a way to make it happen (like our Mason Jar Chandelier and our Dining Room Table). We are currently in the process of remodeling our (almost) 90 year old house and today I’m going to share with you one of our crazy design ideas that made our home so much more functional.
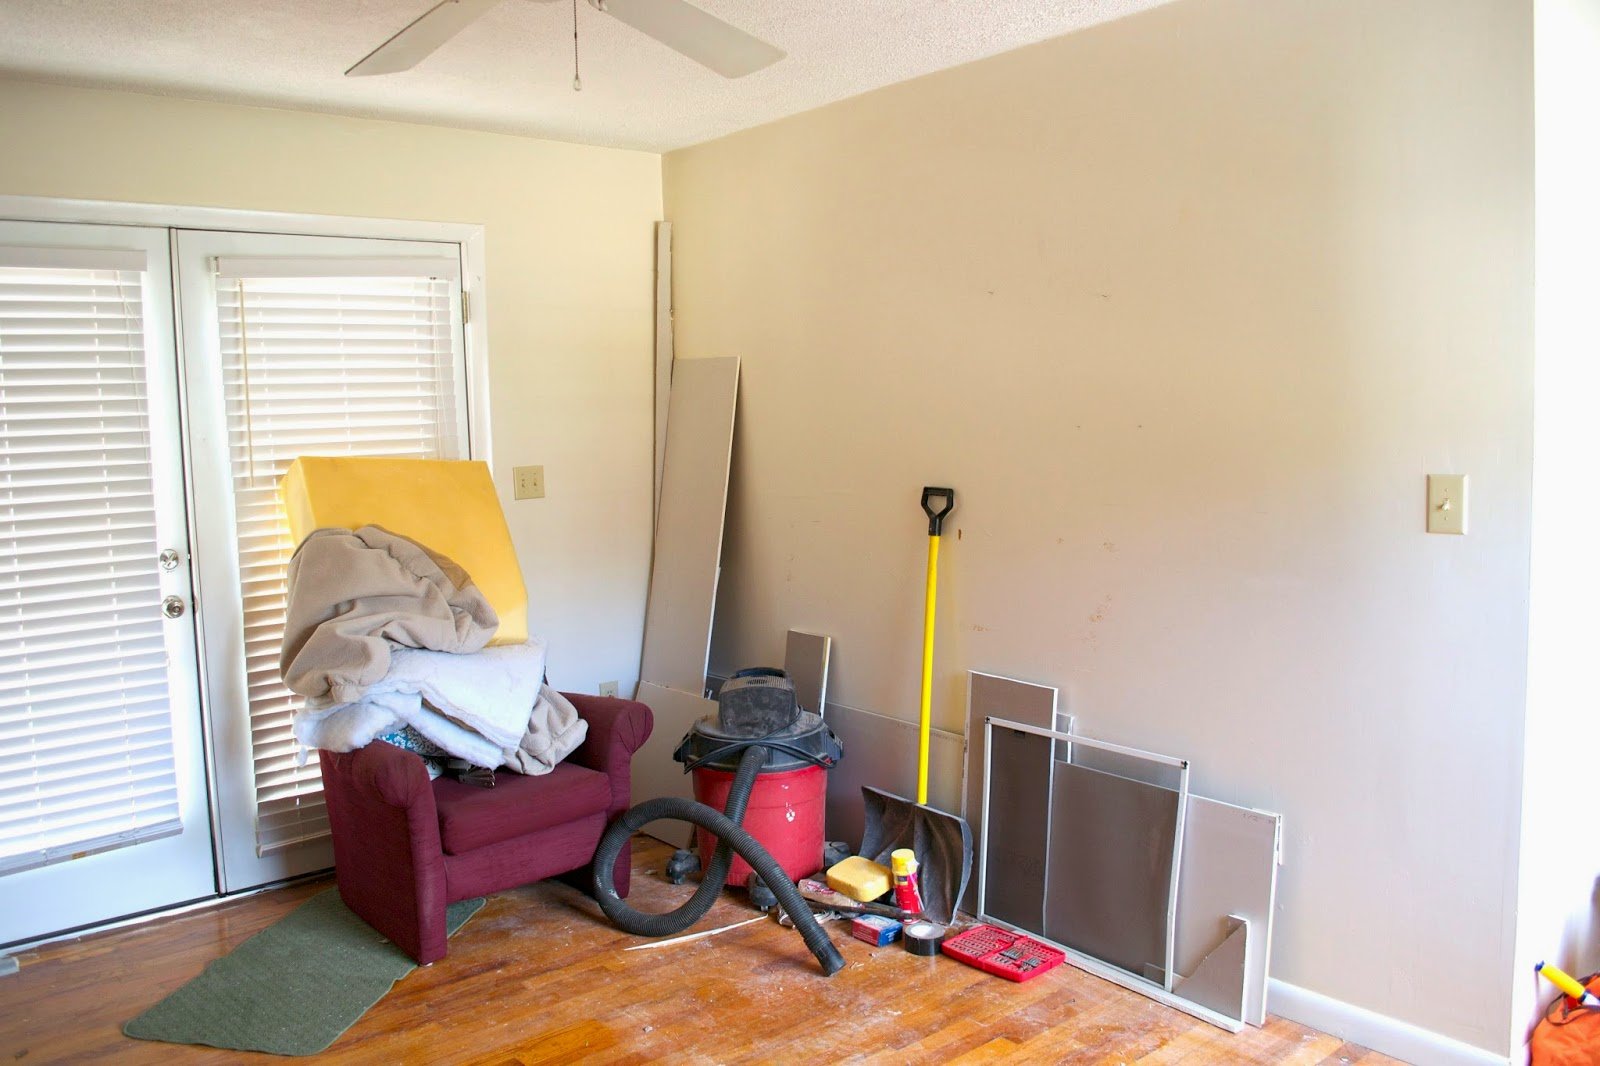
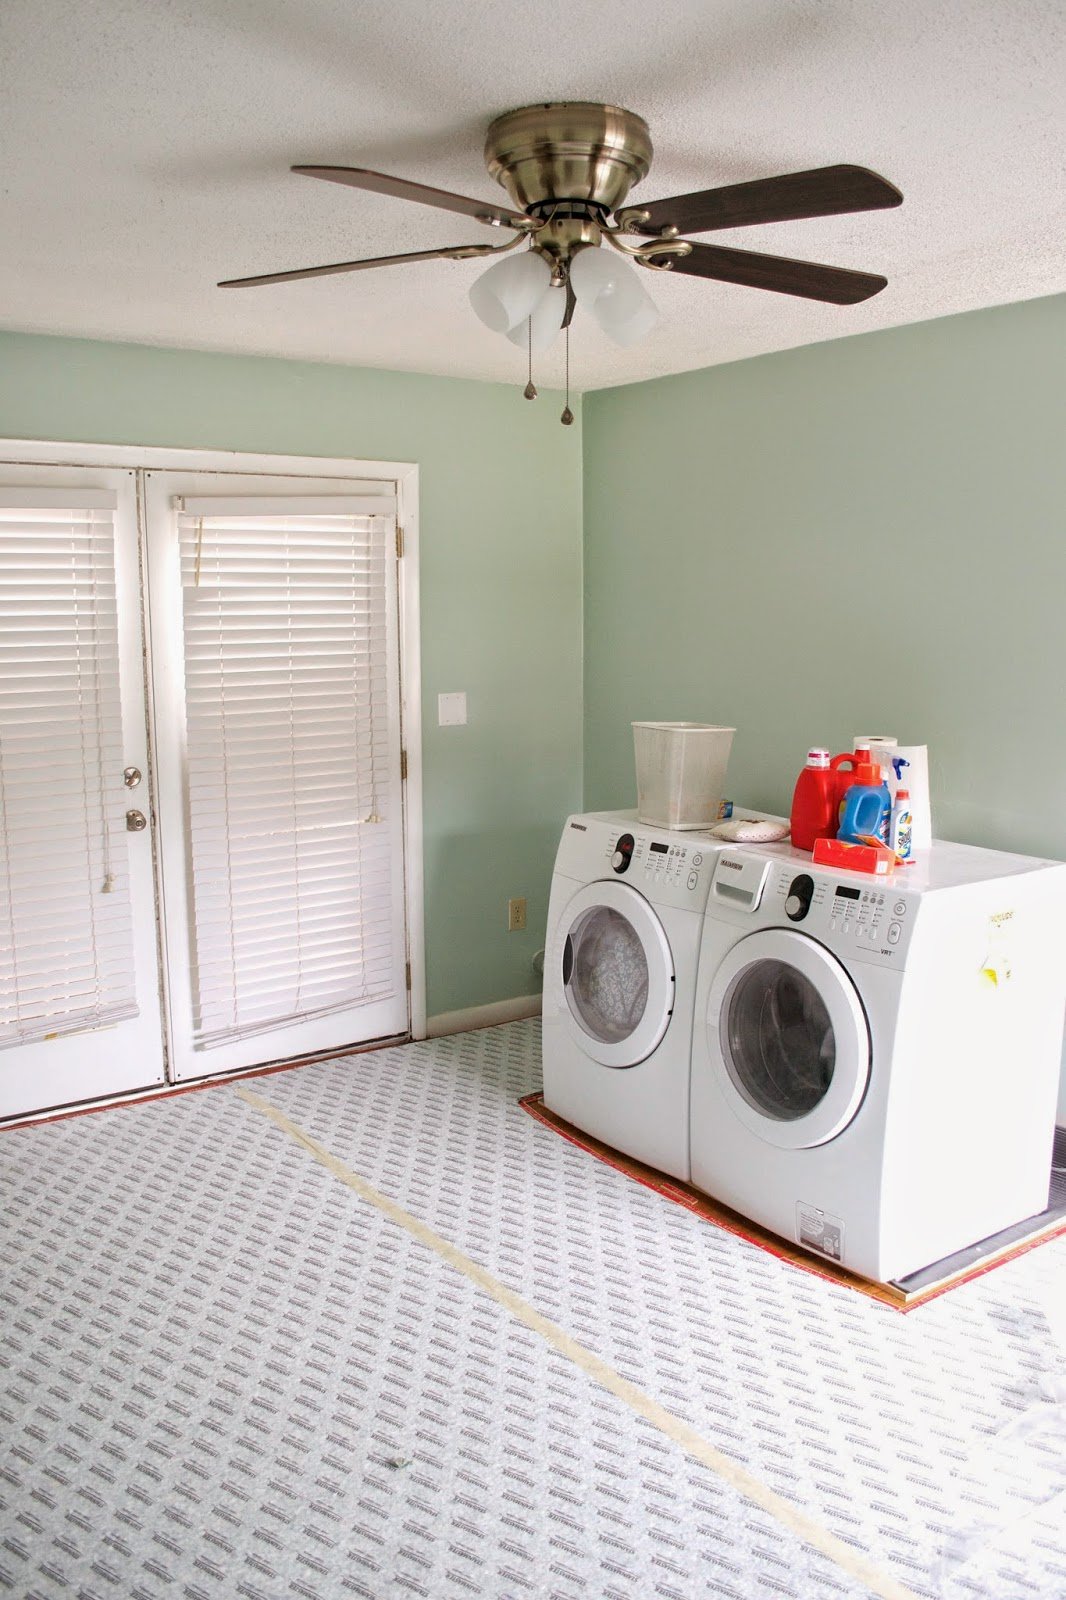
I don’t know about you, but having to do laundry is a pain in the butt and having to do it in a dark gross space like a basement or a garage makes the whole process so much worse. When we moved into our house, the laundry hookups were in the garage which isn’t even attached to the house so we would have to carry all our laundry through the house, outside and through the garage. It was super inconvenient and the garage was dirty and not air conditioned so it was miserable during the Florida summers.
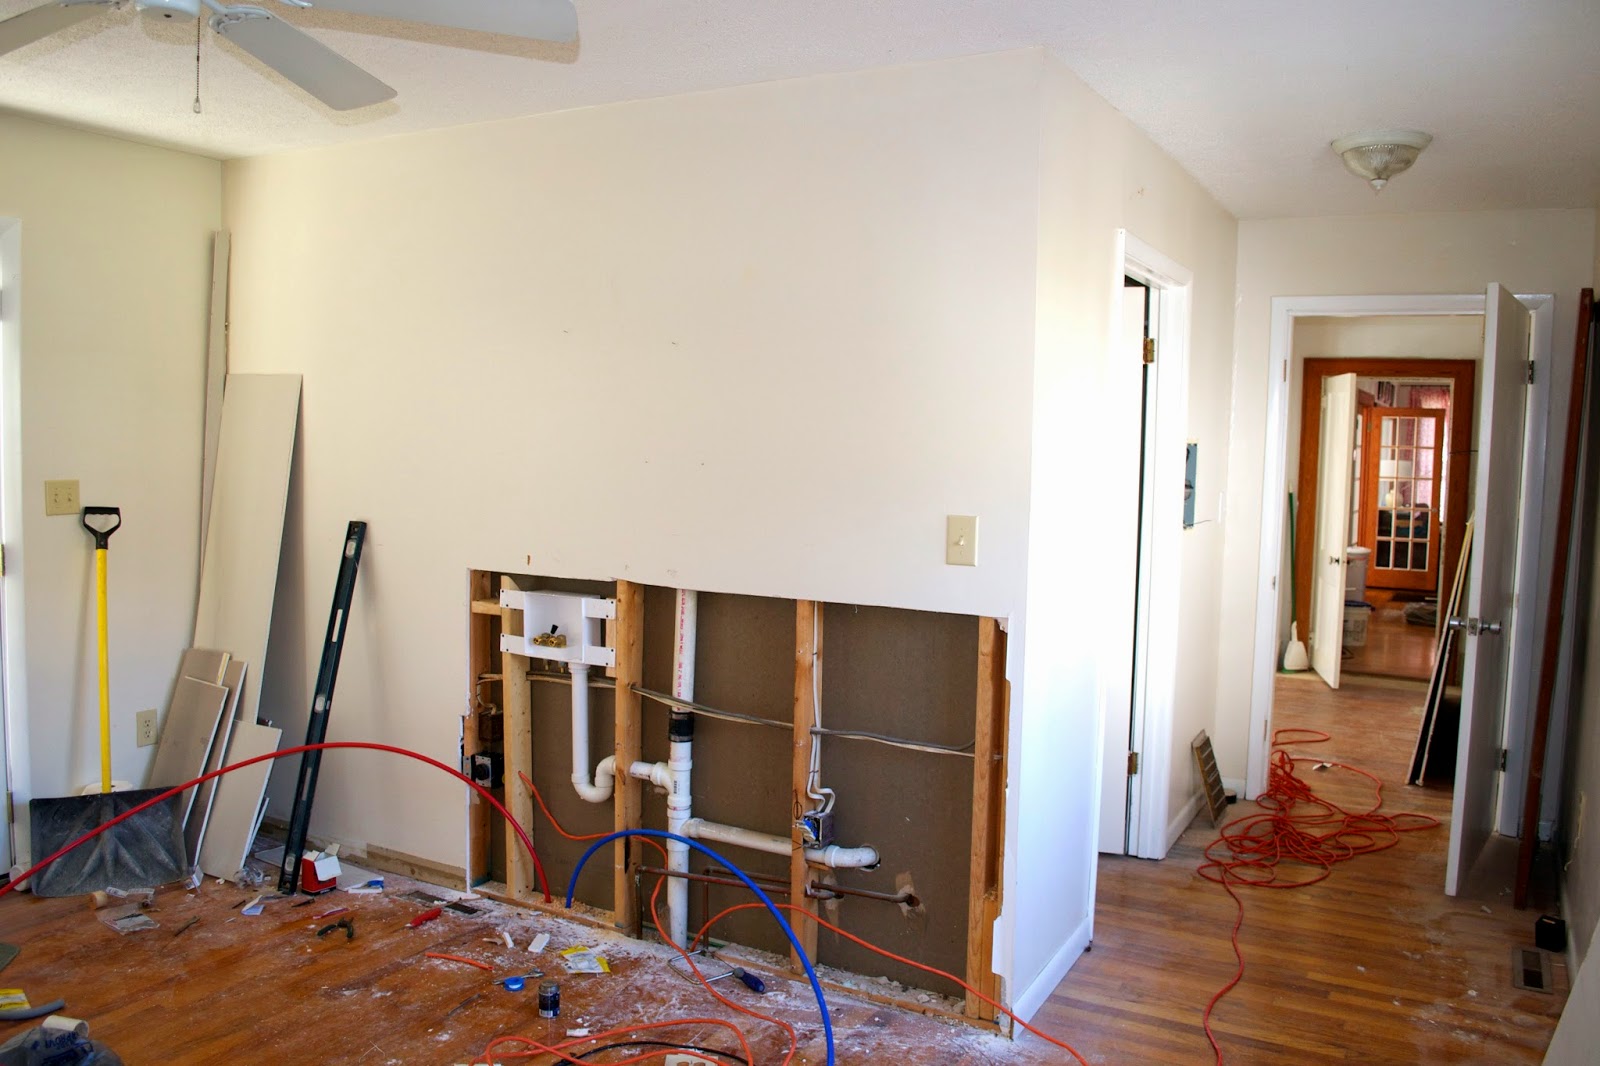
We spent quite a few months brainstorming the best place inside the house to move the laundry and after nixing a bunch of ideas, we landed on the room at the very back of the house. This was originally the bedroom of a mother-in-law suite so the wall shown above was shared with the bathroom. This made plumbing the wall for laundry pretty easy since we could tap into the existing plumbing. We were in the process of running new supply lines for the rest of the house and repurposing a lot of rooms so it was the perfect time to add in the laundry without doing a lot of extra work.
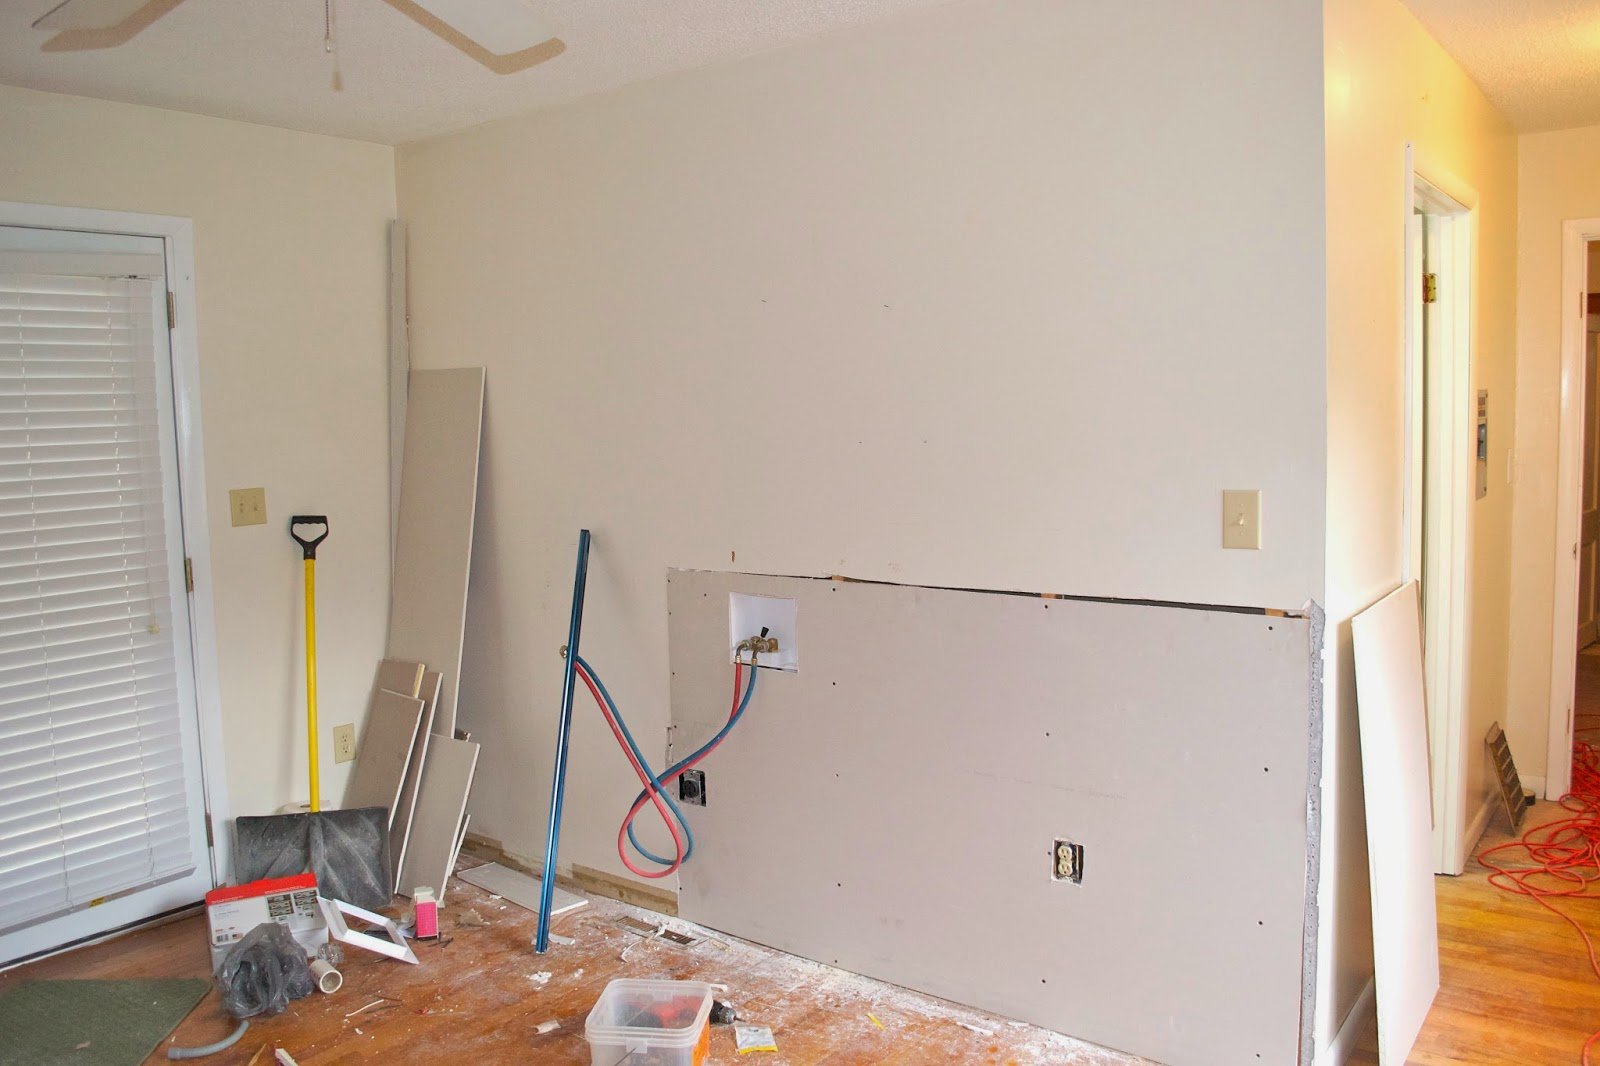
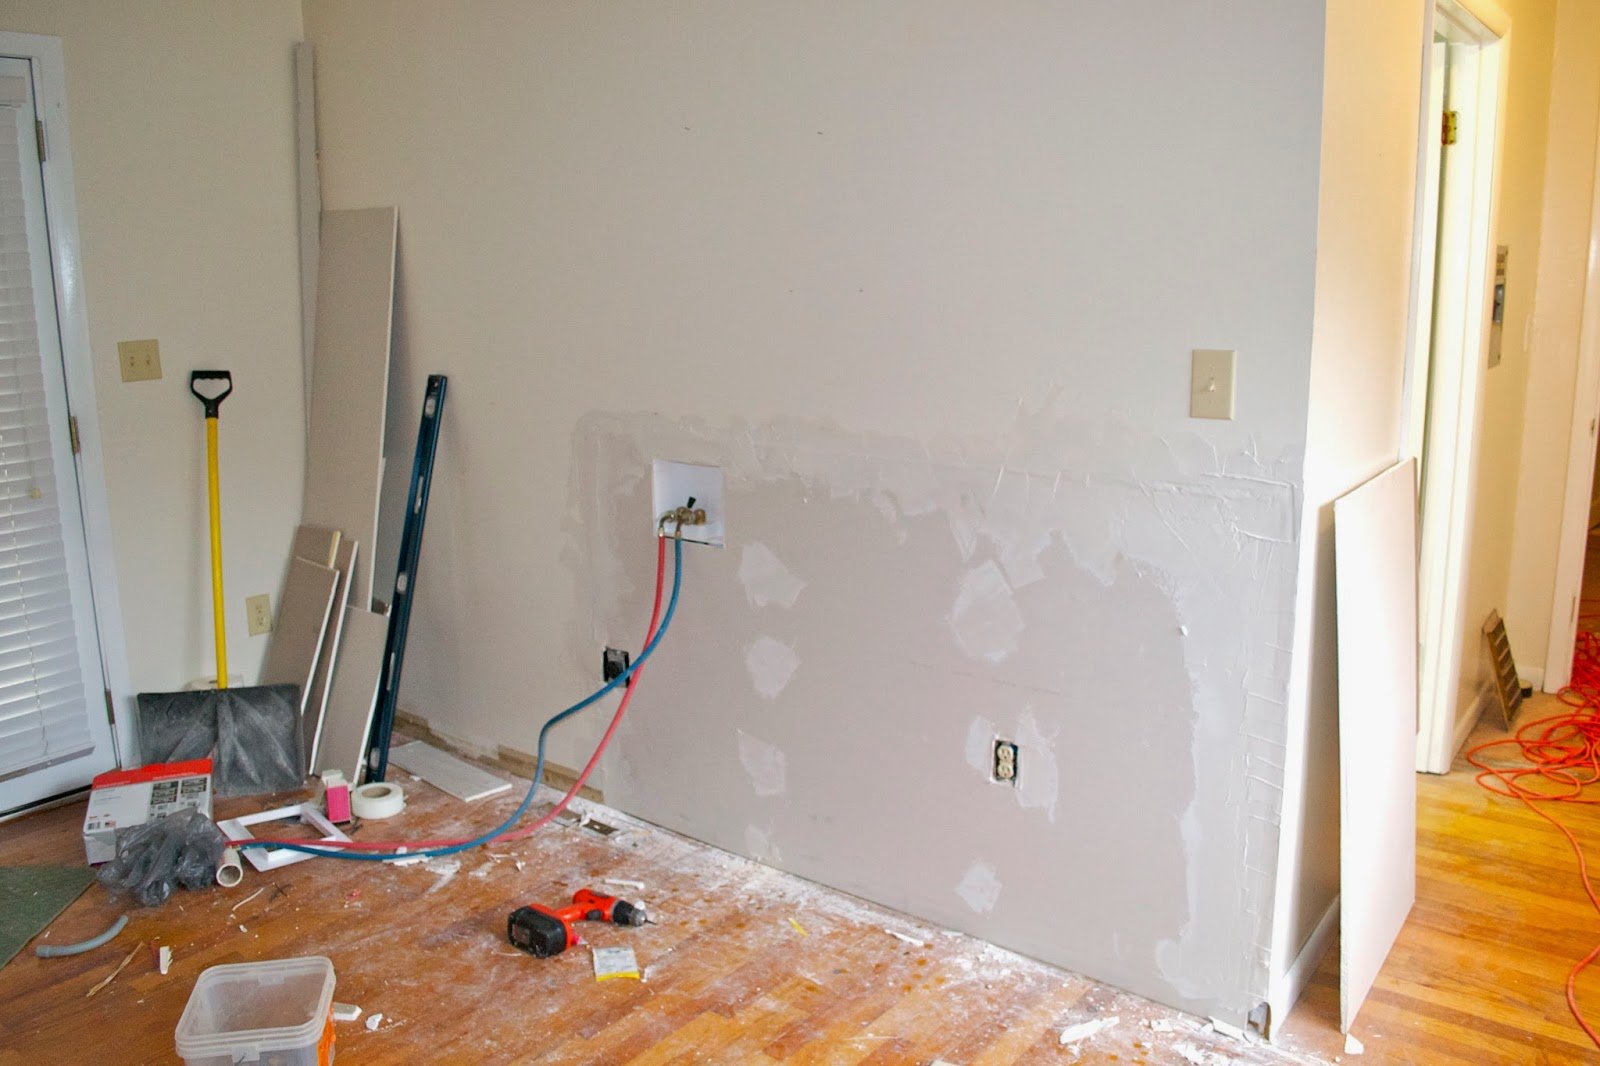
We ended up cutting a large section out of the drywall so we could easily add in the new drainage, electrical and supply lines. Cutting out a simple shape made rehanging the drywall and patching a lot easier and the whole process of prepping the wall for the laundry only took an afternoon of work.
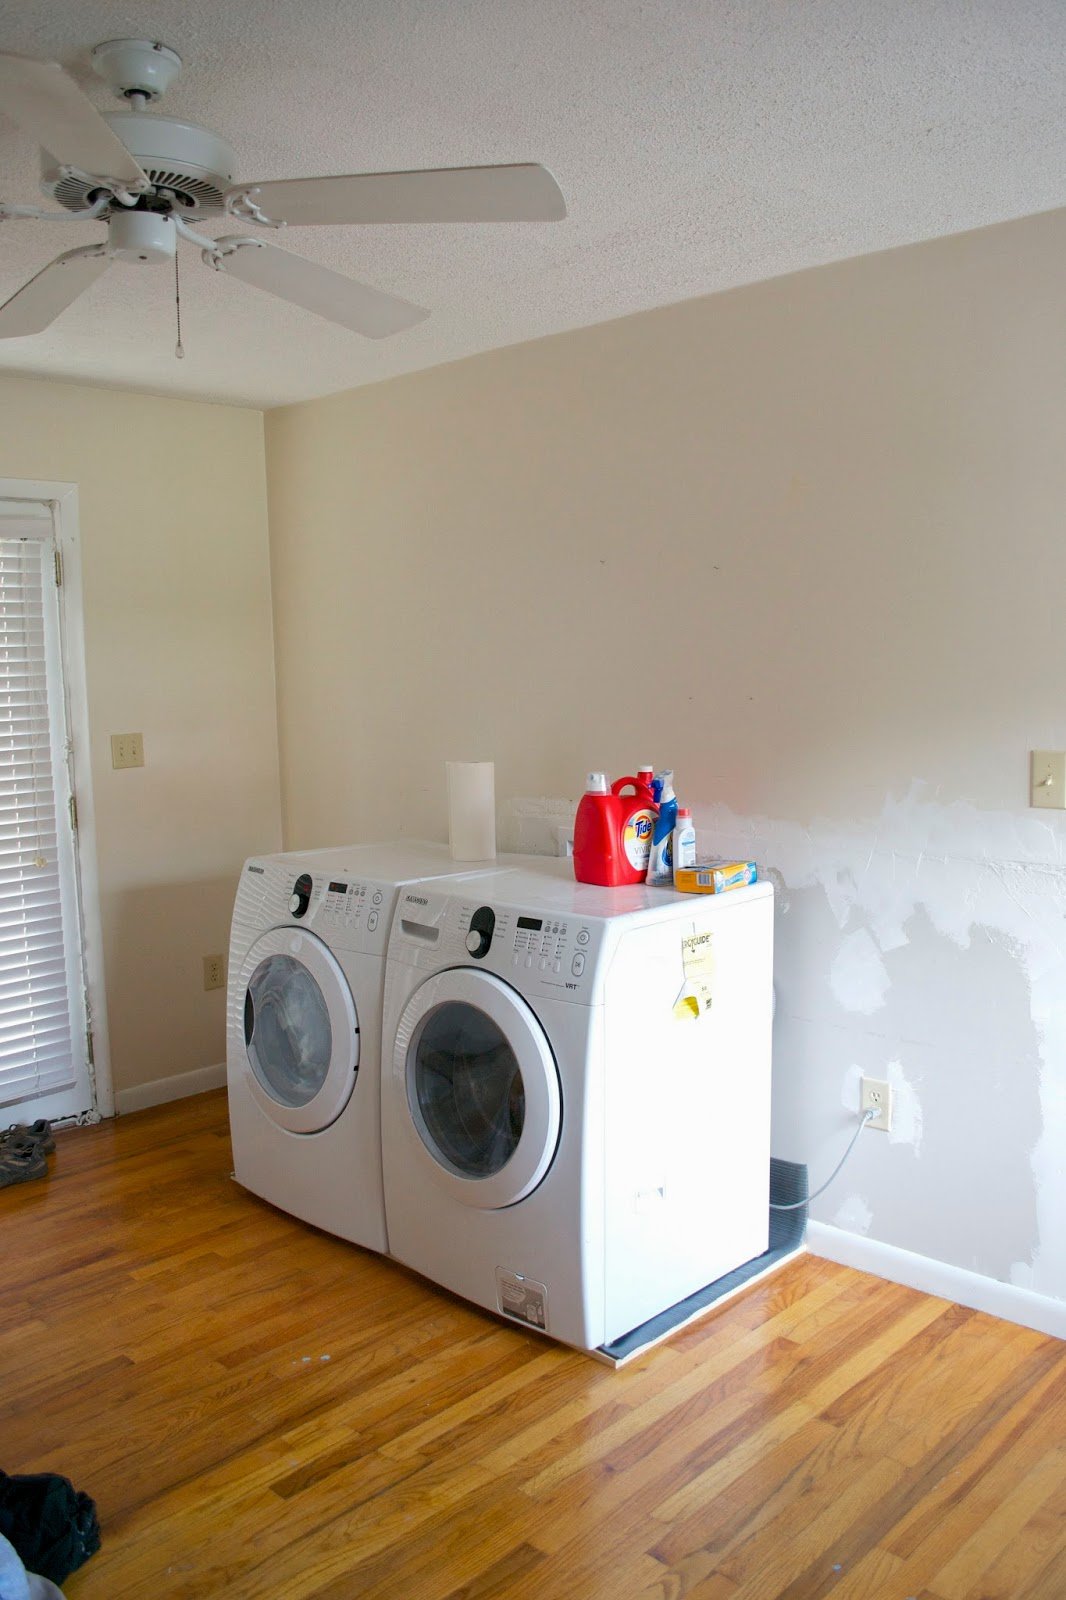
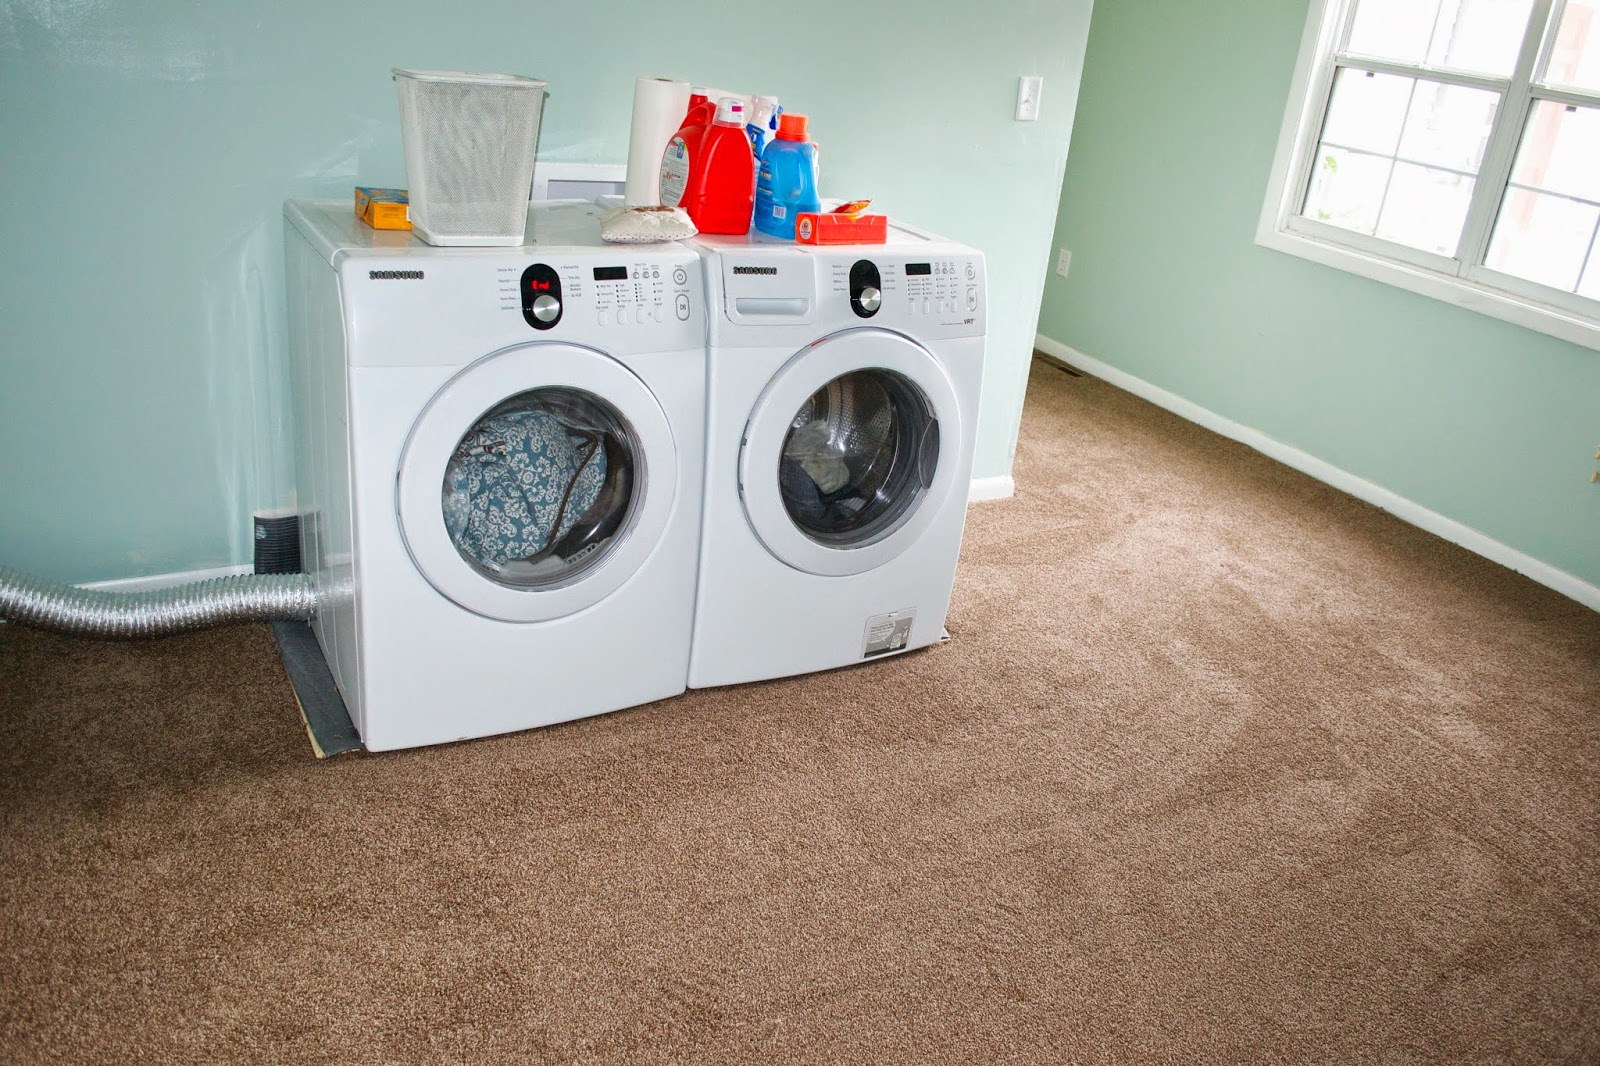
We brought the washer and dryer in right away (we seriously didn’t want to do another load out in the garage) and installed them on top of a rubber mat to reduce vibrations and to add a little bit of protection in case of a leak. We were able to have the dryer vent go right out the wall with the doors in it and since we knew we would be building the storage around, we didn’t worry about running it through the wall.
We have plans of eventually having this room be a large closet with the laundry, but we decided to have this space be our son’s nursery for now. Lots of dirty clothes/cloth diapers = lots of laundry and we figured having them in the same room would make life a lot easier…. and we were right. So, while we were working on getting the laundry set up, we were also prepping the room for baby. Once we had working laundry, we paused to paint, put in carpet, and install a fan that was a little less wobbly.
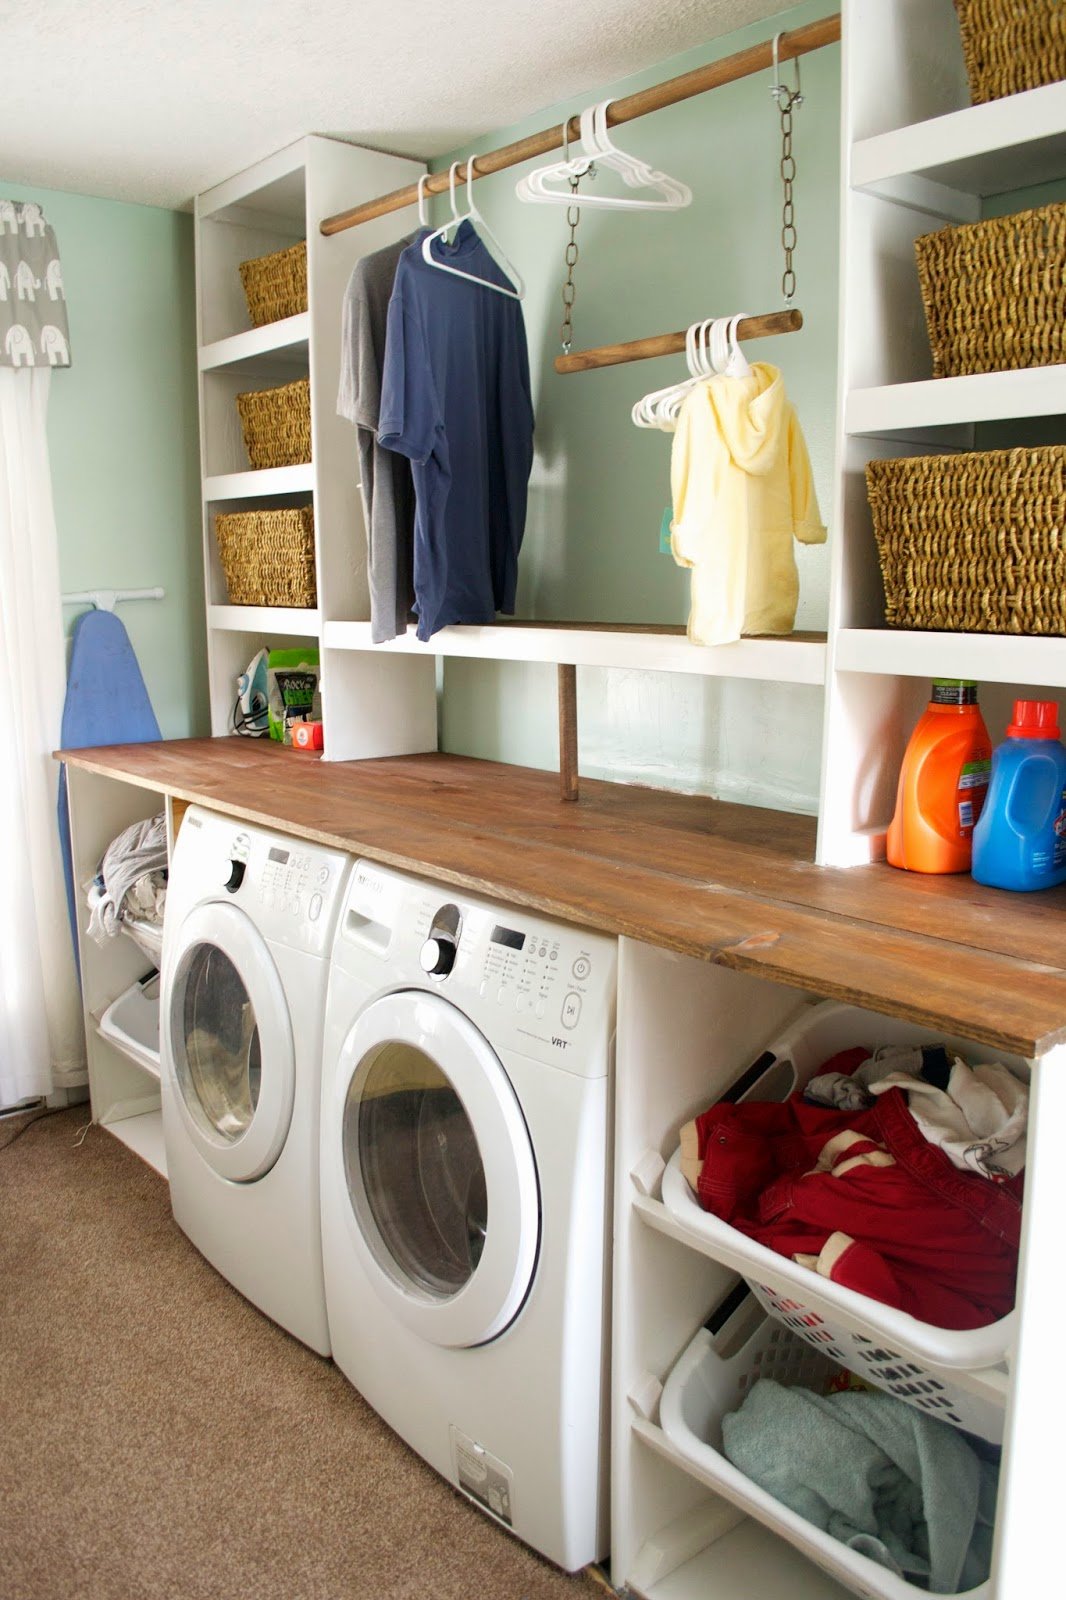
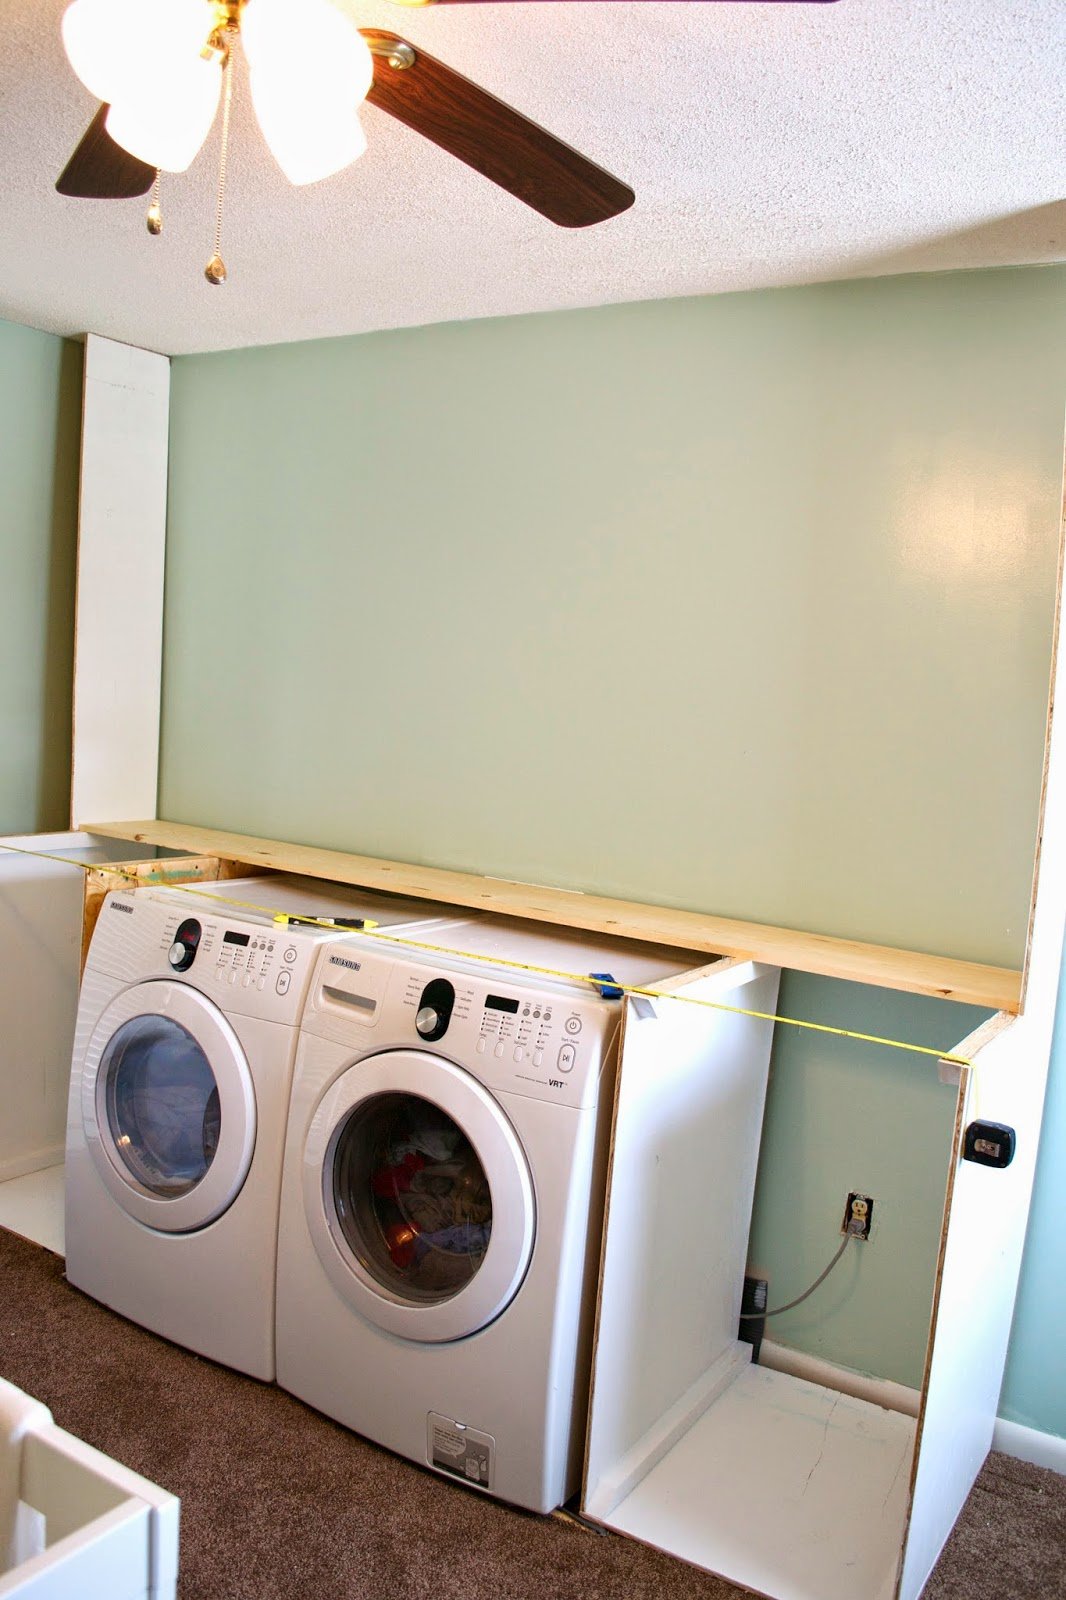
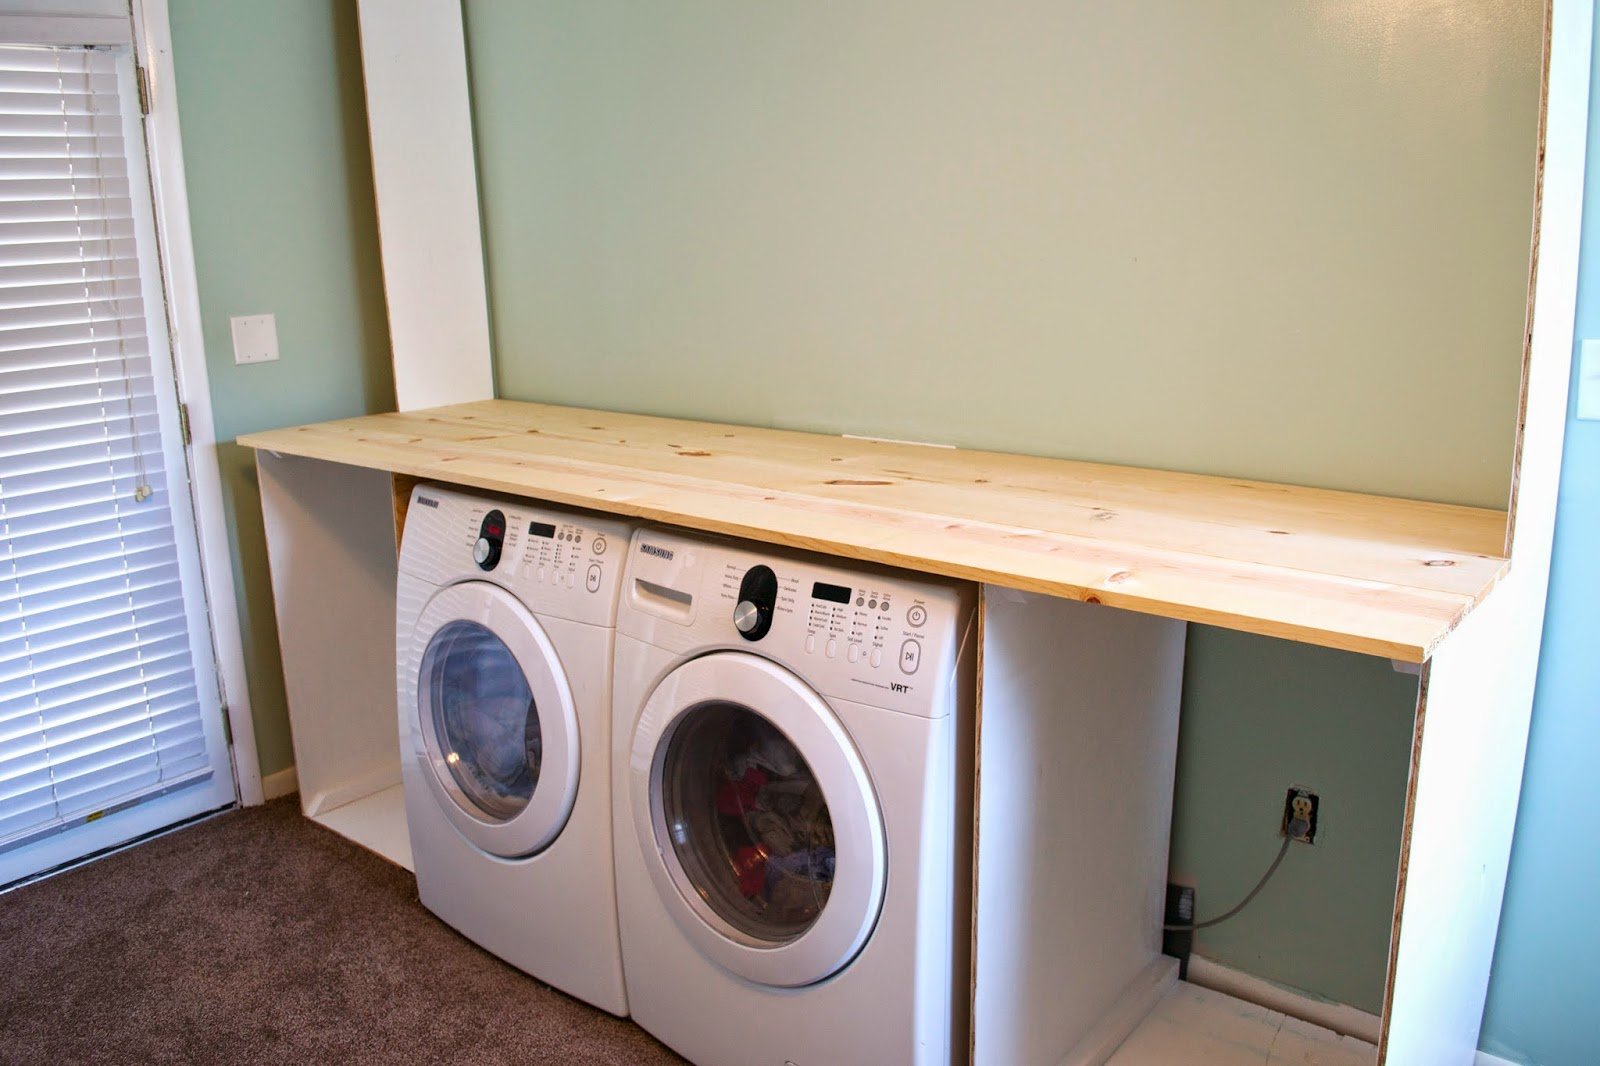
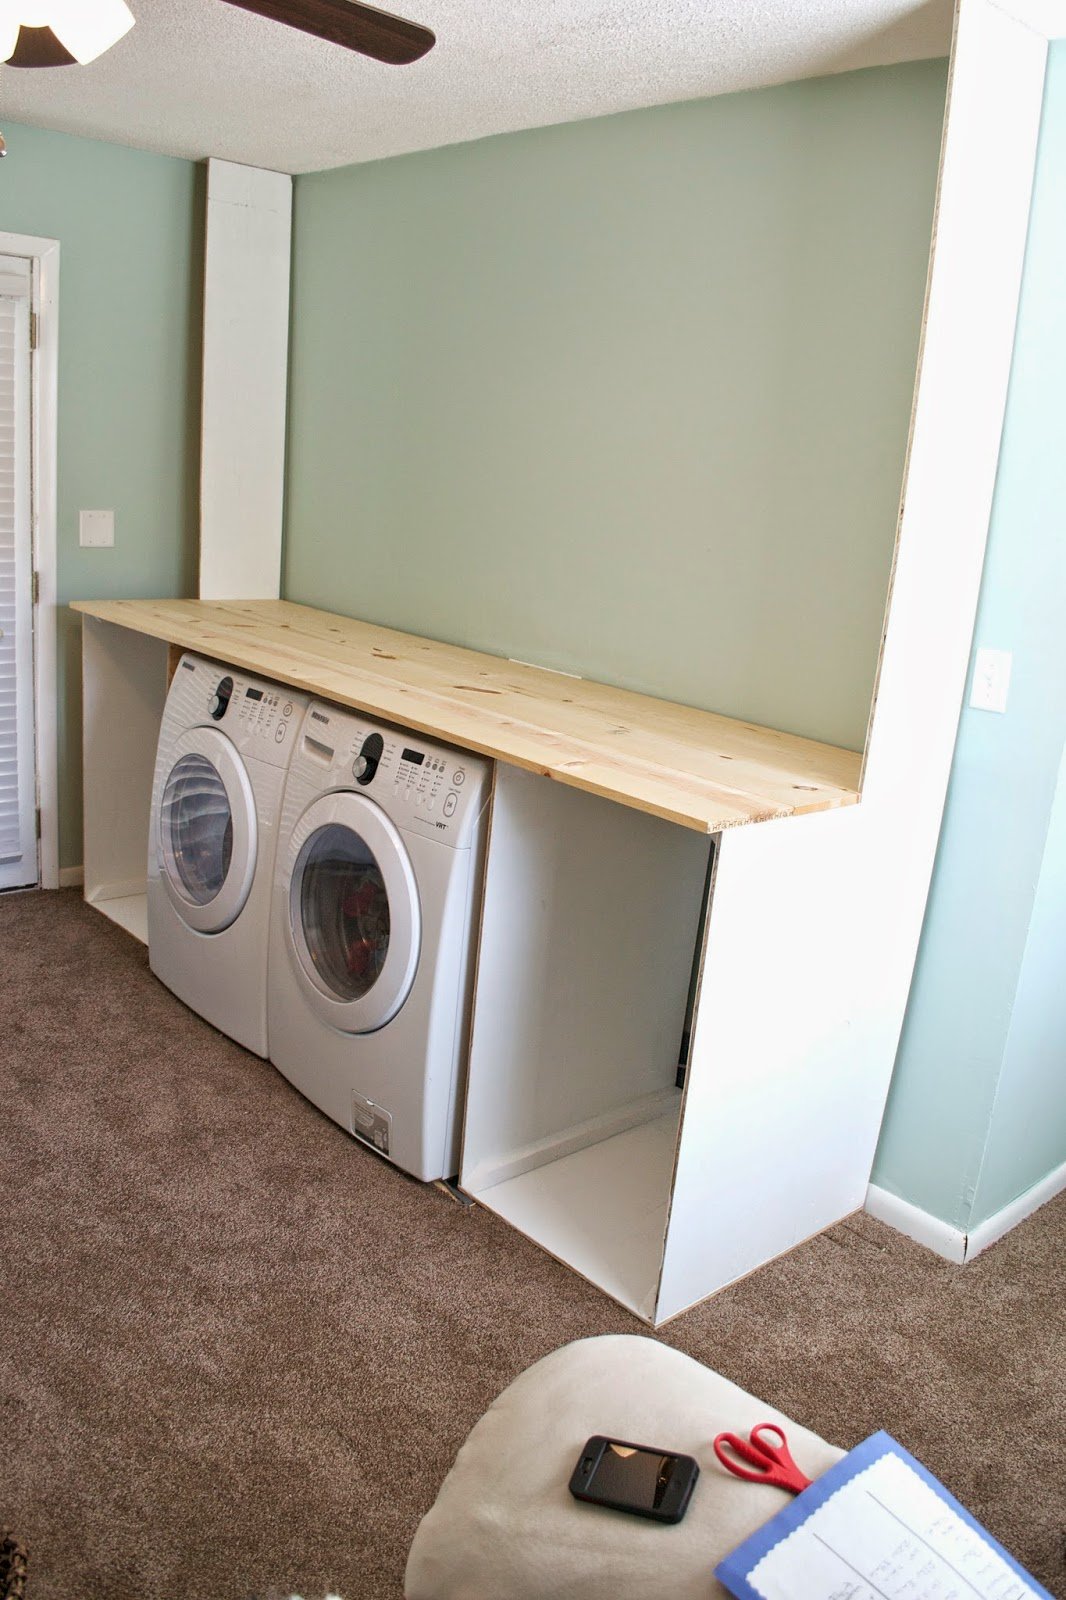
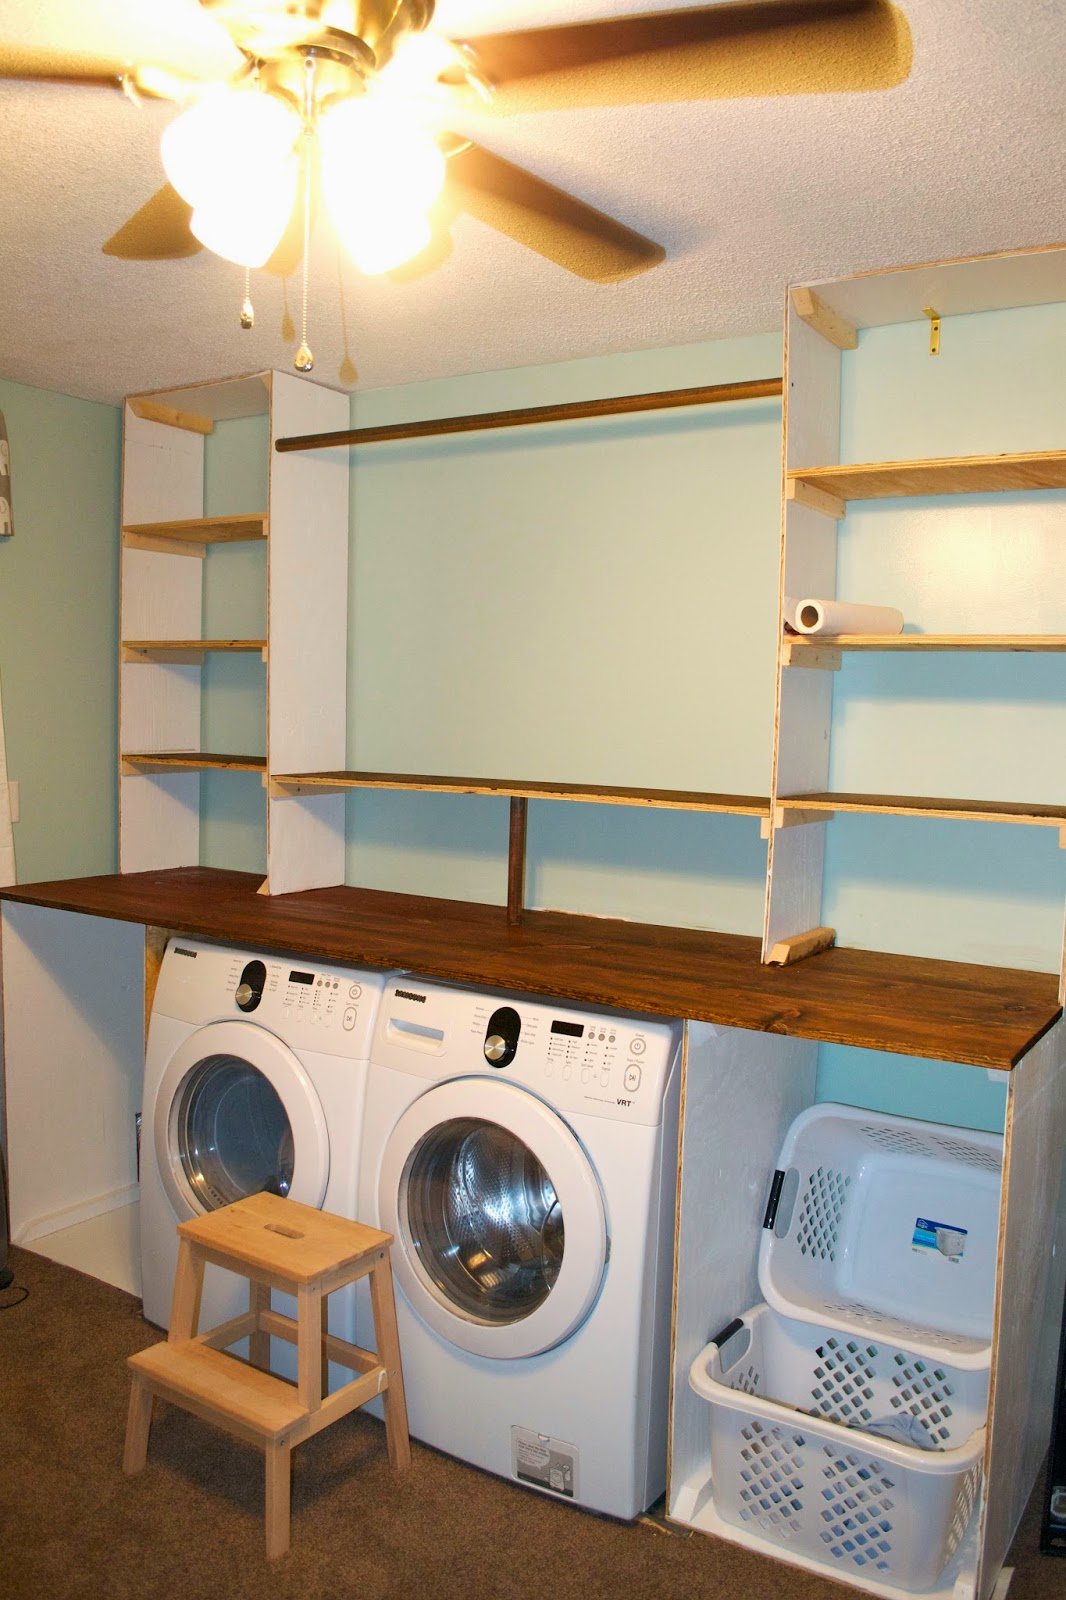
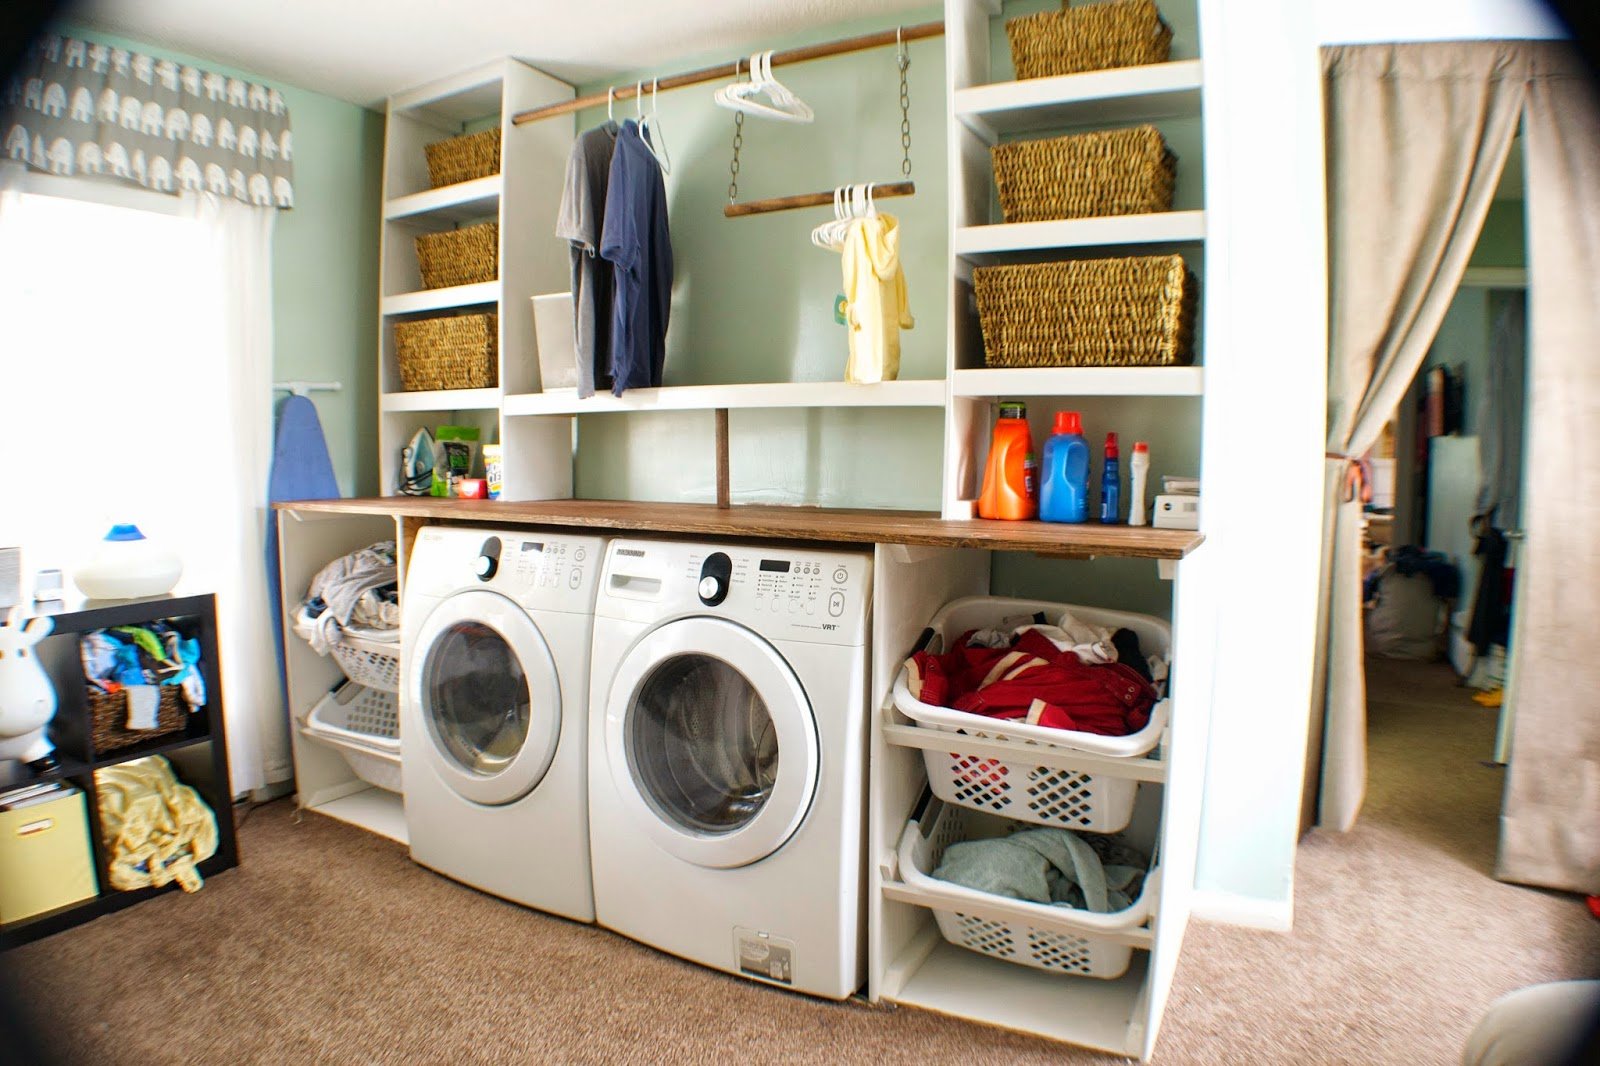
Then it was time for building the laundry unit. This was a pretty basic build. We started with 1/2″ plywood and used our table saw to cut four rectangular pieces and two L shape pieces. The L pieces became the exterior sides of both the bottom and top boxes of the unit and we used corner blocks and the other pieces to form the base and interior sides for the bottom boxes.
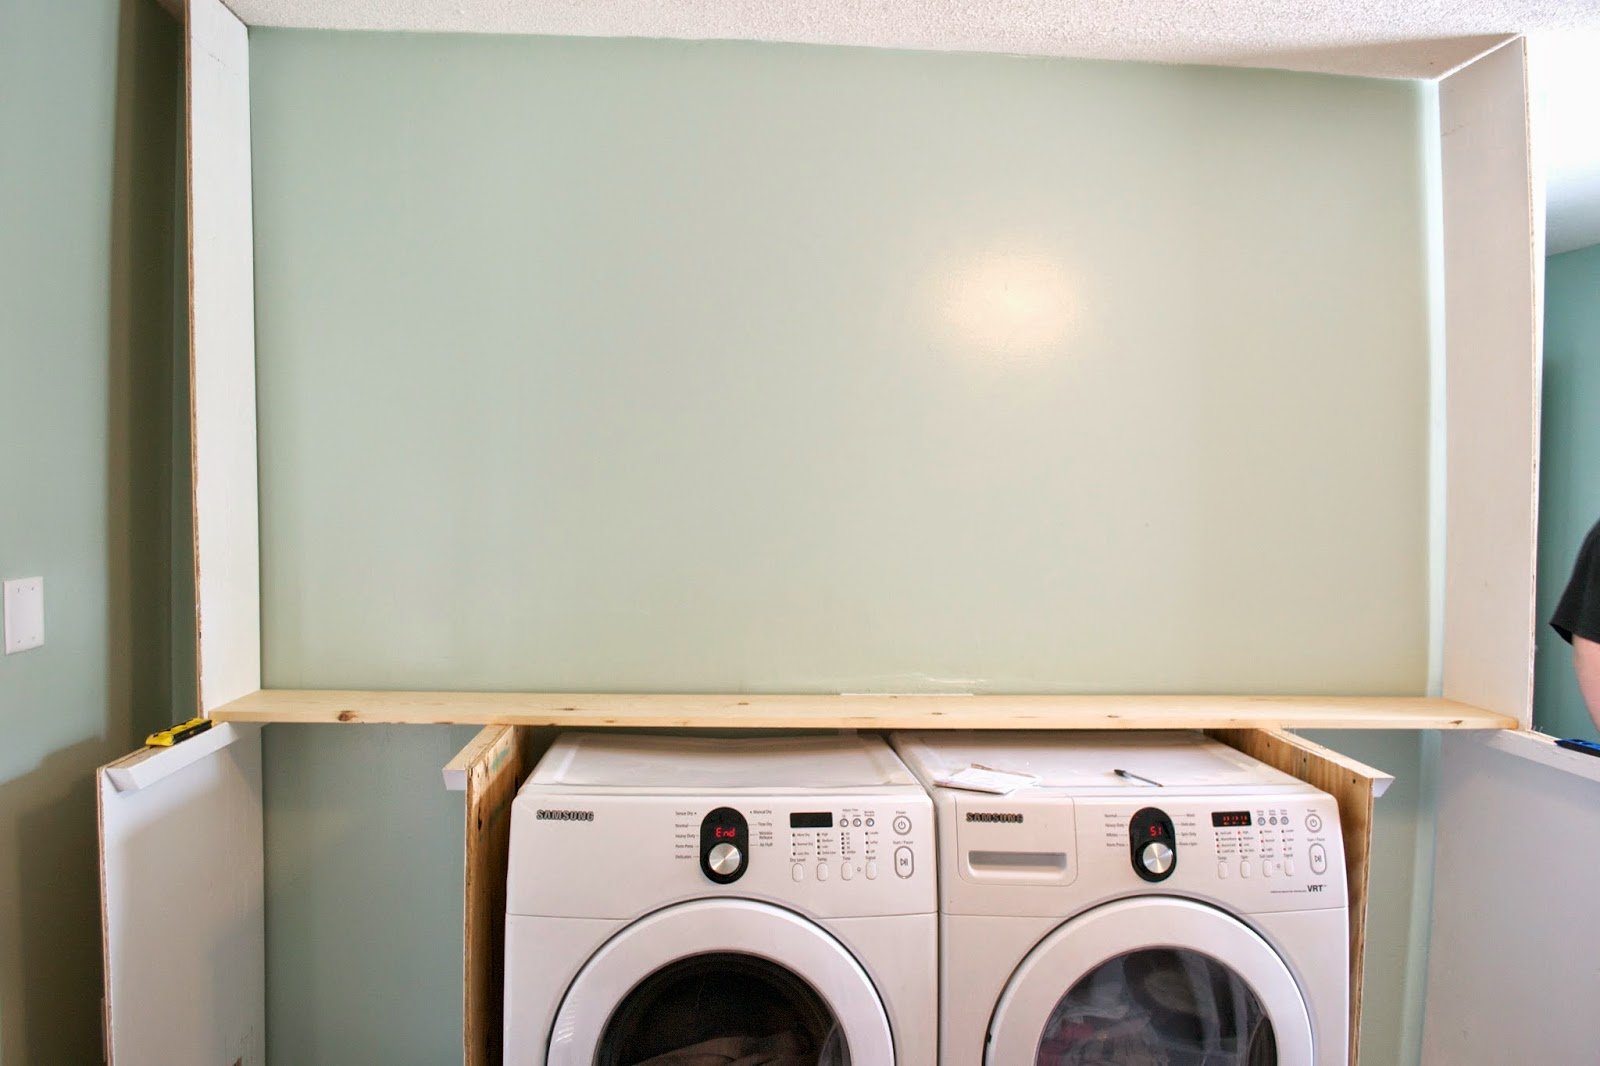
To complete the bottom boxes, we used 1×8 inch boards to create a counter top. There was a fair amount of play in the plywood, so while one of us used a measuring tape to make sure that the widths were correct, the other used our nailer to nail the top board into corner blocks that we had attached to the side walls.
We designed the height of the counter to be a couple of inches above the machines so that there would be room for air to circulate.
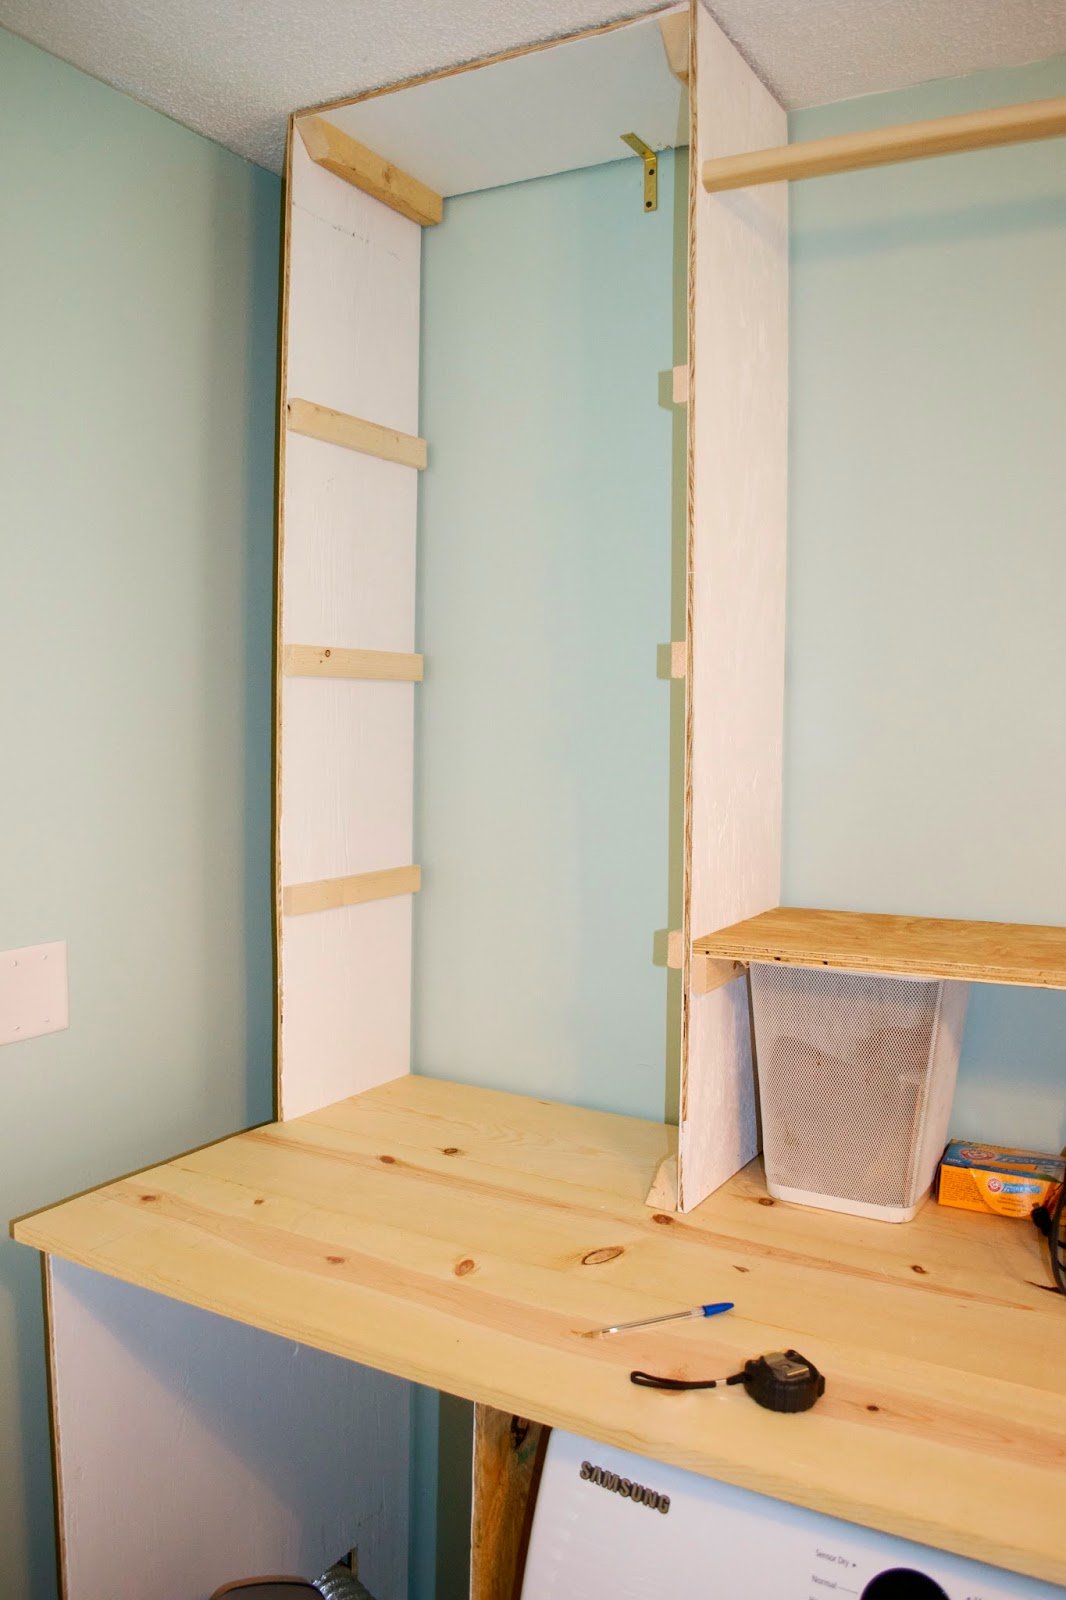
To build the top boxes, we cut one long and one short piece of plywood and once again used corner blocks to build the frame for the box with the counter being the fourth side. We also added 1×2 pieces on both sides of the sidewalls to act as supports for shelves.
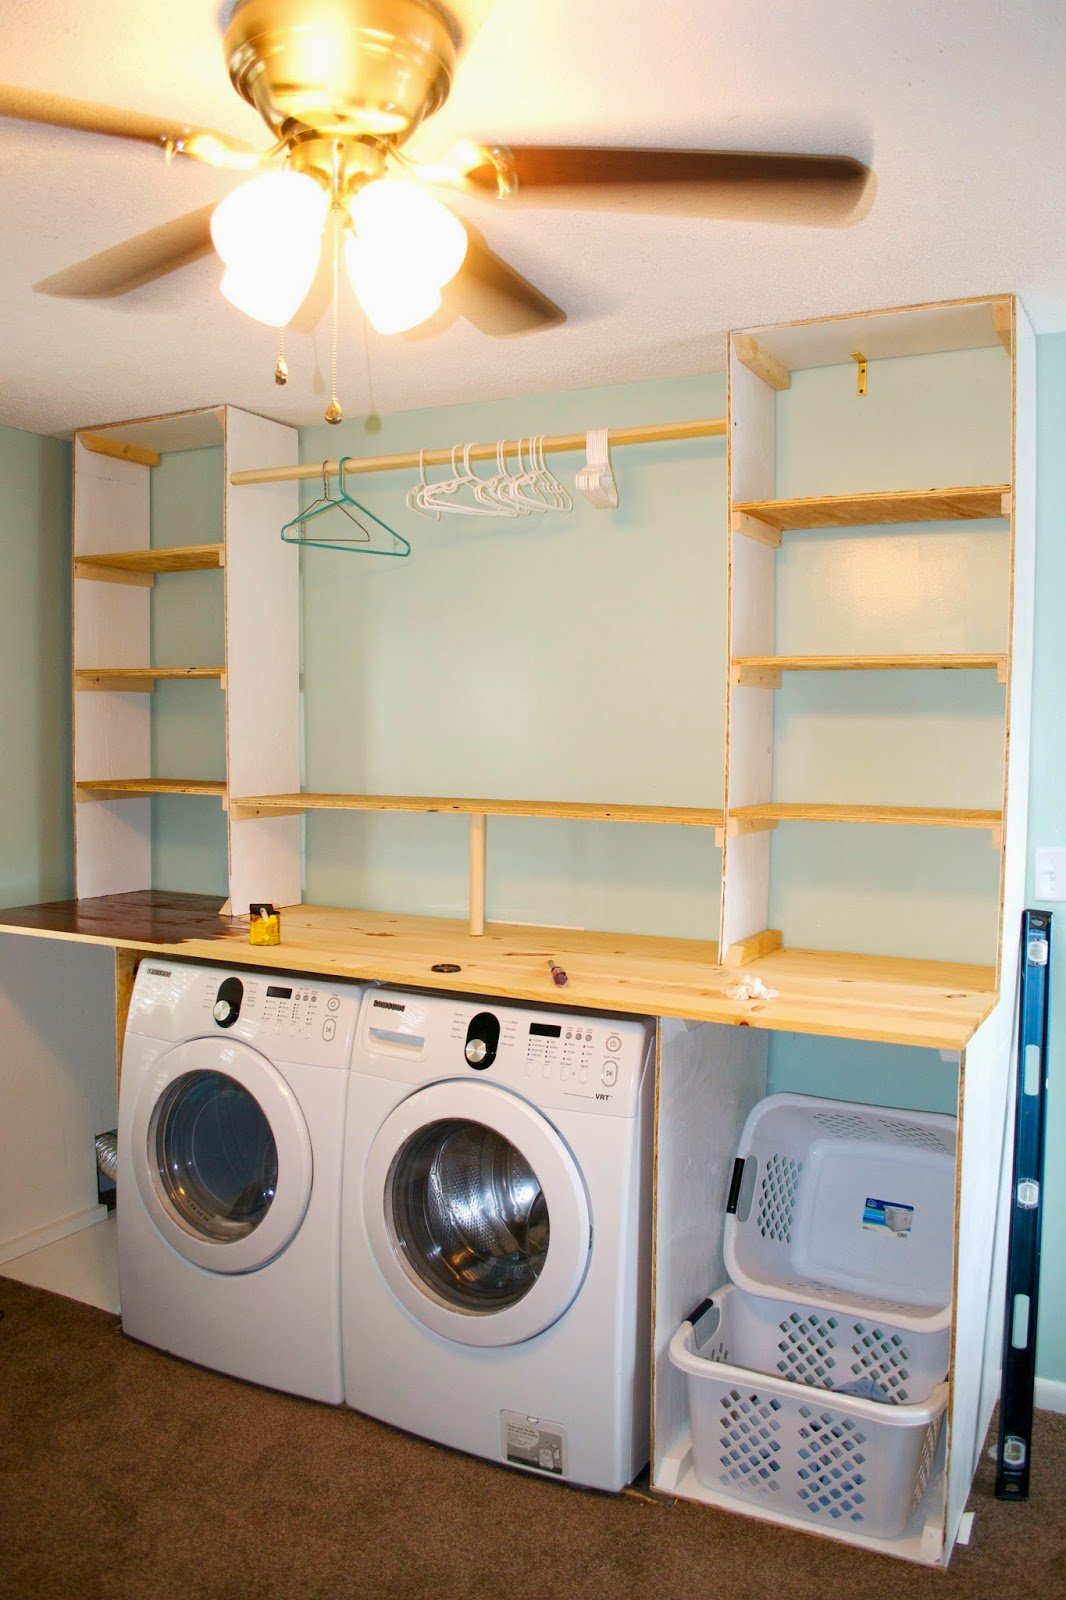
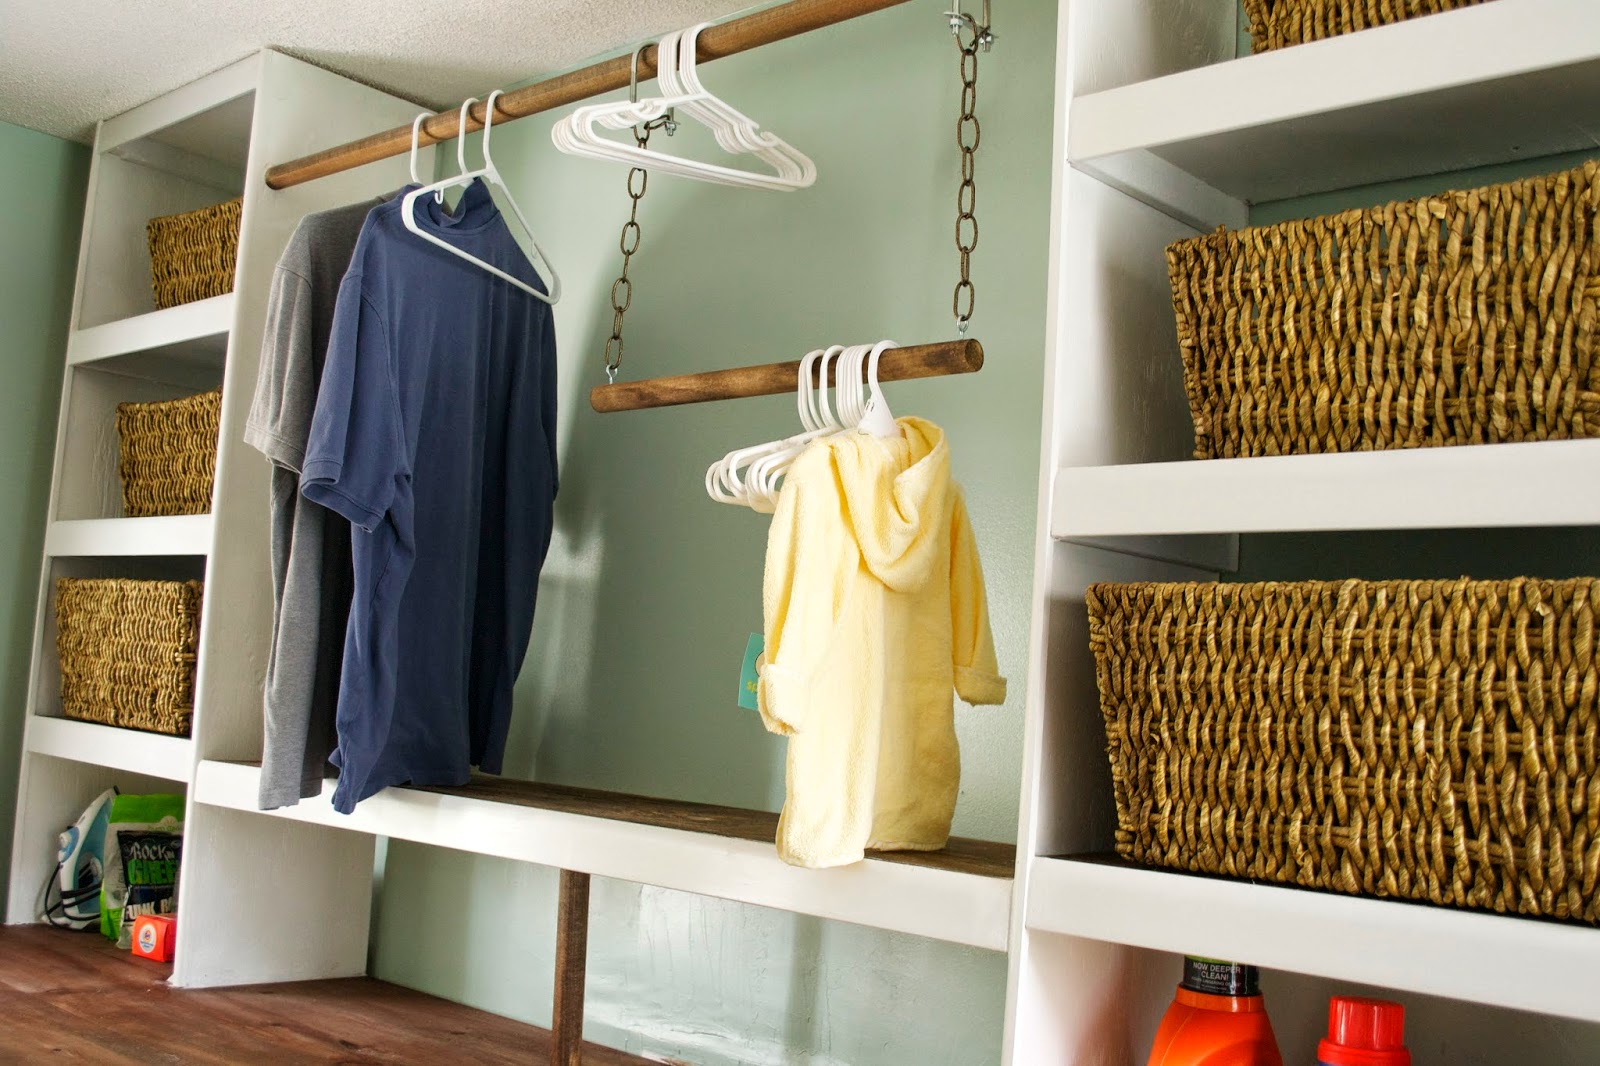
We used leftover plywood for the shelving and for added functionality and stability, we added the hanging rod and the long center shelf. We also anchored the top boxes to the wall.
At this point, the structure was there but things were still looking a little rough. To finish things up, the countertop, shelving and rod all got a coat of stain.
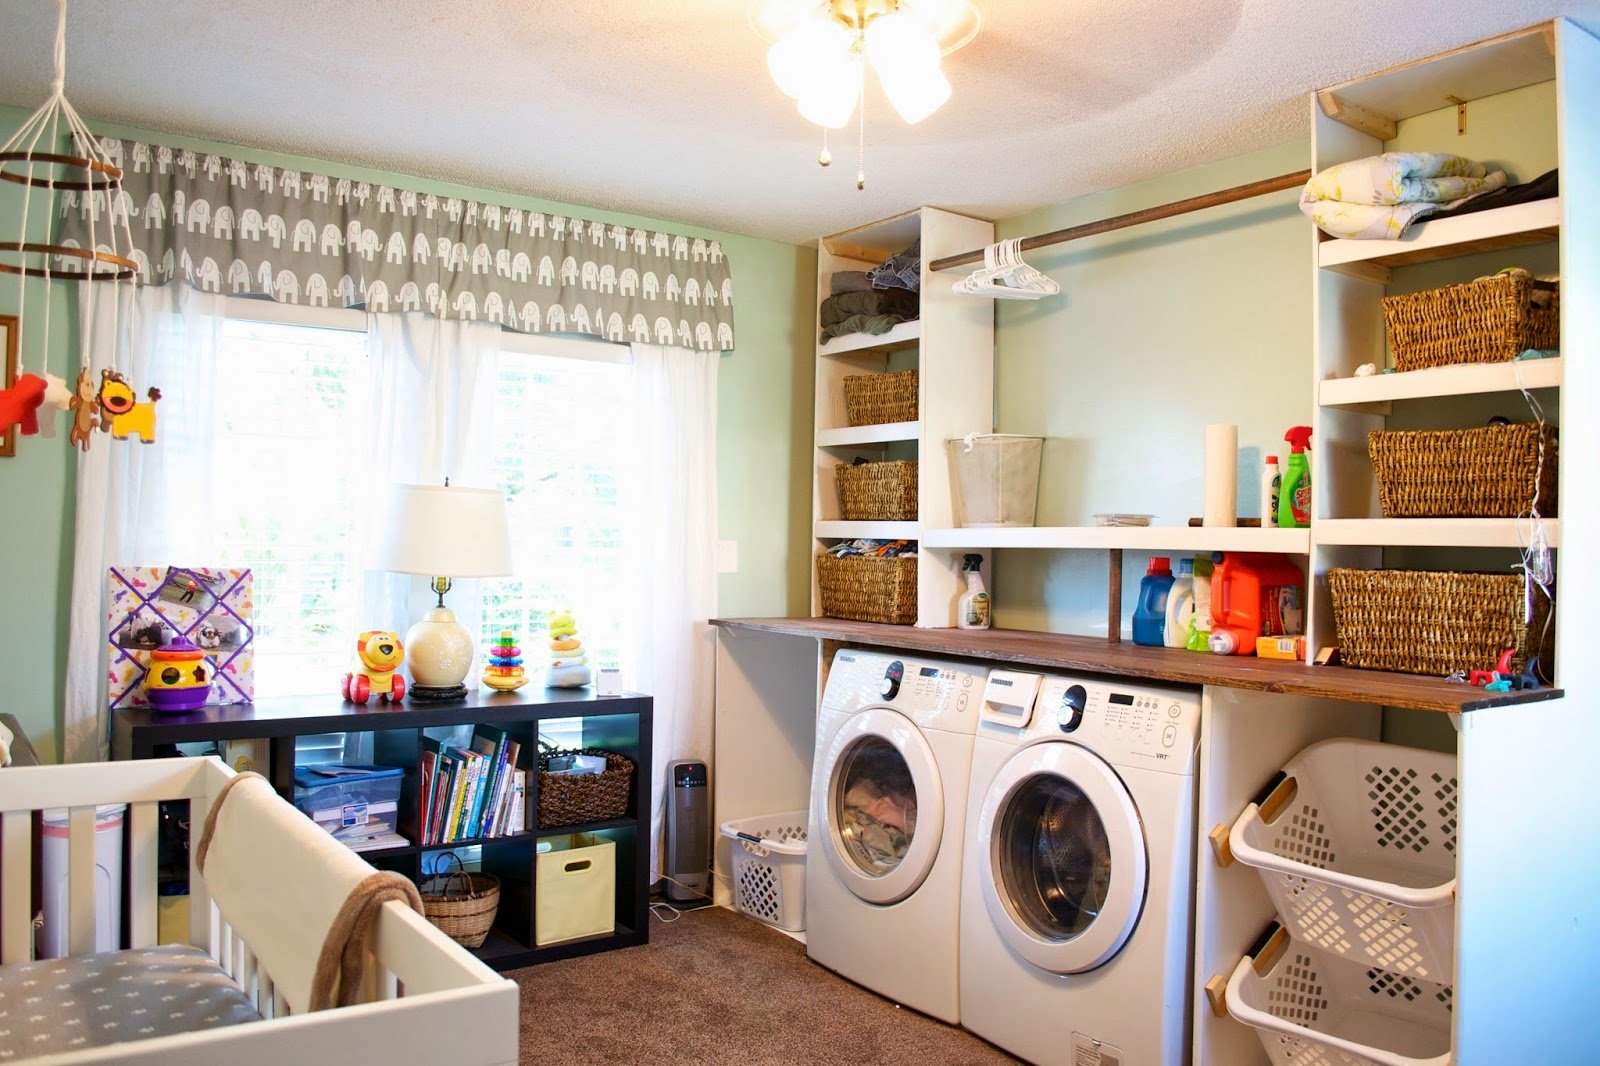
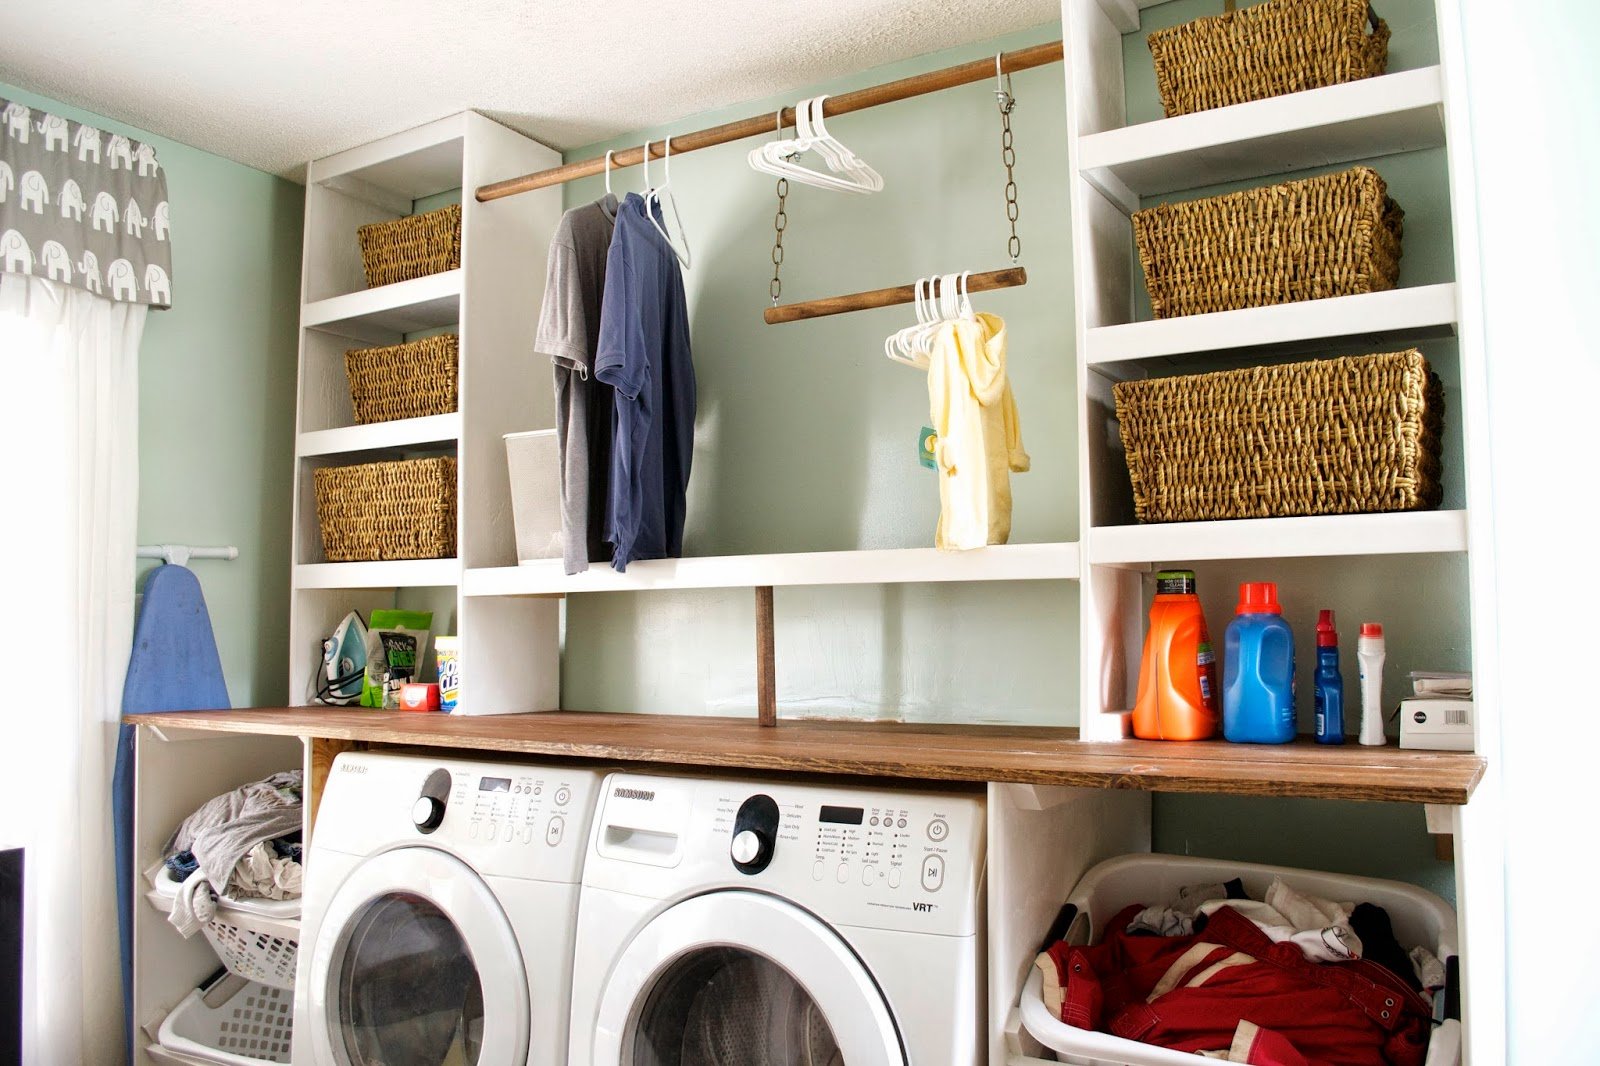
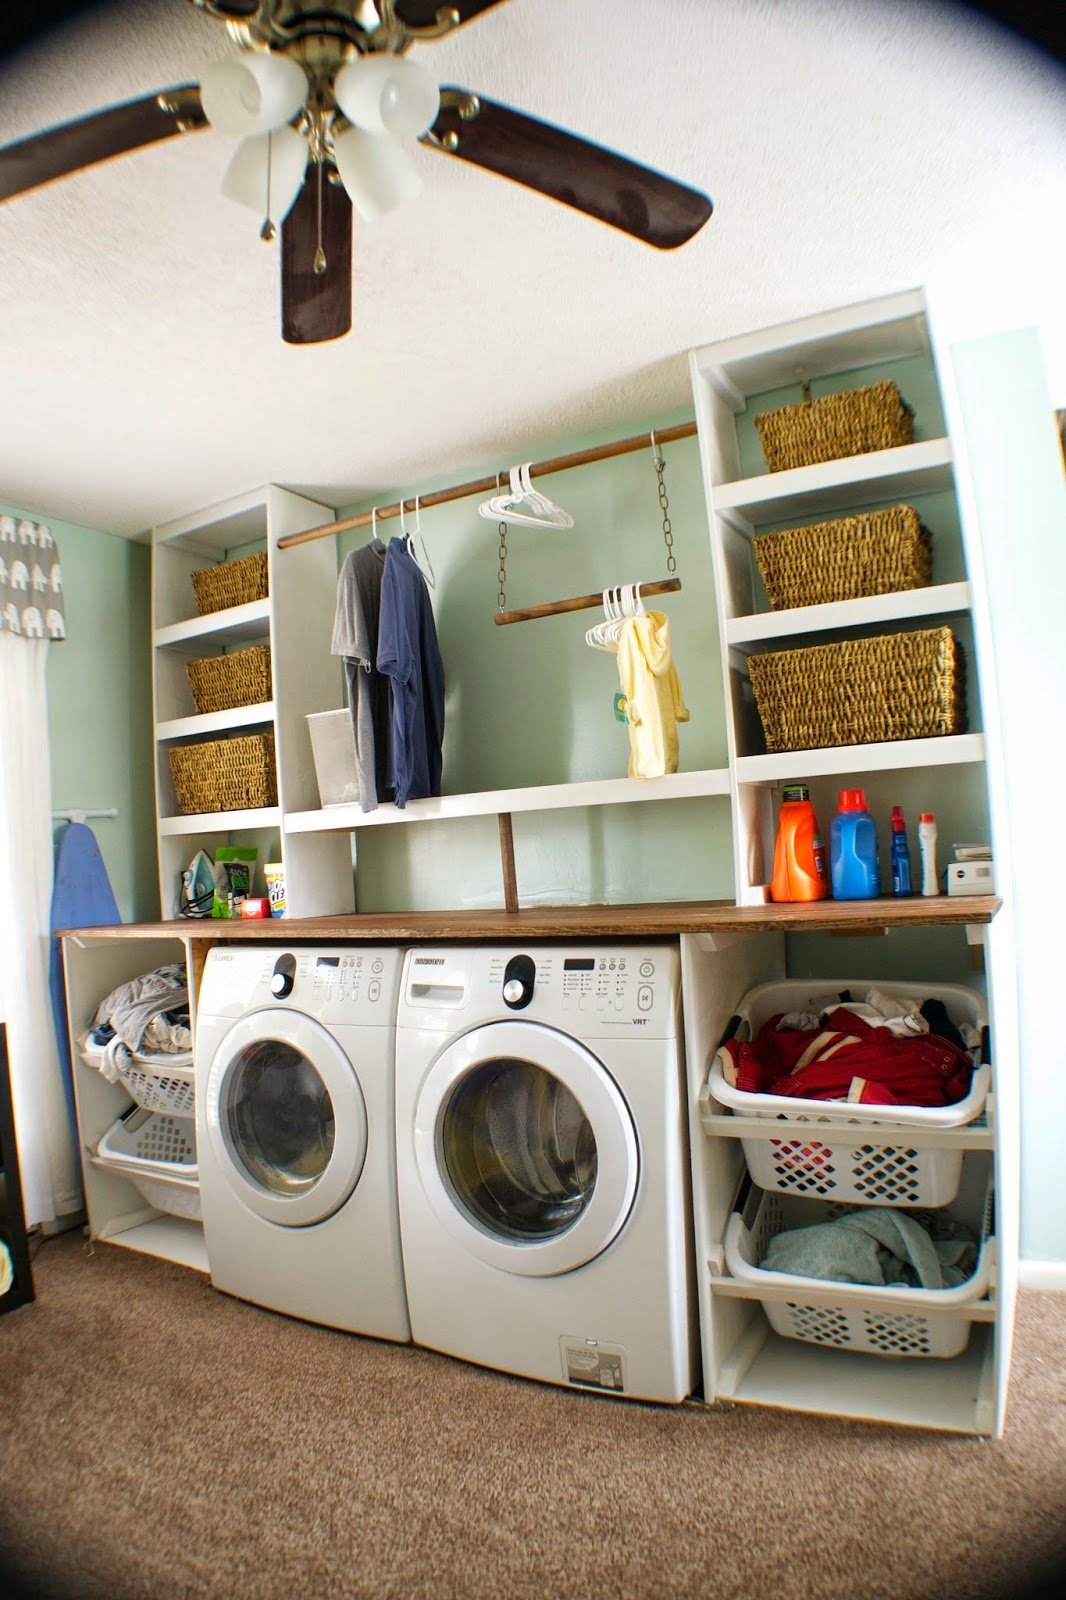
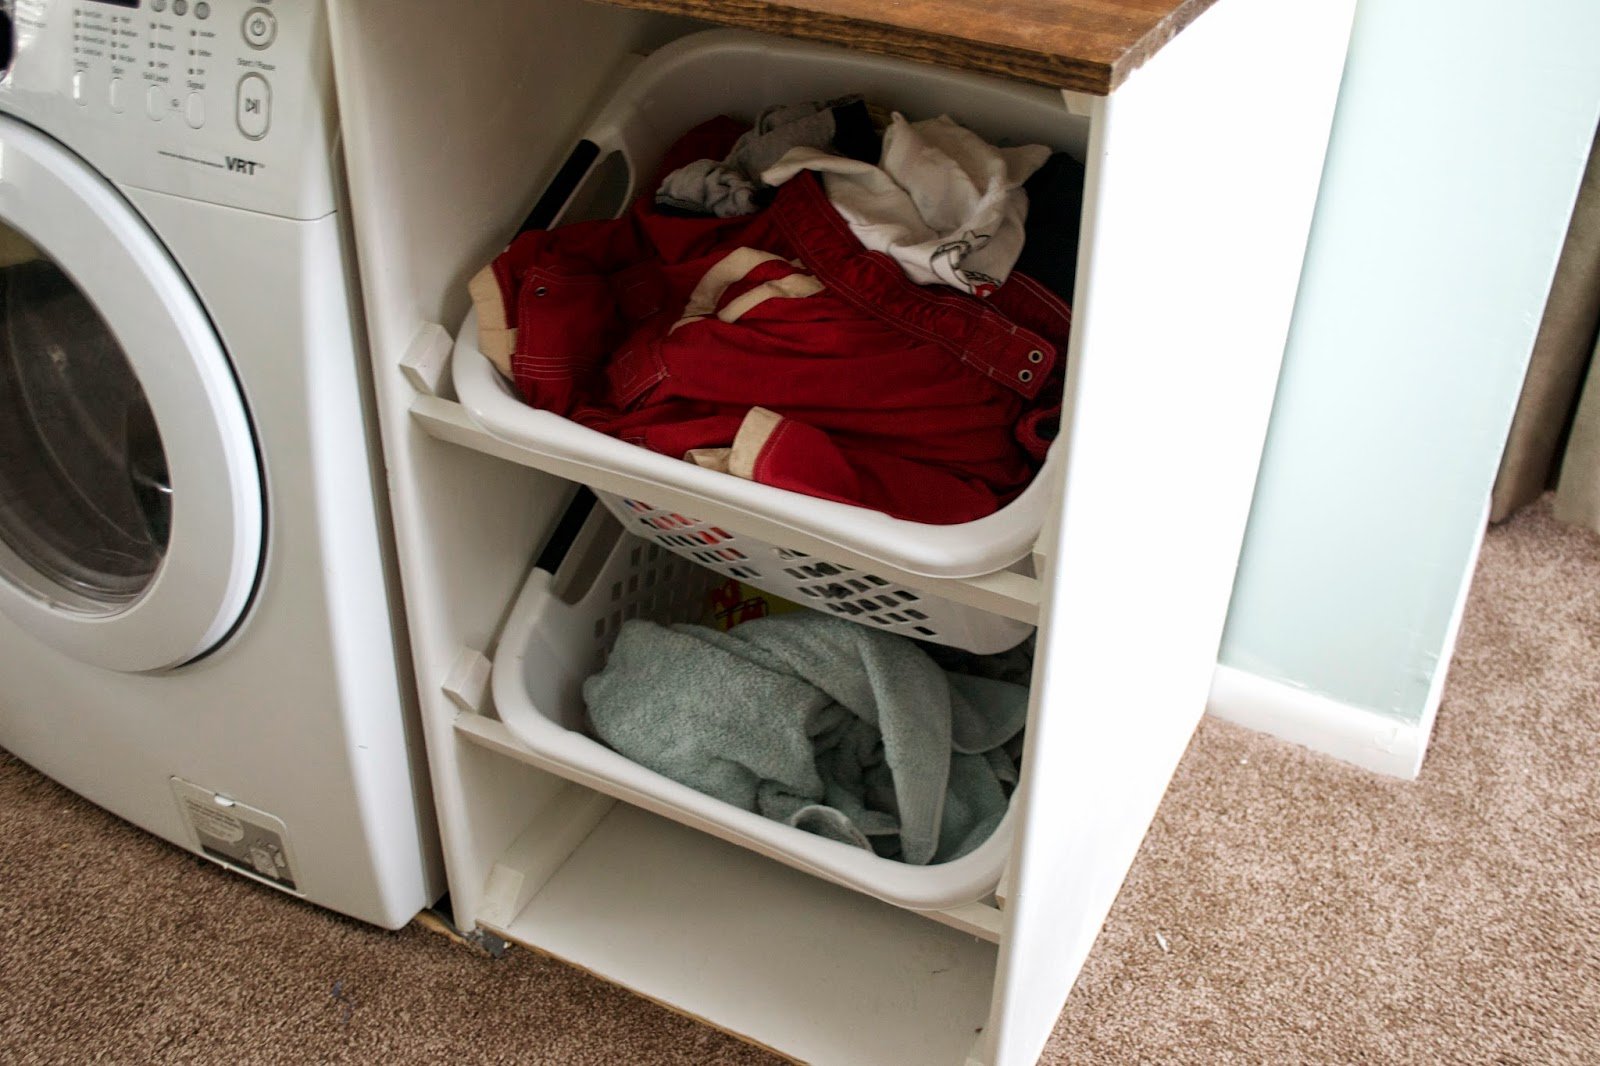
We also trimmed out the front of the shelves to give them a bulkier, more finished feel. In the bottom boxes, we added angled brackets for laundry baskets. While flat brackets would have still given great storage, having the baskets angled makes throwing laundry into them and getting it back out to do laundry a lot easier.
The unit was about 99% finished and then other things (like finishing the rest of the room, having baby, etc) came up and since the unit was pretty functional, we haven’t had a major push to finish it.
Recently, we finally had some time to finish so we added the last bit of trim, painted everything, finished the basket storage and hung an additional rod so that we have double the space for hanging baby clothes.
The one nice thing about taking so long to finish that 1% of stuff is that we can tell you how much we love this setup. I can’t go so far as to say we love doing laundry, but we now have a system that makes the whole process significantly more pleasant. I love that I can take the baby’s dirty clothes off and I don’t even need to move and they can be in the laundry. Our room is also next door so we basically have made the laundry process as easy as we possibly can.
If you are wondering about the logistics planning naps around laundry, it’s pretty easy. The washer is too loud to run while he’s sleeping so we start loads when he gets up and if a load is going when we want to put him down, our washer has a pause button. The dryer can be run while he’s sleeping as long as there aren’t a lot of metal pieces that clang. He actually seems to sleep better when he falls asleep with the dryer going.
I found the baskets at TJ Maxx and the smaller ones are great for storing all of the baby’s little things like socks and bibs. We use the larger ones for clothes that are either too small or too big for him.
Since we took about a year and a half to complete this unit, we don’t have a great budget breakdown, but for the unit itself (not including plumbing and electrical) we spent about $200 including the baskets. All materials except the upper baskets came from Lowe’s and the upper baskets came from TJ Maxx.
A huge thank you to Remodelaholic for letting us share our laundry unit with you today!
——————————————
Thanks so much for being our guests, again, CK and Nate! Love what you’re doing in your home — can’t wait to see more!
Head over to Seesaws and Sawhorses to see more from CK and Nate, like these awesome industrial-style pantry shelves. Check out all of their projects here (and they even break it down by time required, whether you have days, hours, or minutes!)
Would you like to be featured on Remodelaholic? Join the link party or submit your project here — we can’t wait to see what you’ve been doing!
Lorene has been behind the scenes here at Remodelaholic for more than a decade! She believes that planning projects and actually completing them are two different hobbies, but that doesn't stop her from planning at least a dozen projects at any given time. She spends her free time creating memories with her husband and 5 kids, traveling as far as she can afford, and partaking of books in any form available.


Thanks for the feature! Love working with you!
Thanks so much for visiting again! Have a great day!