DIY Entryway Mudroom with Cubbies for Under $150
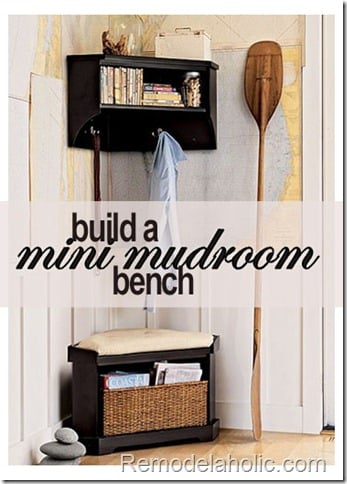 Remodelaholic
repin this for later
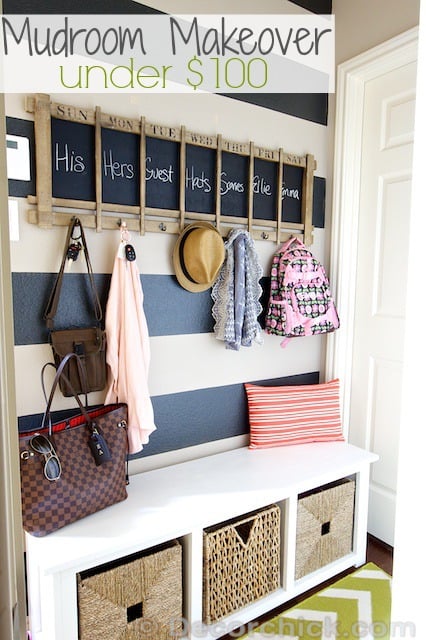
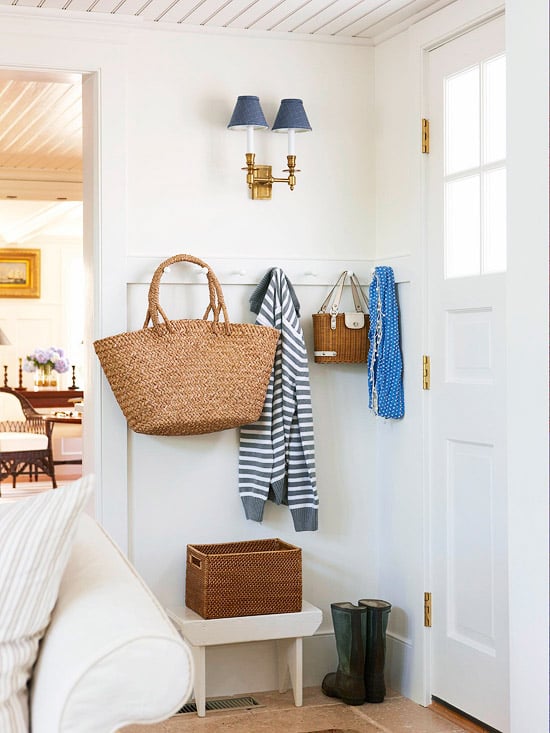
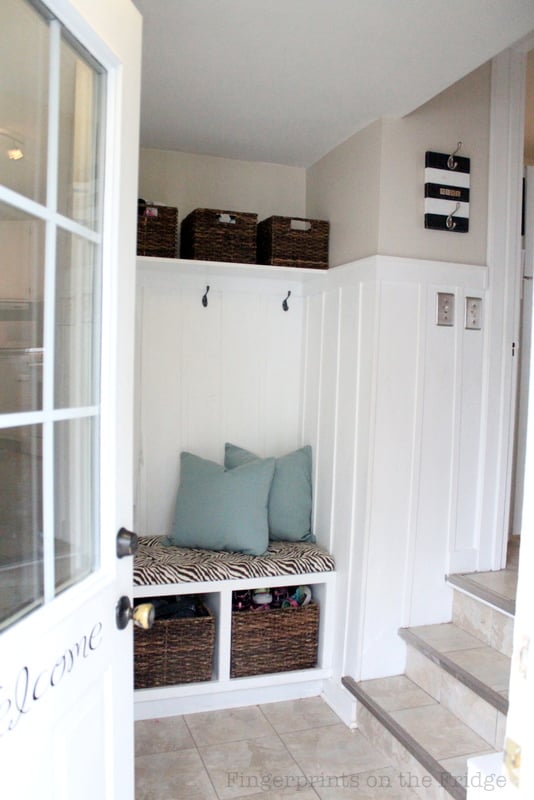
 Jones Design Company via Remodelaholic
repin this for later
And here’s Anna to show you her DIY skills! Give her a warm Remodelaholic welcome!
DIY Entryway Mudroom with Cubbies
by Anna of Home Heart and Hands
Hello Remodelaholic readers! My name is Anna and I’m from Home Heart and Hands. I’m so happy to be guest posting on one of my very favorite blogs! I am new to blogging, but I am not new to DIY. I’ve been an avid DIY/home design blog reader for several years and have been literally obsessed with transforming our home with my own ideas and my own two hands.
I am a stay at home mom of four little ones (ages 3 to 11) and wife to a husband who has a very demanding job. Home decor, building things and using my creativity to save money, make life easier, and my home more functional are my passions and how I stay sane in my crazy hectic life. I’ve always found that I can never find what I have pictured in my head. For me, the best way to get the look that I want is to do it myself! I’ve learned a whole lot through trial and error with my projects and I am so excited to share them with you.
I am currently working on a new built in fireplace/bookshelf unit that I am almost finished with and will be sharing the full reveal soon! I am constantly working on crafts like my gathered drop cloth wreath, or re-making things around the house that I’ve happened upon (gifts?) that I don’t really love, but hate to throw away, so why not make them into something I love, like the basket I recently made over. I hope you will visit my blog and check out what we’ve been up to.
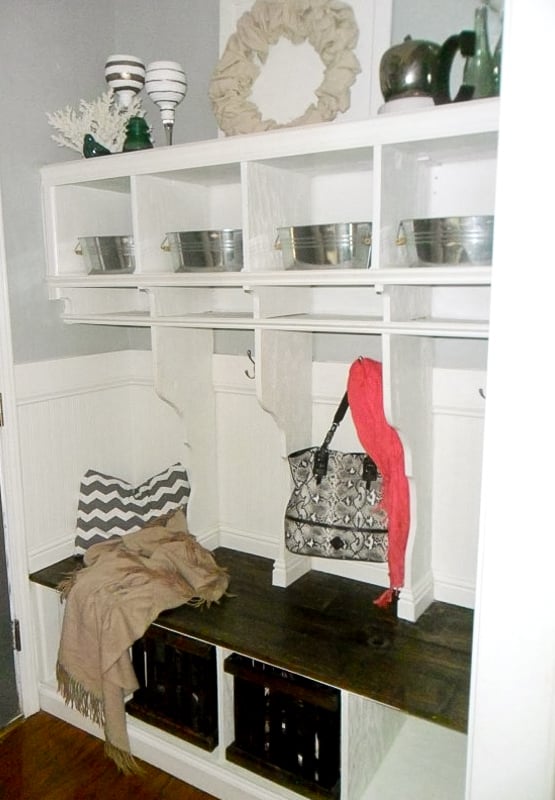
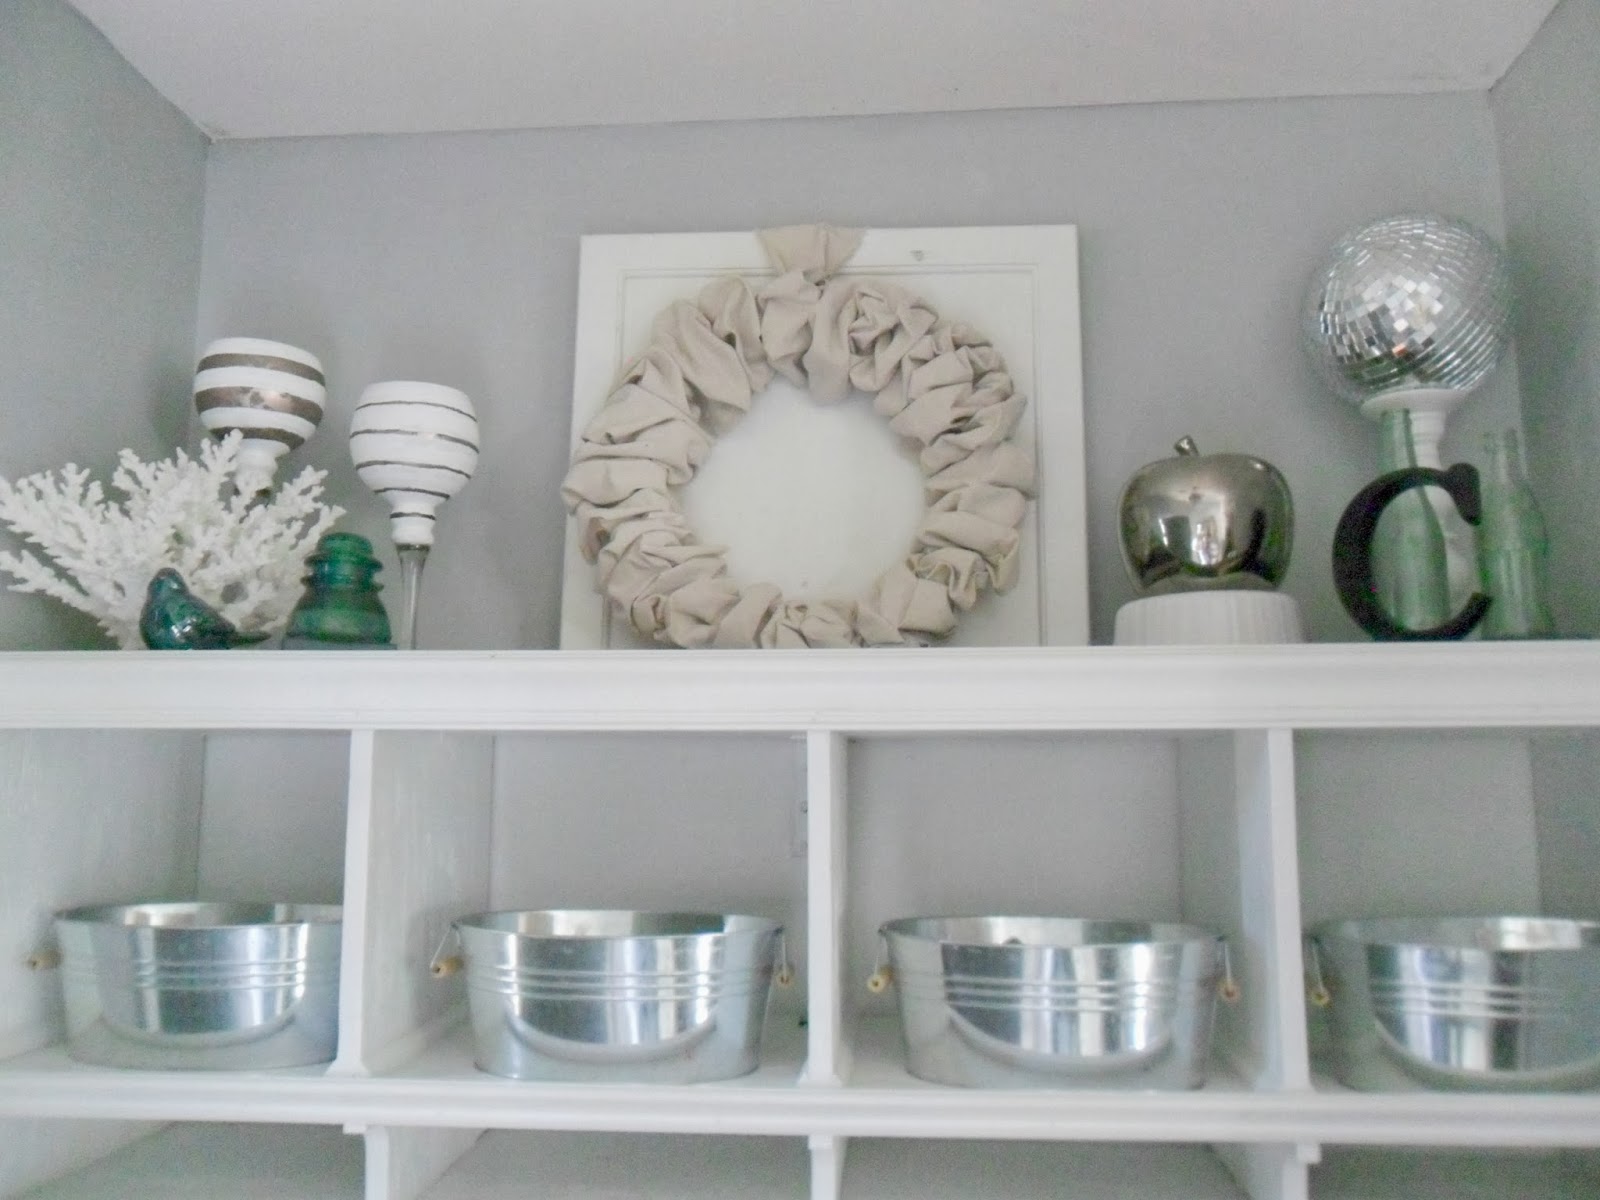
Today I am sharing with you my baby….my entryway mudroom. This project was my very first experience at building …anything… It was a lot of trial and error, and it took an obscene amount of time to complete, but it has turned out to be the prettiest thing (thus far) in my house. Just look at her….she’s beautiful…sigh…

My entryway is a very small area just inside my front door that is technically it’s own room, but really is only separated from the great room by a doorway header. There was always this odd space behind the front door that we would sometimes put a bench in, or random junk…I think the stroller lived there longer than I’d care to admit. It was a catch all for shoes and “stuff” that was on it’s way either in or out of the house. I found myself daydreaming about a cute mudroom with storage solutions for shoes, backpacks, coats, homework/papers and whatever else…soon, I started designing it, and I thought, “you know what, I can do this” The space behind my door is 59.5 inches wide from wall to wall and 22 inches deep. Perfect for a built in!
The materials I used are:
- 3/4 inch plywood. 2 full sheets. (I ripped full sheets by hand with a skill saw…DON’T DO THIS….get someone to cut them down with a table saw, or take them to Lowes or Home Depot and they will cut it for you!)
- 2 Inch wood screws
- 1×6 pine boards (roughly 2 of them @ 8 ft long)
- 2×4 (2, 8 ft long boards)
- Jig saw
- miter saw
- drill
- counter sunk drill bit
- various drill bits for pre-drilling screw holes
- wood glue
- wooden dowel pegs
- heavy duty “L” brackets, Four of them.
- White high gloss paint (generic white from Walmart is what I used)
- Minwax stain, in Dark Walnut [Remodelaholic note: buy it here on Amazon]
- Minwax polycrylic (top coat for bench seat) [Remodelaholic note: buy it here on Amazon]
- Various trim and moulding (including three sizes of base boards)
- Nail gun and compressor
- Caulk for cracks
- putty for holes
- sandpaper
- three prong silver hooks from Lowes.
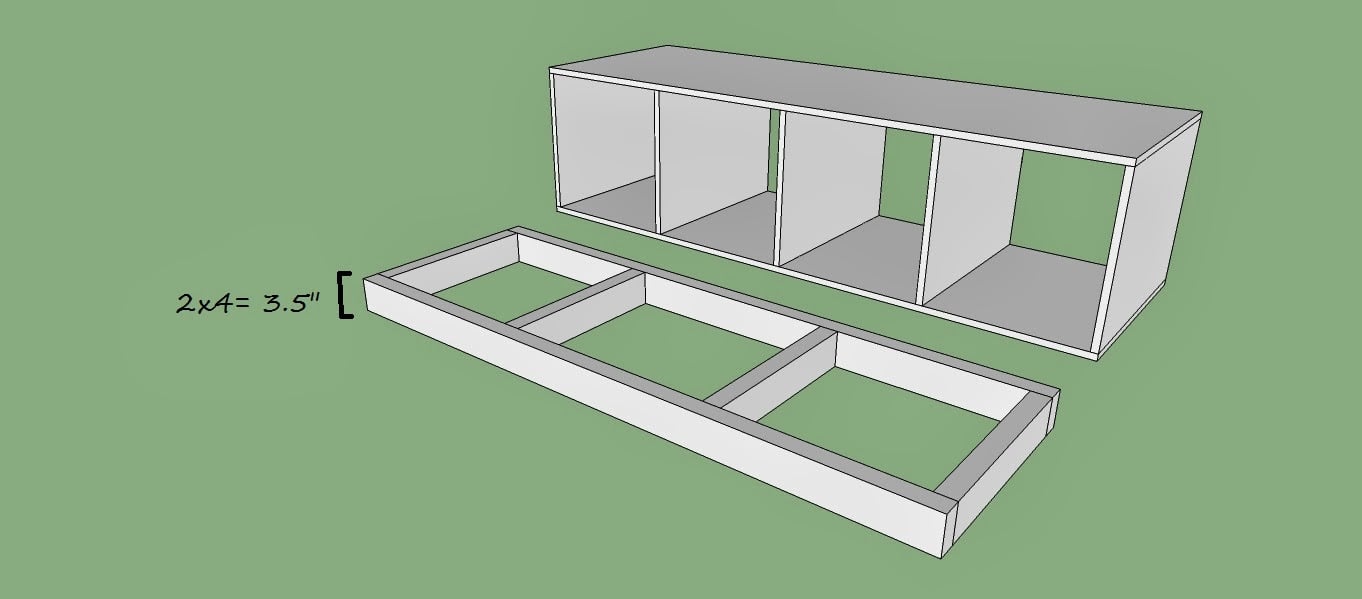
I began by measuring, marking and cutting my plywood down into pieces to assemble the bench portion first. I built a box by screwing through the top horizontal board and into the sides of each of the five vertical boards. I screwed each one in place using three screws. One for the front, back and middle of each board. I pre-drilled each screw hole and countersunk each screw (use the countersink drill bit before you add the screw, it will make a hole for the screw to sit in so it won’t sit on top of your flat surface). Make sure you check to be sure all of your angles are square…very important!
After, I repeated those steps for adding the bottom horizontal board. If you notice, the overall width of your box is less than the width of the space between the two walls. Make sure to leave yourself some wiggle room (I learned this the hard way), gaps can always be covered with trim later. Also, if you have a device to make pocket holes….go get it, because it would make this project much easier. I will, however, continue to describe how to do it the hard way!

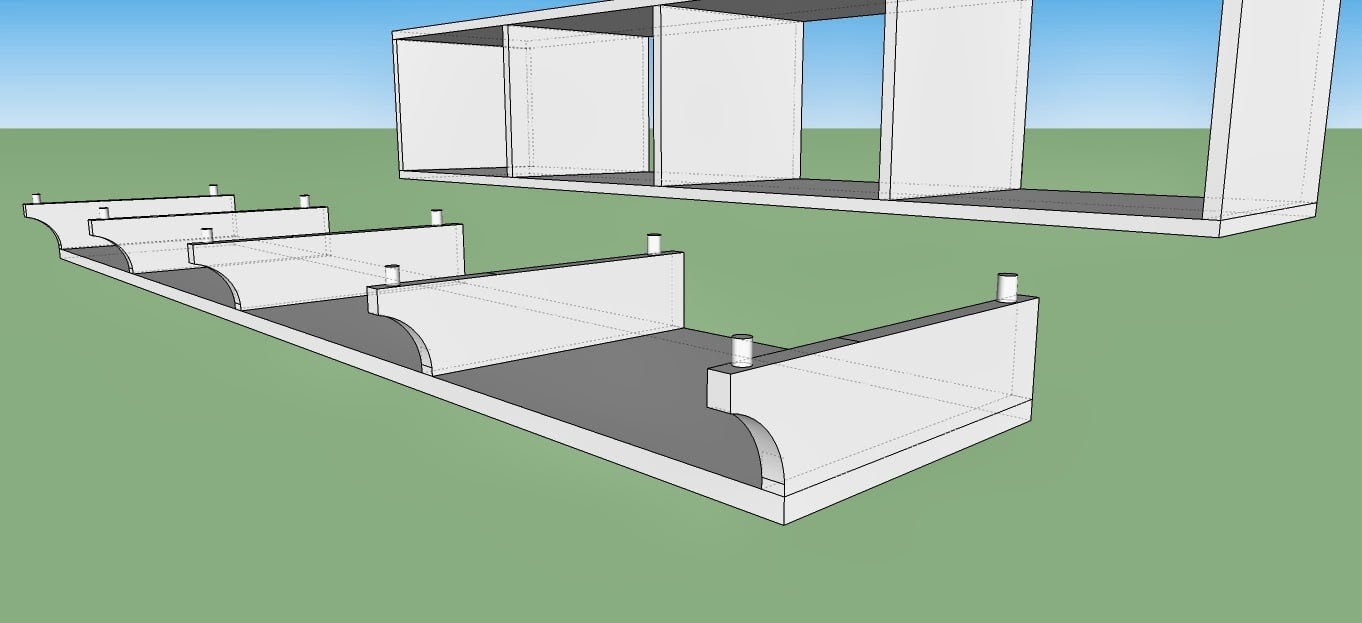
The next step is to build a base. I built a basic base out of 2x4s. I cut two pieces the length of my box above, and then measured (including the width of the front 2×4 and the back 2×4) out four pieces that would fit exactly in the footprint of my box. I screwed these together in the same manner, but from the front and back instead of the top and bottom. Make sure your 2x4s are standing tall and not lying flat. You want your box to be lifted the full height of the 2x4s. Don’t worry about how rough the 2x4s look…they will be covered with trim later.
Screw in, (with countersunk screws) through the floor of the box, into the base in several spots to secure it.
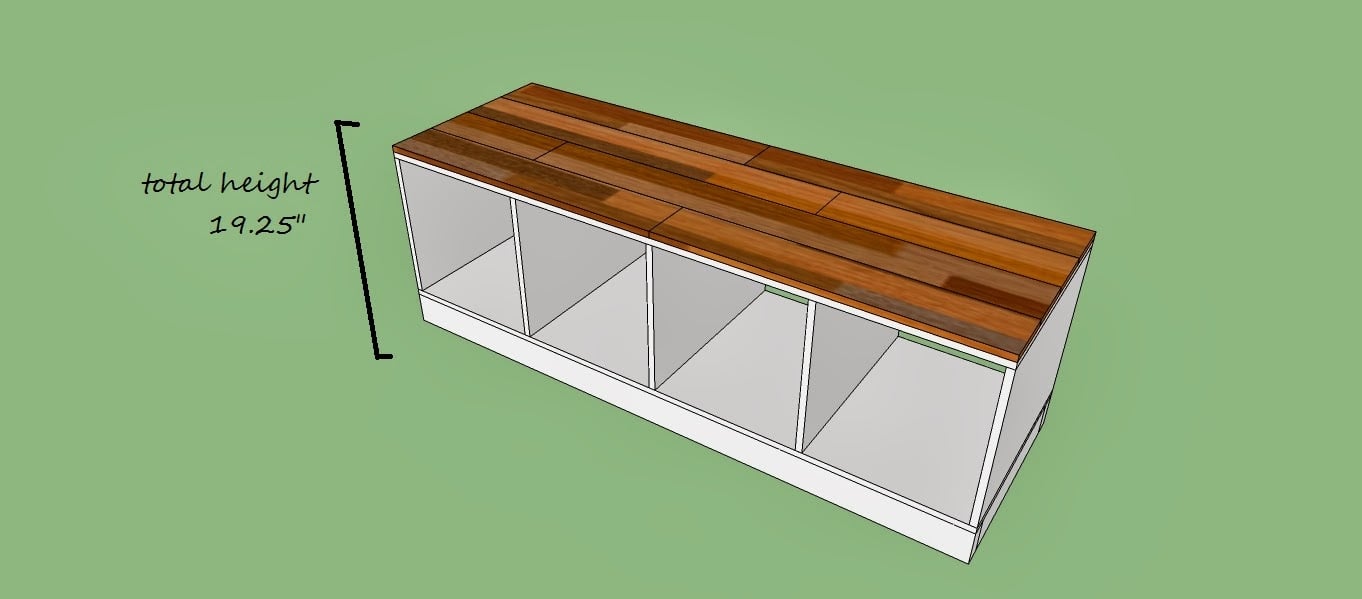
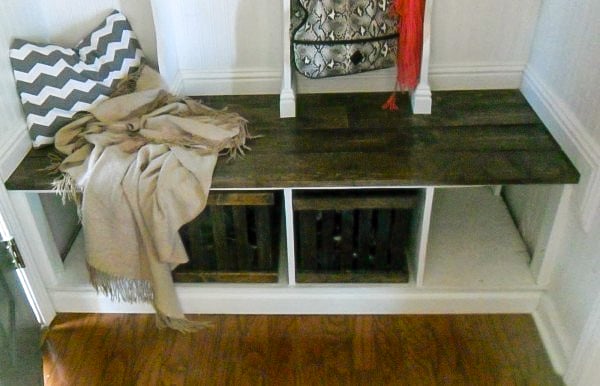
Go ahead and install your bench cabinet in it’s final resting place, and then add the wood planks to the top with a nail gun. I cut these at varying lengths to give the appearance of a wood floor. You just sort of fit them together like a puzzle. You want to install it first and then add the planks because you want the planks to sit flush with the wall on the sides. So cut these to fit the space wall to wall, instead of giving it a few inches of wiggle room on the sides. I also made the planks have a 3/4 inch overhang over the top of the front of the cubbies. I just thought it looked nicer. I Measured out which planks my locker dividers would end up resting on, and I did not attach those to the bench just yet. I left those loose, so they could be attached to the bottom of the locker dividers before they were installed on the bench. You can either stain them now, or wait to do it when everything is all finished. I waited to the end with mine.
An in progress shot of my girls dancing on the base of the project.

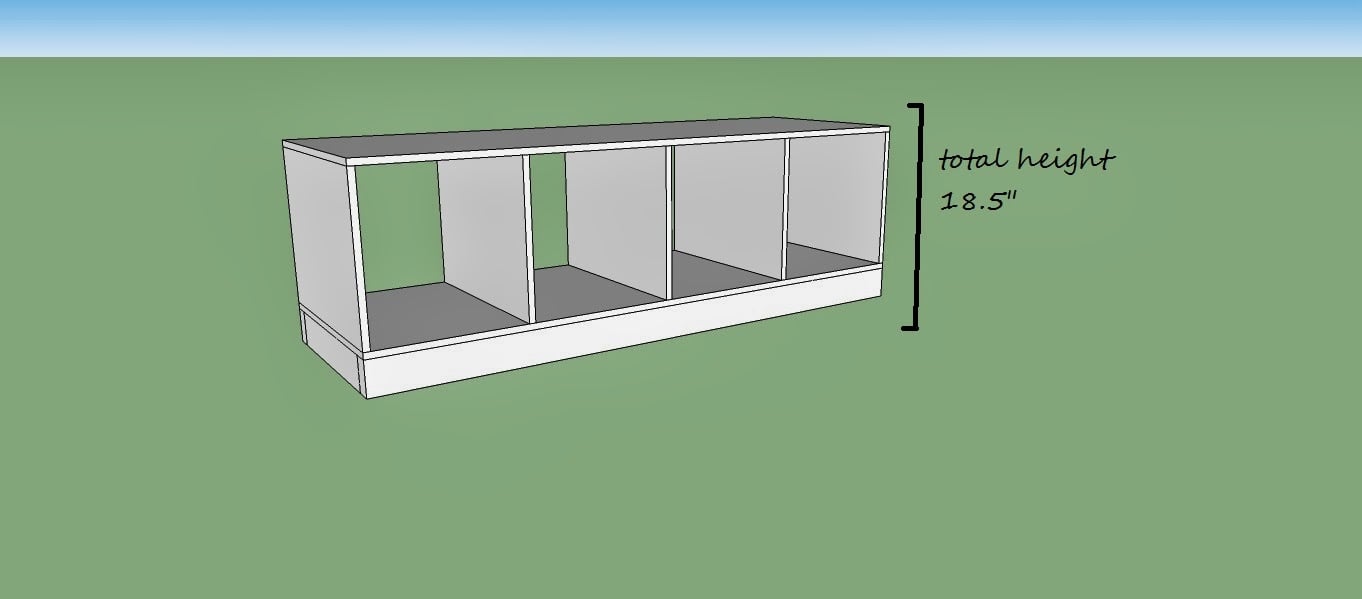
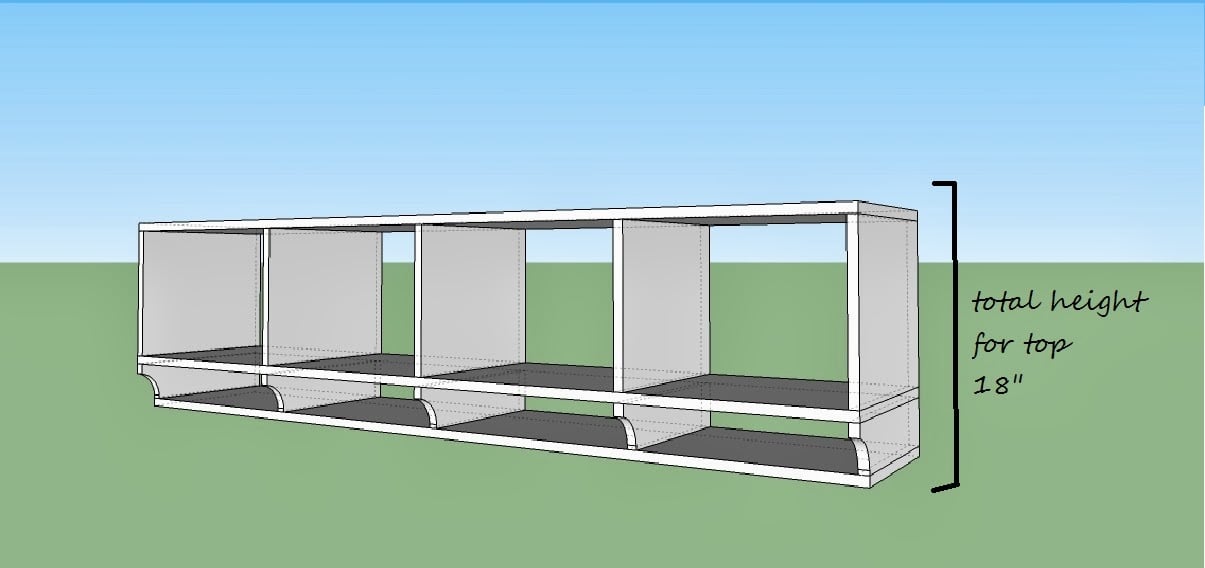
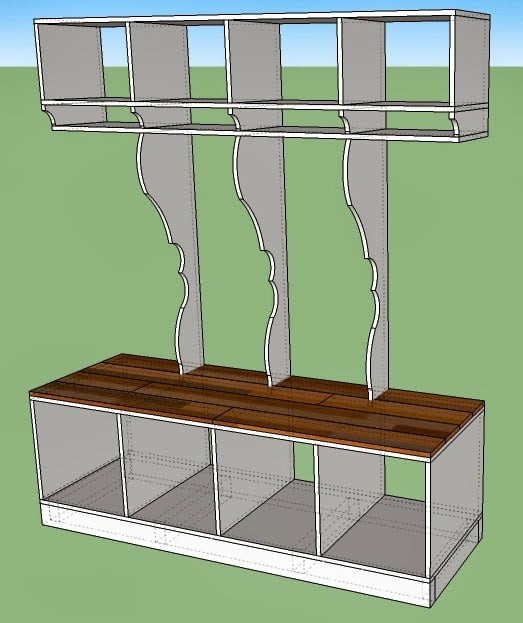
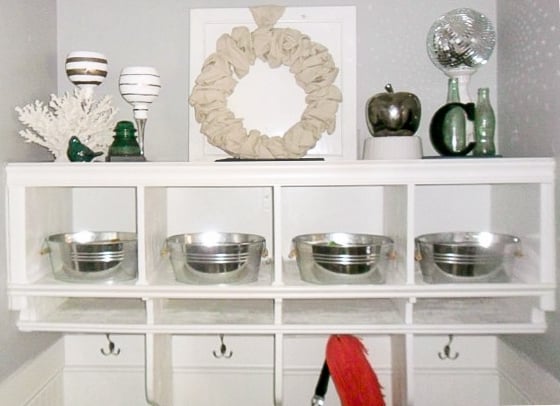
Next I built the top box. I made it to these specifications, in the same manner as the bottom box. Notice that it is quite a bit more shallow than the bench. This is to give head room when sitting on the bench.
(Note: All of the dividers in this project will line up. So it is a good idea to match them up to the previous section already built as you go…that way, even if your measurements are slightly off, they will still line up when the project is completed)
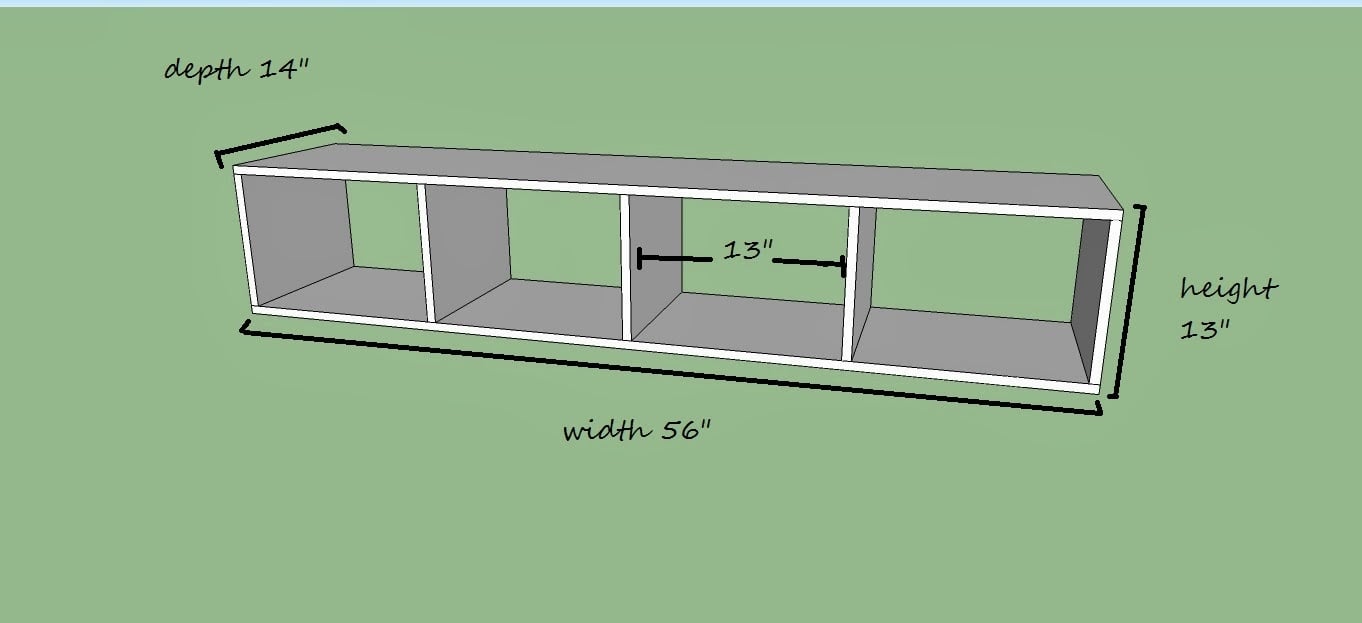
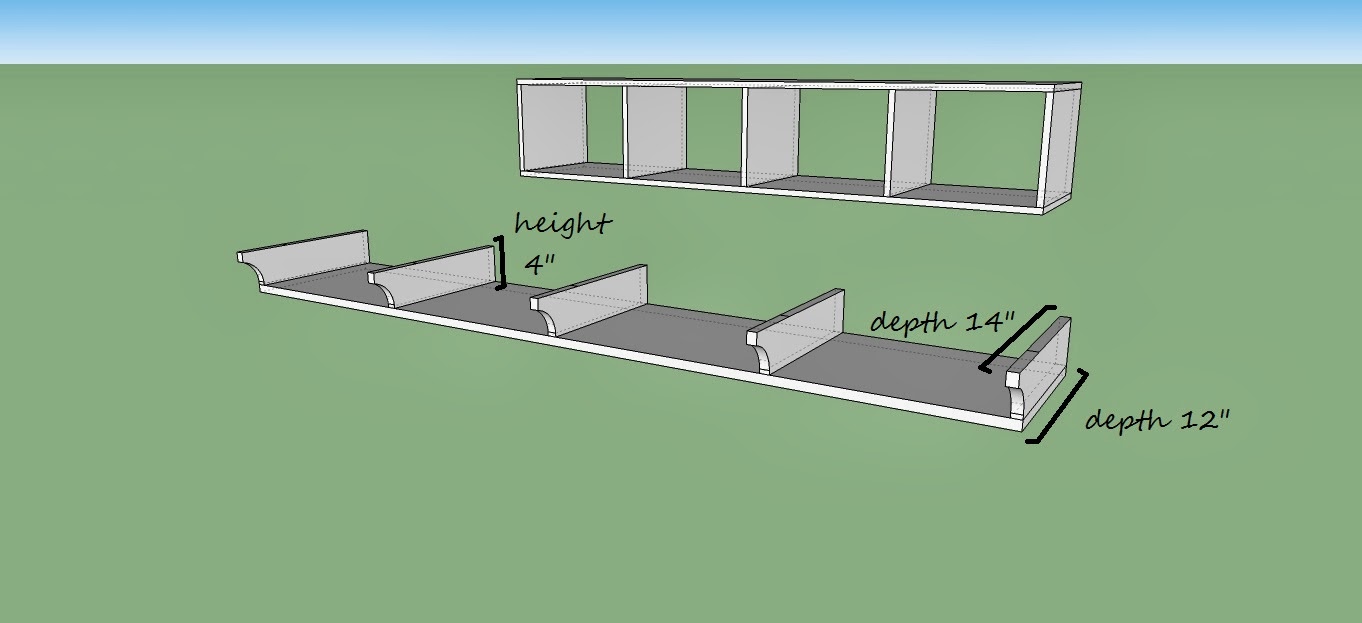
Next I added the homework shelves. I wanted these to recess a little bit underneath the top cubbies, so I cut my board 2 inches less deep. So in other words, the top cubbies are 14 inches deep, so the homework shelf will be 12 inches deep. The dividers were rectangles cut at 14″x 4″ and then I took the jig saw and made a little curve in them that cut off two inches. So that the top portion matches up with the 14″ bottom of the top cubbies and the bottom portion matches up with the 12″ bottom board that will become the homework shelf.
Here is where it would have been really nice to have a Kreg Jig. Pocket holes would have made this so much easier. I, however, got creative and used these little dowel rods. I drilled holes in the front and back of each divider on the homework shelf, just deep enough to cover half of the dowel rod, then I drilled matching holes on the bottom of the top cubbies. I added wood glue, and then the dowels, and put it all together. I let it sit under the weight of itself and didn’t work on it until the glue dried.
Here is how it should look after fitting the pieces together.
The next step was to add the locker dividers. I got three boards that were 12″ wide and 31″ long and free handed a design on the front of one of them. I decided to take the width from 12″ at the top all the way down to 6″ at the bottom. I cut out the design with a jig saw, and then traced it onto the other two boards, and then cut them out as well.
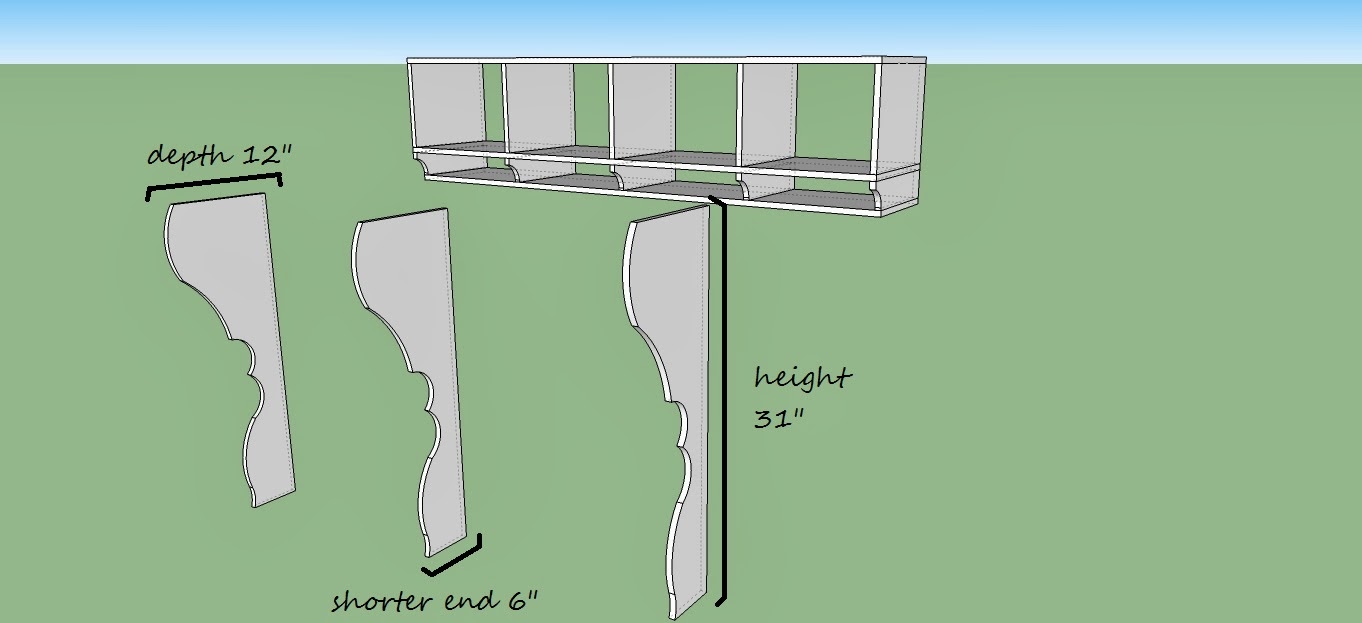
I joined these dividers to the bottom of my top cubby in the same fashion as I joined the homework shelf to the cubby….with wooden dowels and wood glue (see above).
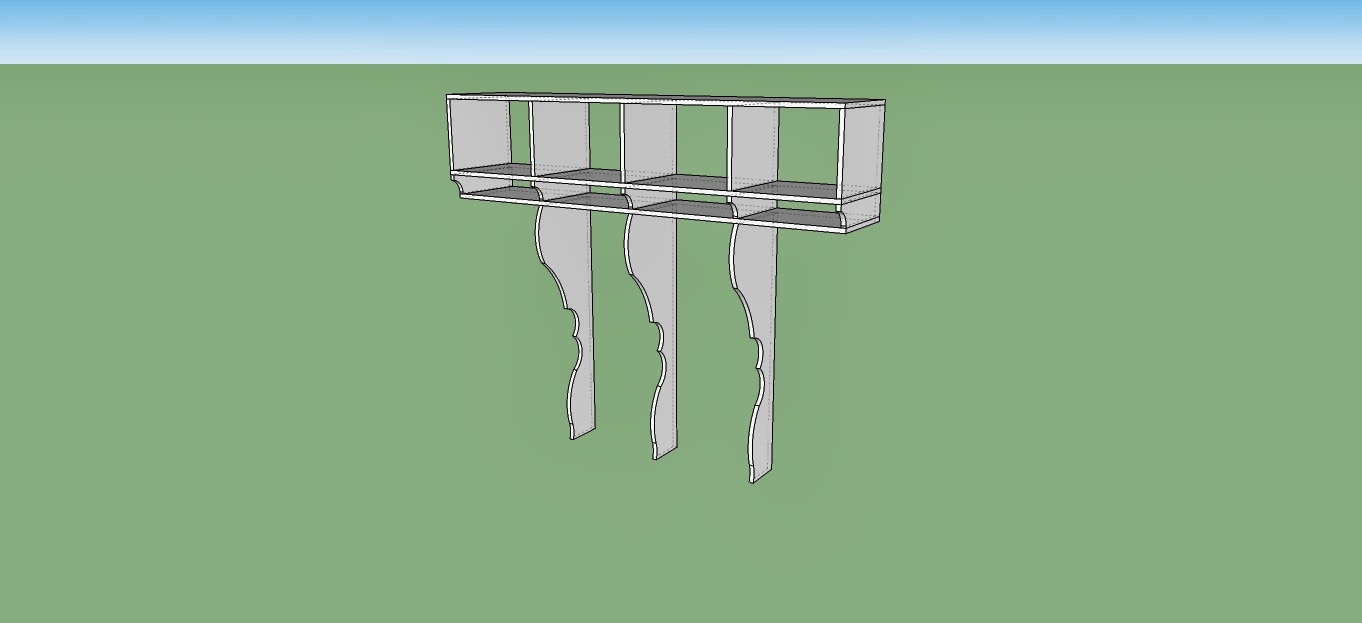
After that, I dry fitted the top portion in it’s place, with the locker dividers sitting on top of the wood bench. I traced each square of each cubby on the wall behind it, so I could see where I could line up my “L” brackets with both the studs in the wall and the top of the cubbies. I also lined up the bottom of the locker dividers with the, still loose (see above), bench boards that they will rest on. I taped them to the bottom of the locker dividers with some painter’s tape and flipped the entire thing upside down on the floor, so that I could screw the bench boards into the bottoms of each locker divider. I then put the whole unit back in place (the bench boards fit perfectly, like puzzle pieces where they belong) and installed it with the “L” brackets (with my husband’s help, because…..yikes, it was HEAVY). Once I had it hung on the wall, I nailed in those last few loose bench boards. We also added a couple of pieces of scrap plywood to the walls on either end of the top cubby. Since the cubby was cut a few inches short, we added the wood to make it sit flush against the wall. We screwed the wood into the studs and then screwed the top cubbies into the wood through the sides.
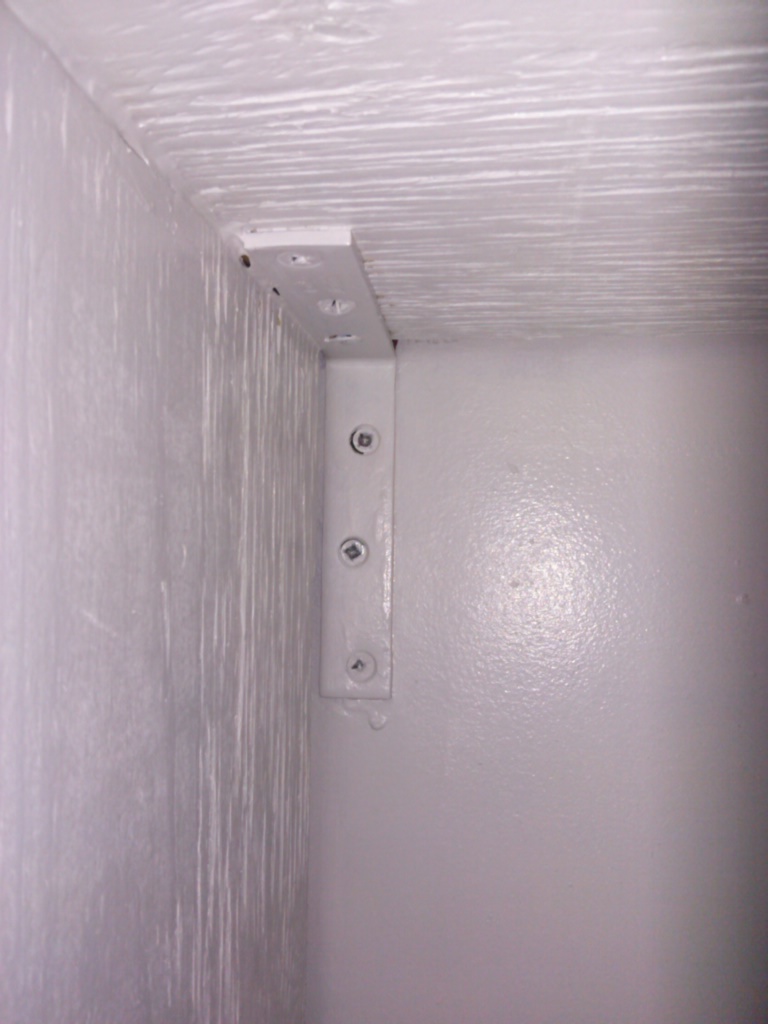
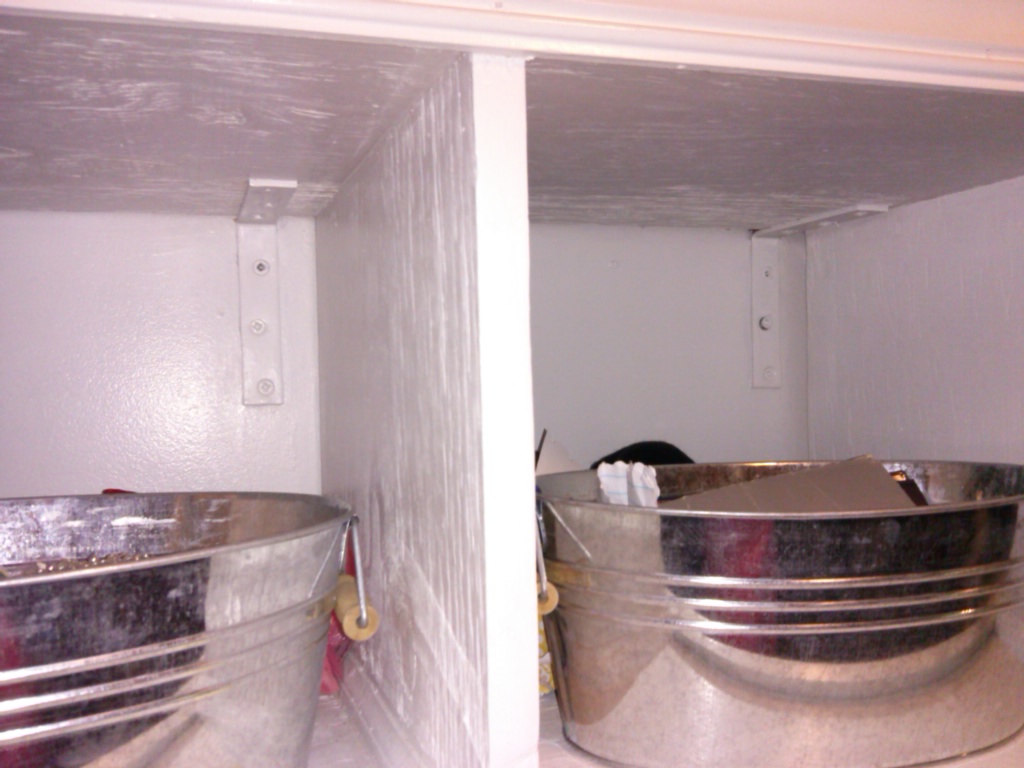
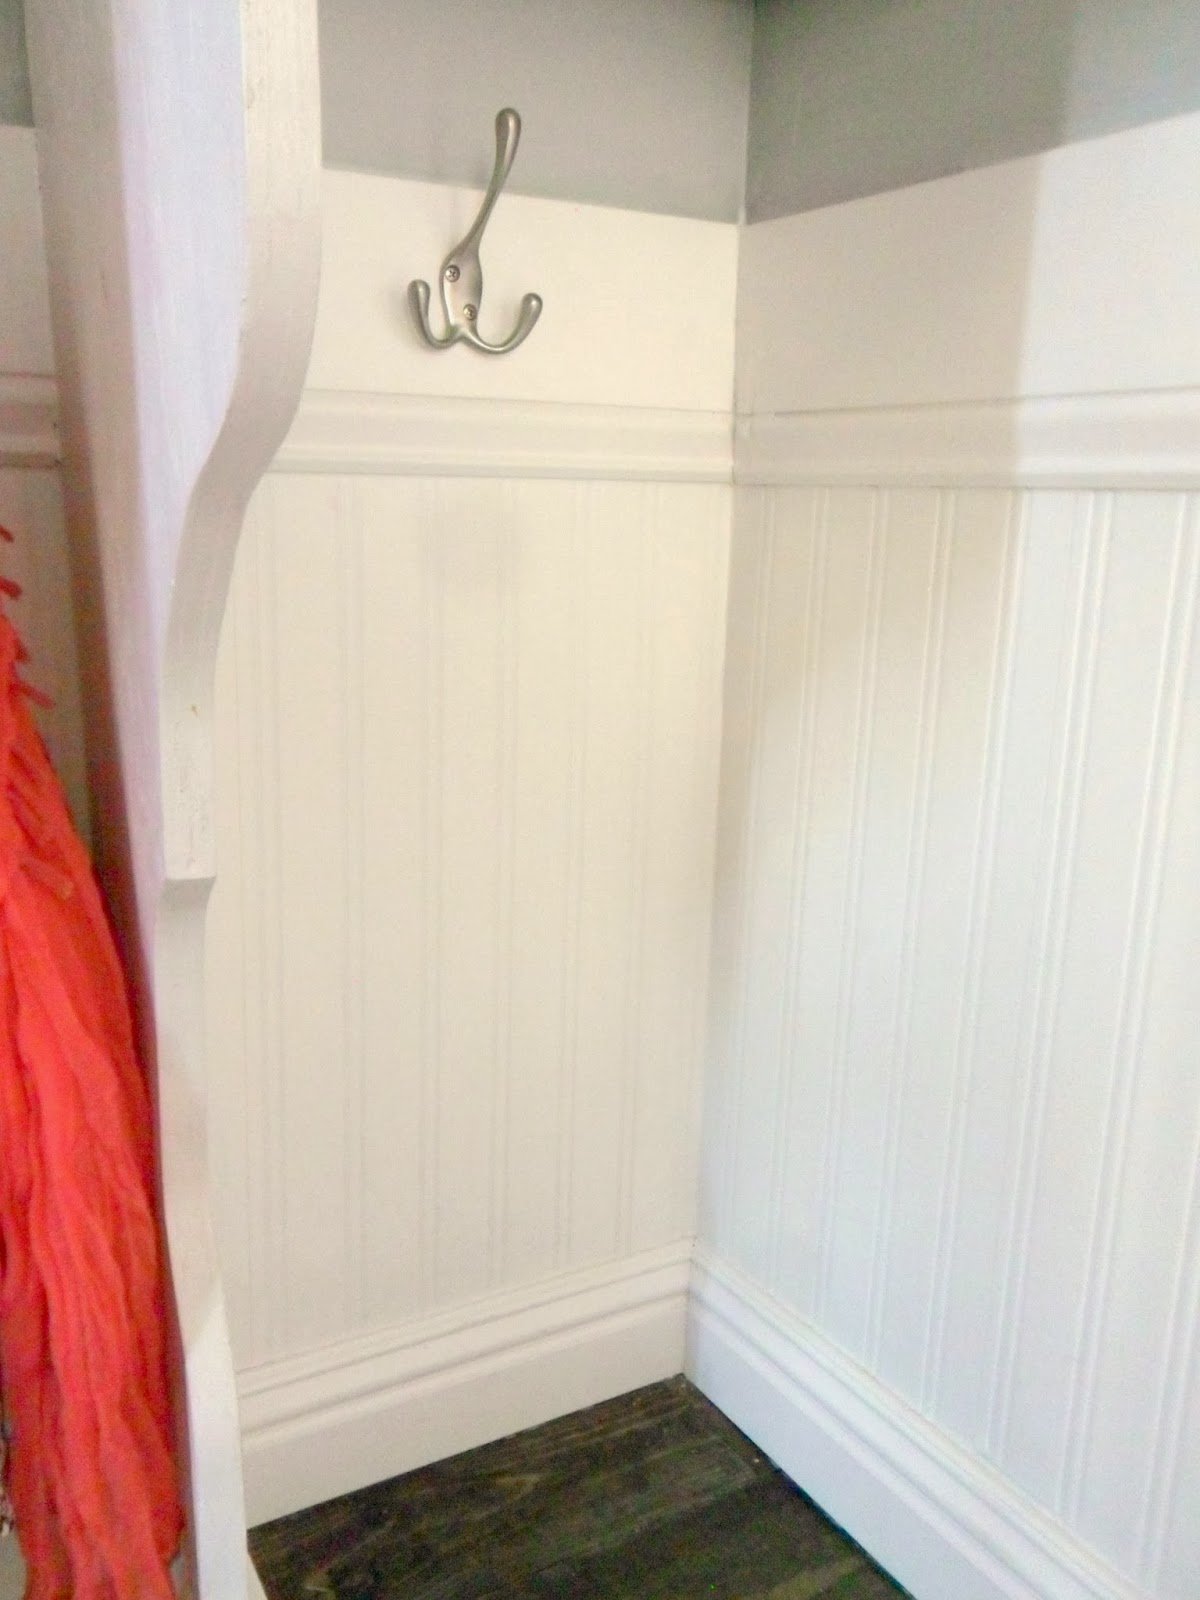
UPDATE: At reader request, here are some extra photos of the brackets. I painted them over with white paint to make them less noticeable.
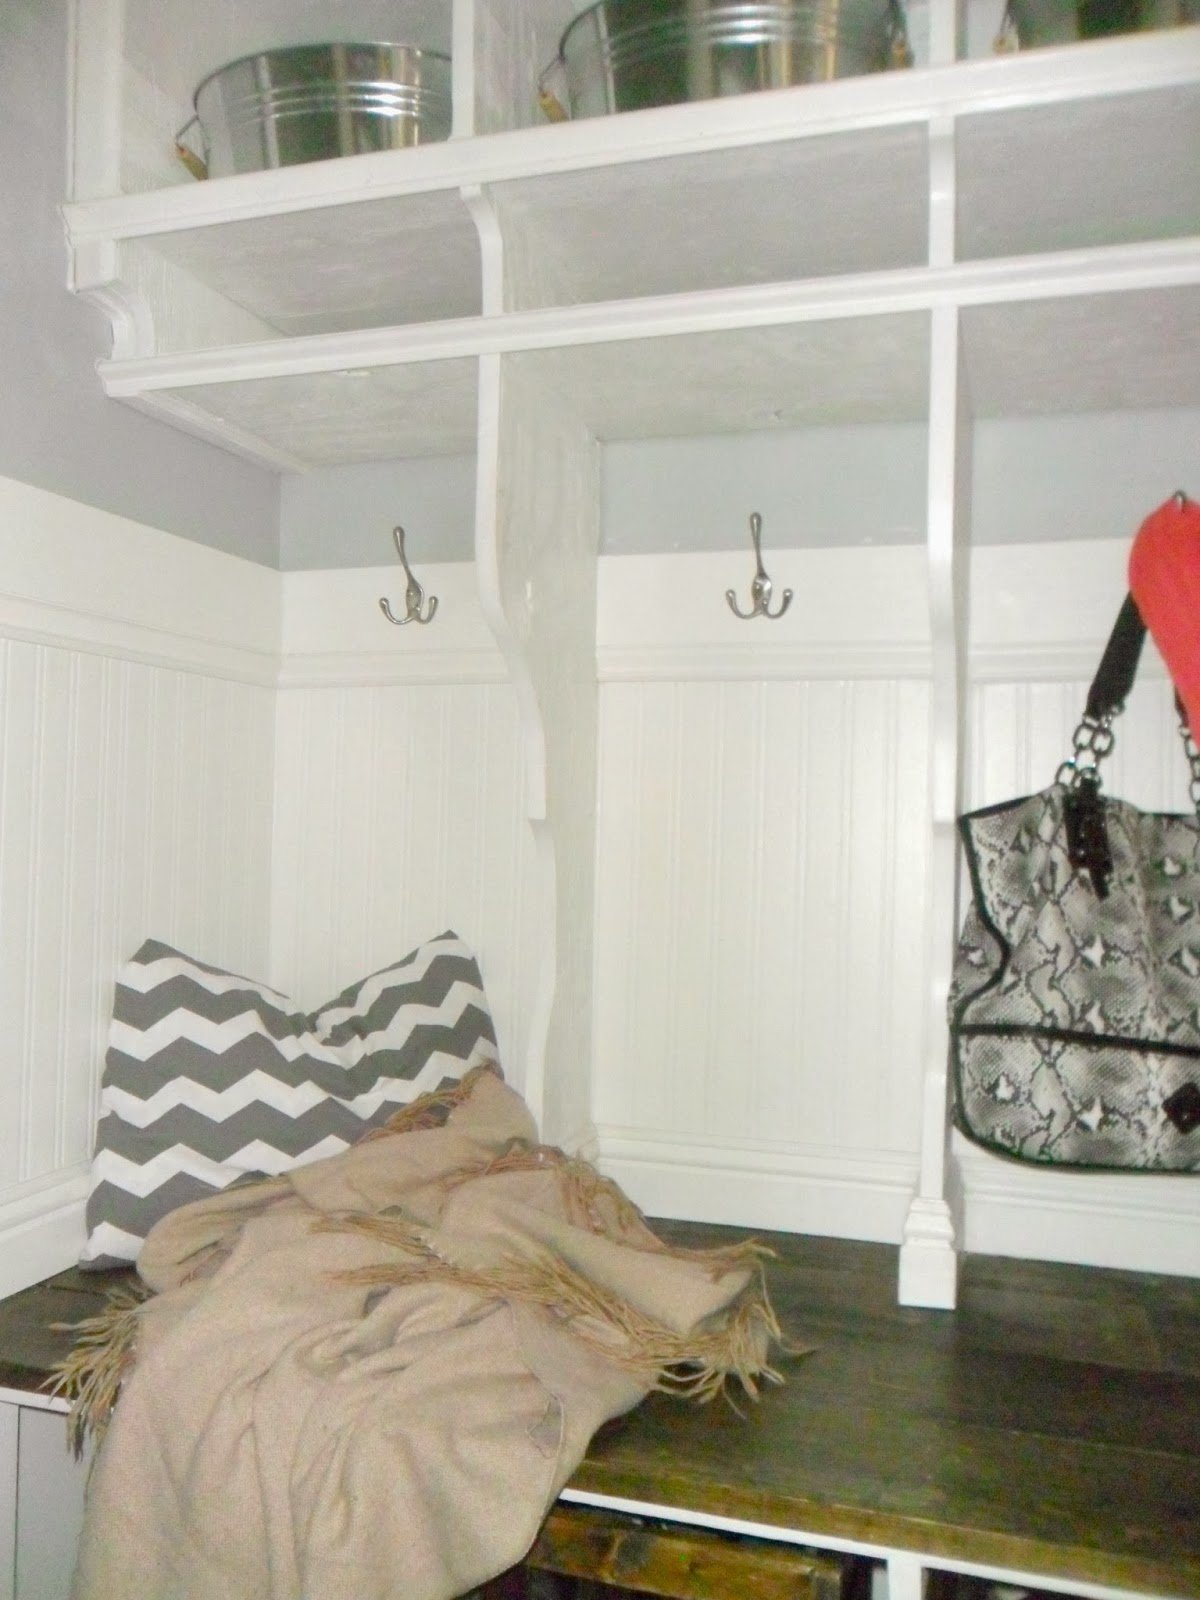
Once it was all hung, we added lots and lots of moulding all around the perimeter of the unit to cover gaps, and across the horizontal portions across the front. We also wrapped the existing baseboard across the front of the base of the bench to give it a built-in look, and then added bead board wallpaper half way up the wall behind it. I added a medium baseboard between the wall and the top of the bench seat, and wrapped around each locker divider (my favorite part) and then I added a larger baseboard, upside down around the top of the bead board wallpaper. I hung my hooks in between each divider on the larger baseboard. I was so happy to hang those hook, you have no idea!
After that, I sanded, puttied, sanded, caulked (and caulked and caulked) and then painted three coats of white semi-gloss paint on top. I didn’t even prime it…..I know….baaaad! You guys should totally prime yours!
One thing to note….yes, it’s weird that I only have two shoe baskets at the moment. I am in the process of making these and wasn’t able to get them done in time for this post. I still think it looks pretty though 🙂


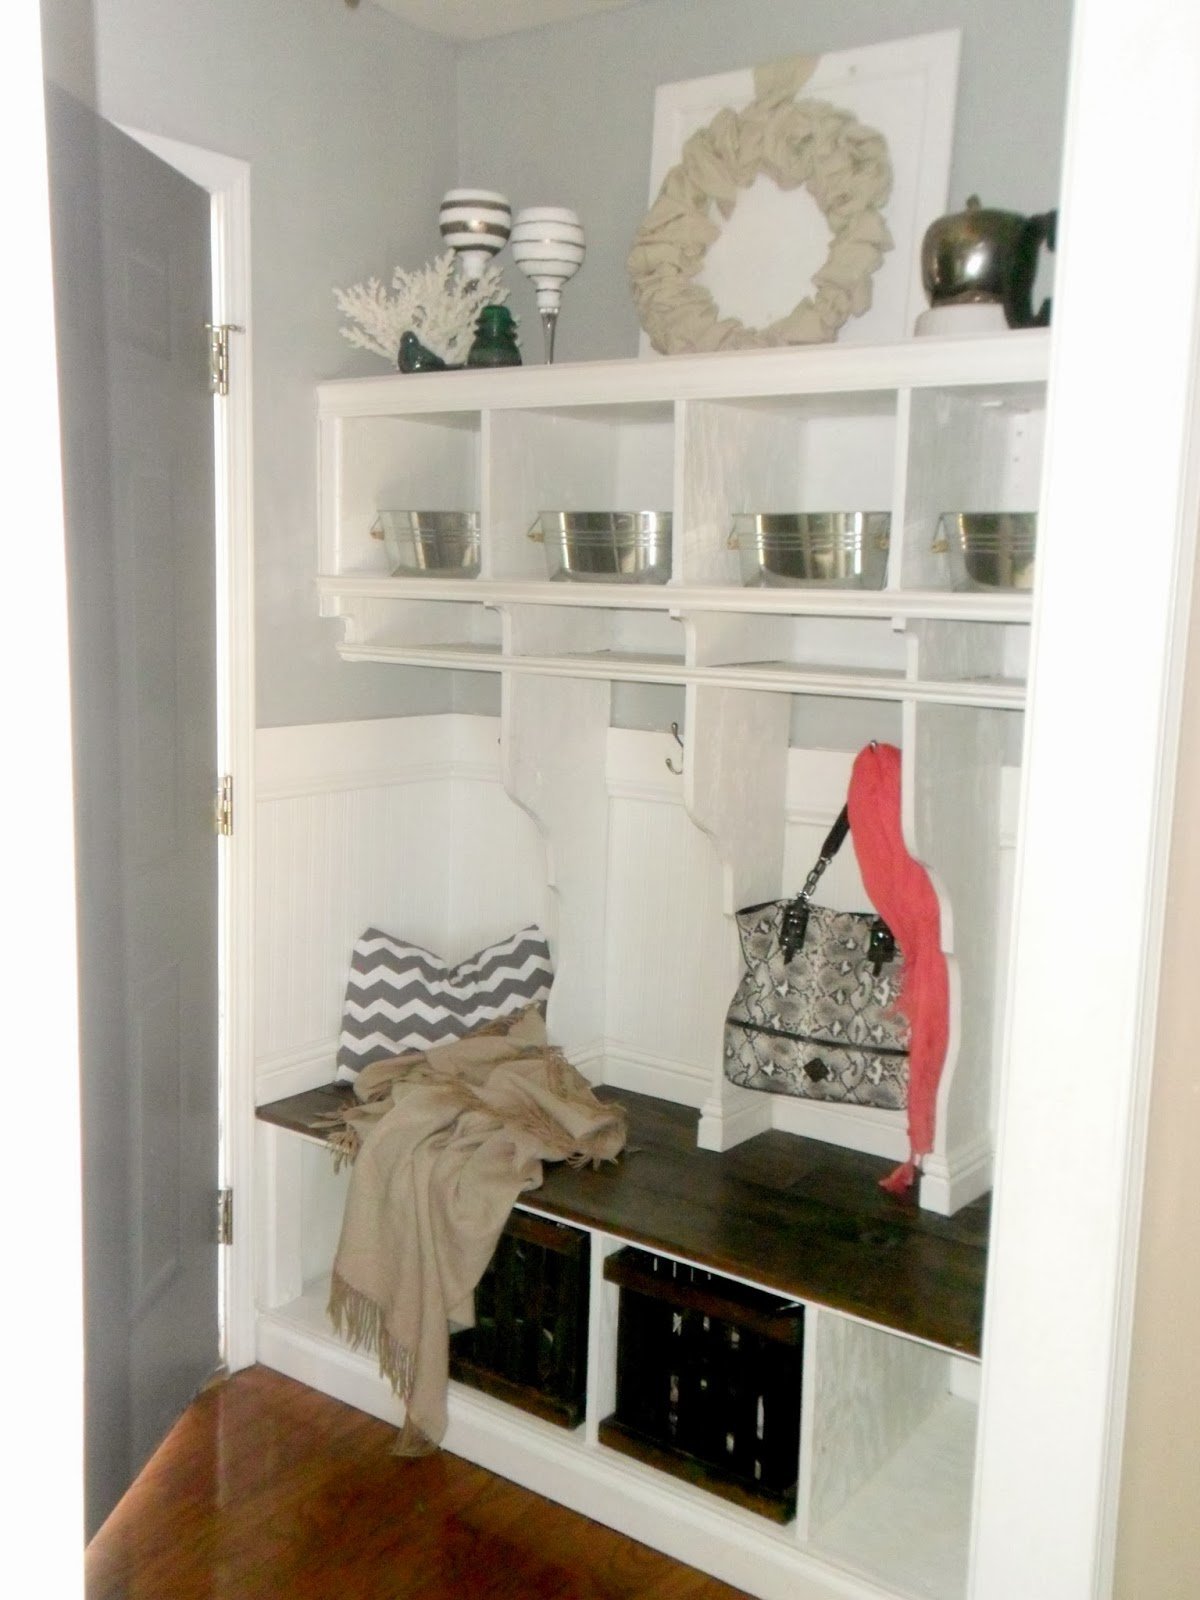
These pictures were SO hard to get. This tiny space has zero natural light. You see I had to crack the door just to let in a small amount of light.
My mother in law is a contractor and I asked her how much something like this would have cost me if I had had it done professionally, and she said about 1700. My price breakdown was
- wood $60
- screws $7
- L brackets $15
- trim $30
- paint, sandpaper, putty….already had
- polycrylic $16
- wood dowels $2
- caulk $2
This was a labor of love for me, and has turned out to be my favorite thing in the house, and the one thing everyone remarks on when they walk in my door. It also solves all of my storage problems too! Good luck Thanks for reading and happy building!
xoxo Anna
——————————-
Great job, Anna — you go, girl, building it all by yourself!
Be sure to pop by Home Heart and Hands to pay Anna a visit, and check out her tutorial for those great shoe crates!
Lorene has been behind the scenes here at Remodelaholic for more than a decade! She believes that planning projects and actually completing them are two different hobbies, but that doesn't stop her from planning at least a dozen projects at any given time. She spends her free time creating memories with her husband and 5 kids, traveling as far as she can afford, and partaking of books in any form available.


Yay! Thanks so much Cassity for this amazing feature! I am so grateful to be able to guest post on your amazing blog! xoxoxo!!!!
We are so thrilled to have you, Anna!
I can see that this was a labor of love but so worth it. It is beautiful! The mudroom cubbies are perfect. If I had a mudroom, this would be what I would want. Thanks for the tutorial. I love them. Pinning 🙂
Thanks, Crystal!
Thank you so much for the sweet comment about my mudroom! It really was a labor of love. Nothing beats the feeling you get once you’ve accomplished something that seems out of reach 🙂
Your work looks awesome! Great job!
Thanks, Jessica! Anna did a great job!
Thanks Y’all!
Great post sharing the DIY entryway mudroom. Very structural and looking very beautiful. Thanks for the share!
Anna! Awesome!! And thanks Cass for supporting guest bloggers! It’s great when someone with some legit expertise (yes, Anna, that’s you!) is able to share their knowledge and experience in an authentic forum like your site. Sharing is caring so many thanks to you both 🙂
Thanks Rheney! I’m laughing because you called me an expert! At least it’s someone else saying that and not myself…haha! And yes Cassity! You are so very wonderful to help support us little people! I was so very honored to be a guest here 🙂
Thanks, Rheney! and you’re welcome, Anna — our pleasure to have you!
Just an honest assessment, Anna ~ expertise is essentially skill, proficiency, and commentary in a given area and your results speak for themselves! Great project and great post!
Thanks again to you both 🙂
Where exactly are the l brackets in this configuration? Are they hidden by anything? Trying to find the best way to mount the upper shelving without screaming, HERE’S MY METAL L BRACKET?! Based on my room’s dimensions, I don’t think I can line up the locker spacing with the studs….
Hi Morgan! It’s hard to see the brackets because I painted them completely over with white paint. If you want me to send you some close up pictures, I’d be happy to. Just send me your email address in a private message at http://www.facebook.com/homeheartandhands. That way neither of us have to post an email address on this public comment section. Thanks!
DONE & THANKS SO MUCH!!!
Morgan,
Anna sent us some pictures so you can see them — I’m adding them to the post right now so you can see them in more detail! Thanks!
This is so wonderful, thank you for taking the time to put this article together and share it with us. I’m going to get started on mine now!
We’d love to see pictures when you’re done, Ryan!
This is simply awesome ! I am literally in the process of doing something like this . I love those metal storage tubs .Could you let me know where did u get them since it hard so find something which has wooden handles.
I got the metal tubs at target a few years ago. They were in the dollar spot. I don’t think they have them anymore. You could always email target and see if they could find them for you? Good luck!
Awesome ! And where can I find beadboard wall paper ? I checked lowes n Home Depot and none of them had them in stores .
This is the best looking mudroom, I’m using it as an inspiration for my entry way closet being turned into a mudroom. I love this!
Thanks for the comment, Magaly! We’d love to see pictures when you finish!
I love this DIY and would love more information on the plans you used. Do you happen to have any further instruction you could share or tutorial information in pdf form?
Sorry, there were no plans. I literally made it up to fit my space. If you read the instructions carefully, I do explain exactly what I did for each step of the way, but if you wanted to re-create this, you’d have to do some measuring and tailoring to your own space. Let me know if you have any questions.
Gorgeous! May I ask how you utilize the short cubbies under the top ‘tub’ cubbies? Thanks, Karen
I love this so much! I have 4 kids too, and my DIY pallet project (coat and backpack hooks) has been an improvement…. I really want an even cleaner more organized wall solution JUST LIKE YOURS! Thank you for posting such detailed instructions!
How did you get your wood so cheaply? Plywood at my home depot is $50/sheet!