DIY Farmhouse Table Tutorial
Our guest blogger had a need for a nice, new dining table that would fit more people around it. She and her husband–they are newlyweds!– like to entertain, and their tiny, two person table wasn’t working well for that. What they didn’t need was the hefty price tag that came on the high quality, larger tables they had admired.
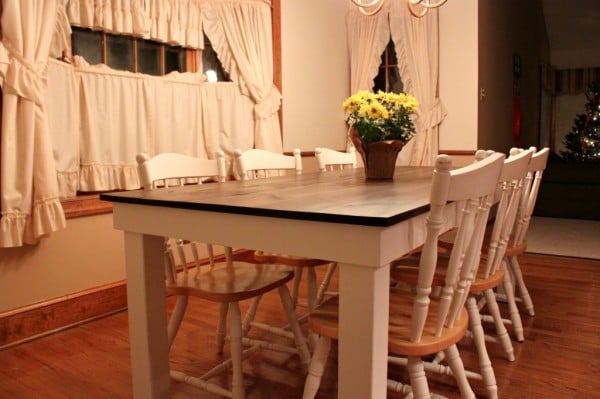
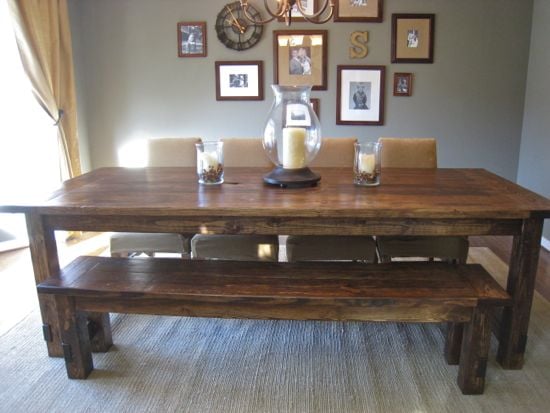
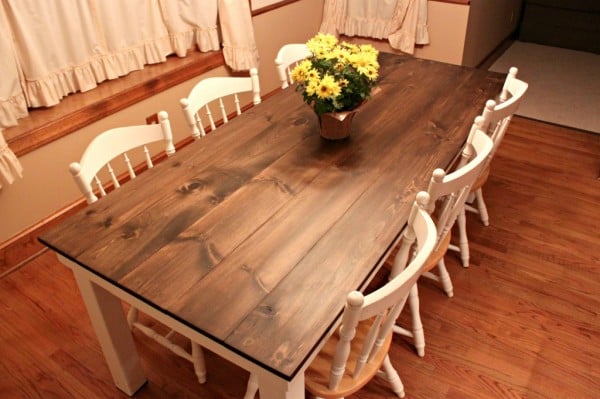
Isn’t that a beautiful table? It’s sitting in our guest blogger’s kitchen, right now, and it’s gorgeous! Its cost was under $150, thanks to our guest’s savvy research and DIY spirit. The newlyweds built it themselves! I’m starting to notice that more and more homeowners are skipping the overpriced furniture stores and DIYing their tables. It’s a great way to save some moolah and get exactly the style and size of table that you’d like. Here are some examples:
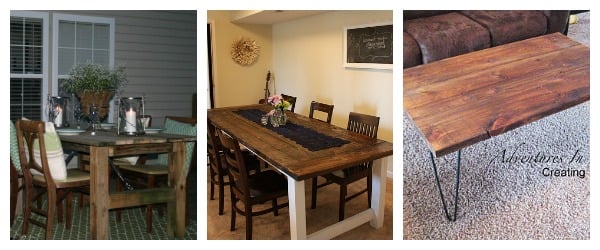
Rustic Table | Design Happens
Dining Table from Reclaimed Door | Instructables
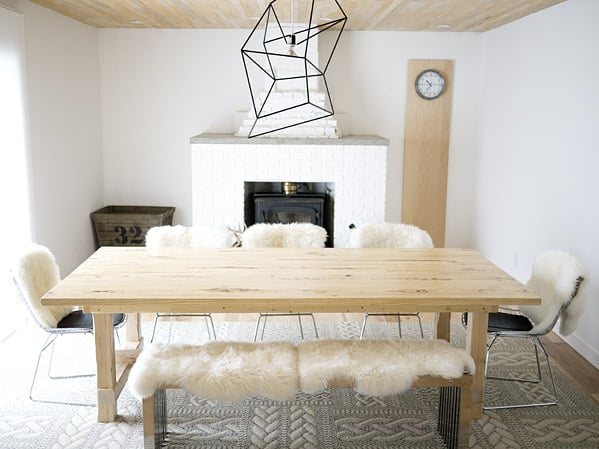
Farmhouse Table | Tommy & Ellie
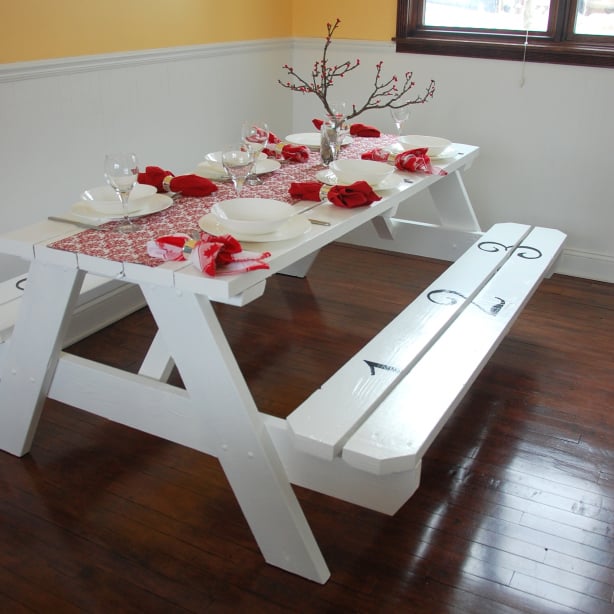
Picnic Table Makeover | Making My House a Home
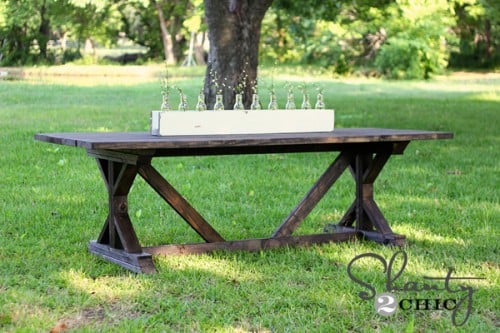
Fancy X Farmhouse Table | Shanty 2 Chic
Let’s find out now how Ashley and Jesse got the table of their dreams at a price that most homeowners only dream of!
Submitted by: Attempts at Domestication
Hi! My name is Ashley and I blog at Attempts At Domestication. I’m a newlywed housewife from Richmond, VA. My husband, Jesse, and I met as kids and dated all through college before getting married in April 2011. We love traveling, watching movies, hanging out with our friends, cooking and Star Wars. I blog about my attempts at DIY, crafts, throw in a lot of random stuff about my life and share recipes from time to time too. My husband and I recently bought our first home so follow along as we make our new house truly ours.
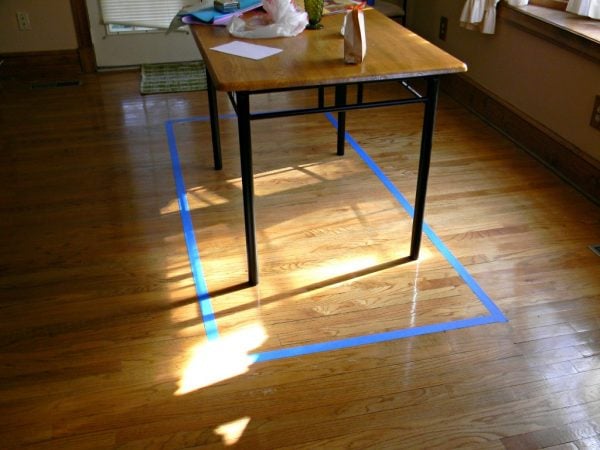
When Jesse and I first started this project we did a whole lot of research on how best to go about building our own table. Jesse and I went searching for plans for our own table on Ana White’s blog. We found that her Rustic Table plans best matched what we were looking for, but Jesse being the detailed person that he is didn’t just want to take her measurements and run with them. So we taped off the floor around our old table to decide how large we wanted our own table to be.
Then we went to Lowe’s with our measurements and got all of the supplies we needed. Jesse had the day after we bought all of the supplies off work, so he started working without me. But he was a good little blogger husband and remembered to take some pictures.

He basically followed Ana White’s plans to a T.
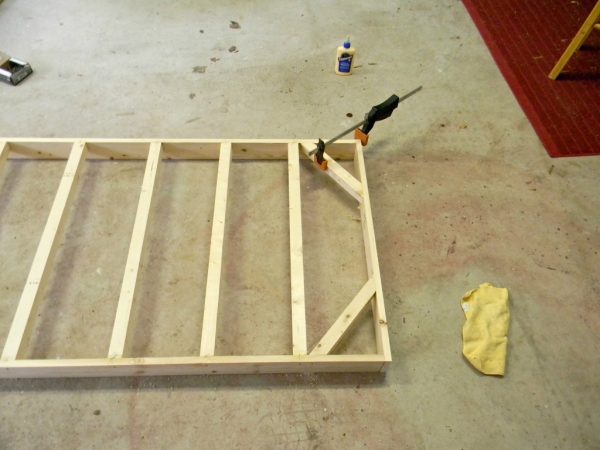
Until it got to the legs. Ana White used 2×4′s for her legs, but Jesse and I decided we liked the look of chunkier 4×4 legs instead.
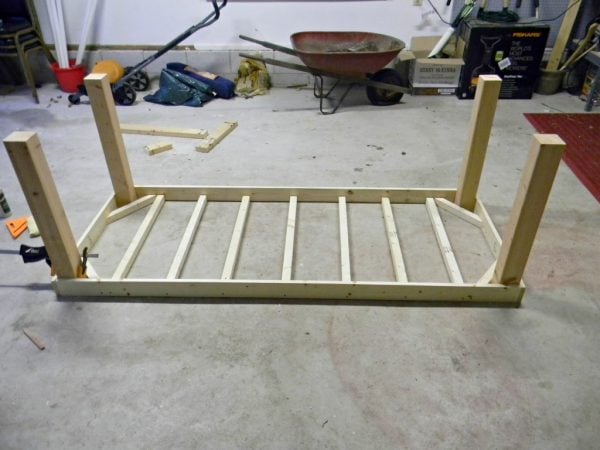
Jesse also did things in a different order, like attaching the legs to the apron before attaching the table top. This did make everything way easier when it came to painting, no tape needed.
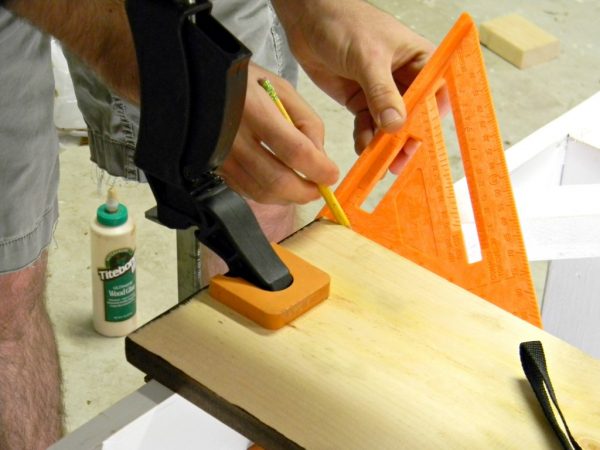
We also stained the bottoms and sides of the tabletop boards before attaching them to the apron. After the top was attached I stained the top side and applied about 3-4 coats of Matte polyurethane. I like the matte finish because it doesn’t add any sheen and makes things look even more rustic; however, we’ll have to add a regular coat of poly as well because the matte is too soft for something that will see such rough use over the years.
And now for what you’re all wondering about, how much did this project cost us?
- Wood – $86
- Stain (Dark Walnut) – $7.77
- Paint (Olympic Snow Storm) – $11.97
- Polyurethane (Rustoleum Matte finish) – $11.93
- If that is all we needed to buy then our total would have been: $117.67
But Jesse decided that he needed a new drill and we accidentally ruined our brushes and had to buy more, plus we were out of sand paper. We actually ended up still spending just a little over $300, which is still WAY cheaper than we would have paid for a table anywhere else. The chairs are also new purchases, but after I sold our old table and chairs for $80 these chairs ended up only costing us $10. When the weather gets warm again I plan on spray painting them all solid white.
Congratulations on your beautiful, new table, Ashley! Thanks for sharing it with us. Remodelaholic readers, if you’ve enjoyed reading about this DIYed table, here are a few more of our posts that you might like:
DIY Outdoor Dining Table | Farmhouse Dining Table | Reclaimed Wood Coffee Table


Ashley’s table is beautiful! She and her hubby did a great job =)
What a beautiful table that turned out to be, I especially like the color they choose to stain it. Such a rich brown. Thanks for sharing!
This is impeccable timing!! I’ve been eyeing tables just like this on furniture sites!! Thank you for sharing and Ashley and Jesse for making it look so easy!!
I loooove a DIY farmhouse table! Too bad I didn’t have better skills before I bought our dining room table…. 😉
Bummer! But I am sure there are plenty of other projects you could take on! That is the fun part about our home! There is always a ton of stuff to do!
Ashley, what a beautiful table. To think, you and your husband have only just begun your life together, this table will certainly hold many happy memories in the future for the both of you and your friends and one day a family of your own. I can’t wait to see what else you and your husband accomplish together.
So this might totally give away my ingorance, but how do you go about attaching the table top boards to each other/to the apron?? I have no woodworking experience, but I would really like a table like this, so I might brand out and just go for it lol
An “L” bracket on the underside would be the way i would do it. Something like this.
Magnificent items from you, man. I have take into accout your
stuff prior to and you are simply extremely fantastic.
I actually like what you have got right here, really like what you are saying and the way
in which you assert it. You are making it enjoyable and you
still take care of to keep it smart. I can not wait to learn far more from you.
That is really a great web site.
Did you find that the table was sturdy without any kind of support between your 4×4 legs? Most designs I’ve seen have a 2×4 stretcher between the legs and also extending the whole length of the table connected to the stretchers that are connected to the legs.
Thoughts?
Gorgeous job! We were in the same predicament many years ago and we took our existing farmhouse tabletop and added stair balusters to turn it into an island. We got the look we wanted for a price we could afford!
What kind of wood did you end up choosing? It turned out beautiful.
Hi Krista, This post is from a guest and I’m not sure how often she checks back in on these comments, so your best bet to get your question answered is to click over to her blog (linked up at the top of the post). And if you build one, send us a picture! 🙂