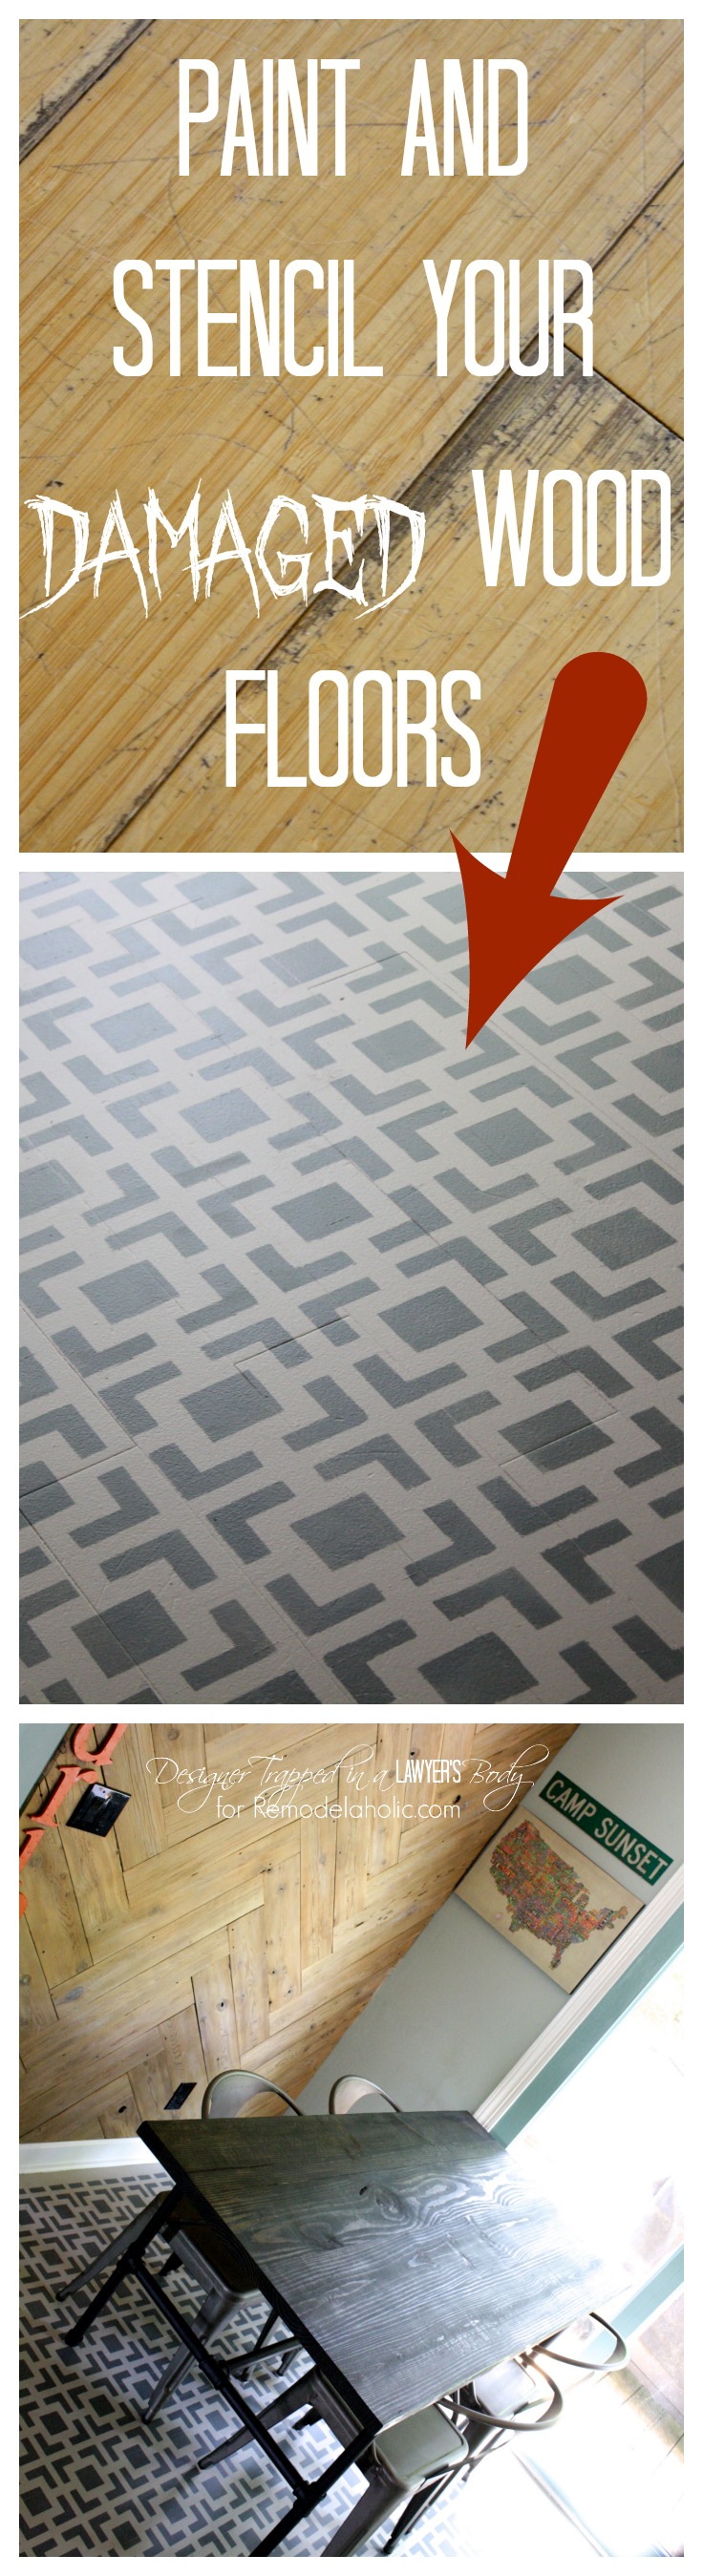
High Style, Low Cost Painted and Stenciled Floor!
Hello Remodelaholics! There are no words for how excited I am to be contributing to Remodelaholic! I am Tasha and I blog over at Designer Trapped in a Lawyer’s Body. You may remember my first contributor post about how to transform an outdated, cultured marble vanity with concrete. I am so happy to be back again this month to share another thrifty, high impact design idea with you!
My blog focuses on thrifty DIY renovations and I am here to share with you one of my favorite DIY projects that I have ever tackled! I have seen many creative ways to address damaged or outdated floors, like here and here on Remodelaholic. My favorite way to update an outdated or damaged floor on a tiny budget is to use PAINT! There have been some fabulous painted floors shared here on Remodelaholic, like here and here. You may have even seen how I painted my ugly vinyl laundry room floors over here on Remodelaholic when I guest posted about my high style, low cost laundry room renovation.
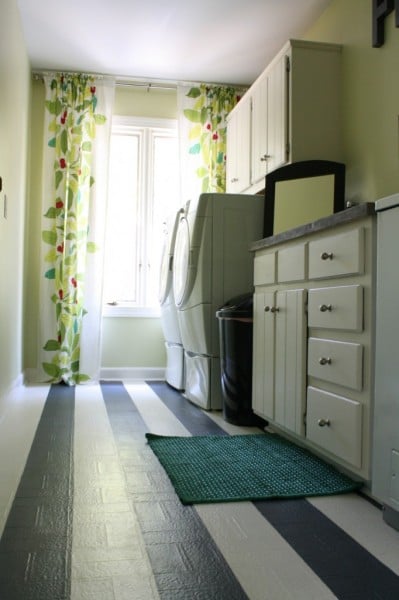
Well, we LOVE our painted laundry room floors so, so much and they are holding up so well {perfectly, in fact}, that when it came to deciding how to update our badly damaged bamboo floors in our kitchen, we knew we wanted to paint them. Not only do we love the look of painted floors, but we simply did not have the budget to refinish our floors {nor did we really love the bamboo flooring anyway}.

So, we quickly decided to paint our kitchen floors, but this time, we decided to take it up a notch by stenciling it! And today, I am going to provide you with a detailed tutorial of how we did it so you can do it yourself.
How to: Painted and Stenciled Floor
This post contains some affiliate links for your convenience. Click here to read our full disclosure policy.
Materials Needed:
- Trisodium phosphate {TSP}
- Paint brush
- Porch and floor paint in two different colors {it MUST BE porch and floor paint}
- Latex primer
- Large paint roller frame, roller and extension rod
- Small paint roller frame and dense foam roller
- Paint trays {one large, one small}
- Stencil of your choosing
- Paper towels
- Card board
- A whole, whole, whole lot of patience
Steps:
1) Prepare the surface- I cannot over emphasize the importance of this step. You must thoroughly clean your floor. We used TSP and mixed it according to the directions. We literally scrubbed the floors on our hands and knees and then hand dried them. I think rushing this step could compromise the whole project, so take your time and do it right.
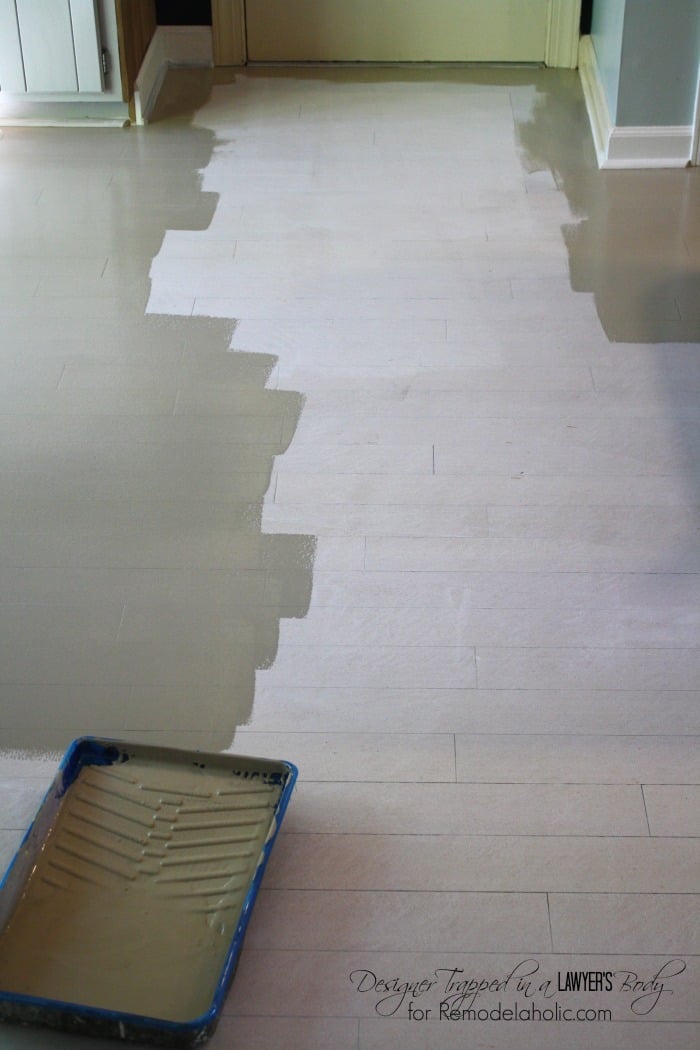
2) Prime the entire floor- Using your large roller and extension rod, prime the entire floor. You will need to use a paint brush to cut in along the base boards. We allowed the primer to dry overnight.

3) Paint the entire floor with your base color- Again, using your large paint roller, you need to paint the entire floor with your base color. Double coat if necessary. Again, we allowed the base coat to dry overnight.
4) Stencil your floor- This is the fun part, but I am NOT going to lie… it is time consuming. It was not difficult, it just took a long time. I highly recommend listening to an audiobook while you work. That’s what I did 🙂 I used the Hollywood Squares stencil by Royal Design Studio. I LOVE the modern, contemporary look of it, but you can absolutely choose a more traditional stencil depending upon your own personal style!
We started by taping off the perimeter of our room with 1 inch painter’s tape. This was a personal choice. You can run your stencil all the way up to your baseboards if you choose.

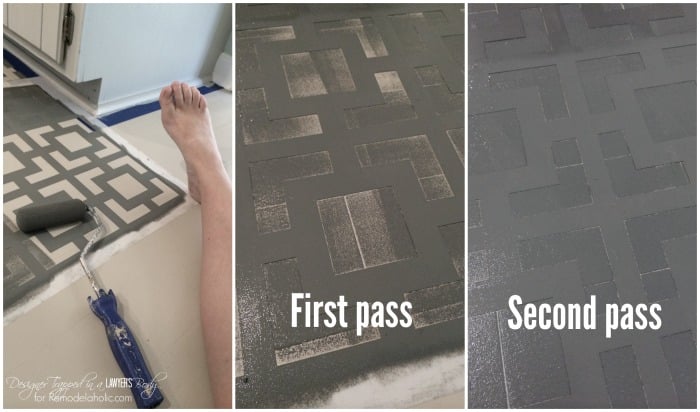
Next, gather your supplies. You need your small, dense foam roller, paper towels and a piece of cardboard. Plus, of course, you need your secondary paint color in a small paint tray. You need the paper towels because you want to work with an almost totally dry roller–this will help prevent the paint from bleeding under your stencil. Every time you add paint to your roller, be sure to roll it over the paper towels to remove most of the paint.
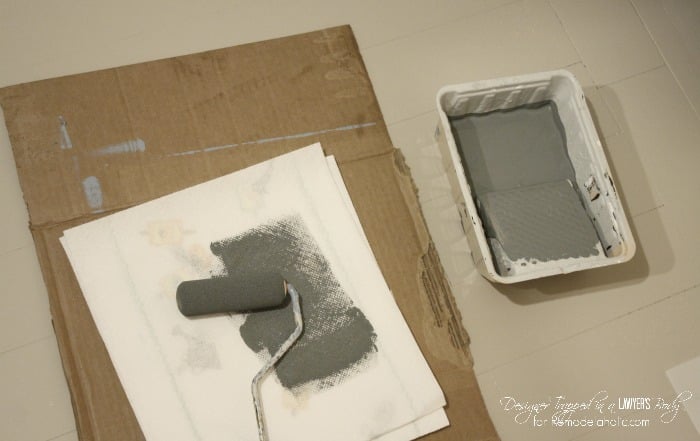
Because you will be working with a mostly dry brush, you will make two over the stencil each and every time you reposition the stencil. After the first pass, you will have poor coverage. After the second pass, you will be in good shape.
After you have good coverage, carefully lift and move your stencil to the next spot. Be sure to line it up using either the registration marks on the stencil. Or, you can do what I did, which was to line it up using the stencil pattern itself {because I kept getting paint on my registration marks and they were hard to see!}. Repeat over and over again until your entire floor is covered.
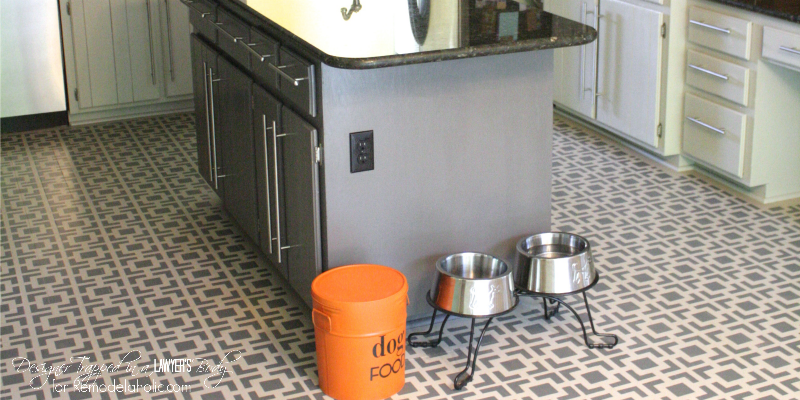
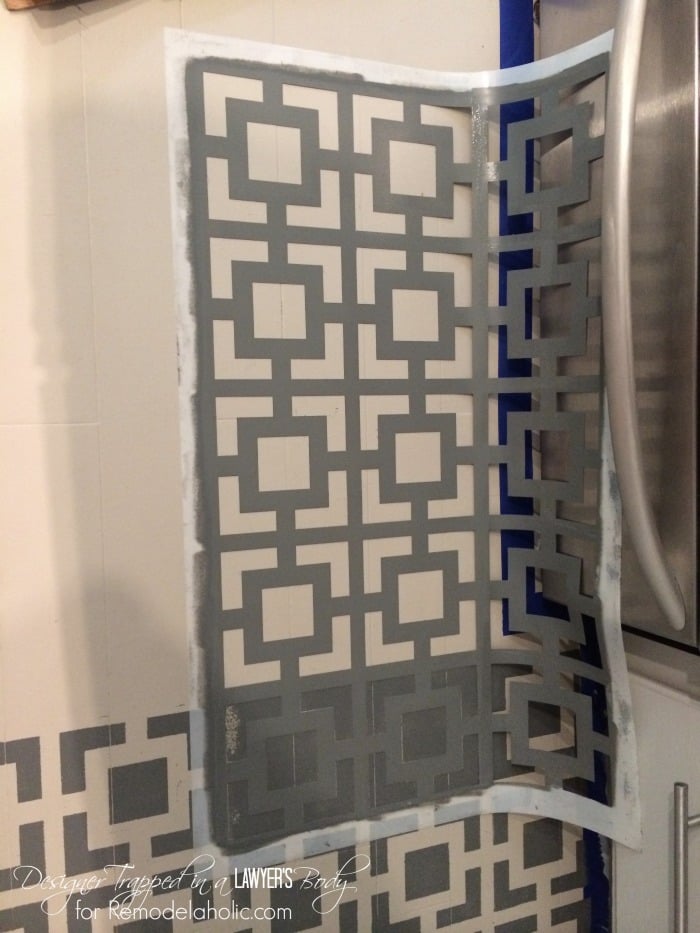
I stenciled the perimeter edges last, because that is the most tedious work. To see how to position your stencil when working around the perimeter of cabinets or appliances, check out the photo below.
Time Spent and Cost:
You can complete this project for around $100, depending upon the size of your room. The stencil I chose retails for $45 and the paint we purchased at Lowe’s is $27 per gallon–we used two gallons {one of each color}.
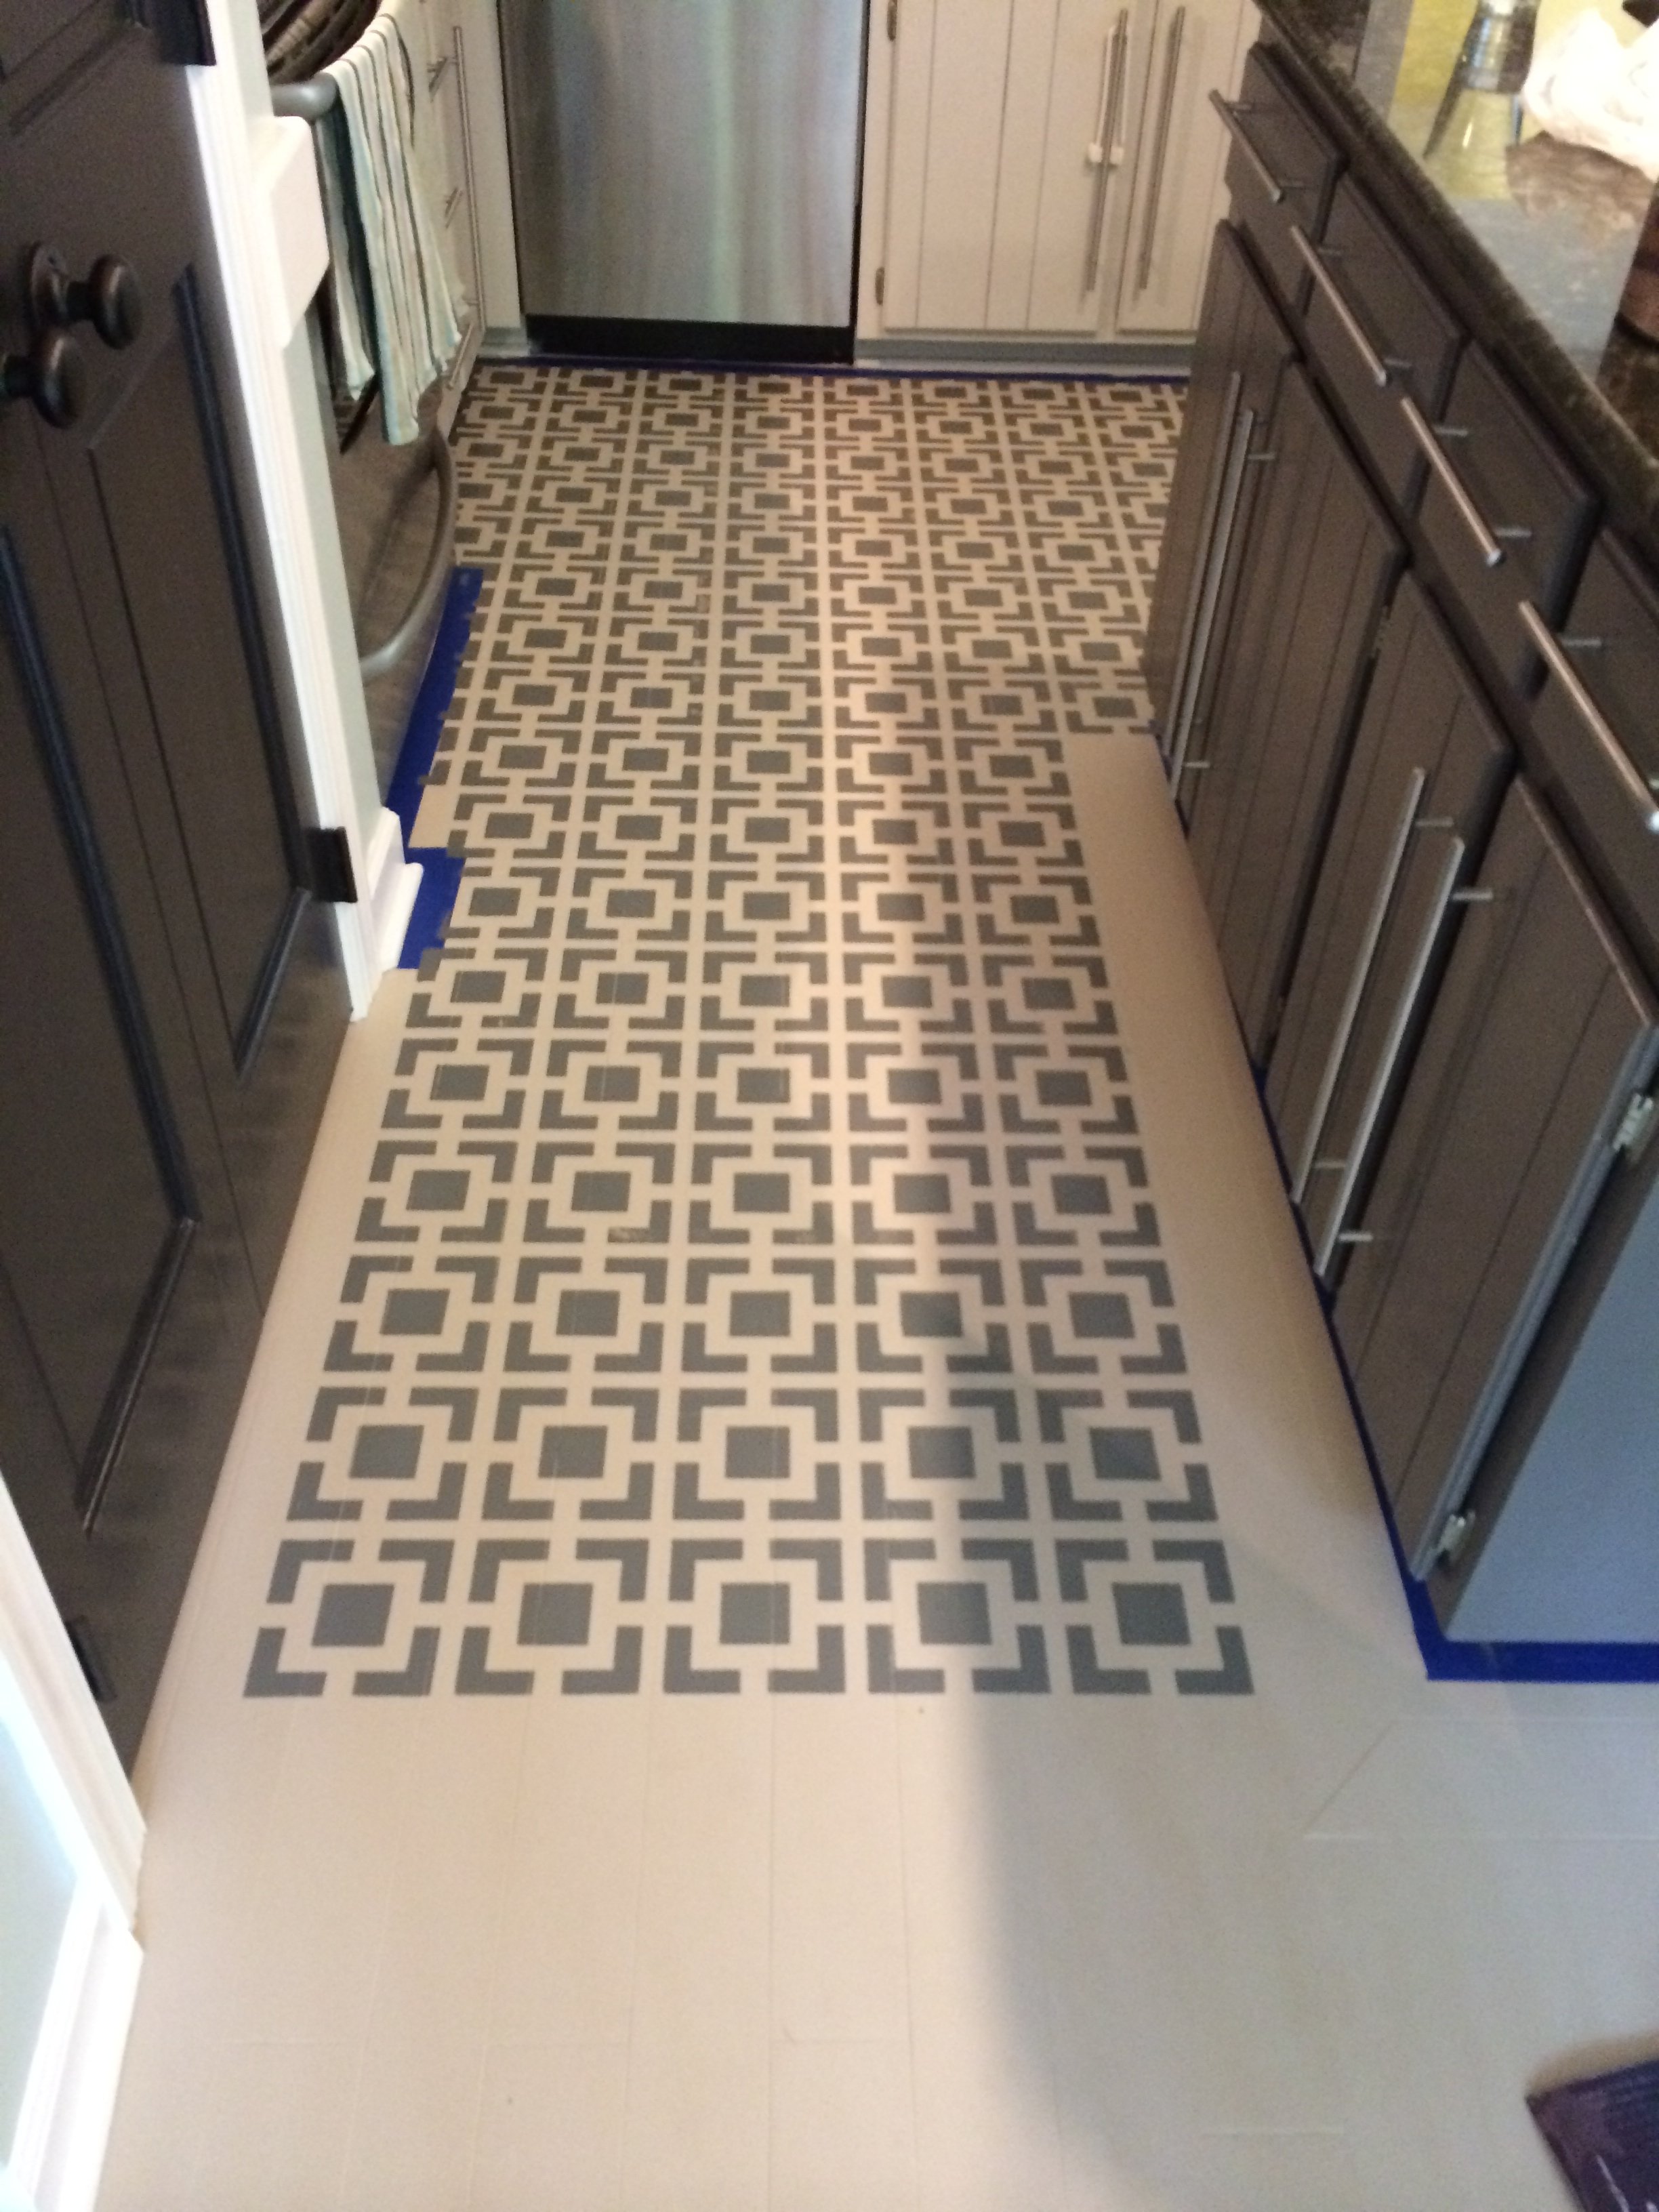
I didn’t time myself, but I believe it took me around 5 hours to stencil the floor, plus another 2 hours or so to prep, prime and paint the floor with the base coat. So, again, it is a time consuming project, but it is one of my favorite projects of all time, so was 7 hours WELL spent! Check out the stunning result.
Tips and Observations:
I am sure some people may disagree with this tip, but I recommend working from left to right to complete and entire row BEFORE beginning your next row. Think of it like reading a book. Left to right, then on to the next line.
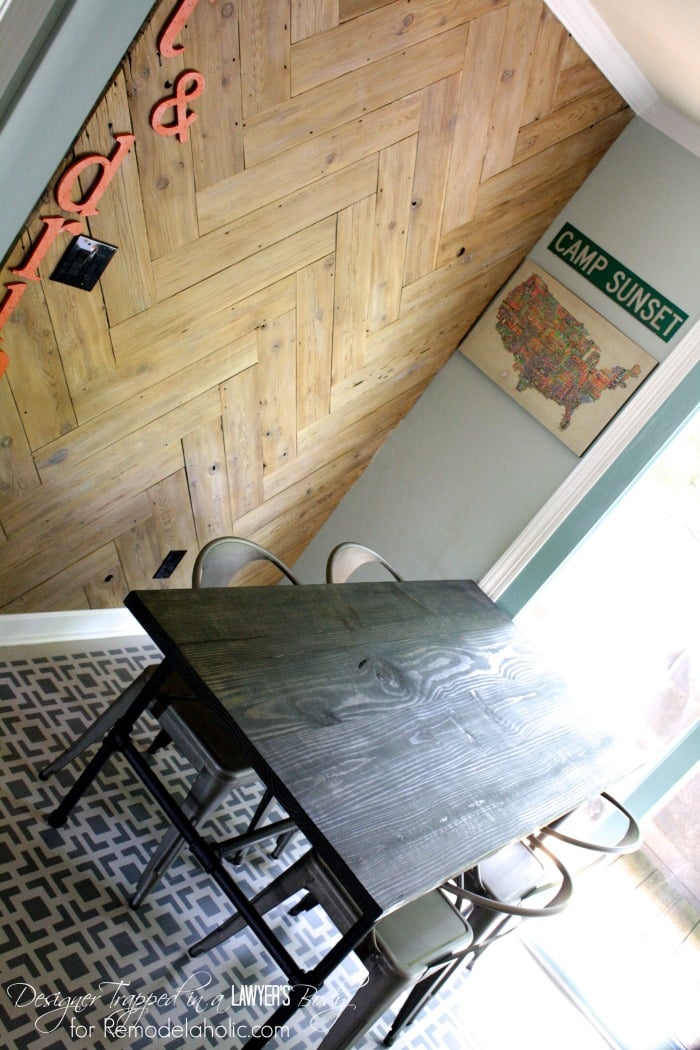
I will also say that I have never encountered a room that is perfectly square, and our kitchen was no exception. With a geometric stencil, there will almost certainly be one corner of your room where the stencil does not line up perfectly with the perimeter of your room. For us, we planned to end our stenciling in the eat-in area of our kitchen, knowing that the stencil wouldn’t line up perfectly in that corner, but that our kitchen table would essentially hide it. As it worked out, the stencil is off by about 1/4 of an inch in that corner, which is very minor and not noticeable at all with our kitchen table and chairs in place. We are perfectly happy with that solution, but if you don’t want to see ANY imperfections, a geometric stencil may not be your best option.
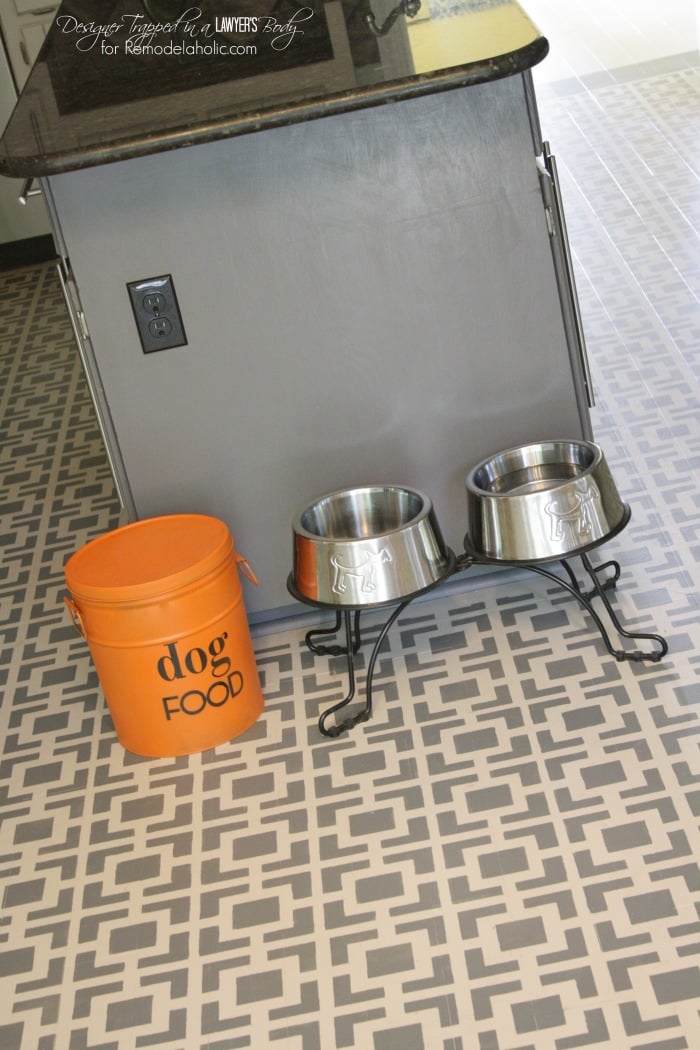
Finally, IT IS NOT NECESSARY NOR DO I RECOMMEND adding a polyurethane finish on top of it. There is a very long story behind this that I will share at some point on my blog, but take my word for it. We finished painting our kitchen floors in April and they are holding up better than I ever could have expected. And our kitchen gets HEAVY use by us, our twin girls and our 90 pound Boxer. So far, we have no scratches or peeling. We do have some black marks from our shoes, but those wipe off with a magic eraser. In short, porch and floor paint is made for floors and should hold up well without any additional protective coat on top of it. That has certainly been our experience {in our kitchen AND our laundry room}.
We LOVE the end result.
I would love for you to head over to my blog, Designer Trapped in a Lawyer’s Body, to explore some of our other thrifty renovation projects, like how we totally transformed our kitchen for less than $700. You may also want to see our final powder room reveal, which includes the DIY concrete vanity that you saw in my last contributor post. And if you love a stylish light fixture, you won’t want to miss how I made a DIY bentwood pendant light for a fraction of the price of the designer original! I hope to see you over in my corner of blog land soon!
 ————————————–
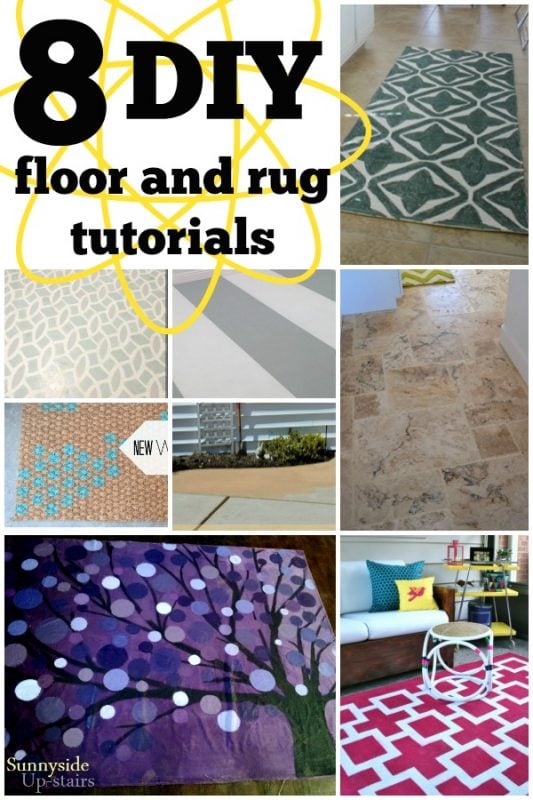
More DIY budget-friendly ways to update a tired floor:

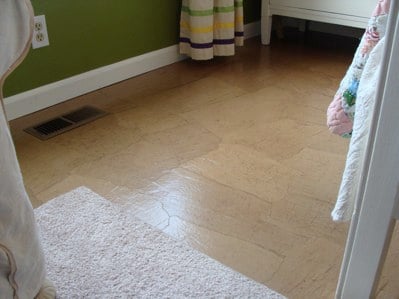
Brown Paper Leather-look Floors
Hi! I'm Tasha author and creator of Designer Trapped in a Lawyer’s Body, where I blog about thrifty DIY home renovations, simple crafts and tips for a happy household. Join me as my firefighter husband, 3 1/2 year old twin girls and I renovate our outdated home one room at a time. We are living proof that you can create your dream home on a budget even when you lead very busy lives!

Omg, your floors came out beautiful!!! Was your wood laminate or hardwood? Does it matter when it comes to your recommendation not to finish it on top as long as I use the paints you used???
Thanks so much, Myoung! Our floors were hardwood, bamboo floors. I have also painted vinyl floors and the paint has adhered perfectly well to them also. So, I think no matter what type of surface you use the porch and floor paint on, you really should not need a top coat. Hope that helps!
hi! I am seeing you had no problem with your floors! I painted my bamboo floor with floor paint and the paint will not stick. I’ve called so many people and they told me that you can’t paint bamboo and you can’t sand it, so i don’t know where to go from here… i painted the floors white, do you think if I cleaned all the paint off and used the cleaner you mentioned, I could start over?
I really love your kitchen floor. We are working on a similar project on our sunroom floor and was wondering if you would mind sharing the paint colors you used on your floor. Great job.
Did you use any type of sealer over top? We have extremely high traffic (10 people live here plus two active dogs) and our bamboo floors are shot after only 7 years of use.
Hi Dawn! We did not use a sealer on top. The porch and floor paint is durable enough on its own. Our kitchen floors have now been painted almost 3 years and are still holding up PERFECTLY. We are amazed. I hope that helps! ???? Tasha
Thanks! Maybe I can do this in the sprint or summer.
hello, I am very interested in a solution for my ugly bamboo floors, and I love this idea! however, please clarify: were you floors bamboo or wood??? because everywhere else online I have found says that bamboo which is a grass, not wood) cannot be painted. thank you.
They are bamboo 🙂
Thank you so much Tasha for sharing our tips. I’ve been researching how to paint floors for months now and so glad to find your post on how to do it correctly so it can withstand daily traffic. My biggest worry is that it will scuff and peel but sounds like you did not have this problem. Has it still held up well for you after some time and wear. Thanks again for the detailed info:-) Cheers. Marie
Hi Marie! Our kitchen floors have now been painted almost 3 years and are still holding up PERFECTLY. We are amazed. I hope that helps! 🙂 Tasha
oops. sorry correction on my last comment I meant to say ‘your tips’ not ‘our’ tips…
What type of Latex primer did you use? Is there a clear one? I am planning to paint the bamboo floor but want to keep the color as it is.
Was your bamboo the “hard” shiny kind? I keep hearing I can’t do anything to it but your pics kind of look like my floor. Mine is so flat and shiny, it looks fake, but it’s not