This is such a fun pendant light idea! You can make it from a recycled glass bottle. The project is from Rachelle at Adventures in Creating, Thanks for linking up to the party!!:
Finally! I finished my secret project I have been working on that involves that light kit I got from Ikea I’ve been talking about for the past 2 weeks. I decided that it was time to replace my star lamp that I wired long long ago:
I still like it and will probably find another home for it but I have been itching to make a light out of one of these:
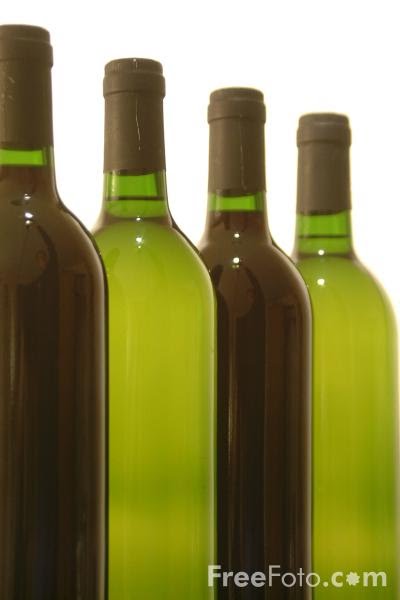
I know what you’re thinking- wine bottles again! What is the deal with this girl? Well I ended up with quite a few of them after I made my wine glasses and citronella candles; I told everyone I knew to save their wine bottles for me and I now have a pretty good collection. So I had to do something with them!
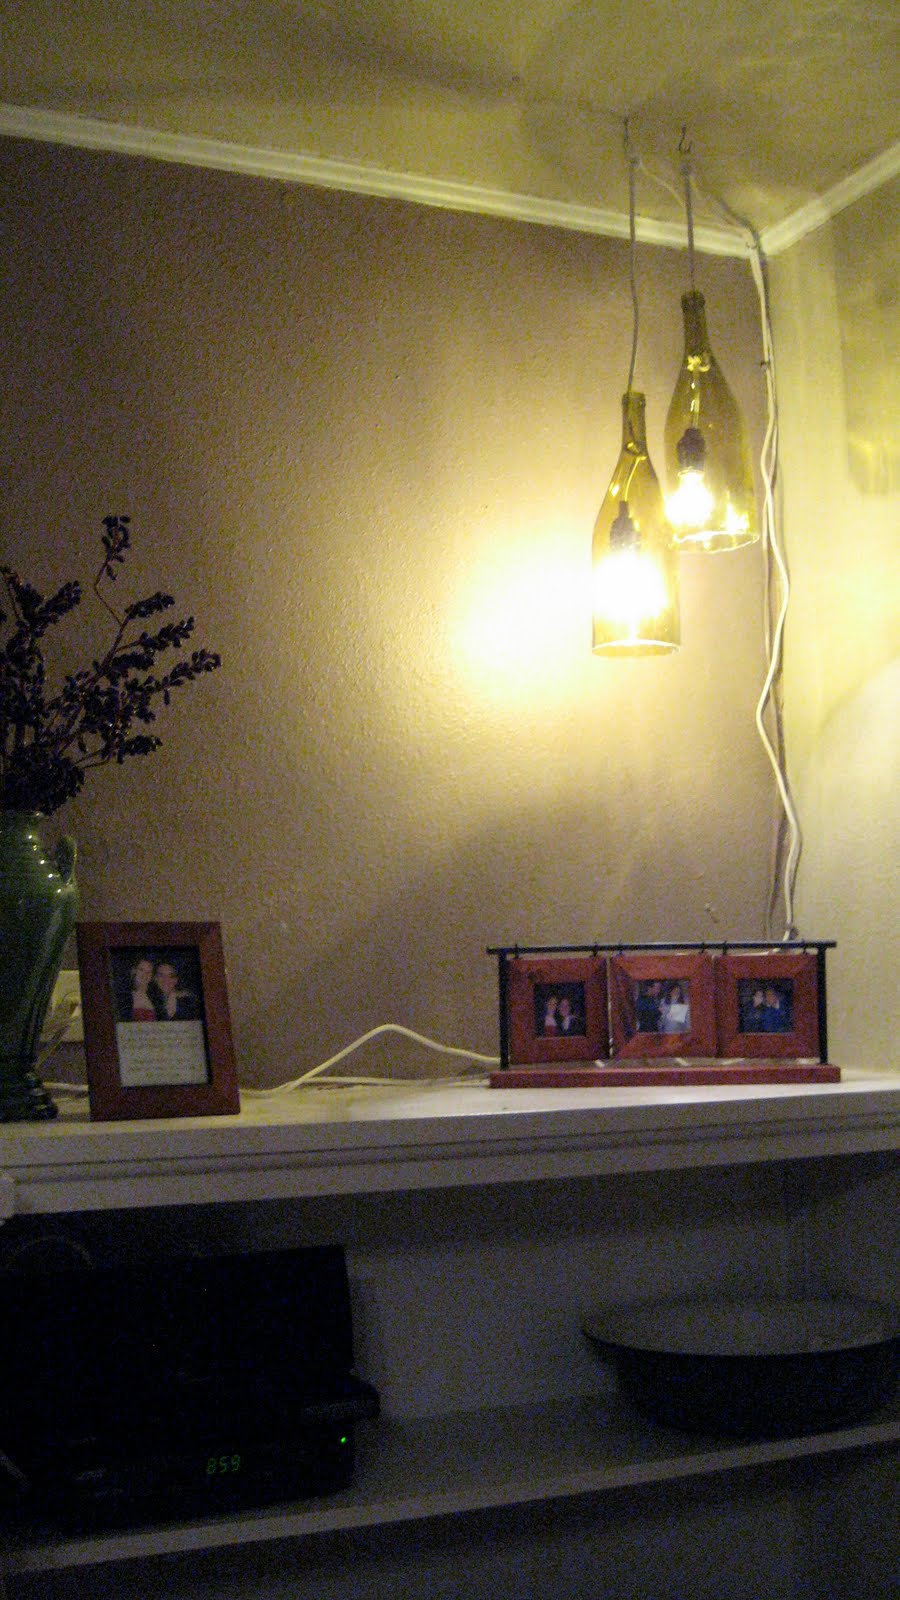
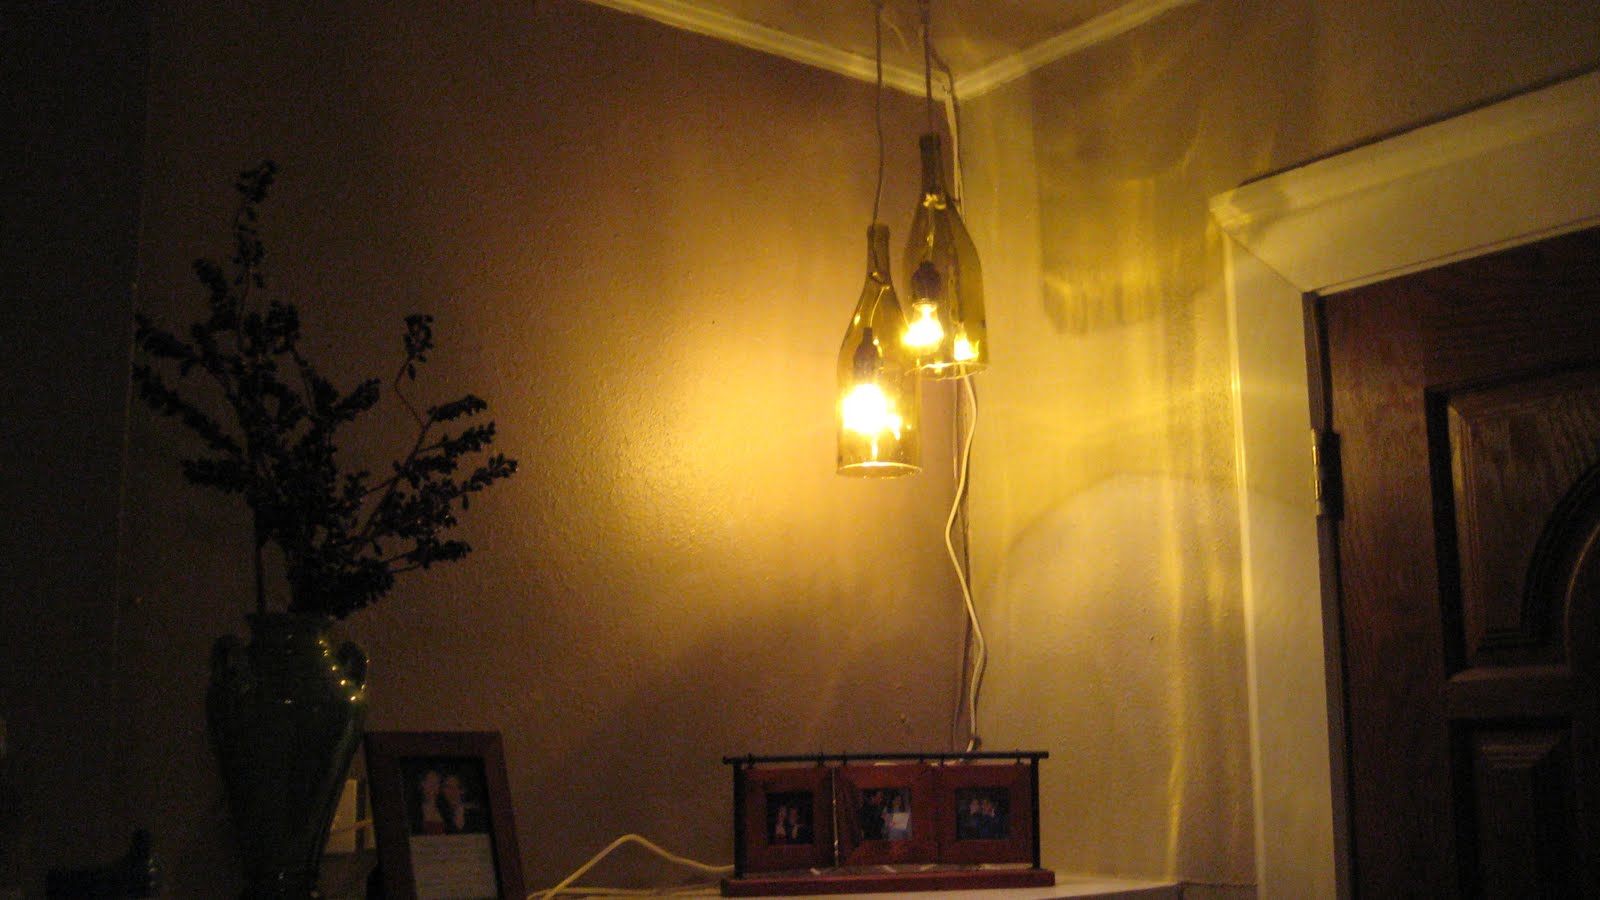
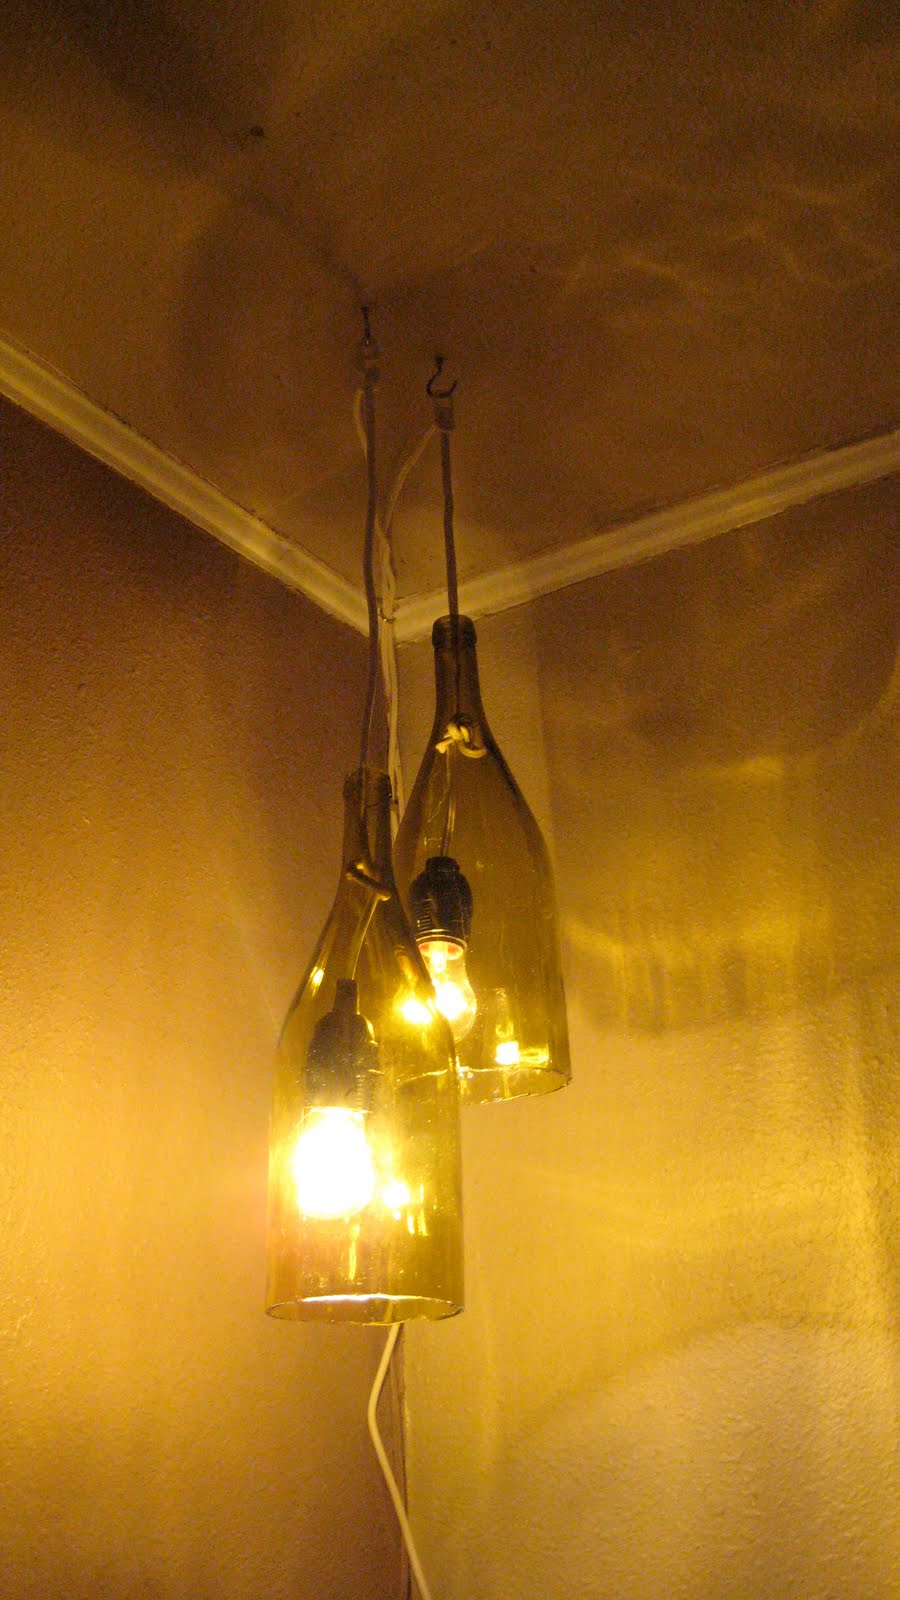
So I came up with this:
Like them? I love them! They are my new favorite project I have done. Want to make some of your own? You can!
All you need is:
Wine Bottles (I used the large ones)
Dremel tool with Cutting Wheel and Grinding Bit (Or a wine bottle cutting kit)
Pendant light Kit
Plug
Safety Goggles
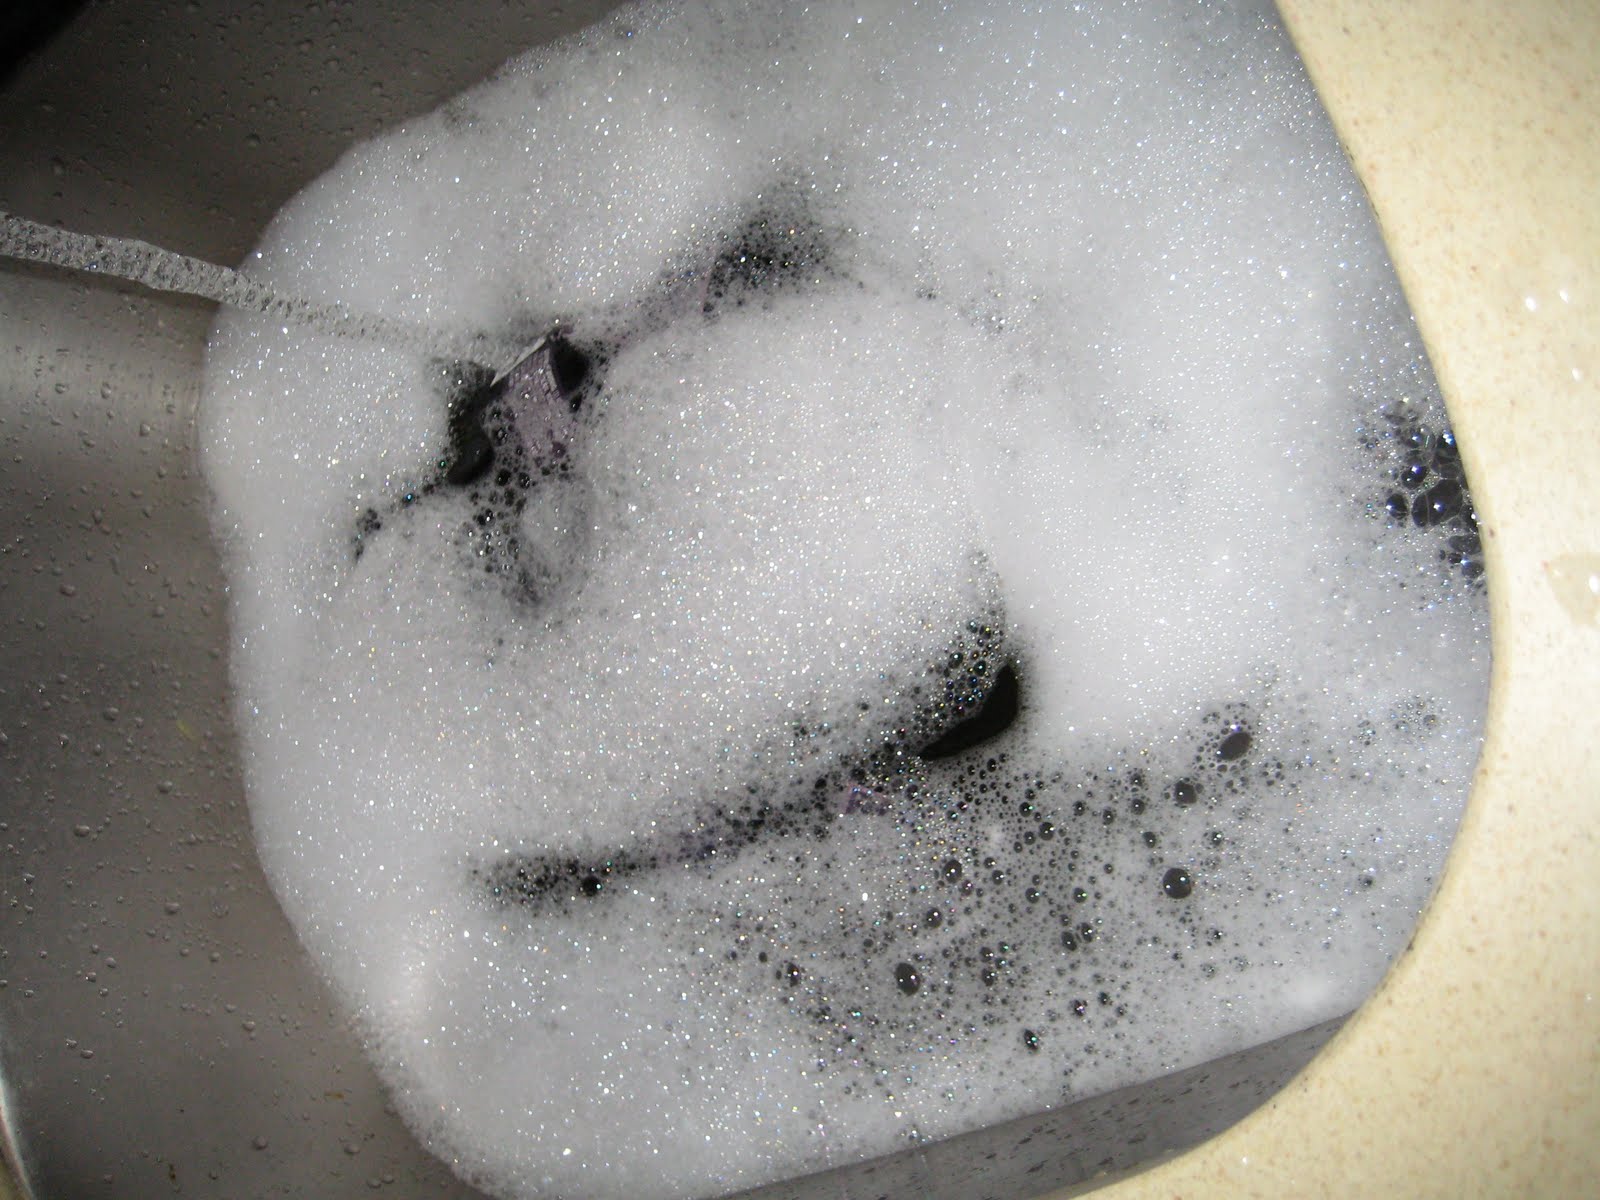
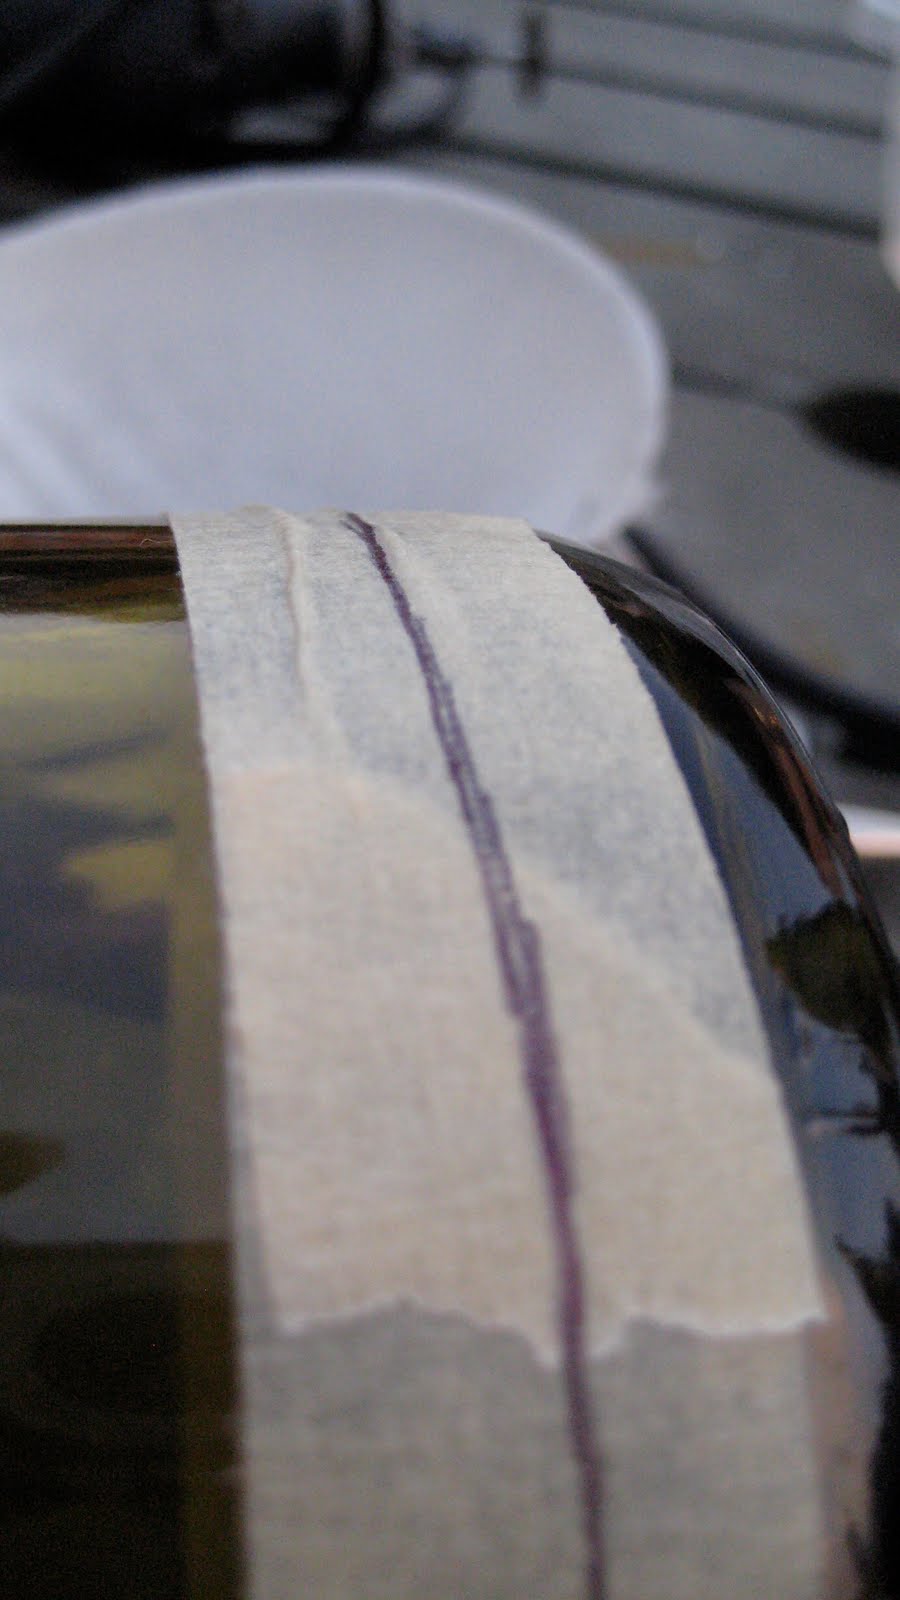
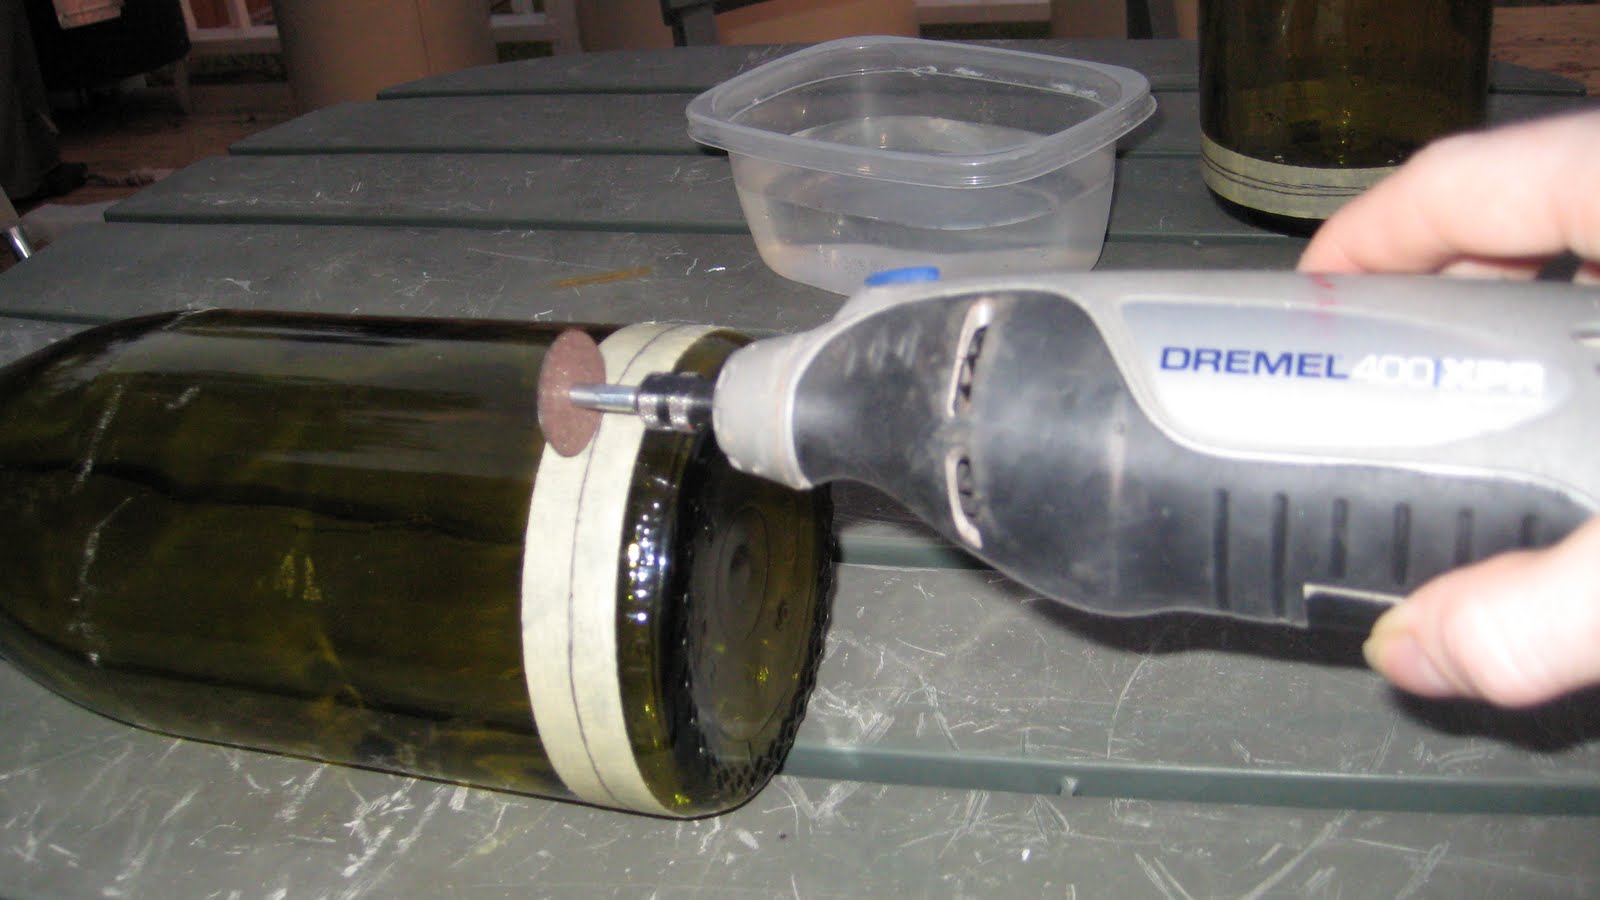
First I soaked my wine bottles in warm soapy water to take the labels off. Then taped off a section on the bottom and drew a straight line along the tape. This indicates the line I am going to cut along.
Next I was ready to cut. (Remember to wear safety goggles and a mask!) Using the Cutting Wheel of my Dremel I cut along the line I had drawn on the tape.
Take your time and let the tool do the work. If you apply to pressure you’ll just wear down the Cutting Wheel faster, but you won’t make your progress any quicker. (Trust me I tried!)
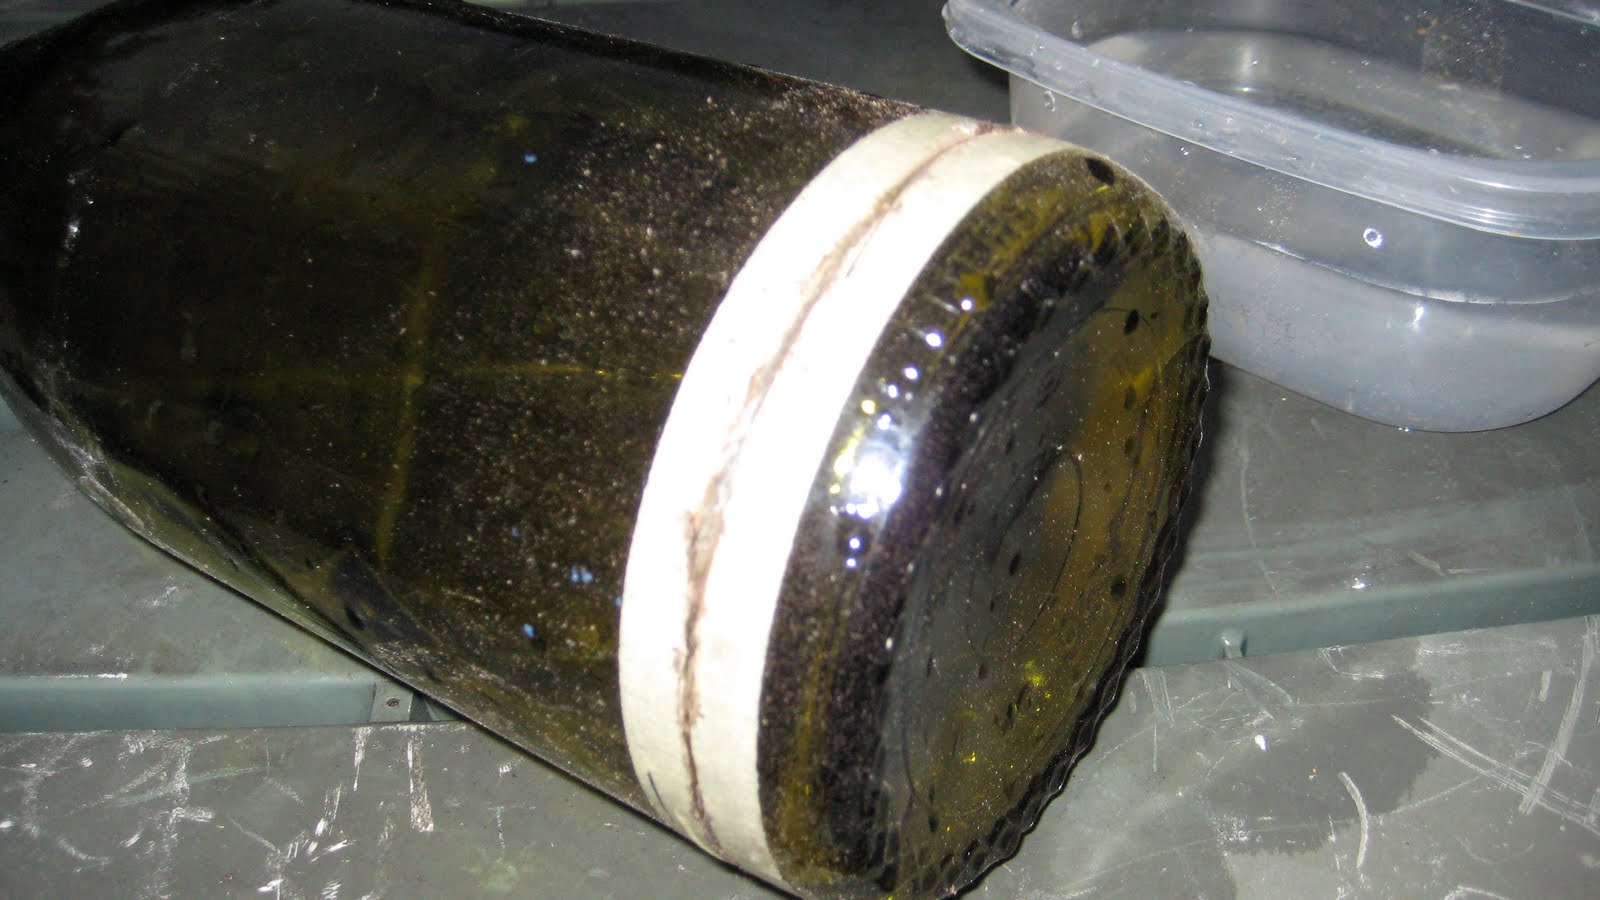
Making some progress! I like to keep the tape on the whole time to keep any glass shards in check. Also remember to periodically dip the Dremel in water and spray some on the glass to keep both from getting to hot. The Dremel can over heat and the glass could crack if not.
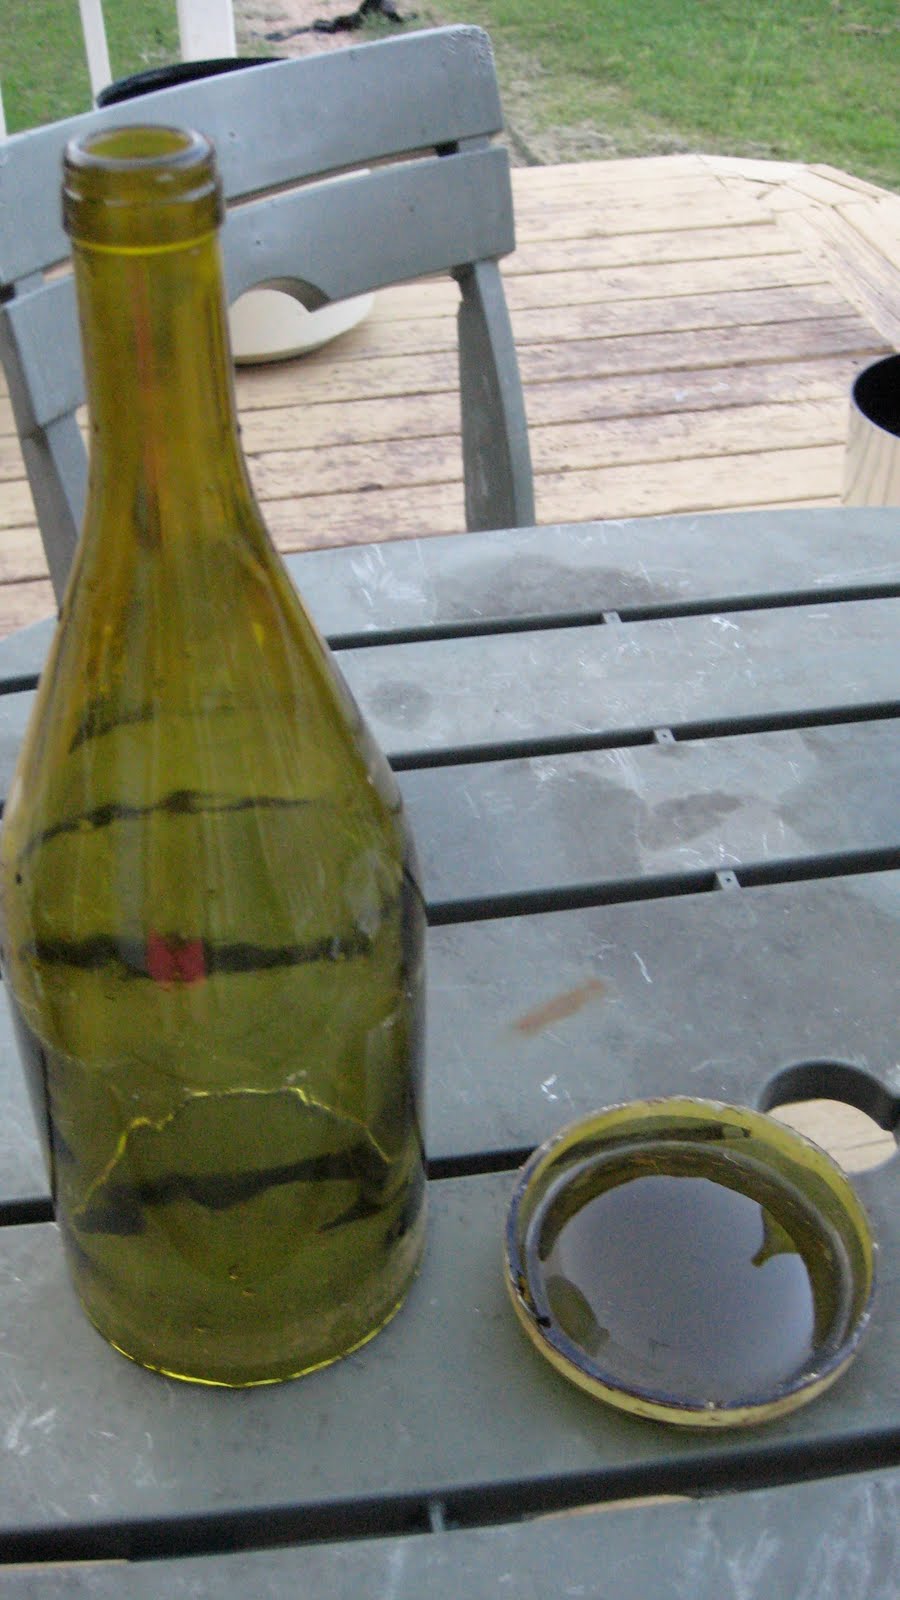
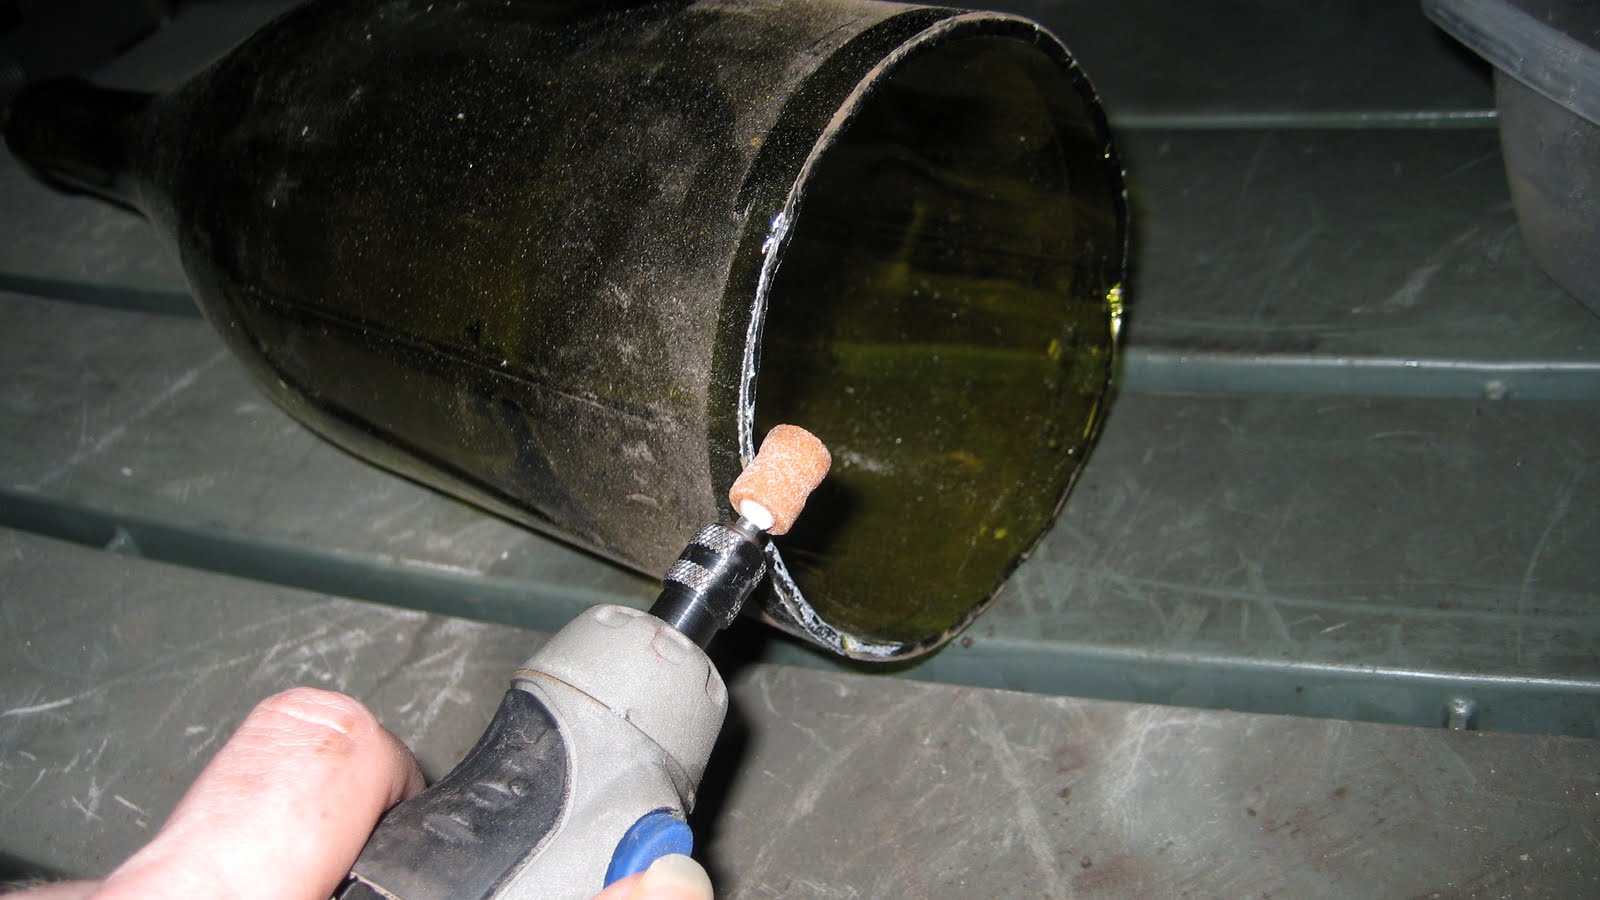
Yay success!! Next you’ll use the Grinding Bit for the Dremel to smooth out any rough edges.
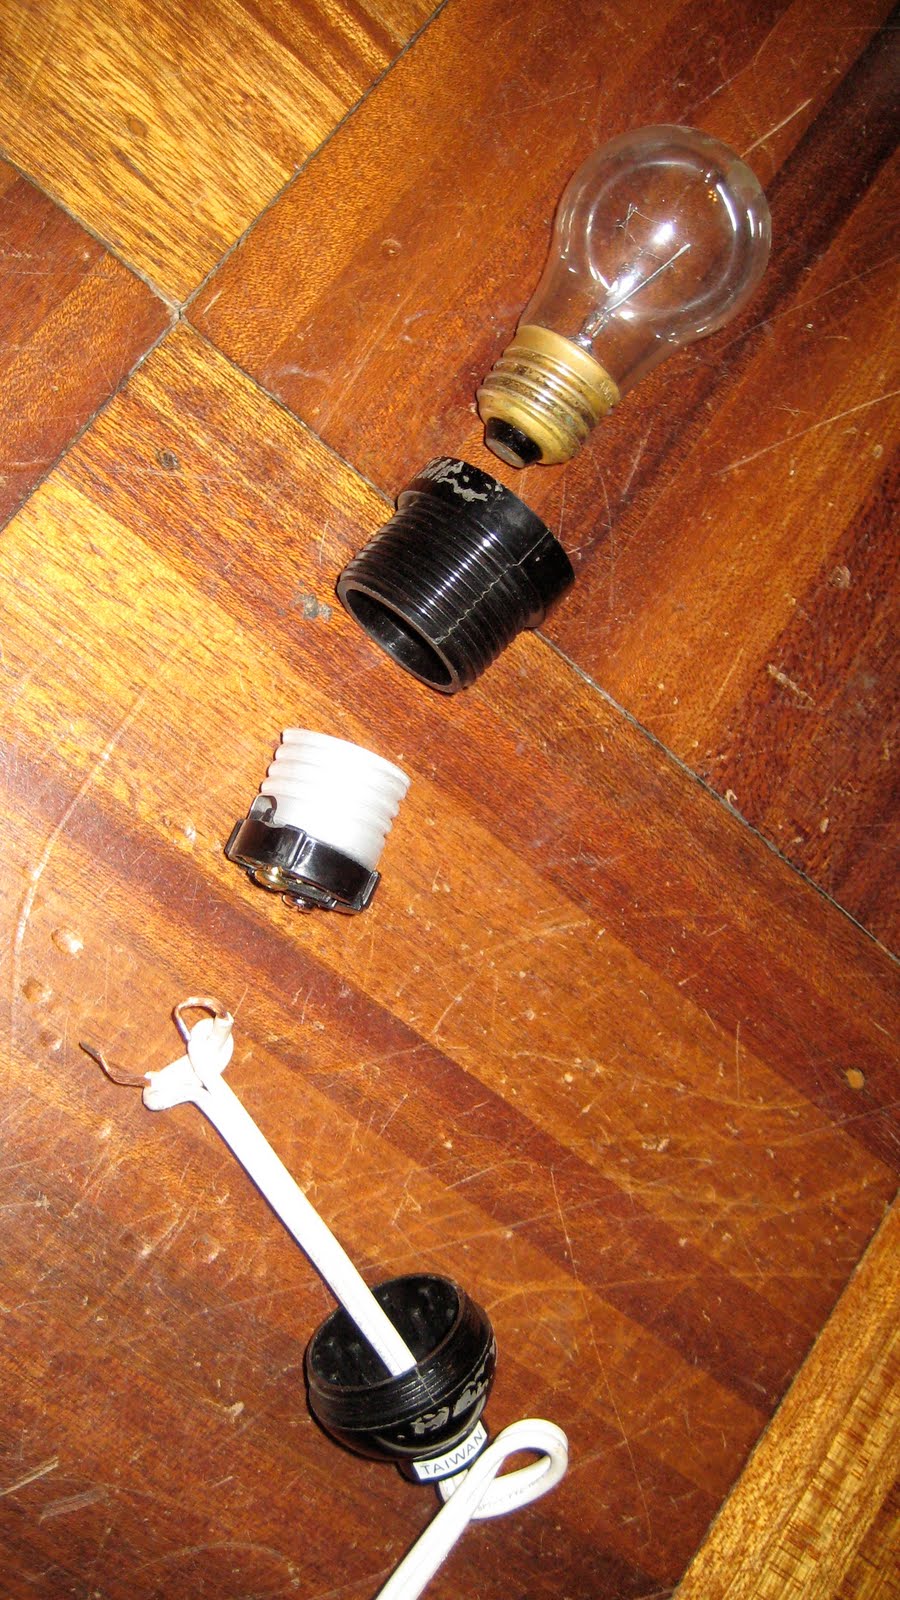
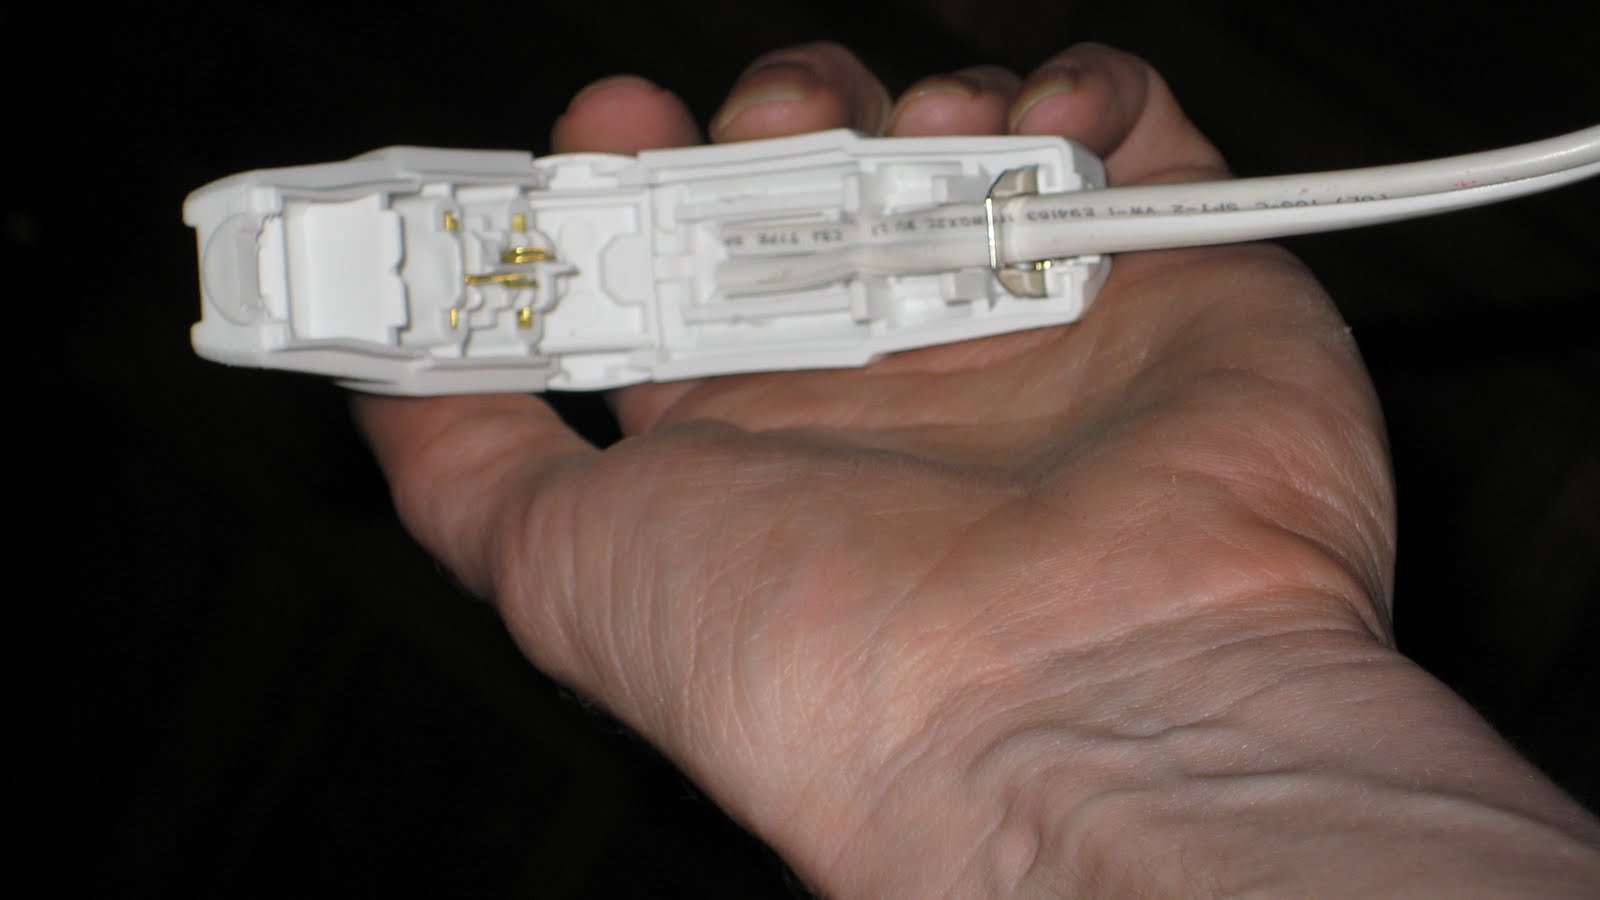
Once your are done with this step you can use the polishing bit to make the edge extra smooth and shiny. Once your all done it’s time for wiring! I had 2 different wiring kits, the one from Ikea and the one I already had. I was hoping I could just slip the plug through the neck of the bottle and be done with it but the plug is to wide, so it was off to plan B (and C). The wiring kits were different so I had to use two different ways of wiring the bottles.
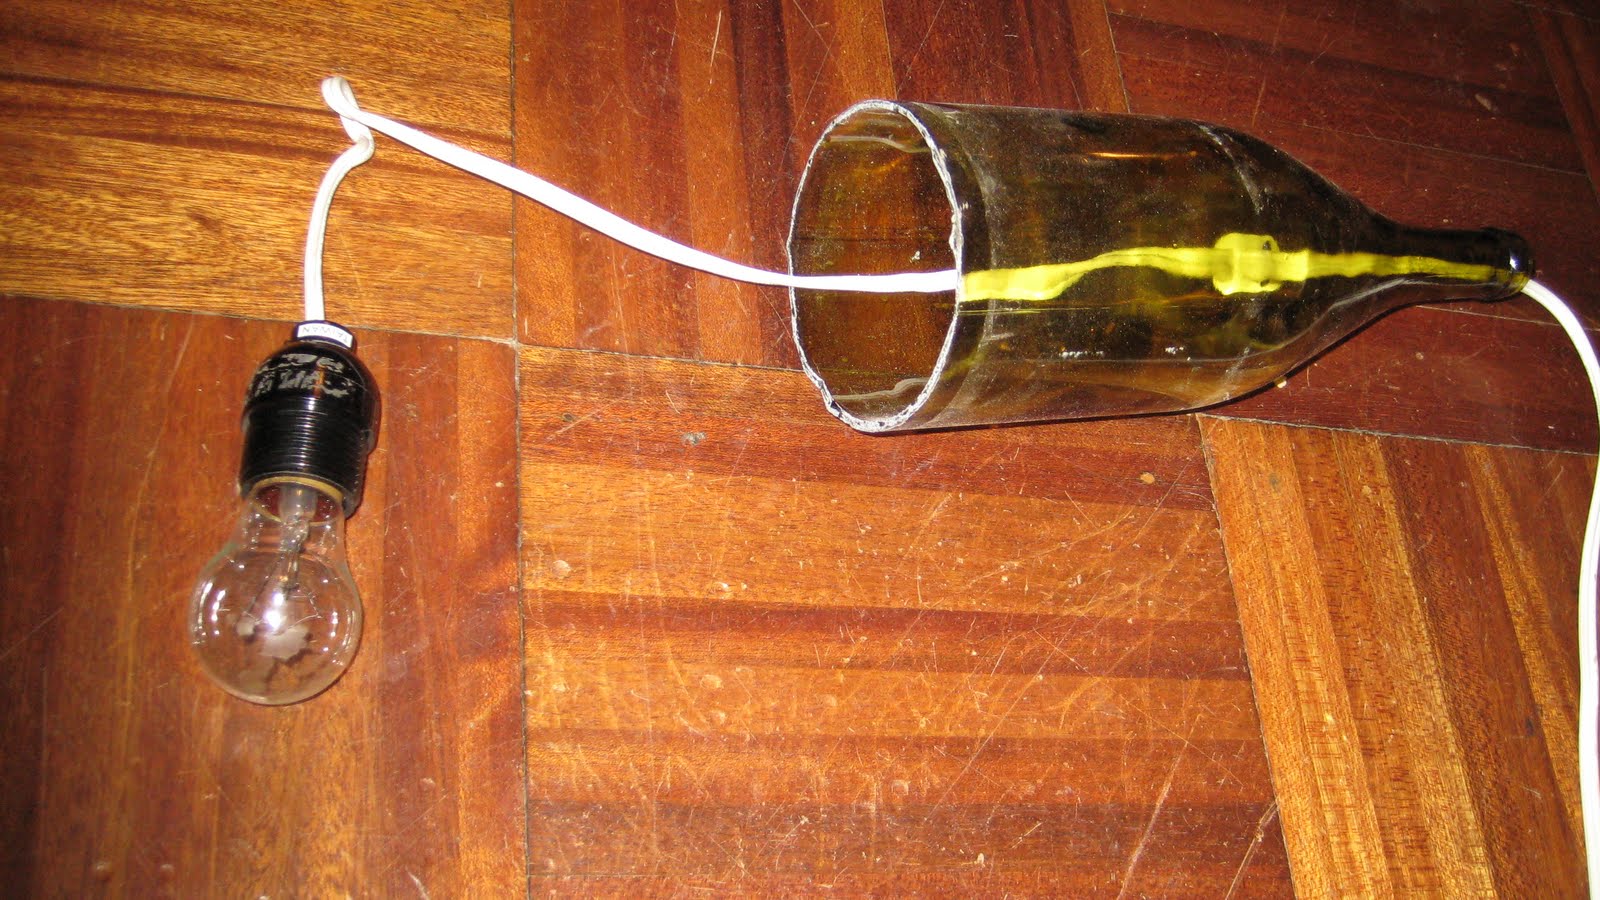
For the first one I was able to take the light housing apart, being sure to keep everything in the same order. Once I had it all apart I just ran the wire through the neck of the bottle, then put the housing back together.
Once it was run through I tied a knot in the wire so the bulb would hang inside the bottle in the position I wanted.
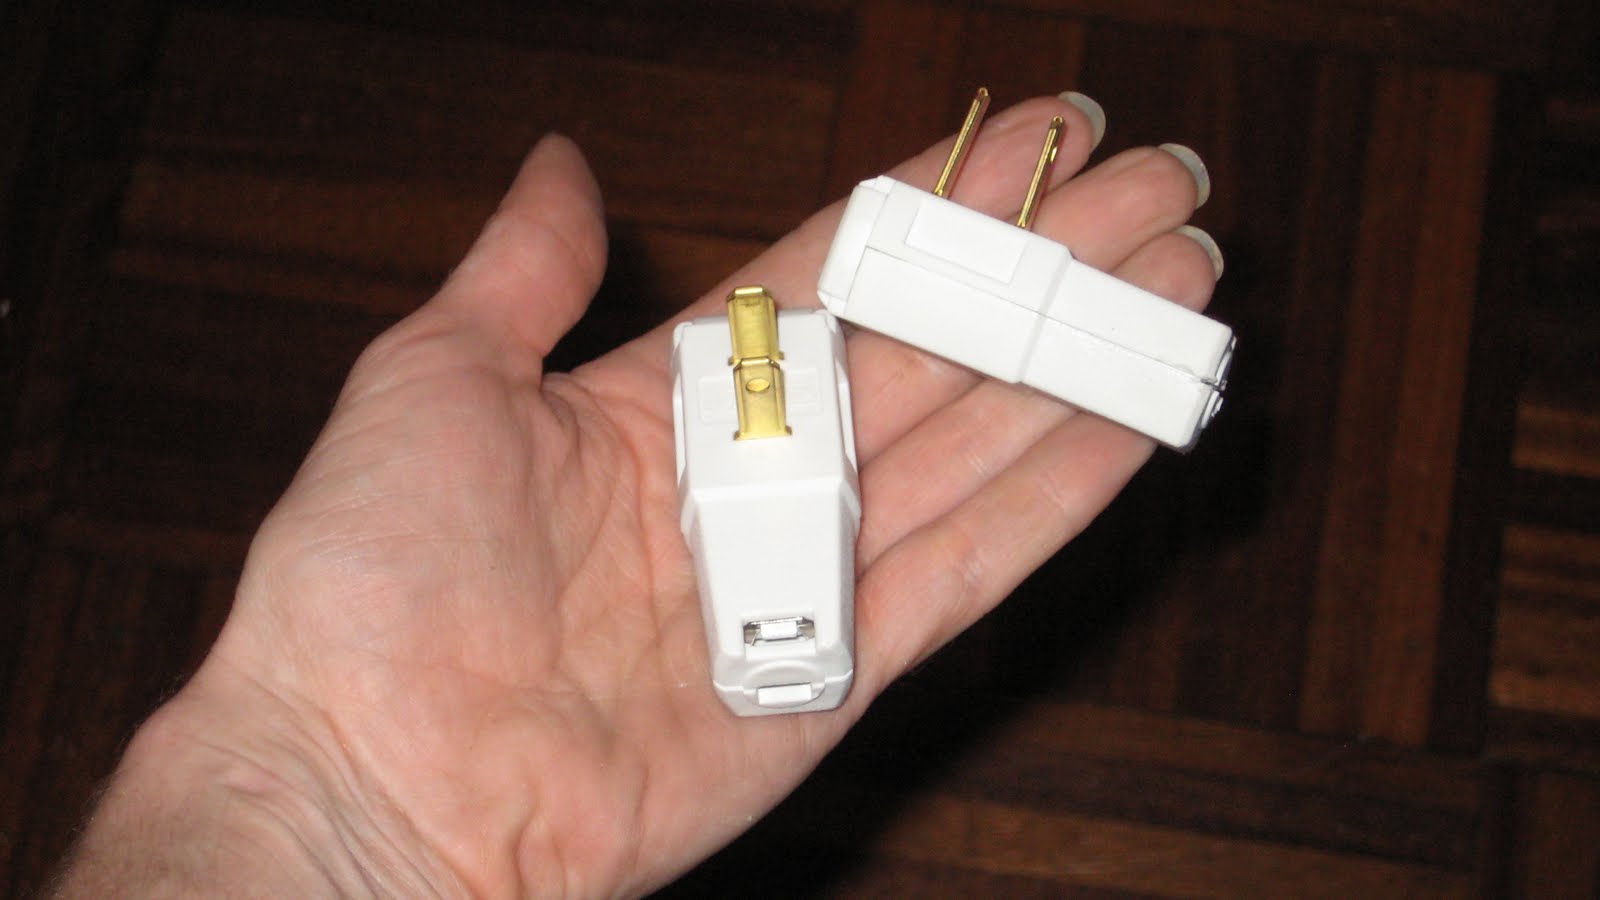
For the Ikea light kit I couldn’t figure out how to take the housing apart, so I had to resort to other measures. I had bought a wireable plug from Home Depot and used that.
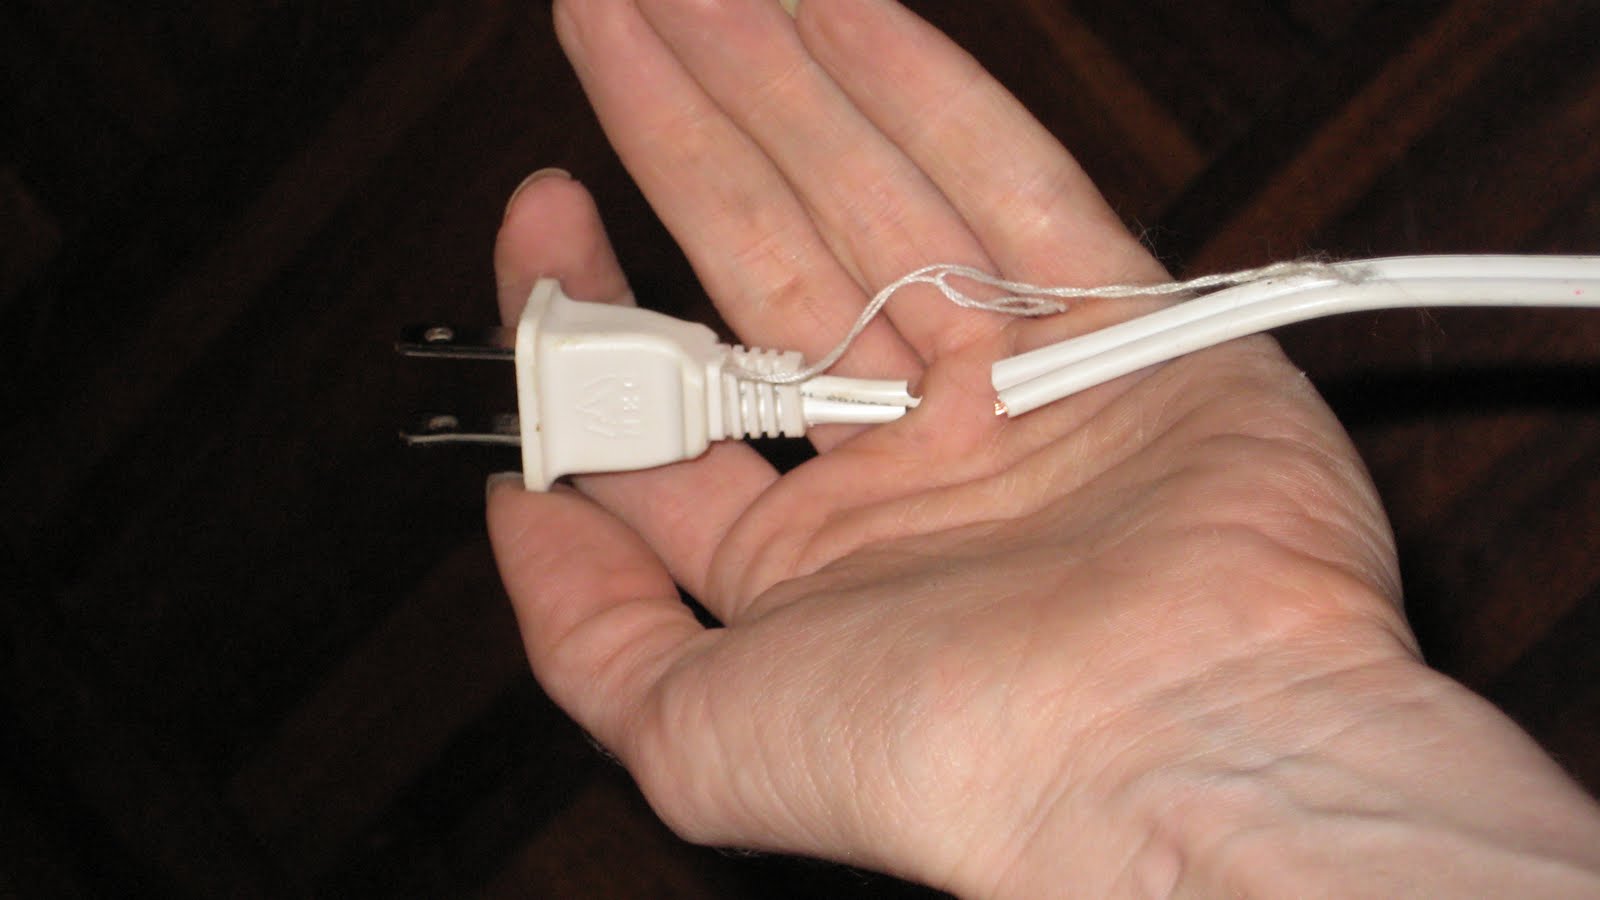
To attach the wire to the new plug, I had to cut the old one off. Then I ran the wire through the neck of the bottle.
Then just run the wire through the slot of the plug and snap it closed. Done, easy! Now you’re ready to light it up!
I love the light they give off! (I’ll have to paint the wire the same color as the wall this weekend!)
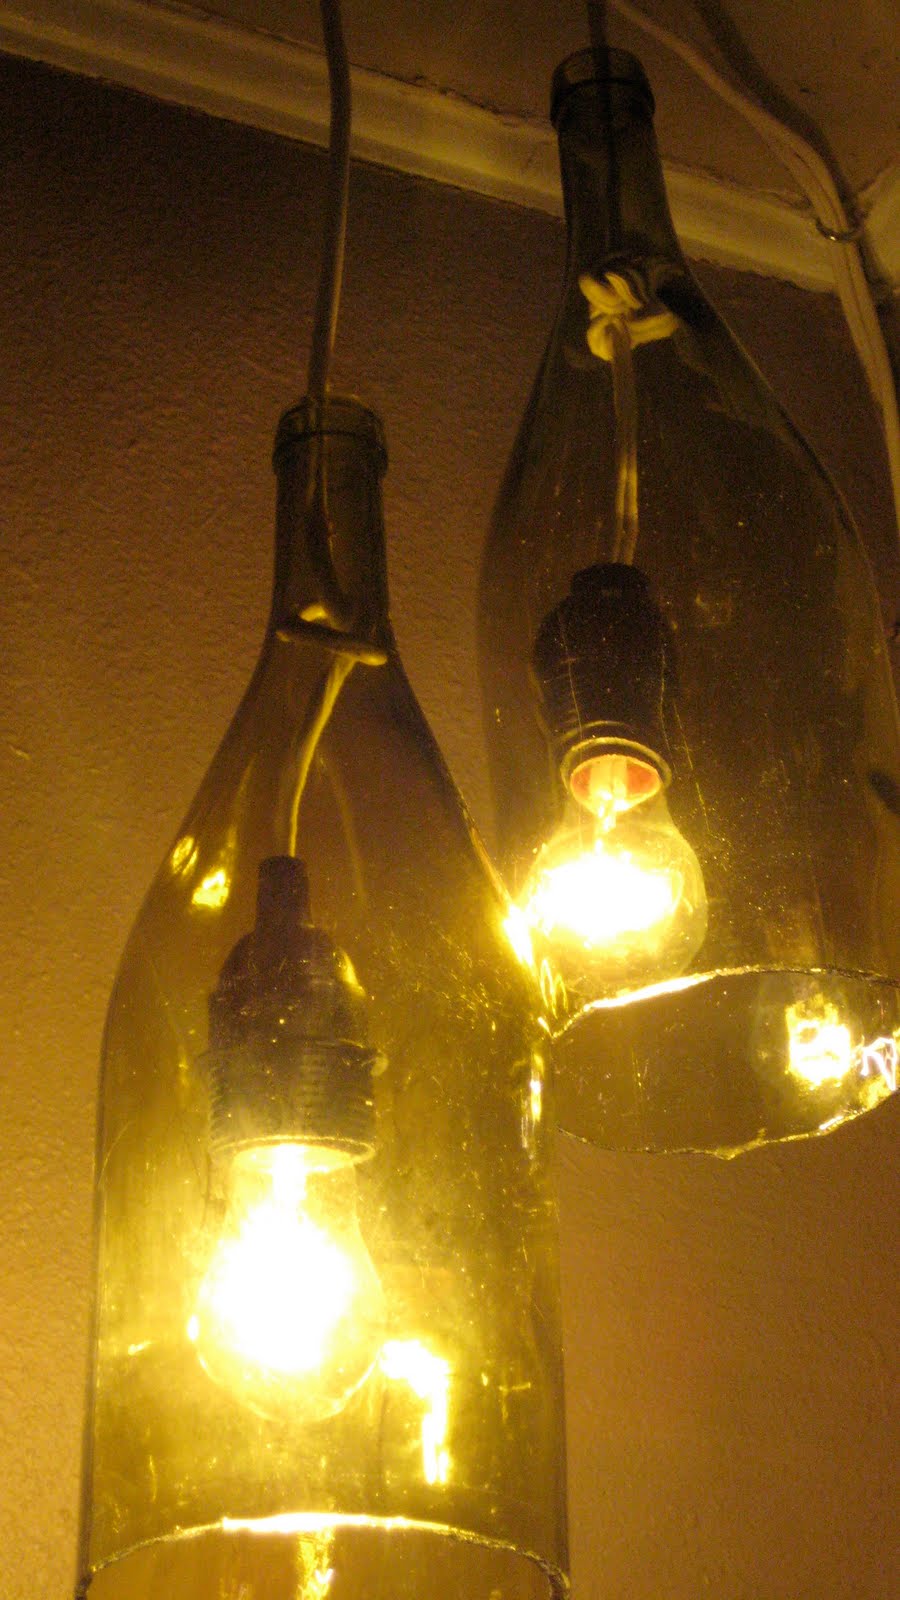
A few close ups:
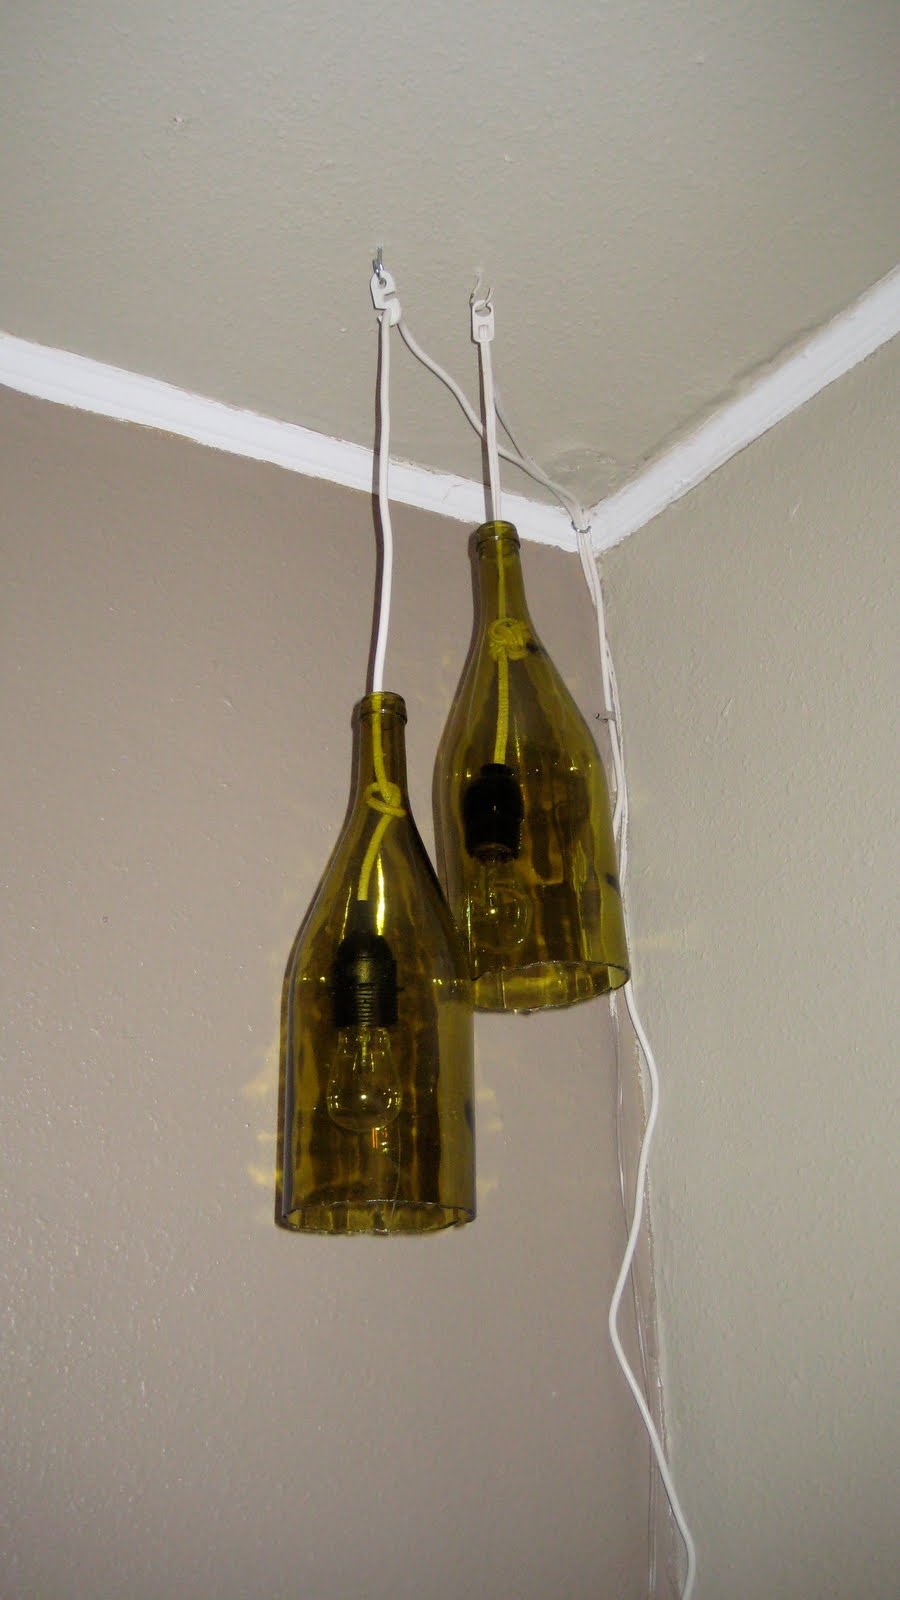
And one shot of them off:
So what do you think? Do you think this is something you would want to make?
Cassity Kmetzsch started Remodelaholic after graduating from Utah State University with a degree in Interior Design. Remodelaholic is the place to share her love for knocking out walls, and building everything back up again to not only add function but beauty to her home. Together with her husband Justin, they have remodeled 6 homes and are working on a seventh. She is a mother of four amazing girls. Making a house a home is her favorite hobby.
>I like this article- Thanks for sharing it. I passed it along to a friend that has a very interesting place. It is made with colored bottles in the walls and different places in the cottage. She calls it the "Mermaid Cottage". Thanks from Sigrid at Kast Fabrics
Loved the idea!! Going to use them as pendent lights on each side of my bathroom mirror above a pedestal sink. Was looking for green pendent lights and came across your article. Very Awesome idea!
Instead of using the method you used for cutting the bottle, I would suggest using something that is much safer, easier, and makes a cleaner cut. The website below is a good place to start! Hope this helps!
Hi great article. Im trying to make lights out of Jack Daniels bottles so I need to cut the bottom off with a grinding disc please could you let me know what type of grinding disc you are using.
I am going to try this as I love working with my Dremel…But I think I am going to put me a quarter size washer on the cord so that when i pull the light cord through the top it will stop at the washer …eliminates the knot in the cord and the light should hang more straight…just thought that it might work better ….who knows till they try … which I will do …
If it has a cork put it back in and drill a hole for the wire same with a stew top then there is no need for a knot in the wire . It will also sit in the middle of the bottle that’s my view of it but nice idea
Ron
Ack, this is horrifying. There’s a reason glass grinders and such tools keep the tool and the glass wet at all times, and that reason is silicosis. Getting glass dust in your lung is very, very bad. That little band of tape does exactly zero to help. Advising people to do this is reckless and dangerous.


>I like this article- Thanks for sharing it. I passed it along to a friend that has a very interesting place. It is made with colored bottles in the walls and different places in the cottage. She calls it the "Mermaid Cottage".
Thanks from Sigrid at Kast Fabrics
Loved the idea!! Going to use them as pendent lights on each side of my bathroom mirror above a pedestal sink. Was looking for green pendent lights and came across your article. Very Awesome idea!
I think you should tell people to unplug the Dremel Tool before cooling it in water. A lot of folks might not think of this with a shocking result!
Good point!!! Thanks for the reminder!
Instead of using the method you used for cutting the bottle, I would suggest using something that is much safer, easier, and makes a cleaner cut. The website below is a good place to start! Hope this helps!
https://www.bottlecutting.com/pages/how-to
~Christina
Hi great article. Im trying to make lights out of Jack Daniels bottles so I need to cut the bottom off with a grinding disc please could you let me know what type of grinding disc you are using.
Thanks
Dave
I am going to try this as I love working with my Dremel…But I think I am going to put me a quarter size washer on the cord so that when i pull the light cord through the top it will stop at the washer …eliminates the knot in the cord and the light should hang more straight…just thought that it might work better ….who knows till they try … which I will do …
That sounds like it could work, Maude! Let us know how it goes for you!
Neat idea but the result just looks like… broken wine bottles and wires hanging from the ceiling.
Did you use an ordinary cutting wheel or a diamond wheel?
If it has a cork put it back in and drill a hole for the wire same with a stew top then there is no need for a knot in the wire . It will also sit in the middle of the bottle that’s my view of it but nice idea
Ron
Ack, this is horrifying. There’s a reason glass grinders and such tools keep the tool and the glass wet at all times, and that reason is silicosis. Getting glass dust in your lung is very, very bad. That little band of tape does exactly zero to help. Advising people to do this is reckless and dangerous.