Rustic Pallet Wood Ceiling Tutorial
Submitted by Maple Leaves and Sycamore Trees

First things first, this is what this room looked like prior…well several years ago anyway when Ryder was a baby. You can read more about that here.

What made us decide it was time for a wee makeover was when I saw a metal bed in my neighbor’s burn pile one day. (Read more here.) I didn’t want to put a new (to us) bed in a periwinkle room. It was time for a change. Check out how we pulled the room together. For now here is the tutorial for the ceiling:
Hey, this is Mitch, from Maple Leaves & Sycamore Trees, resident carpenter, electrician, plumber, pretty much whatever I need to be to make our house more into the home of our dreams. (Pretty funny when you think about it, since we live in a two bedroom rancher.) Last week Kathleen posted pictures of Ryder’s new bedroomwith this pallet wood ceiling.

It all started several months ago, when she showed me some pictures on another blog where they made an accent wall out of recycled pallet wood. From the time that I first saw it, I loved the way that it looked and the whole idea of reusing old, weathered (and of course free) wood. It looks so warm and rustic which is right up my alley.
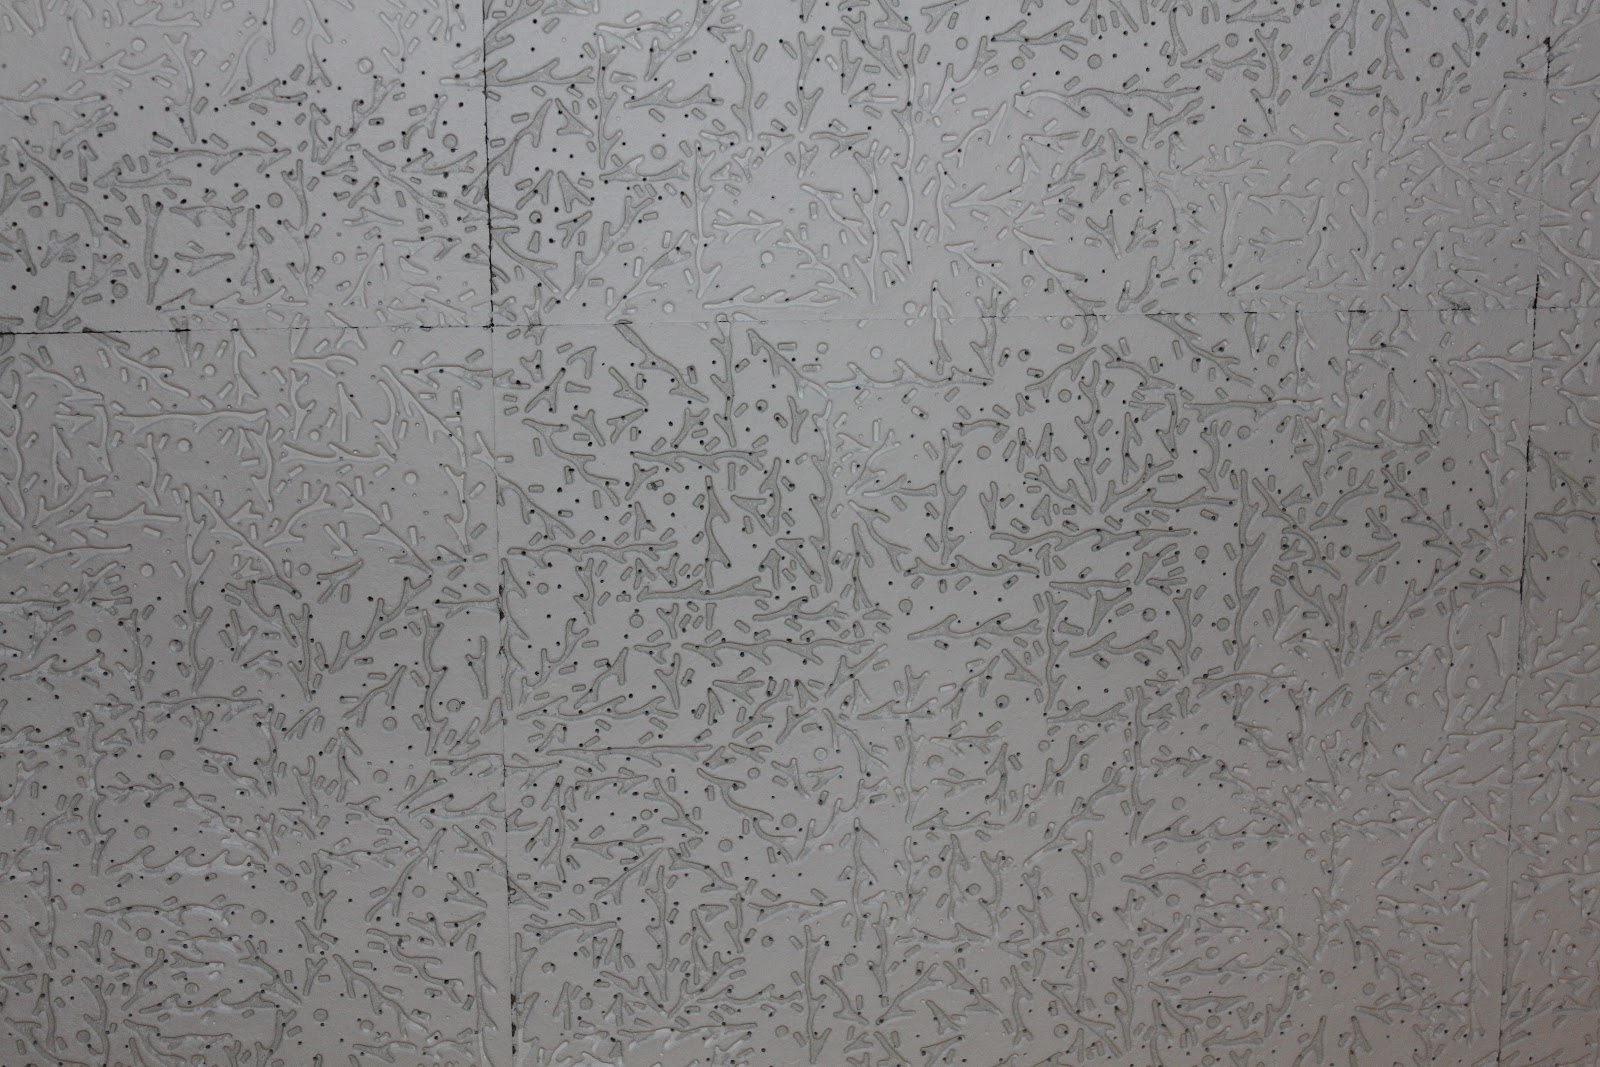
So last month, we were sitting in my son Ryder’s room and looking at the walls and the ceiling. We have both hated the ceiling in his room for a long time and you can see why. Hello, 1980s!

It was so ugly, dated and dirty white. Not what a little boy wants to stare at while he lays in bed at night listening to his Lightning McQueen storybook CD (for the thousandth time I might add). So anyway, as Kathleen and I were there talking about what we would change in the room, she suggested that we paint the walls. Then if we are going to paint, why not do something to that hideous ceiling while we are at it. We both thought of pallet wood and before we knew it we had a new project (like we didn’t have enough to do already.)
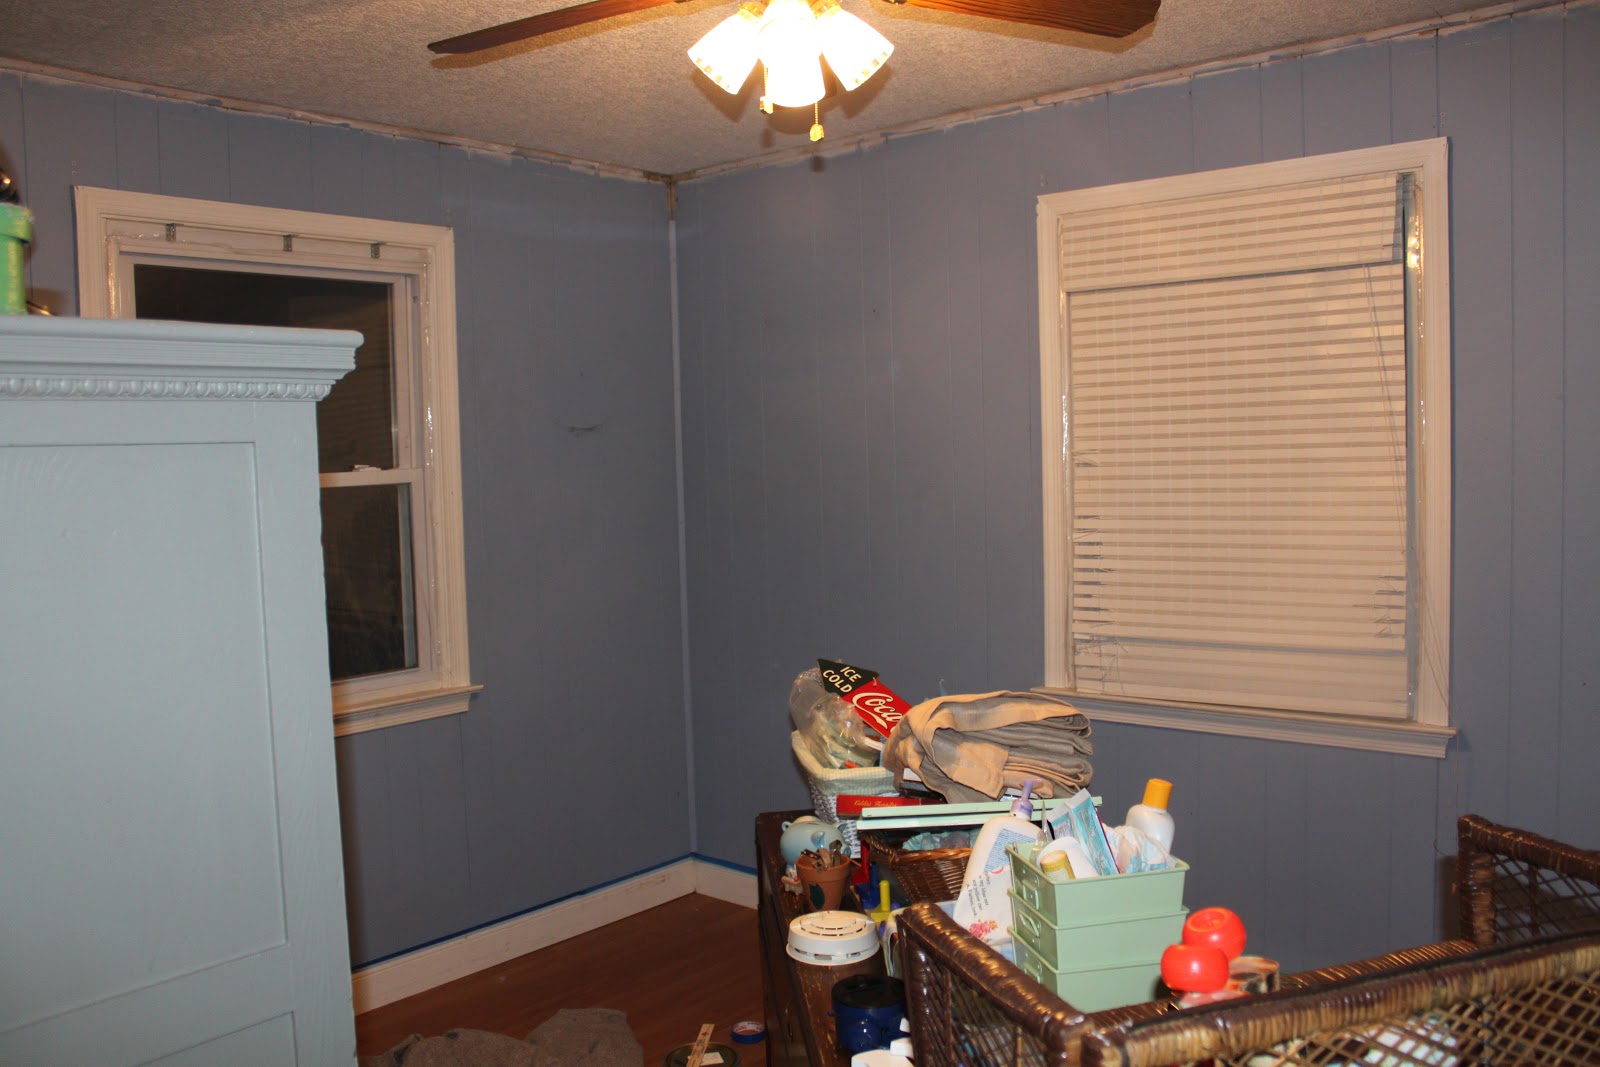
Here is the room getting prepped to be painted after I pulled down the crown molding.

The painting part was easy, but I wasn’t exactly sure how I was going to secure the pallet wood to the ceiling. I did some online research and pinned some helpful pictures and websites (yes I am a man and I am on Pinterest, don’t judge me). Although I didn’t find anyone that had used pallet wood on a ceiling, there were a few that had done some accent walls.
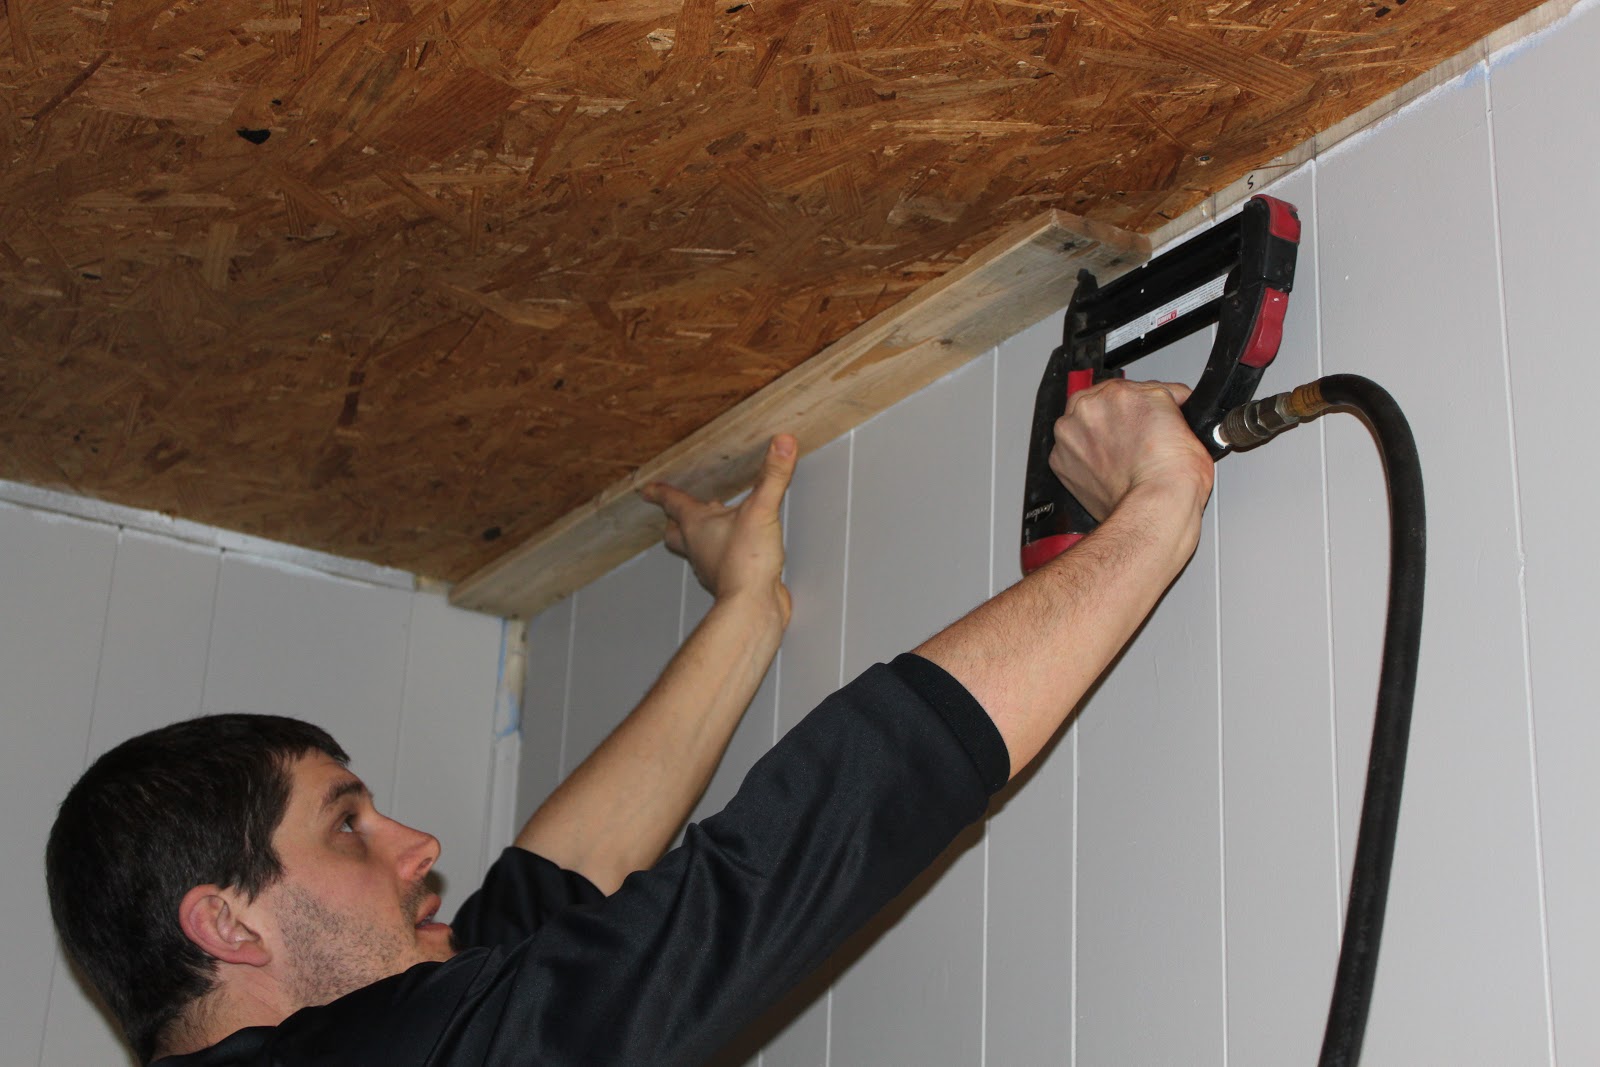
The problem was that our ceiling had a layer of half inch drywall with another layer of bugly (butt ugly) half inch ceiling tile. Also, the joists or studs in the ceiling were 24 inches apart. I decided that my best bet was to get some cheap particle board from Lowe’s and glue and screw it to the ceiling and ceiling joists. I think these 4`x8` sheets cost like $7 a piece.

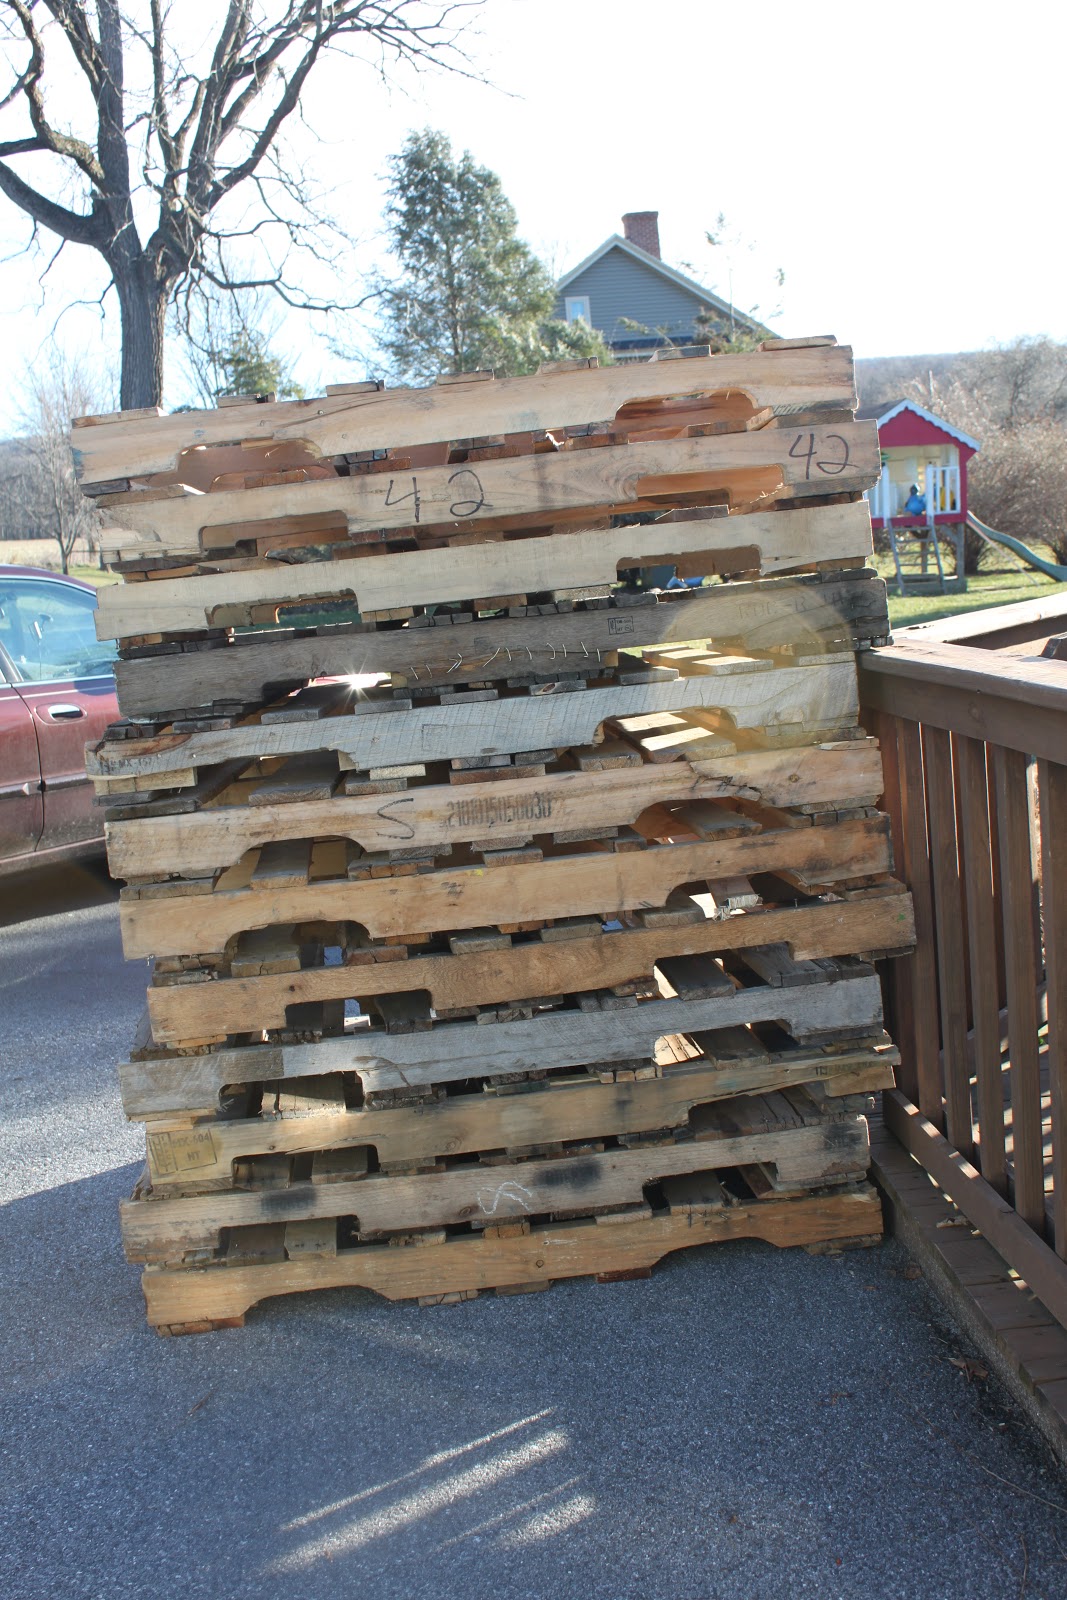
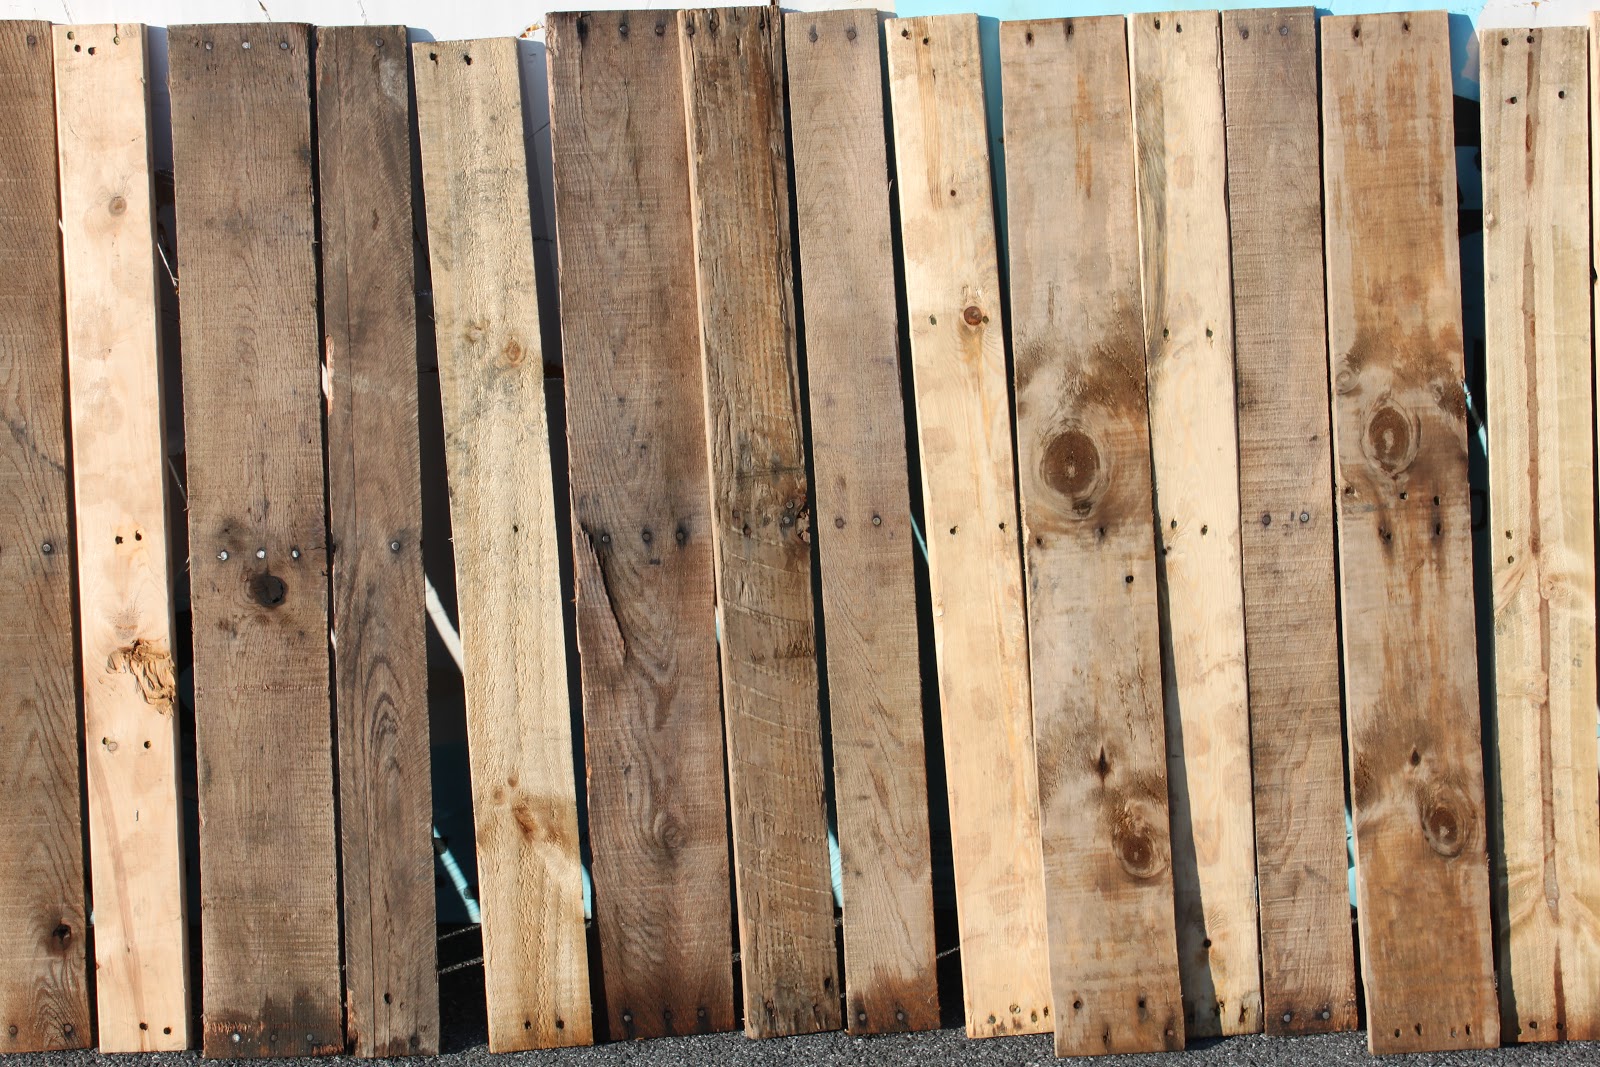
Next I brought home from work about 40 old broken pallets. Thanks Good Food, Inc.(shameless plug for our new website designed by yours truly) for the donation. Note: pallets are not really that hard to find if you ask around. You can even find them on Craigslist for free.

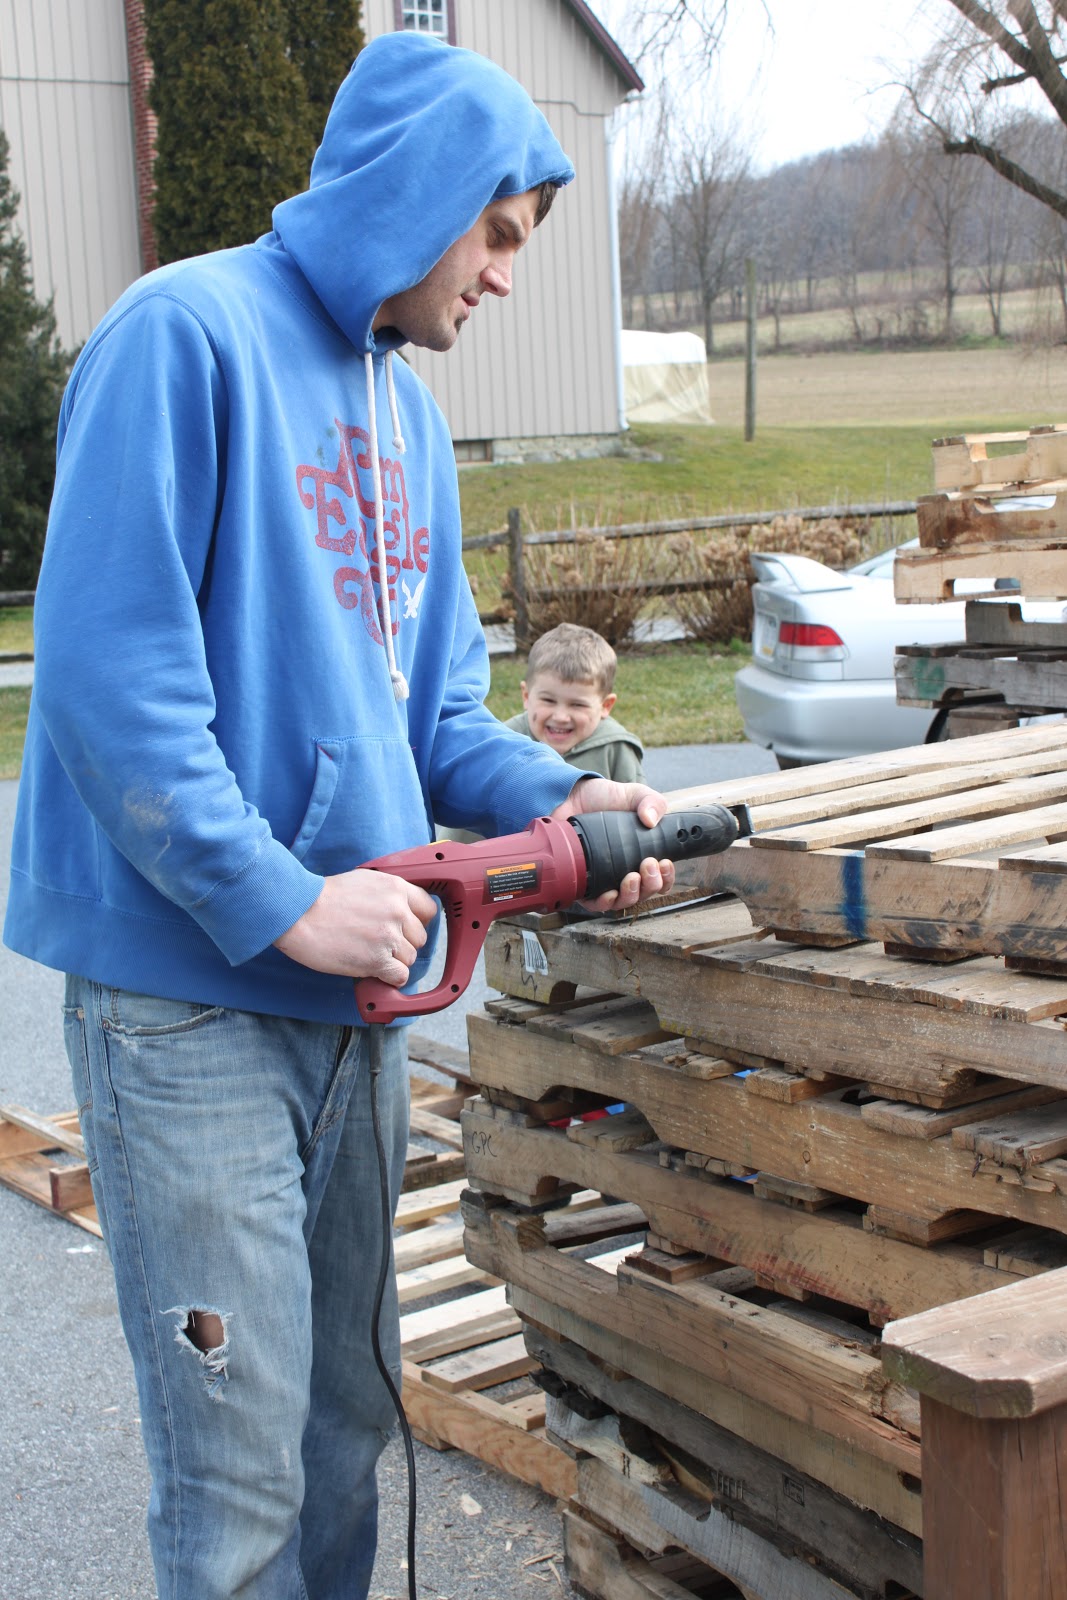
I bought a reciprocating saw from Harbor Freight for $29.99 and used it to cut through the nails to remove the boards from the pallets. I made a mistake and bought blades with 6 TPI (teeth per inch). The first day of cutting I wore out a lot of blades really quickly. After switching to more adequate blades of 18 TPI, the boards came off in no time. Cutting them off like this is easiest and leaves the nail heads in the boards which gives the appearance that they were actually attached to the ceiling with these nails.

Apparently, Ryder is very excited about this project and to have his picture taken.
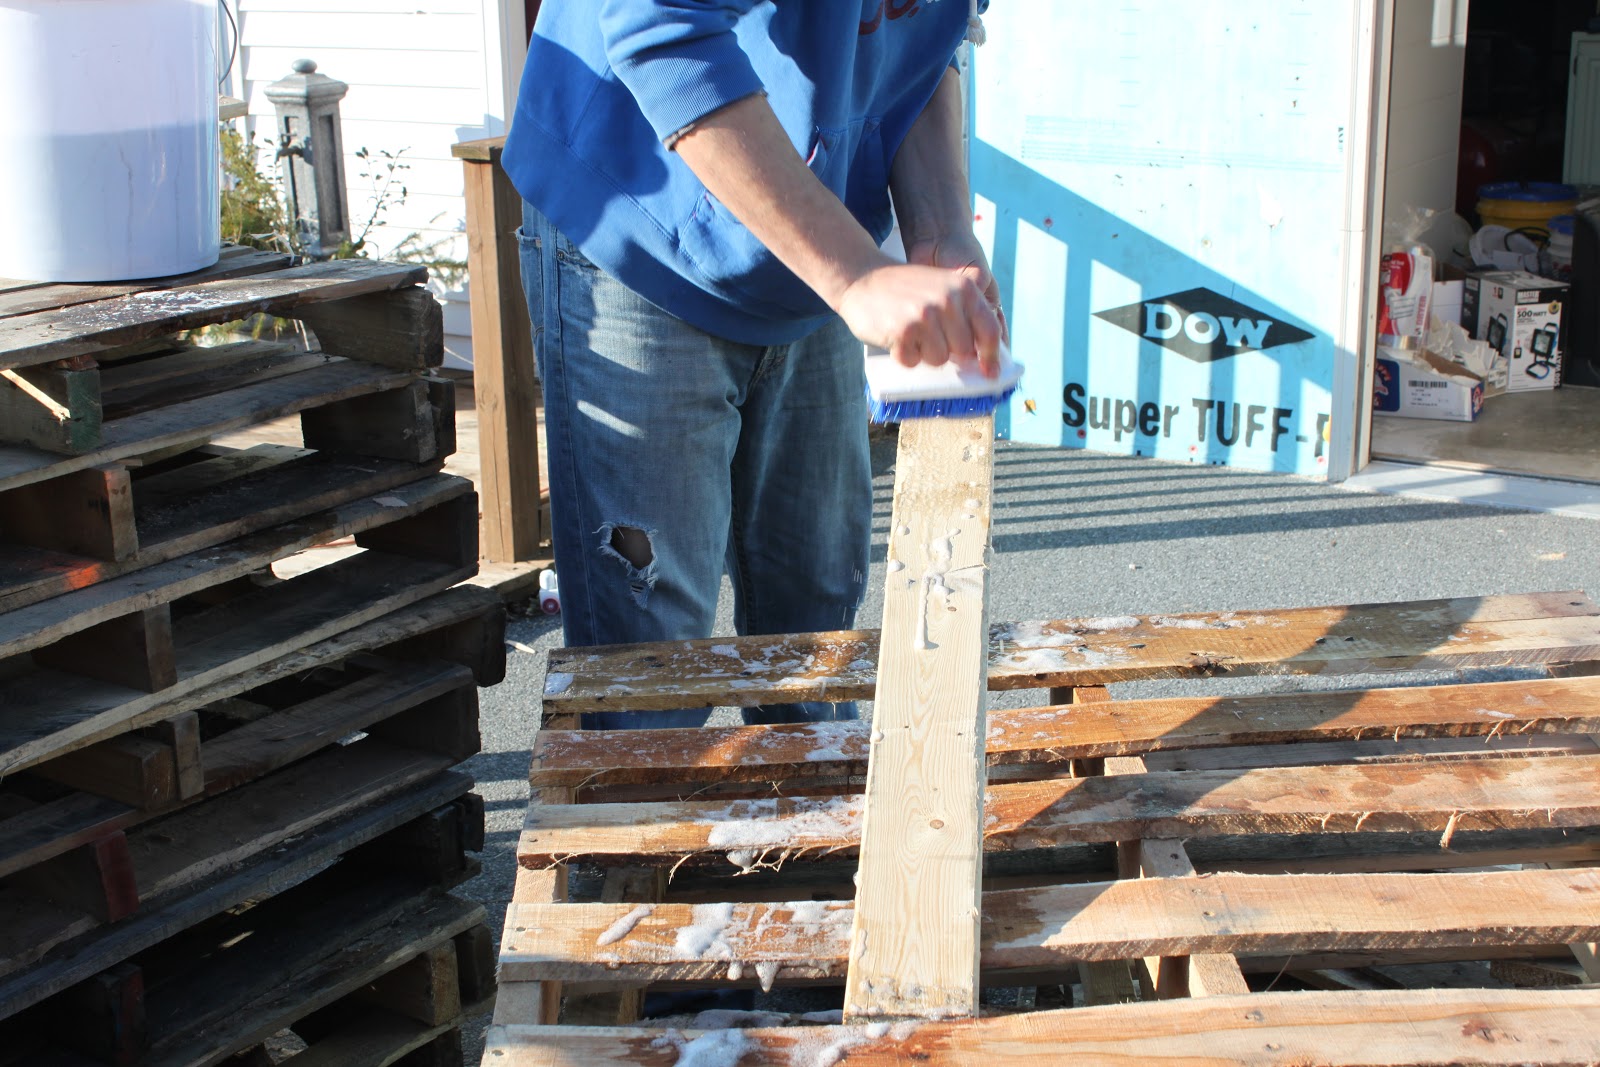
I only cut off the boards that were in good shape and not badly cracked or warped. After the boards were removed, I sanded each board with 120 grit sandpaper to get the large splinters and dirt off.

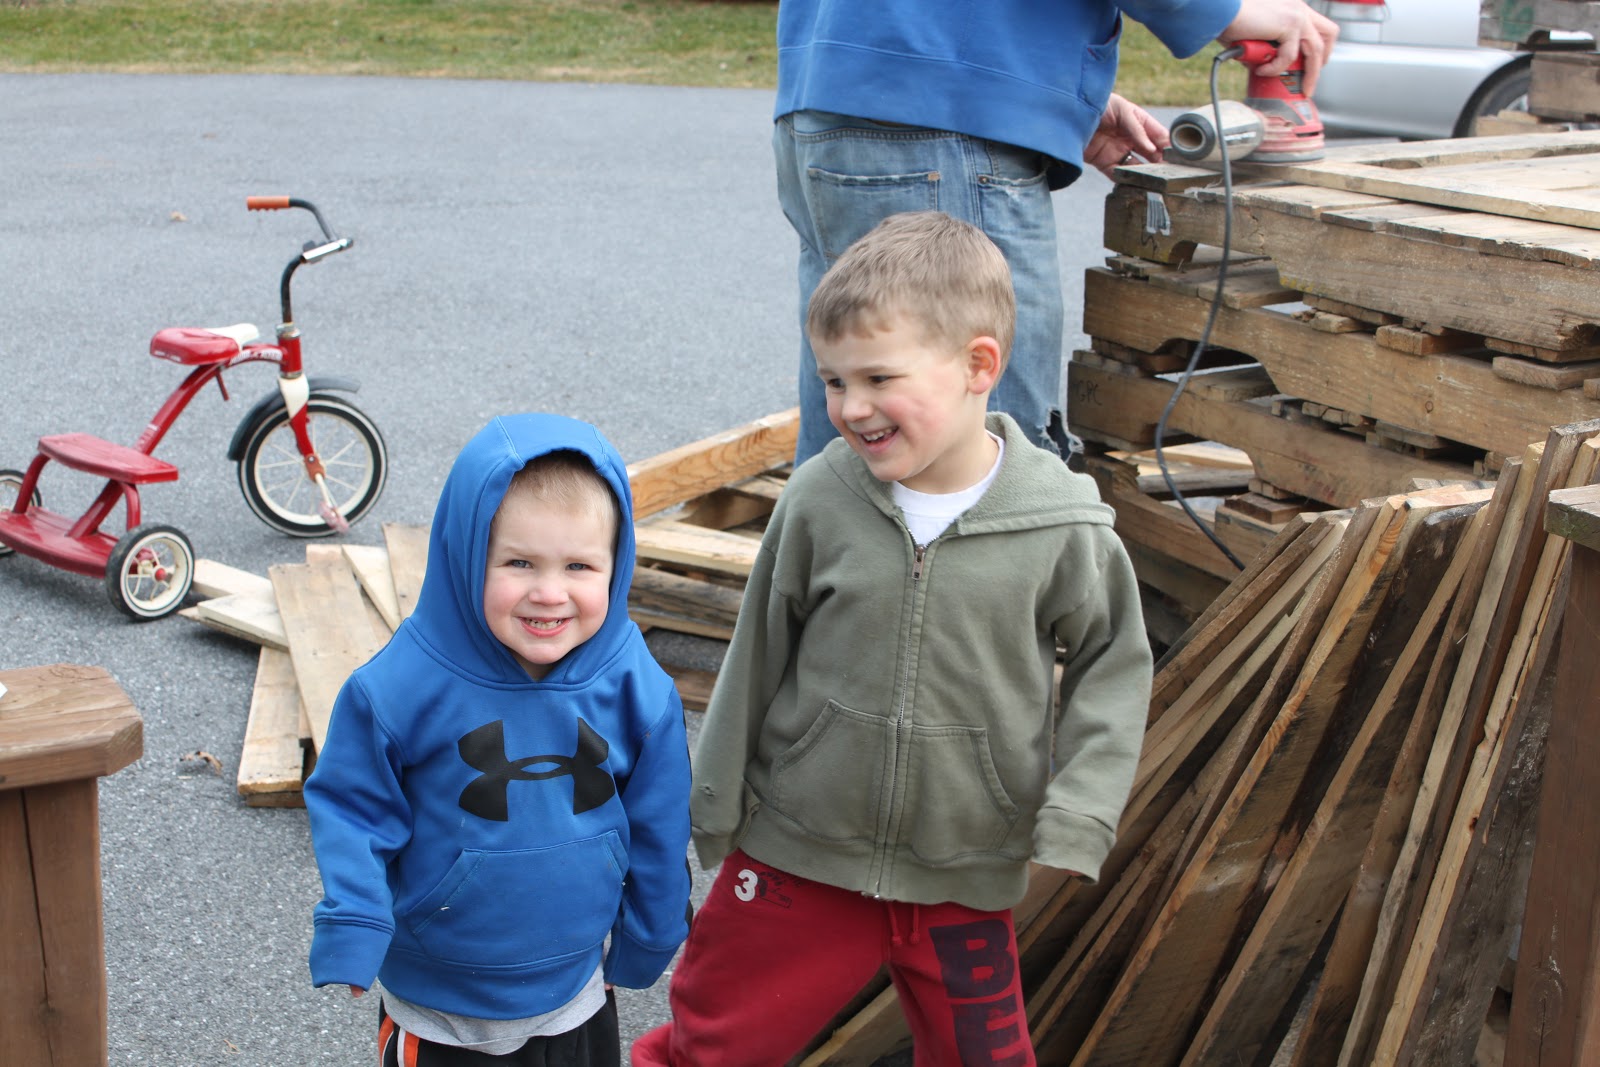
The boys are loving all these loud power tool sounds.

Ryder thought this board that had “Product of Canada” printed on it was cool. And of course being a born and raised Canuck myself, I did too. That board went prominently right above his bed.

I scrubbed each board thoroughly with a stiff bristled brush and soapy water and then rinsed them off. This got a lot of dirt off.

And then I let all the boards air dry.

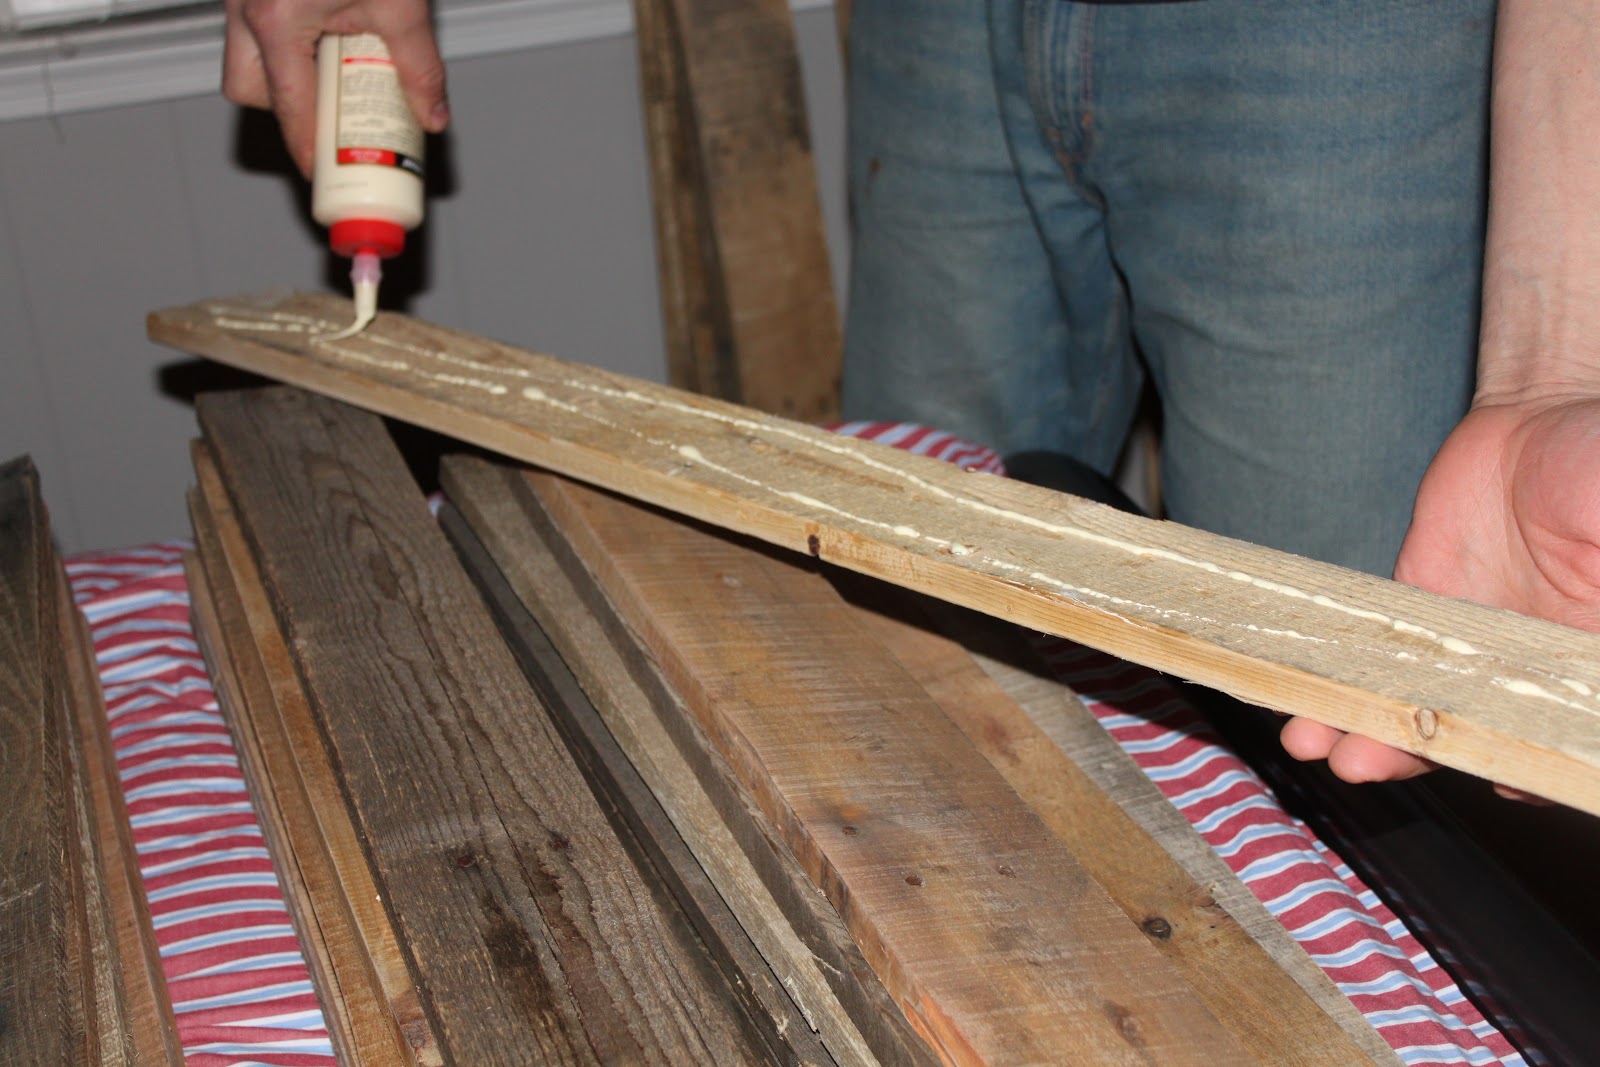
I then sanded all the boards again with 220 grit sandpaper to make them smooth and remove any lingering dirt or splinters before finally being ready to attach them to the ceiling. I decided to use both wood glue and nails. It may have been overkill but the last thing I wanted was for one to fall on Ryder’s head in the middle of the night.

The first board.

Despite how this picture appears, I want to be clear that I do not have a Hitler mustache. I think it is a shadow on the wall or something.
Kathleen helped pick out each row by making sure they were all the same width and similar in color. I varied all the seams by randomly cutting a board to start each new row. The thing I realized as I went along was that the boards are obviously not perfect and there were occasional gaps and unevenness here and there but in the end its all part of the rustic character.


One of the many advantages of being 6`11“
After all the boards were all up, I reattached the crown molding.

And this is how it turned out with the addition a new modern ceiling fan.

It was a lot of time-consuming work but totally worth it and actually really not that difficult. And the best part is that Ryder loves it and can enjoy it for years to come. I know that pallet craft seems to be all the rage right now and may be just a fad, but it really does look cool. So if you want something unique, why not give this budget friendly project a try? With the right tools, I am sure that anyone can do it. If you like this please check out the room reveal!
If you like this post please check out these:
 |
 |
 |
 |
| Little Boys Room Makeover |
Amazing Superhero Boys Room! |
Boys Beach Bedroom Interior Design |
Bold Striped Wall;Boy Room Design Ideas |
Cassity Kmetzsch started Remodelaholic after graduating from Utah State University with a degree in Interior Design. Remodelaholic is the place to share her love for knocking out walls, and building everything back up again to not only add function but beauty to her home. Together with her husband Justin, they have remodeled 6 homes and are working on a seventh. She is a mother of four amazing girls. Making a house a home is her favorite hobby.


Could you tell me approximately how many pallets you used and the size of the room more or less. Just trying to get an estimate for a small 10×11 bedroom we have. Thx so much!!
Most OSB is rated for exterior … so it’ll last.. but it should be sealed to prevent off-gassing when used inside
Hi, I was wondering how you lowered the ceiling fan…or did you? ty 🙂
Hello! Very talented and love the finished product!!! My husband is thinking of doing this ceiling for our garage that he is finishing. Particle board prices have gone u0 big time- can you share a link for what you’d recommend using? Thanks!
Yes, this post is from 2012 and the lumber prices have certainly changed! Particle board or plywood are still your best options for something like this, unless you happen to be installing in such a way that you can secure each board to the ceiling joists (and even then, I still think the extra is worth it.) You can use OSB/particle board like this post or a thin plywood like this project: https://www.remodelaholic.com/inexpensive-diy-herringbone-wood-ceiling-using-pallets/
I’d recommend looking around at the stores near you to see what is most affordable — sometimes a thin plywood underlayment will be less expensive than OSB, depending on what’s available in your area. Here are a few affiliate links for products that should work, to check prices at your local Home Depot:
1/5 in. underlayment – about $20 at my store
7/16 in. OSB/sheathing – about $20 at my store
1/8 in. utility panel – about $15 at my store
Hope that helps!