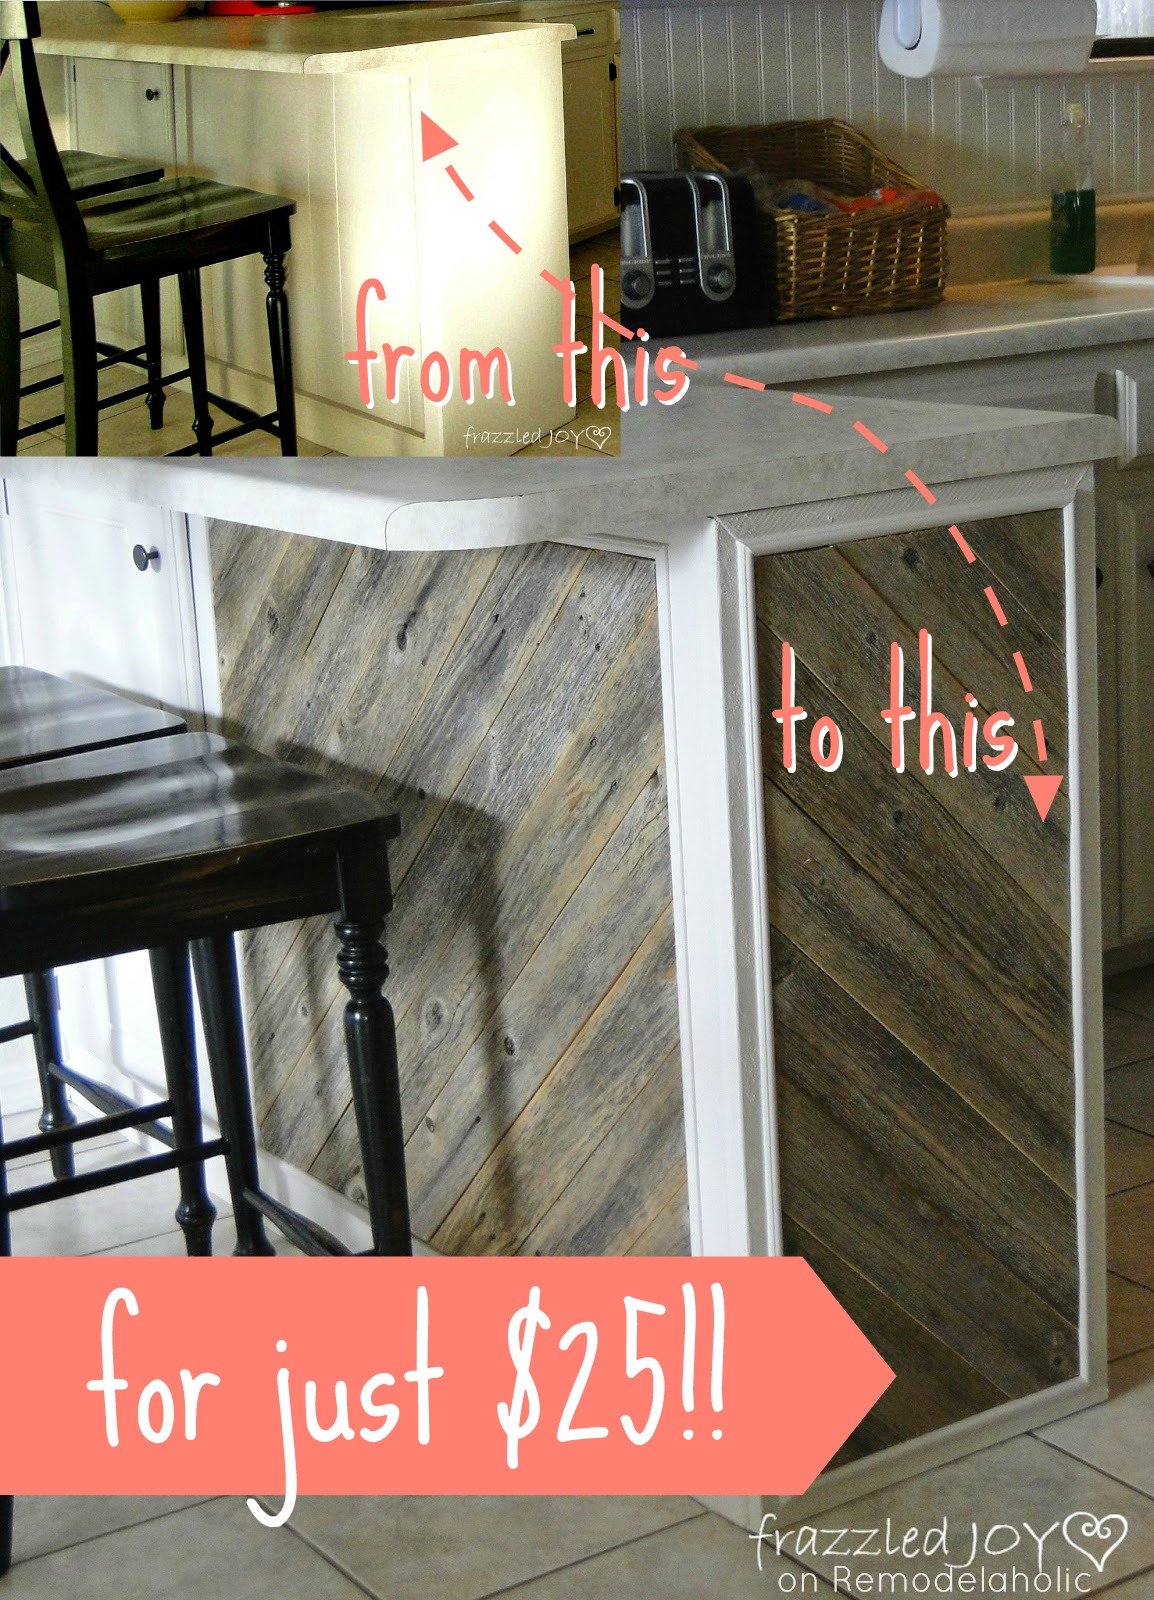
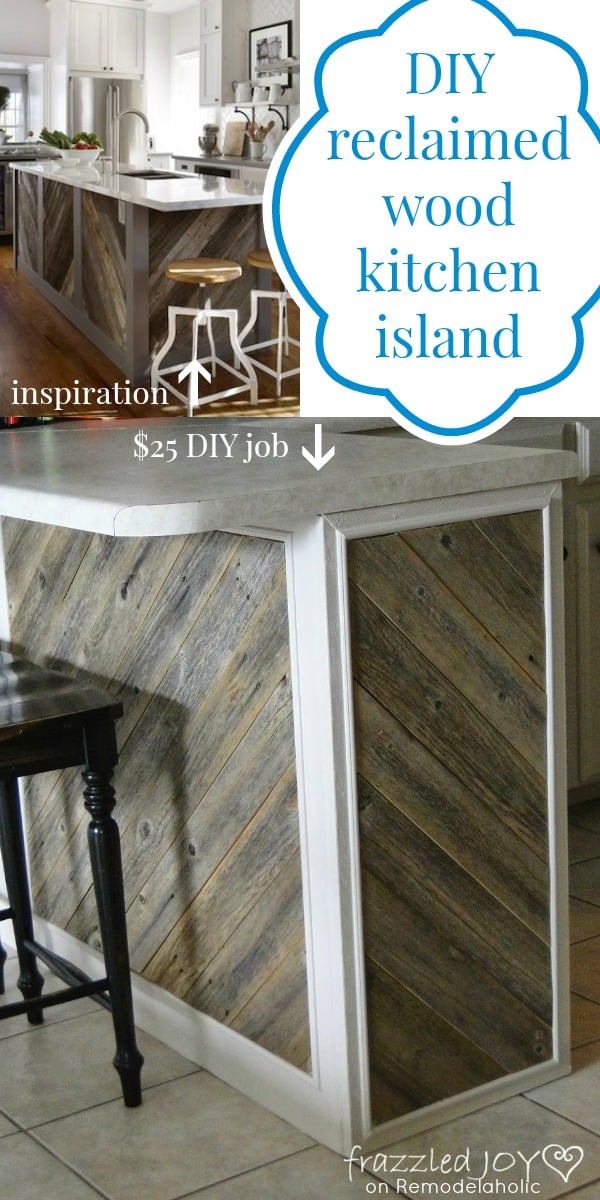
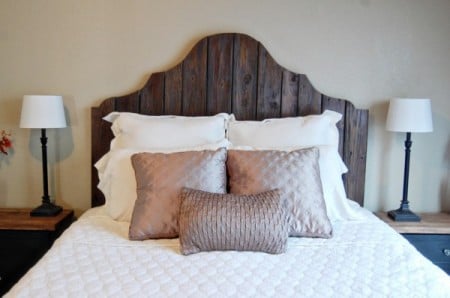
As you know, we are all about taking builder grade and making it beautiful, unique, and interesting — and doing it all on a budget. So when projects like this one show up at the link party, I am always so thrilled to feature them! Just look at the lovely makeover that Denise gave her standard kitchen island, using reclaimed fence wood and $25 in other materials!
And here’s Denise to give you all the details of her $25 kitchen island makeover!
Reclaimed Wood Kitchen Island Tutorial
by Denise of Frazzled Joy
Hi everyone! I am Denise and I blog over at Frazzled JOY. I am married to the love of my life, and I have four awesome kiddos – 3 boys and 1 girl. I started blogging almost 2 years ago and love sharing lots of DIY projects, with the occasional family post. My favorite project to date was my kitchen update. I also enjoyed challenging myself in design by participating as a linking participant in Linda’s One Room Challenge this spring, and challenging myself in writing by participating in The Nester’s 31 Day Challenge.
I am so excited to be here at Remodelaholic to share with all of you guys how I gave a rustic look to our kitchen “island”!!
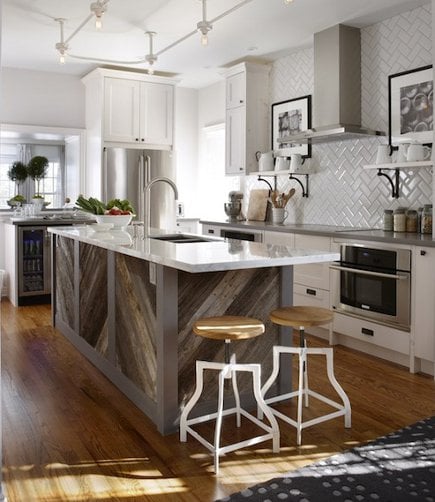
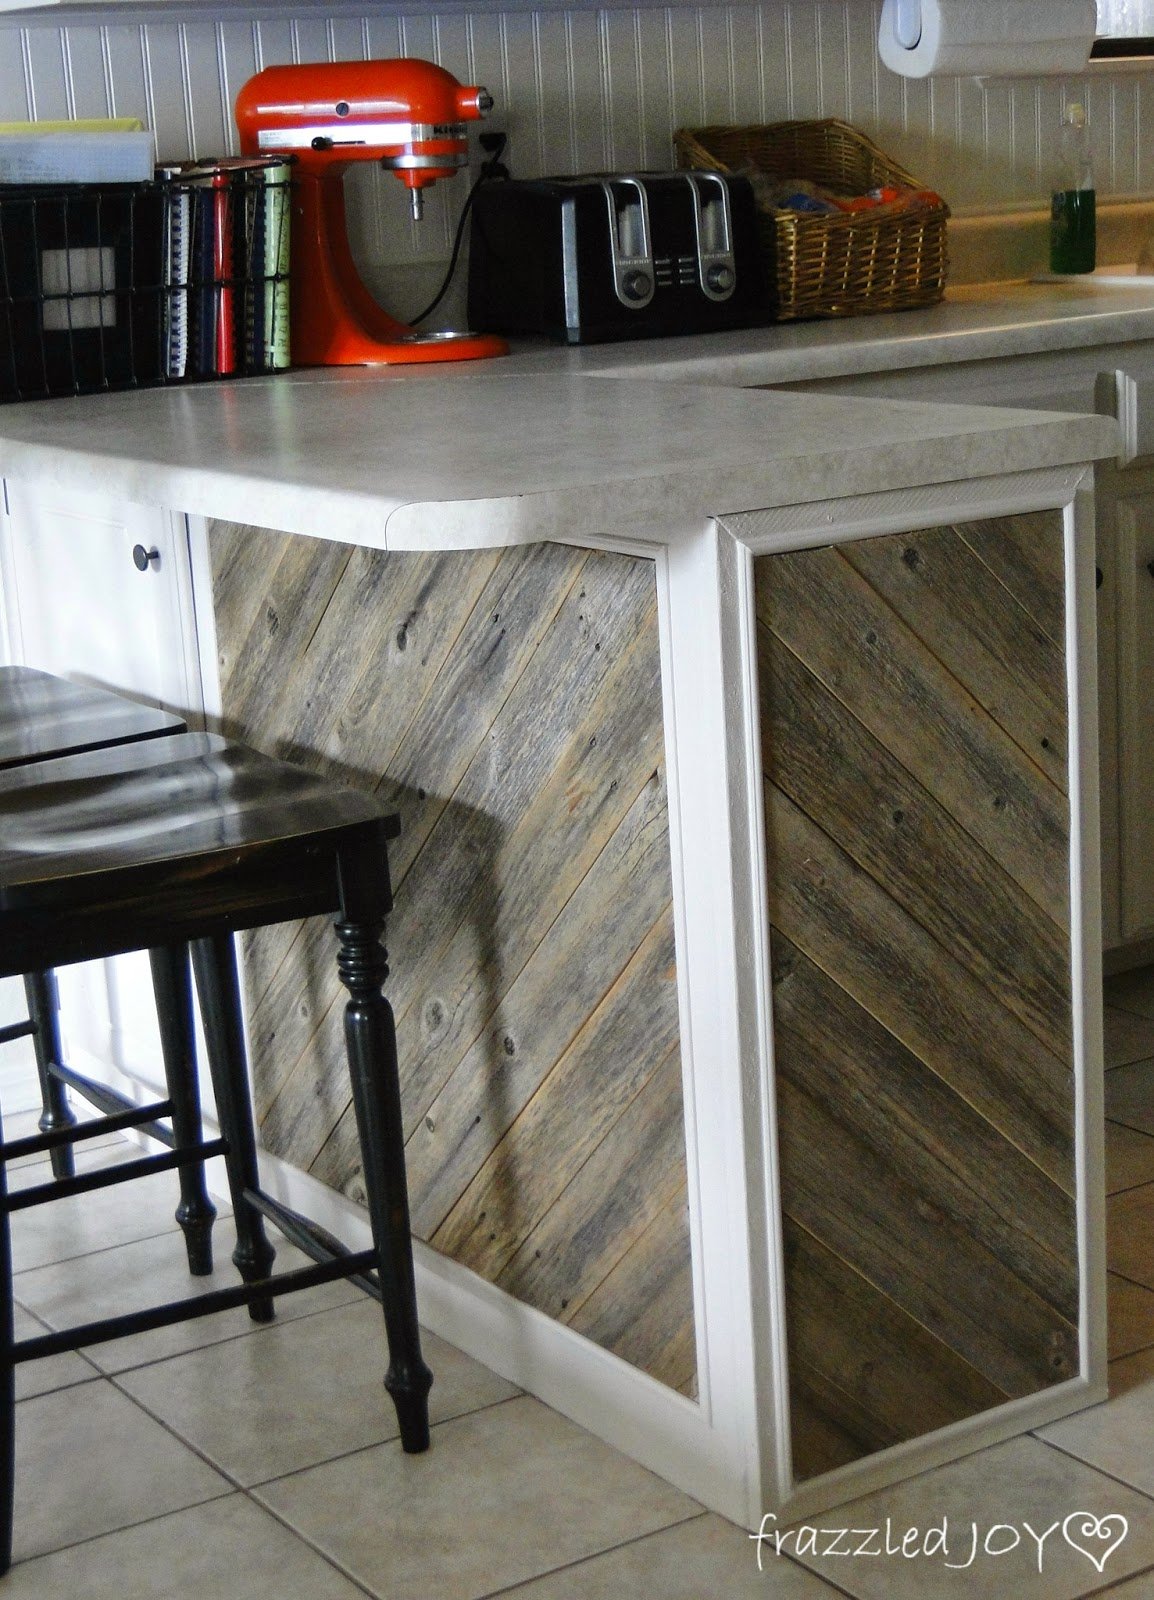
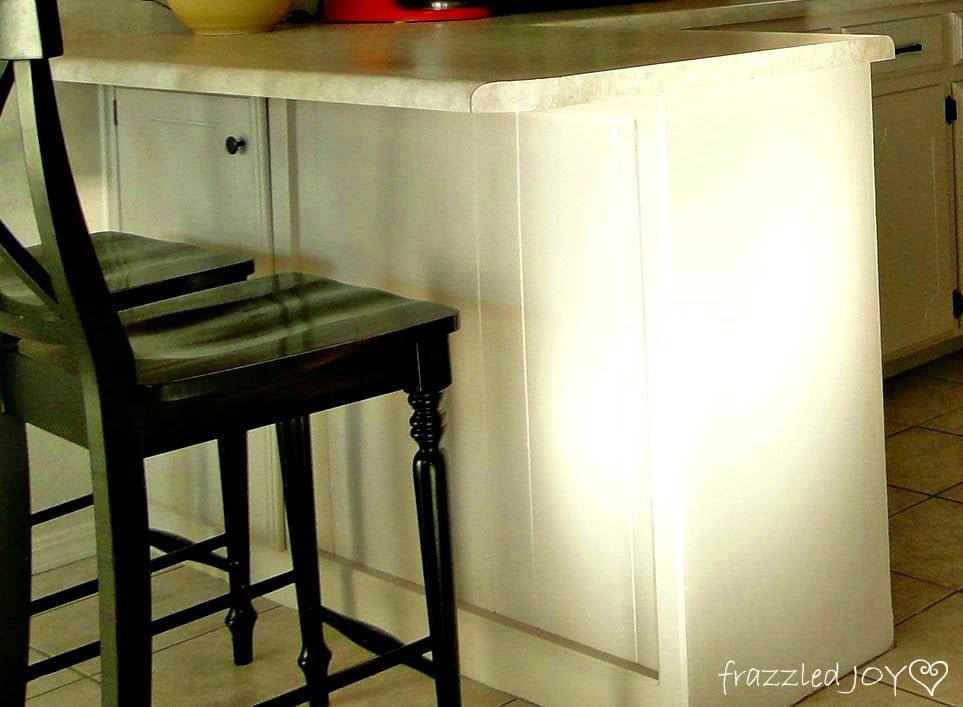
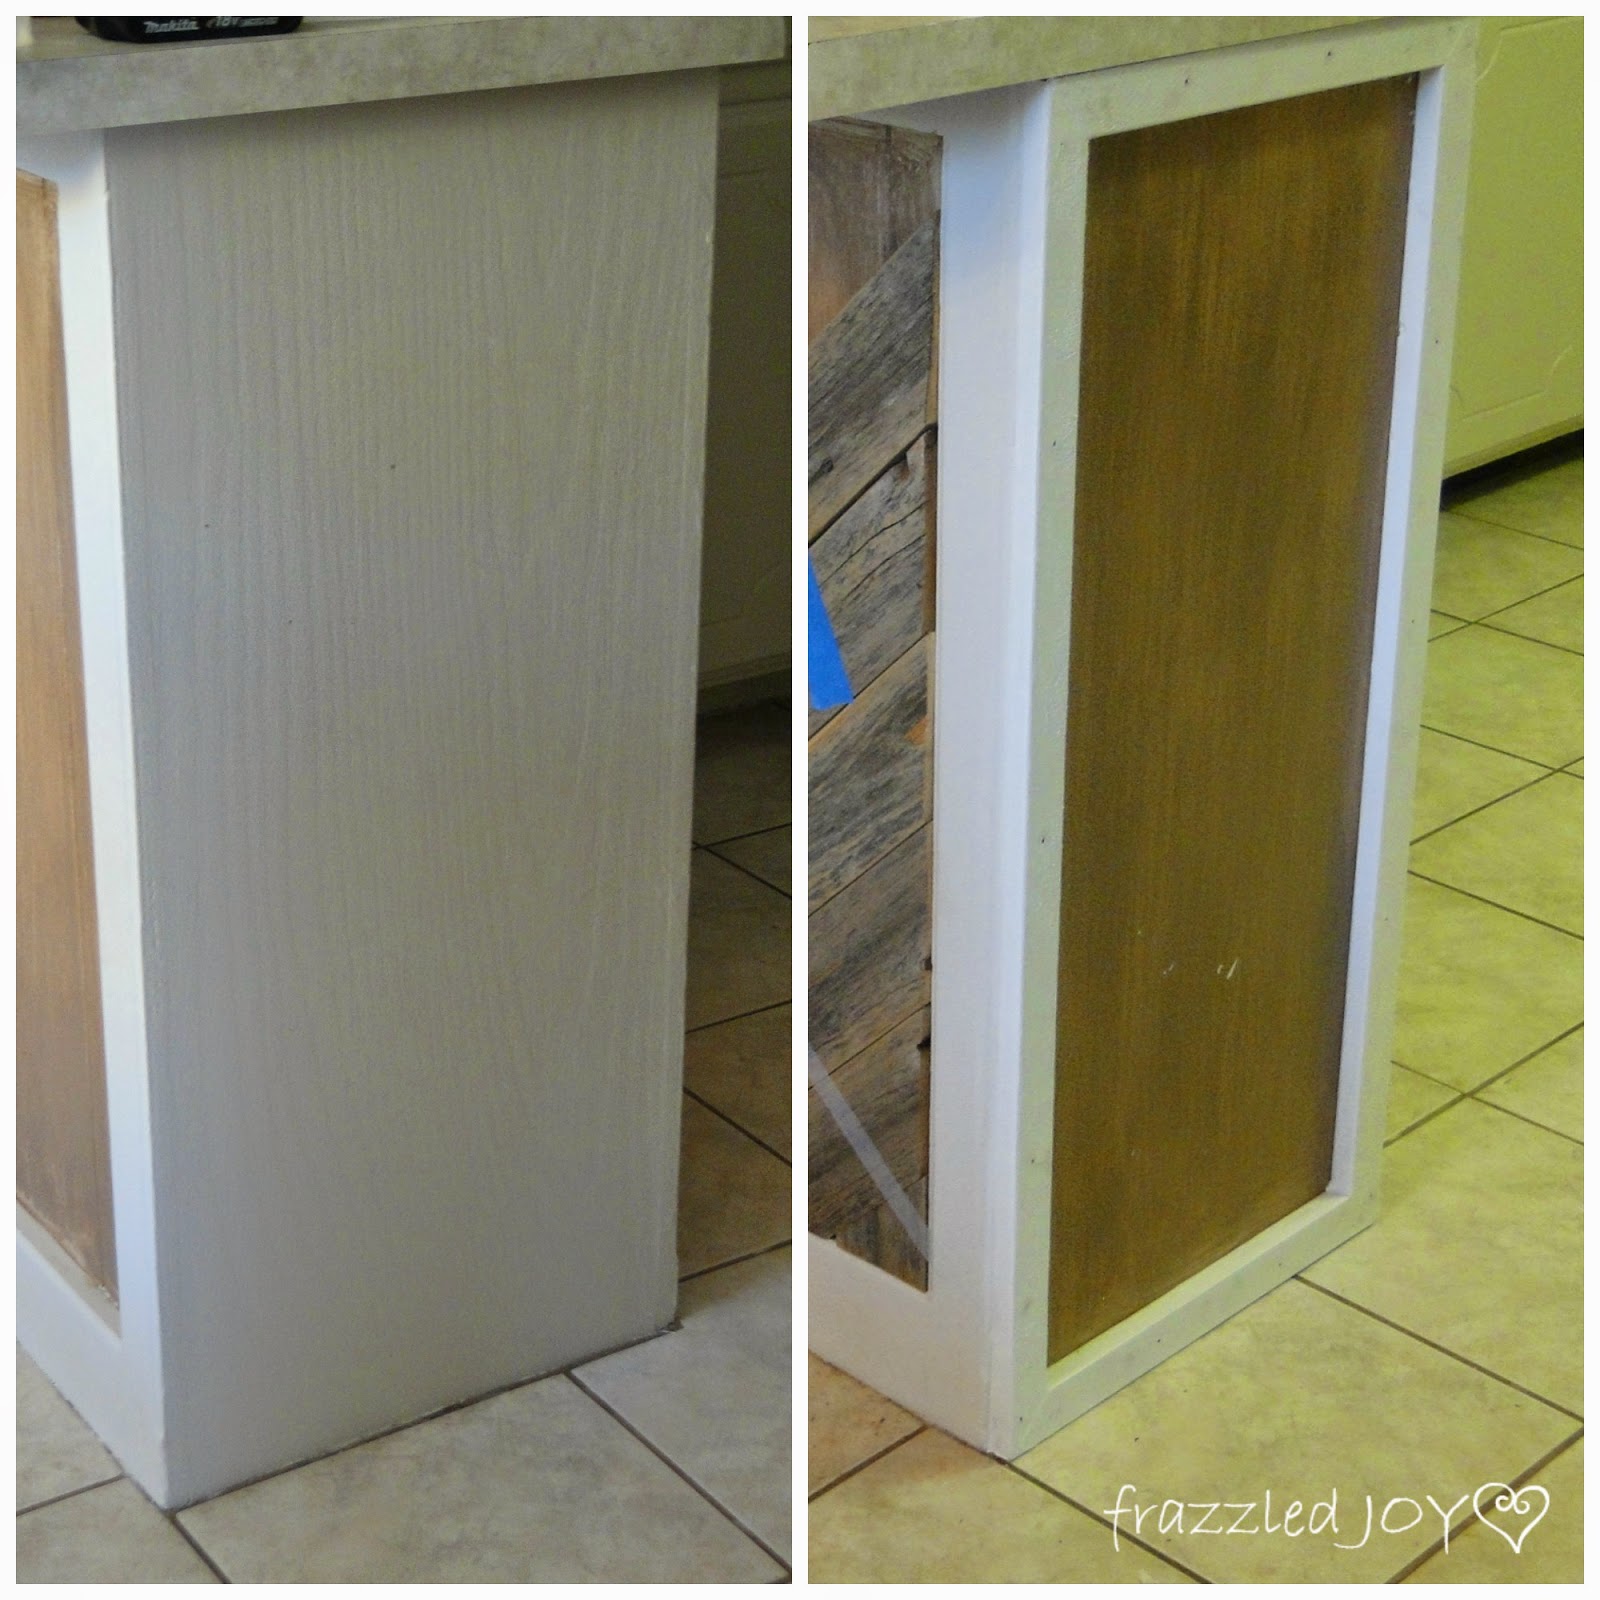
This is something I had been dreaming about for a while. My inspiration came from a Sarah Richardson kitchen. I think I pinned photos of the island in her kitchen several times – they just kept popping up!! I love everything she does! So, when I saw this kitchen island with the rustic wood, I was instantly crushing!! I don’t have as grand of an island as this, in fact it’s not even technically an island, but more of a bar. But, I knew that this would be doable. Here’s the before:
Maybe you can see the set-in space there – a perfect place to add some rustic charm.
So, to get the look I was going for I started with some old fence pickets from a friend, and then I got to work.
First things first was giving all the boards a good hose down with the power nozzle on my sprayer. Then I let them dry out in the sun for a day. Next, I sanded all the pieces, top bottom, and edges, to prevent as many splinters as possible, and just clean them up a bit.
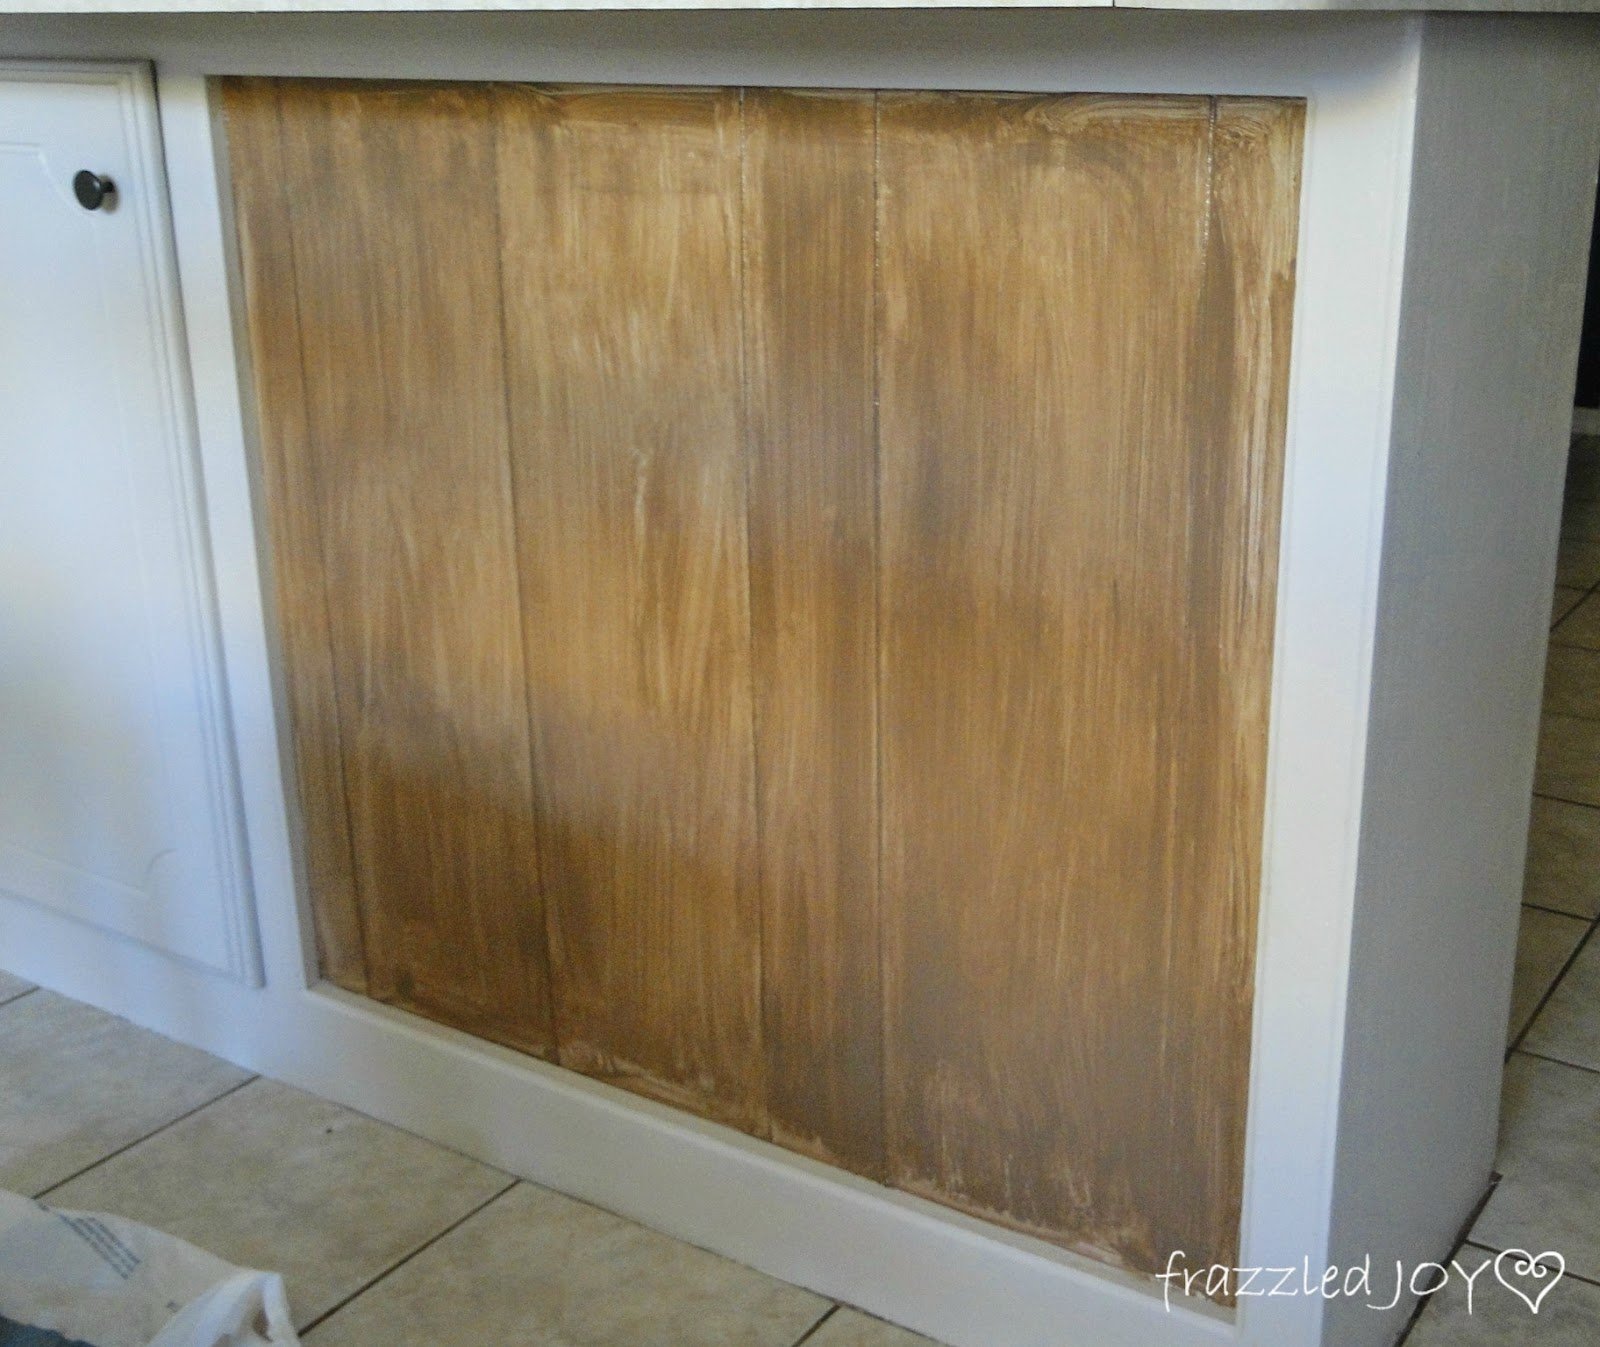
After getting all of the boards ready I needed to get the bar ready for the application. First in that was to paint the background a similar color as the planks – because they are not going to match up perfectly (it’s old wood), and this way the spaces won’t be as noticeable. I simply used some leftover paint for this – obviously it doesn’t have to be perfect.
I also had to build a frame on the end of the bar since that surface was completely flat. I just used 1″ x 1/2″ boards that I found in my wood scraps for that. Simply cut the boards to size, miter the corners and attache with finishing nails. Be sure to pre-drill holes for the nails, so you don’t split the wood. (It also makes it much easier to drive the nails in.)
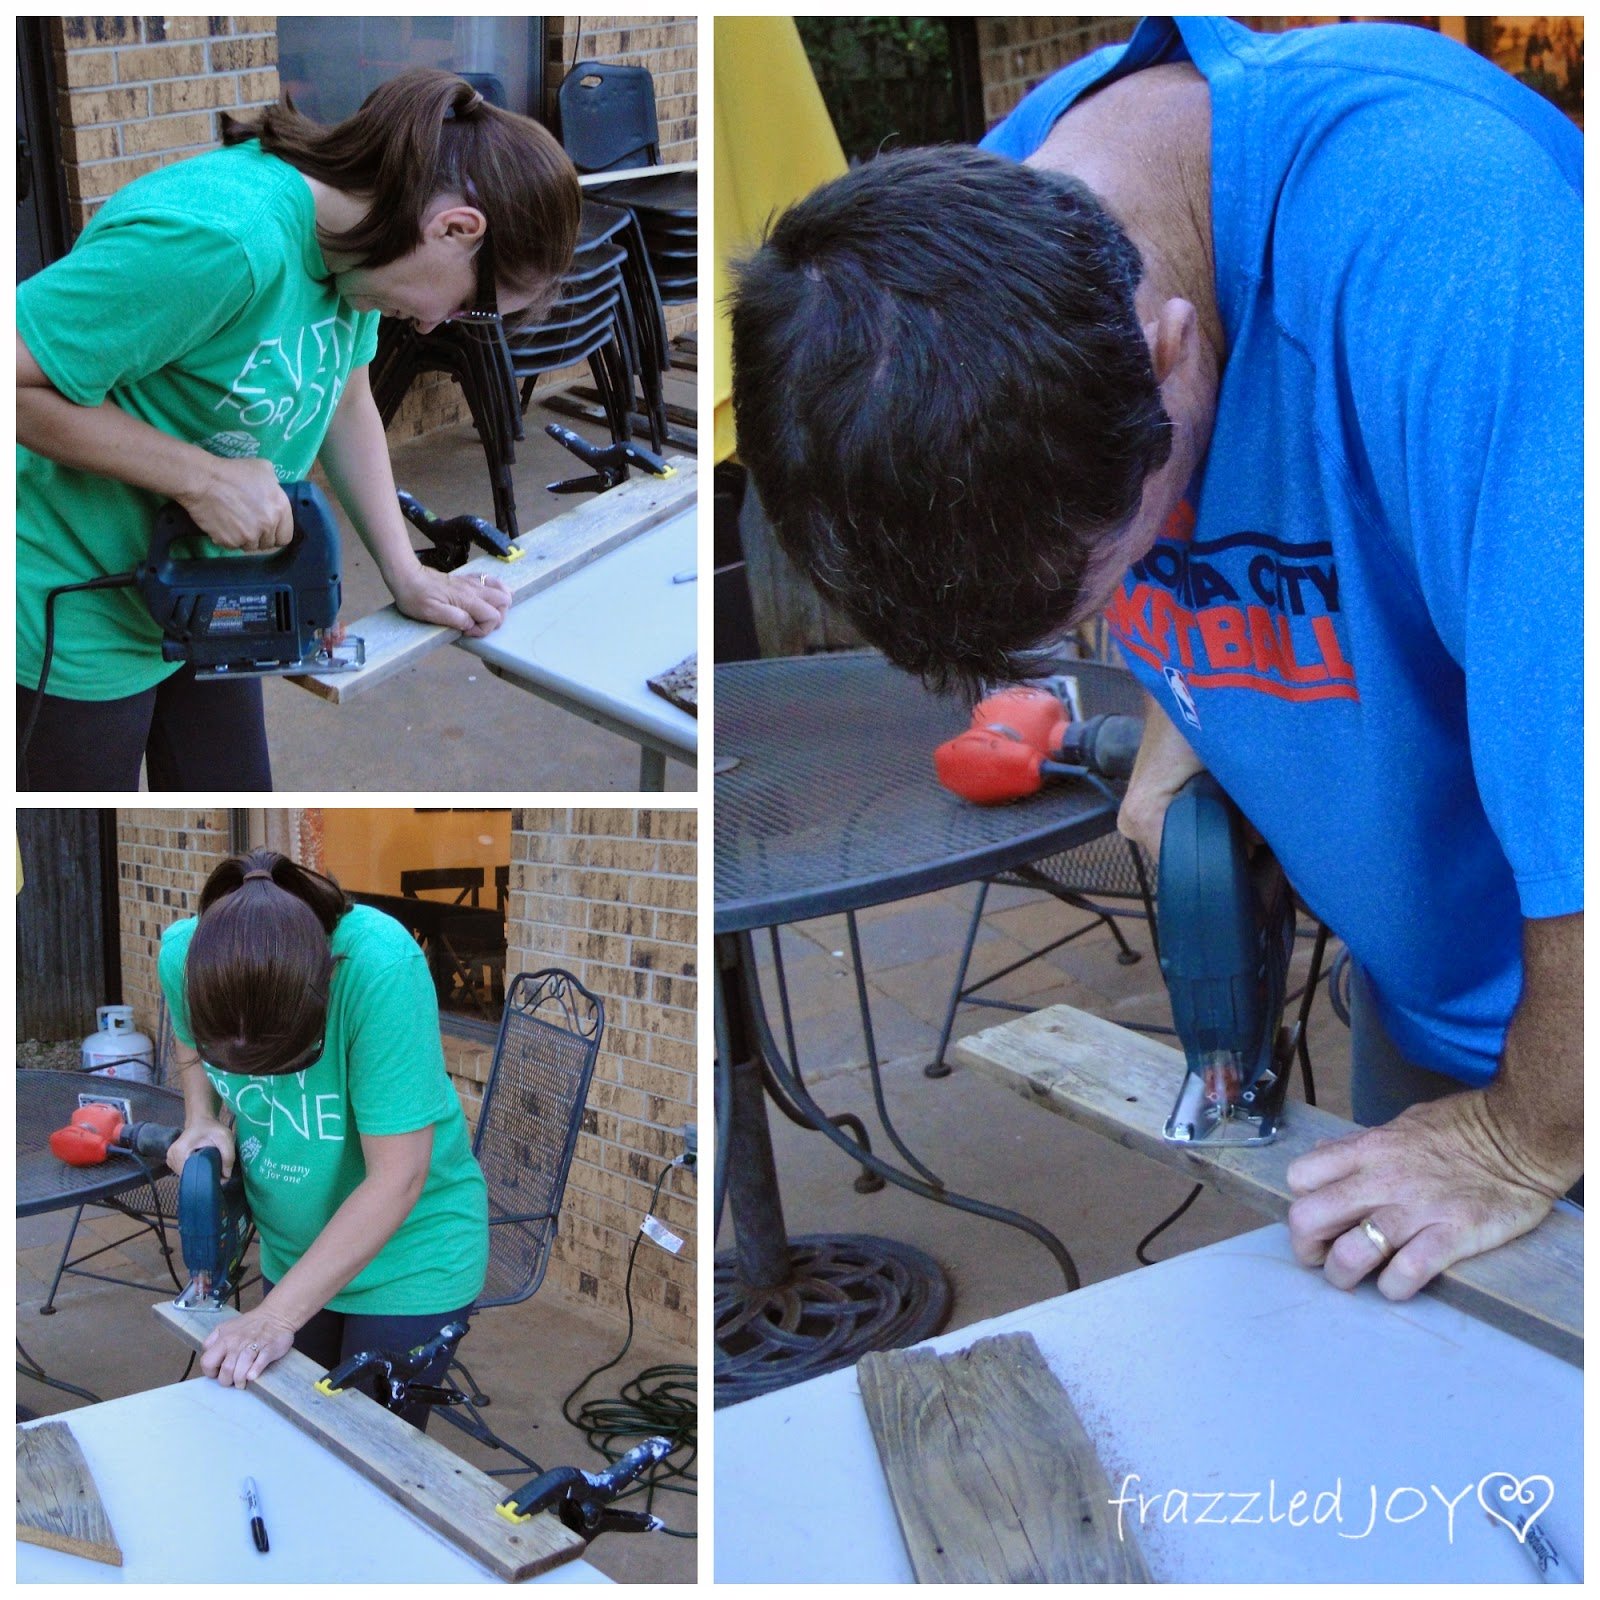
The next part of the project was cutting the pieces. I enlisted my hubby’s help on this one, mostly because my arms got tired :). This obviously would have been easier with a chop saw – but I don’t have one, so I used what I had – a jigsaw.
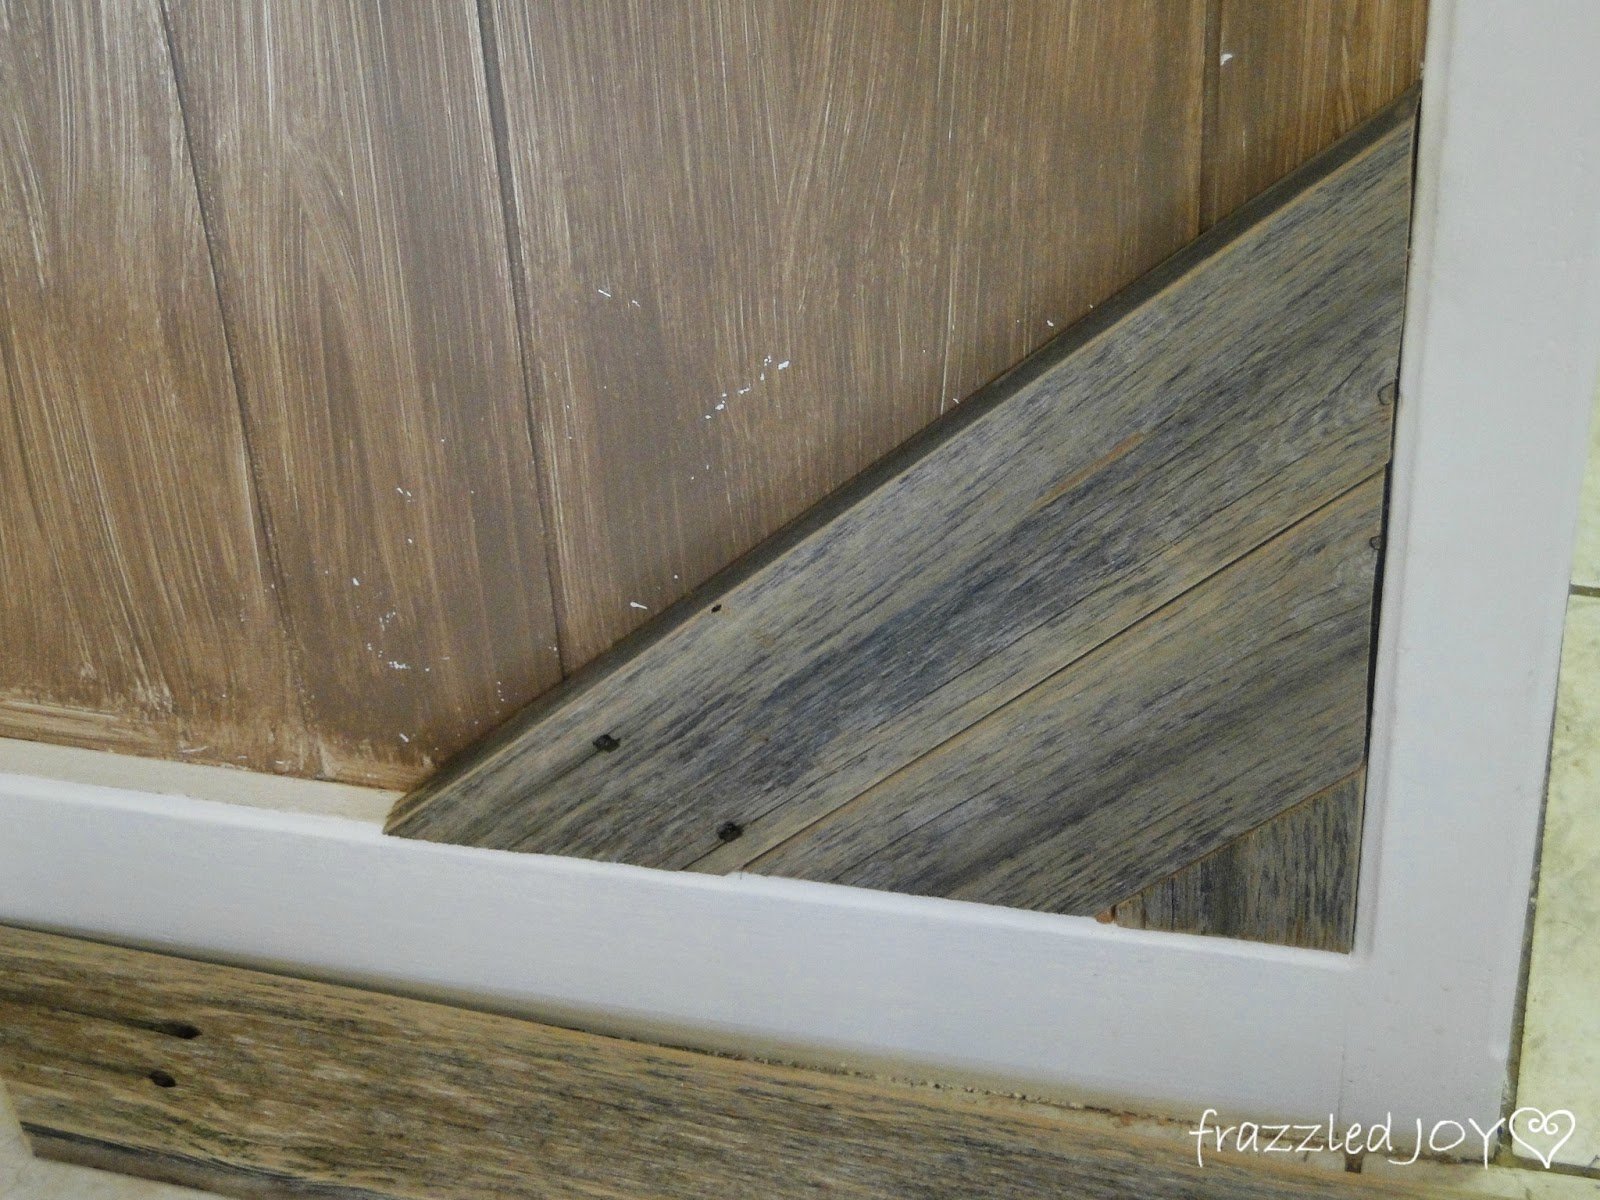
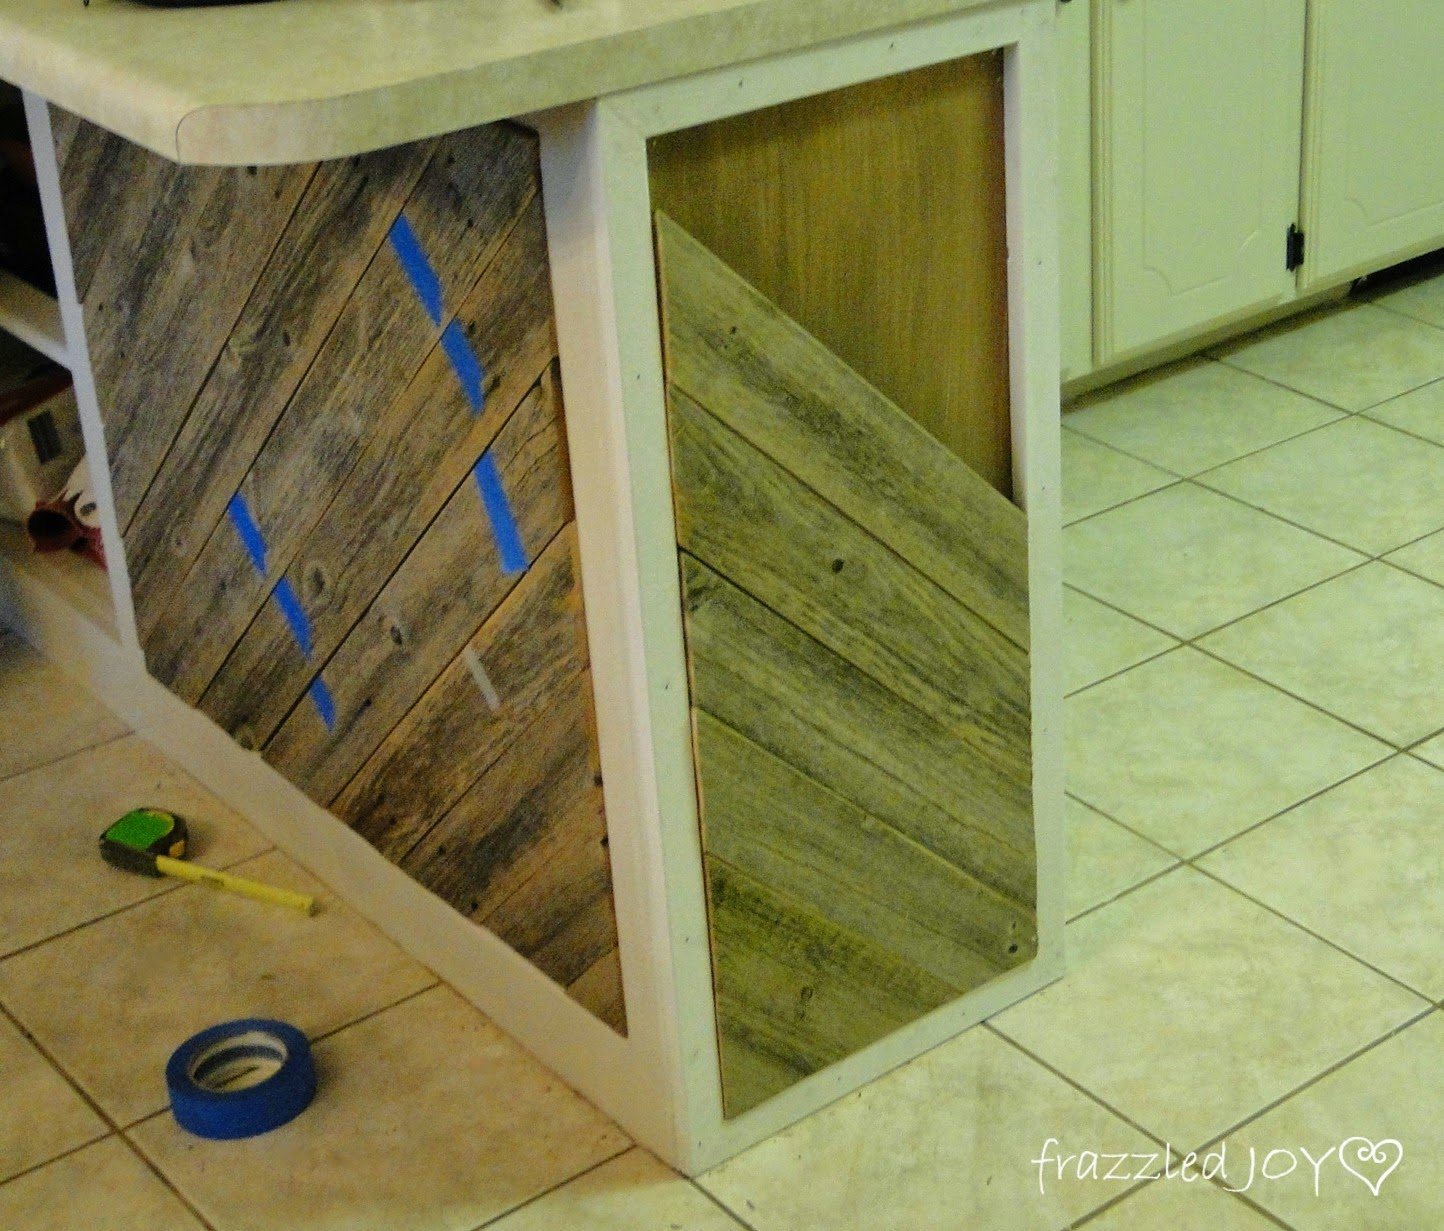
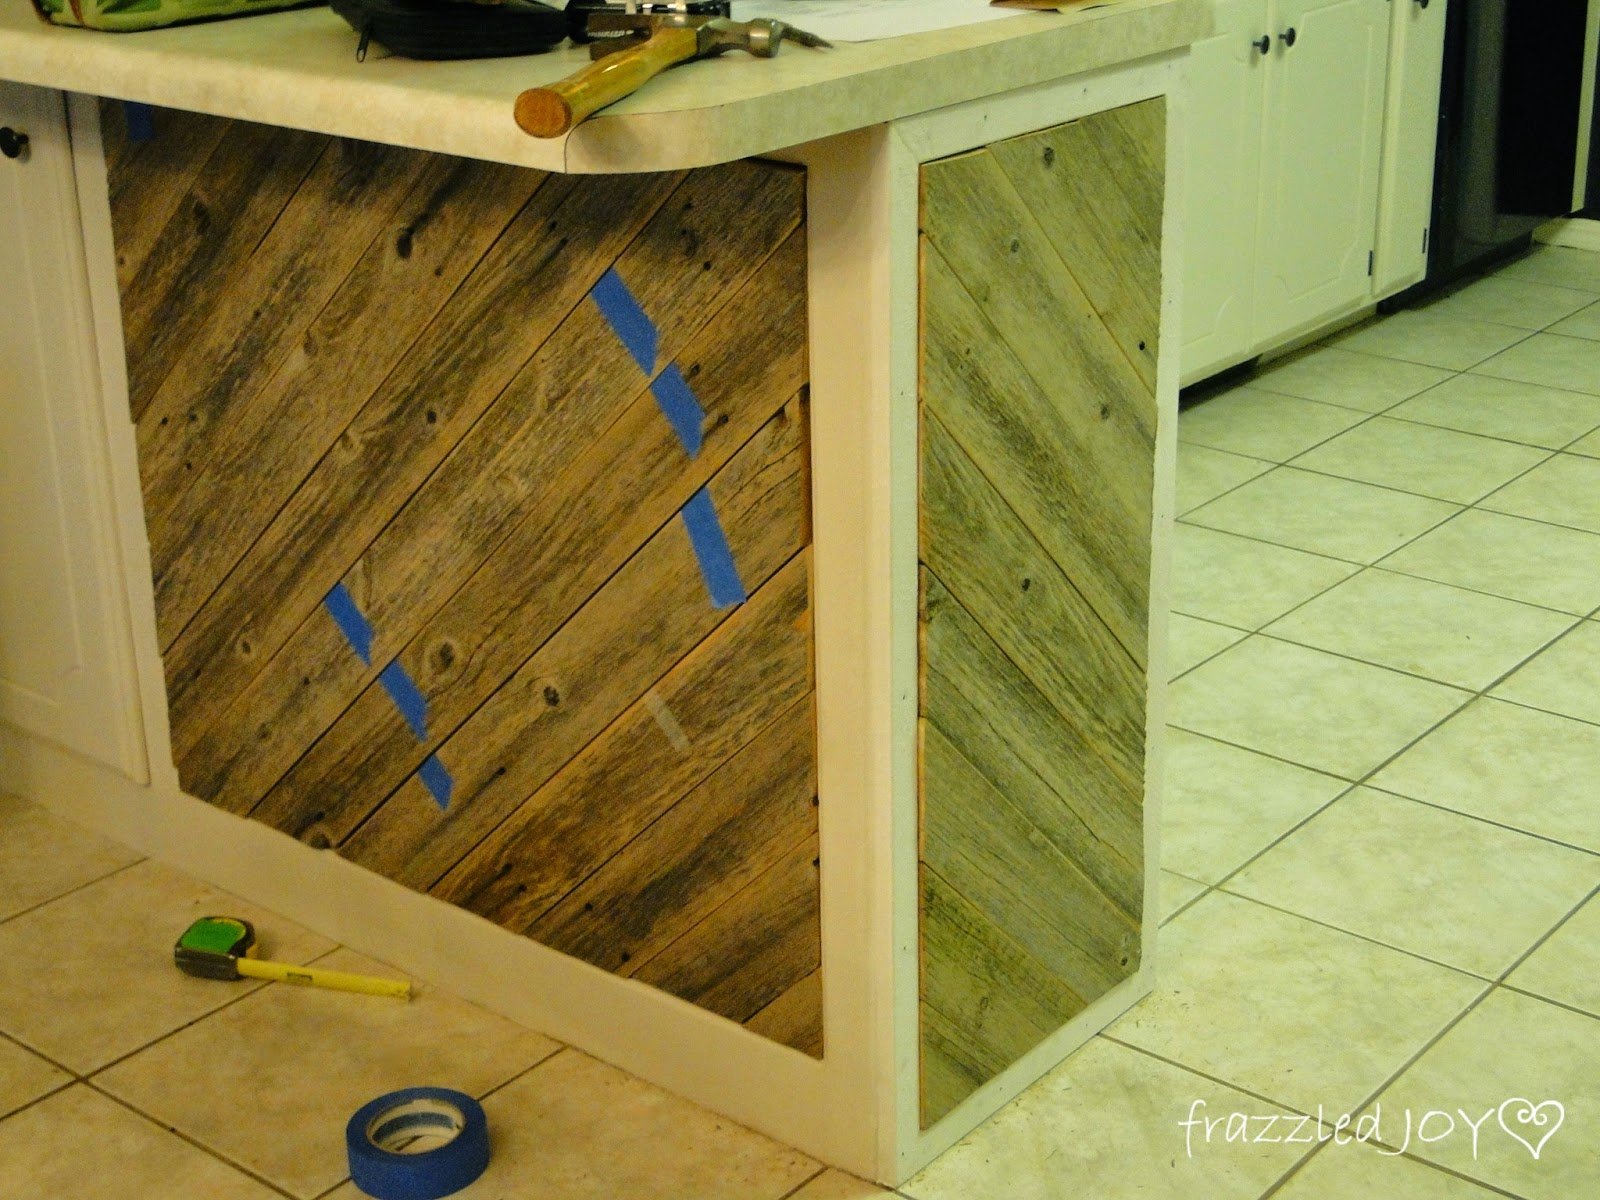
Knowing the look I was going for, I started in the corner with a triangle and went from there. I must confess, I did not measure any of these cuts with a ruler. I cut a 45 degree angle on one end of the board and then held it in place on the bar and marked where the other end needed to be cut. Repeating these same steps all the way across, and on the end.
The tricky pieces were the ones on the corners – they required cutting a couple of angles that met in a point, and took all of the geometry skills I could remember. 🙂
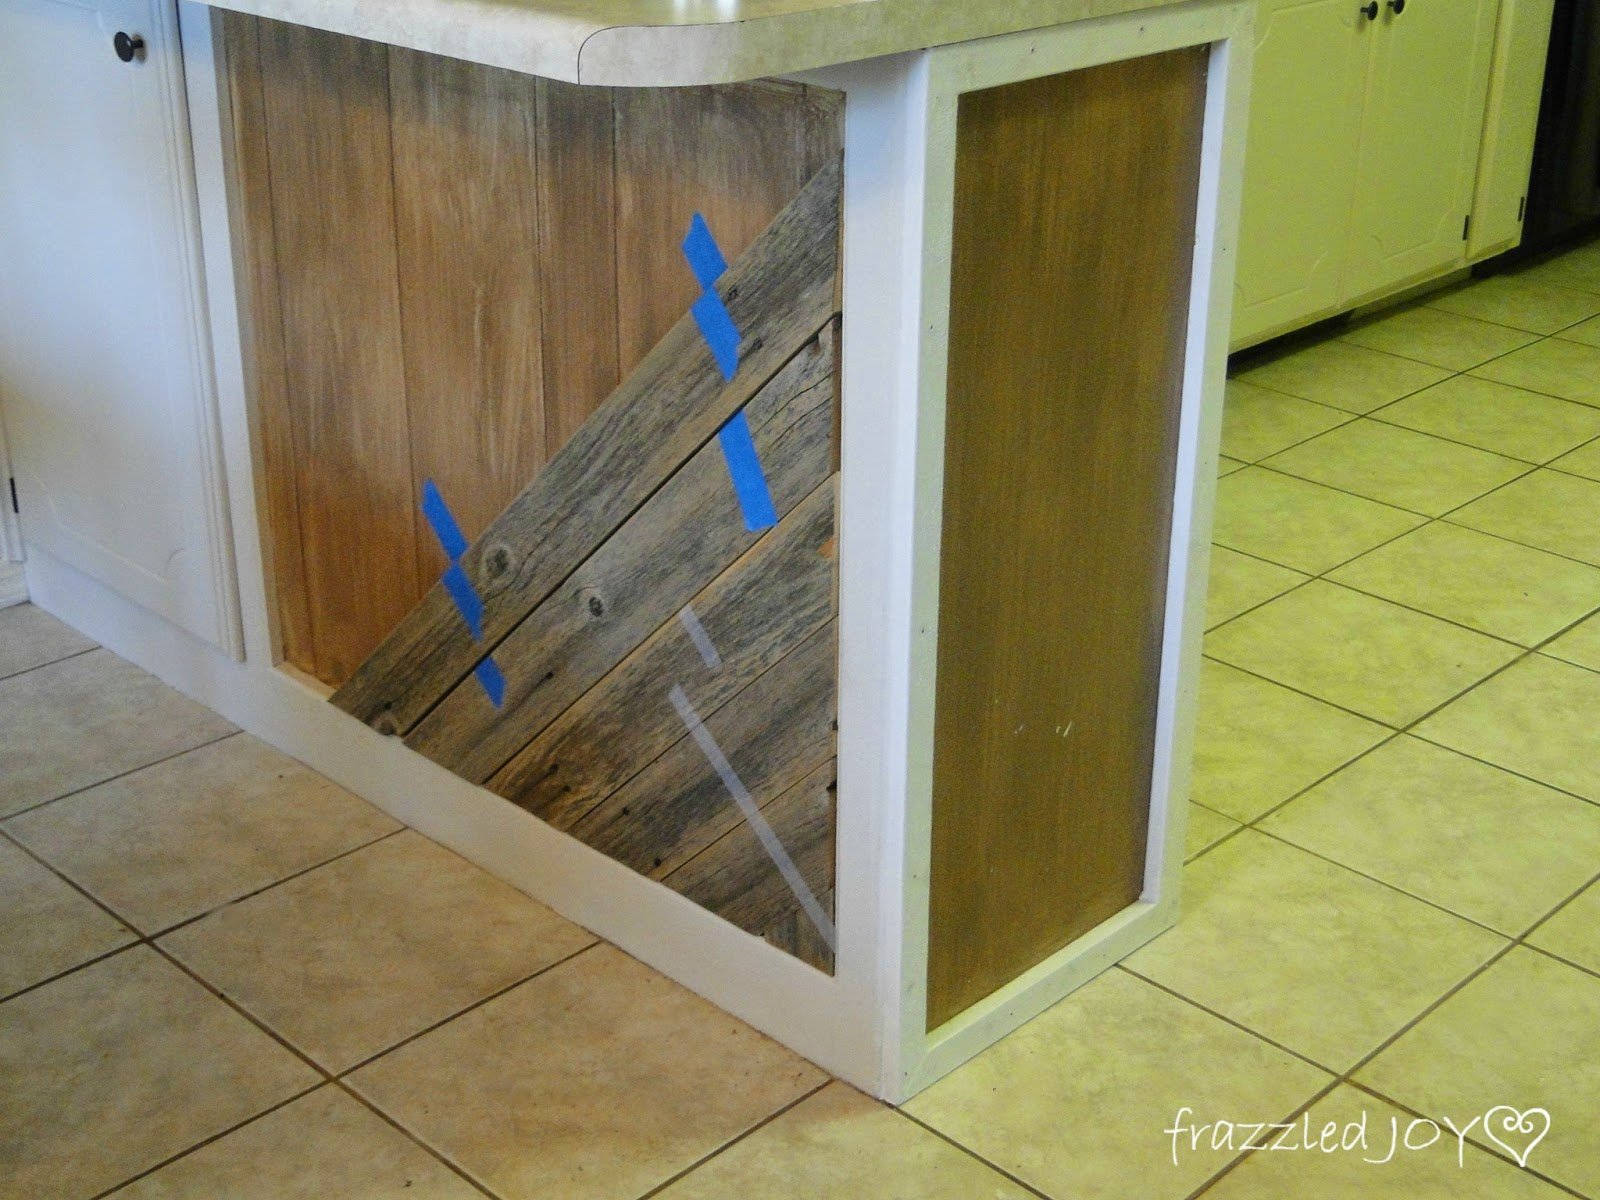
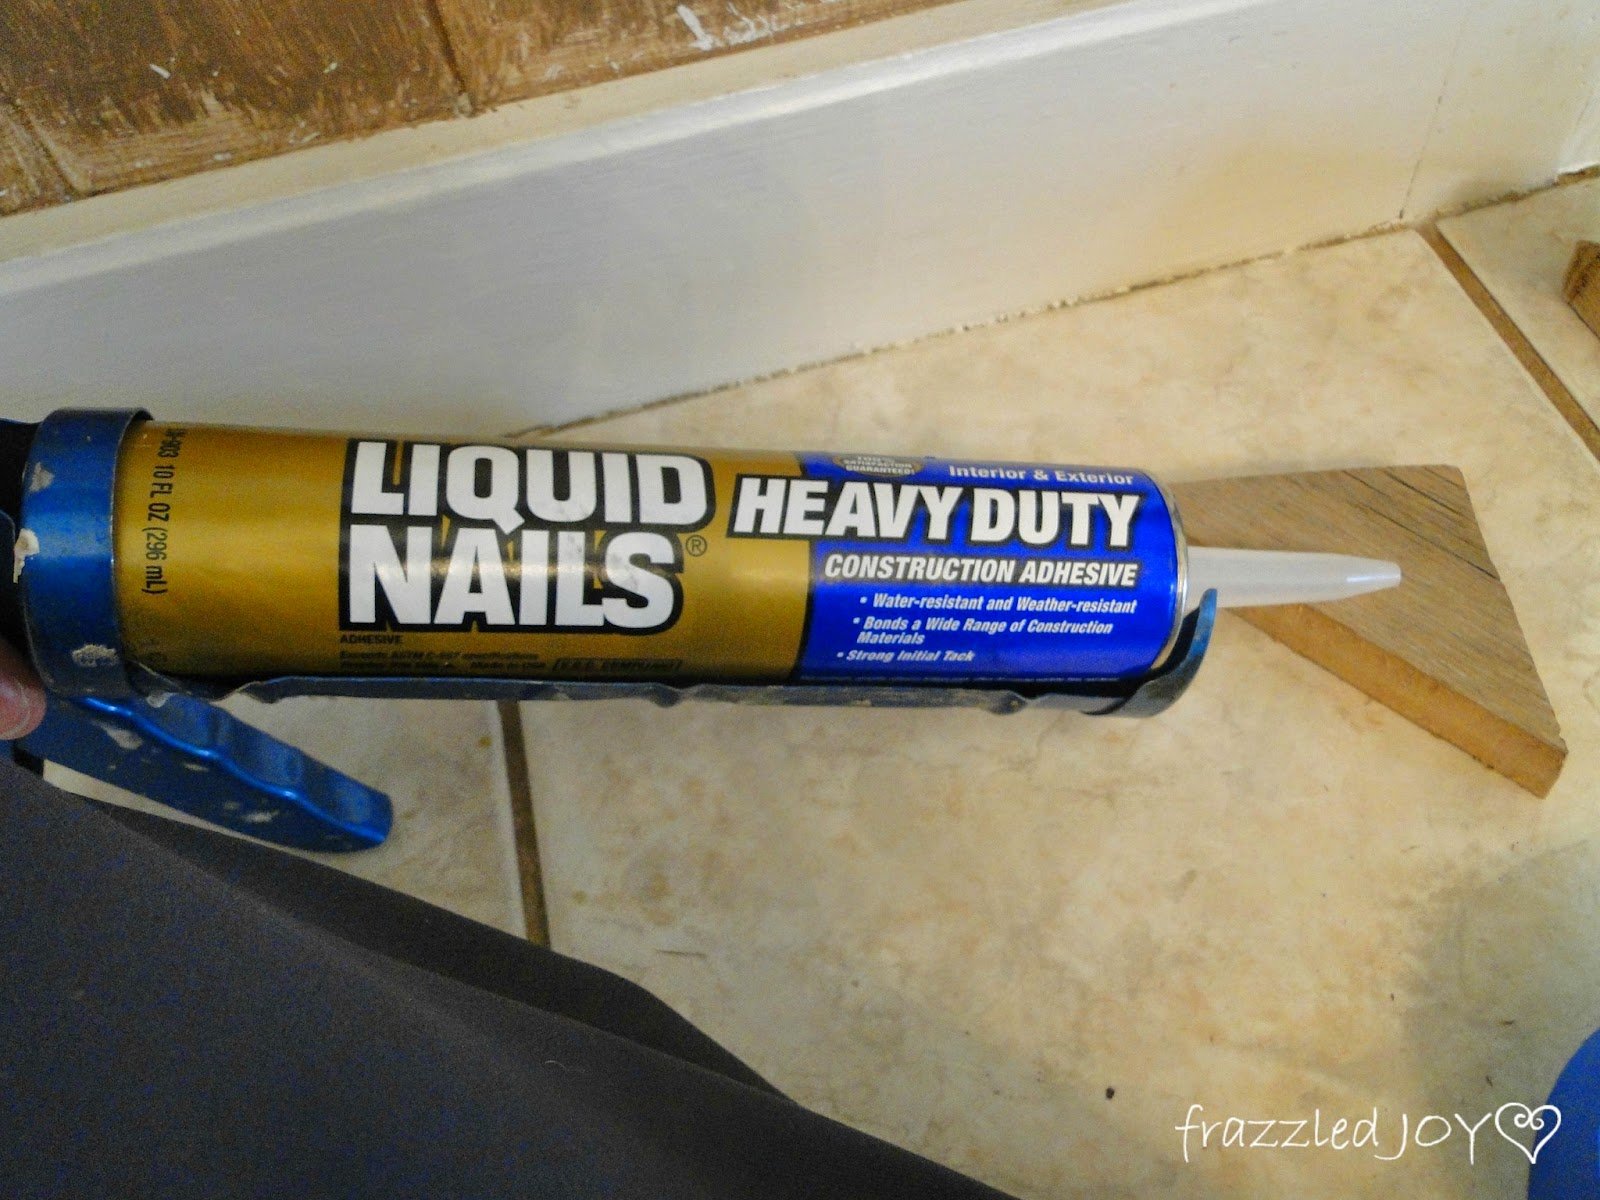
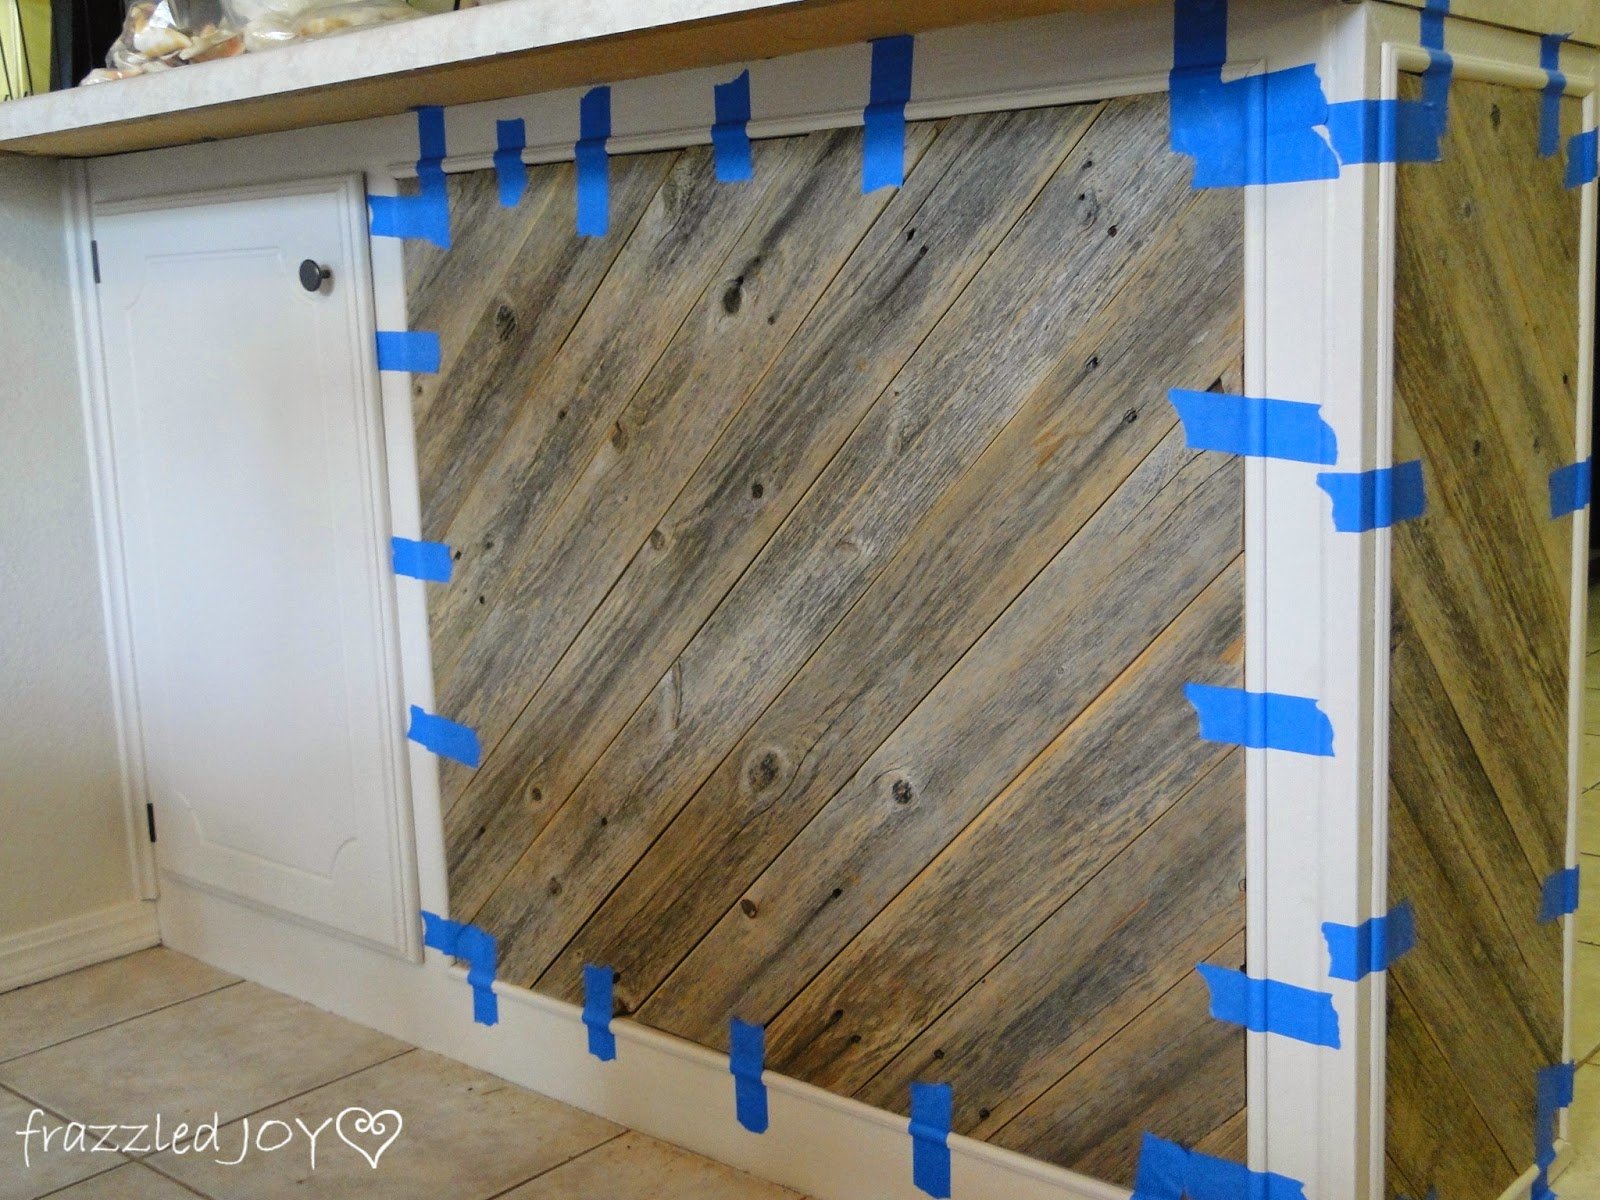
When we got all the pieces cut it was time to attach them. My go-to adhesive for things like this is liquid nails.
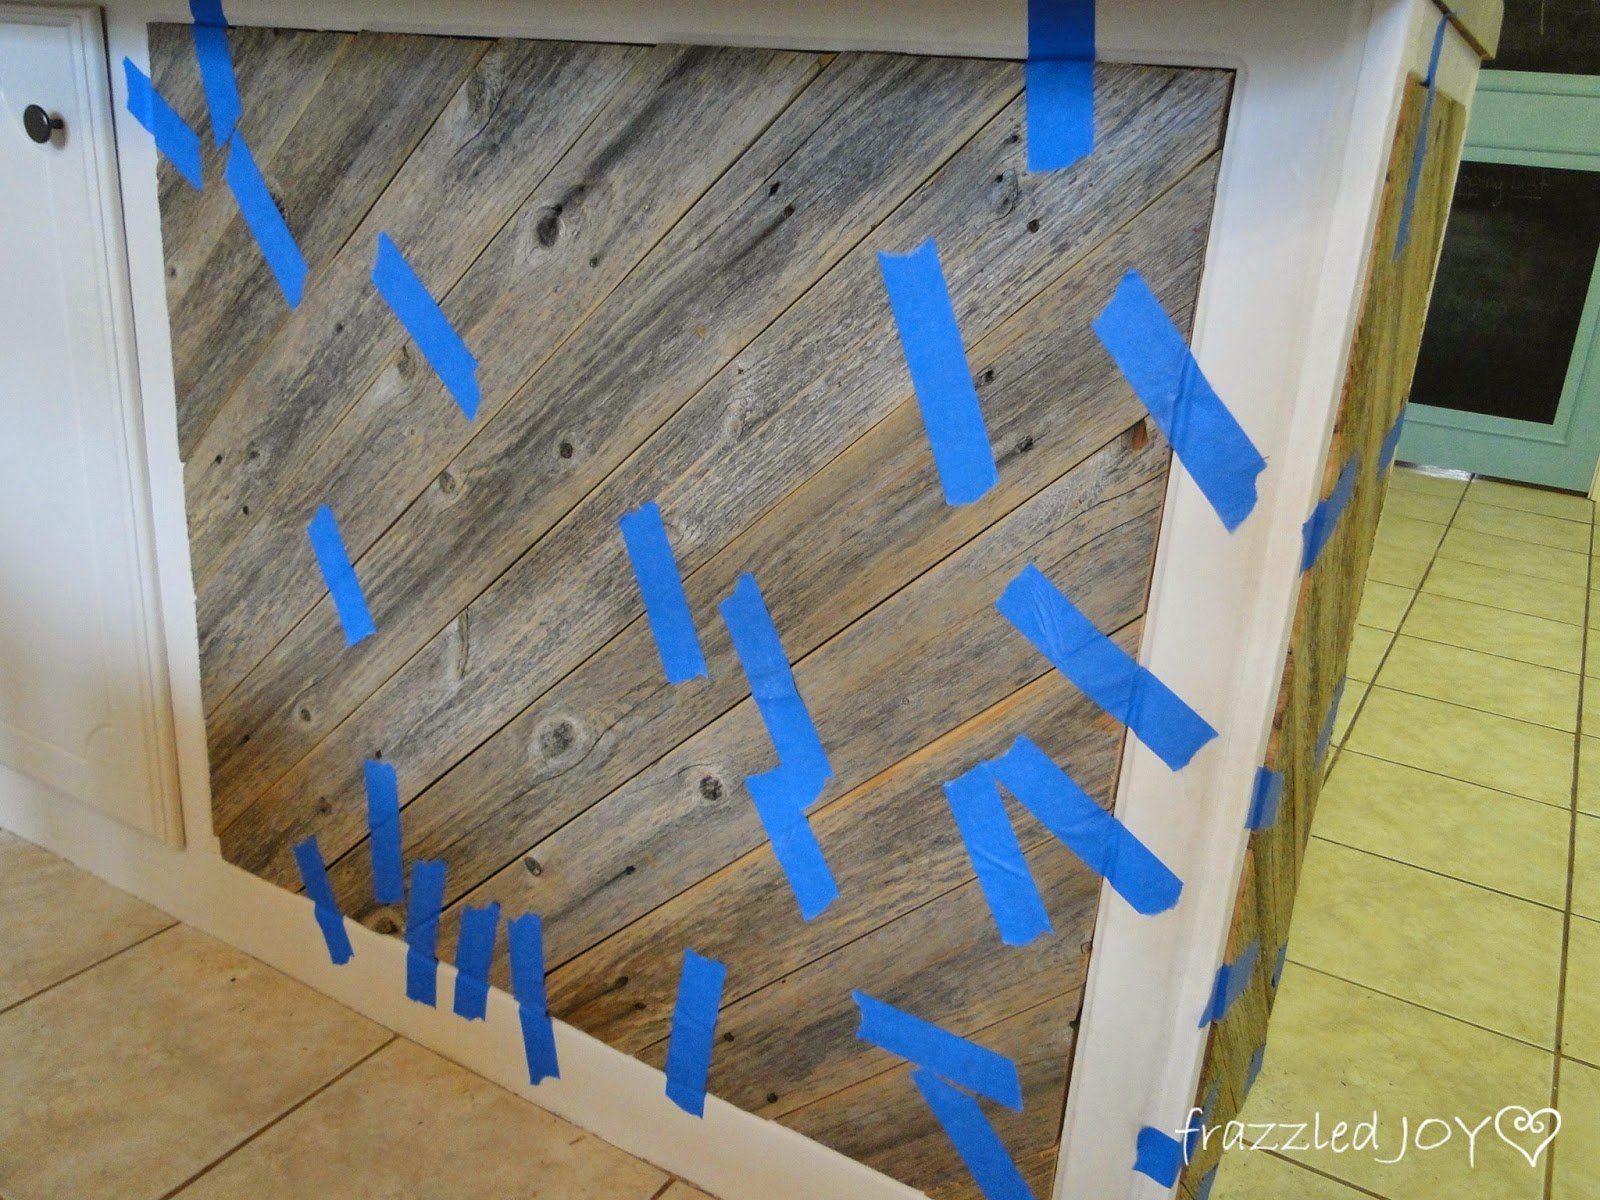
And, I used good ‘ole painters tape to hold everything in place until the glue dried. For the most part the pieces were pretty wedged into the frame, but this just made me feel better.
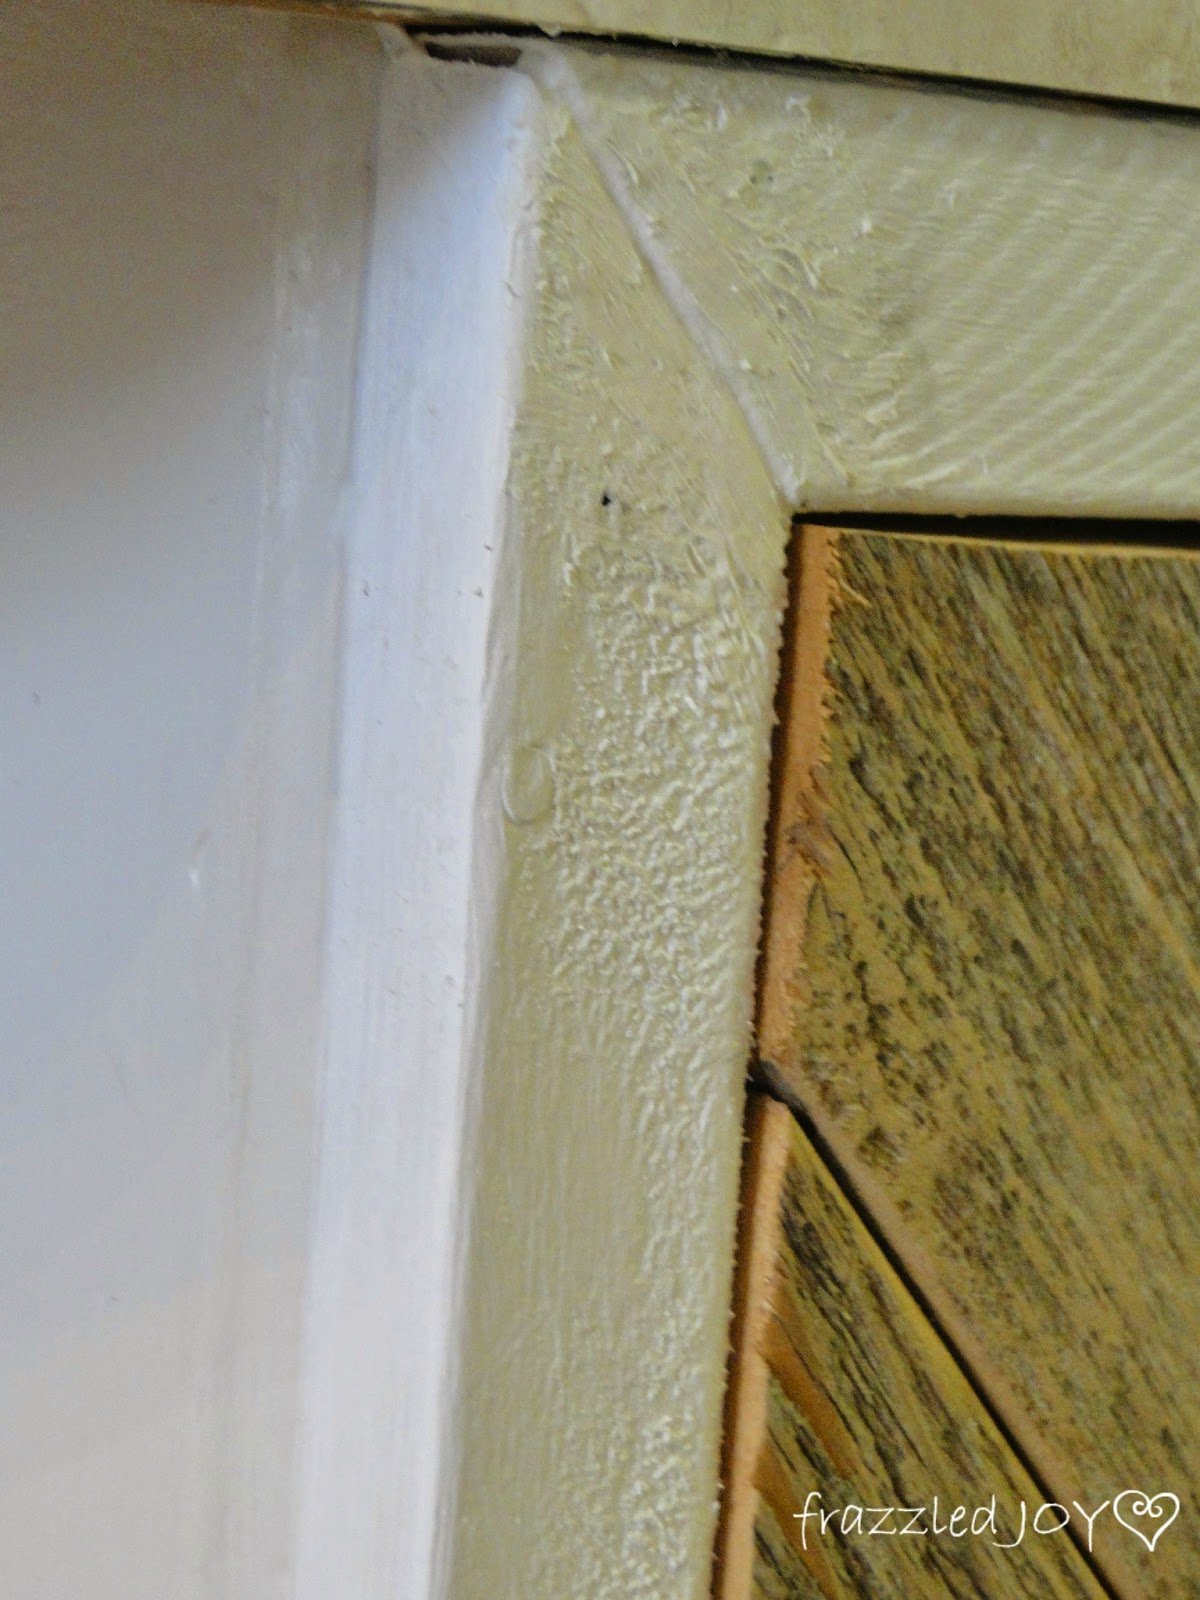
As I was working along to this point I noticed that the fence pickets boards were a little thicker than my frames.
So, I decided to use some trim to make it look a little more cohesive and finished.
I picked out my trim and I painted it with the cabinet color and then attached it with more liquid nails. And, of course, more painters tape to hold everything.
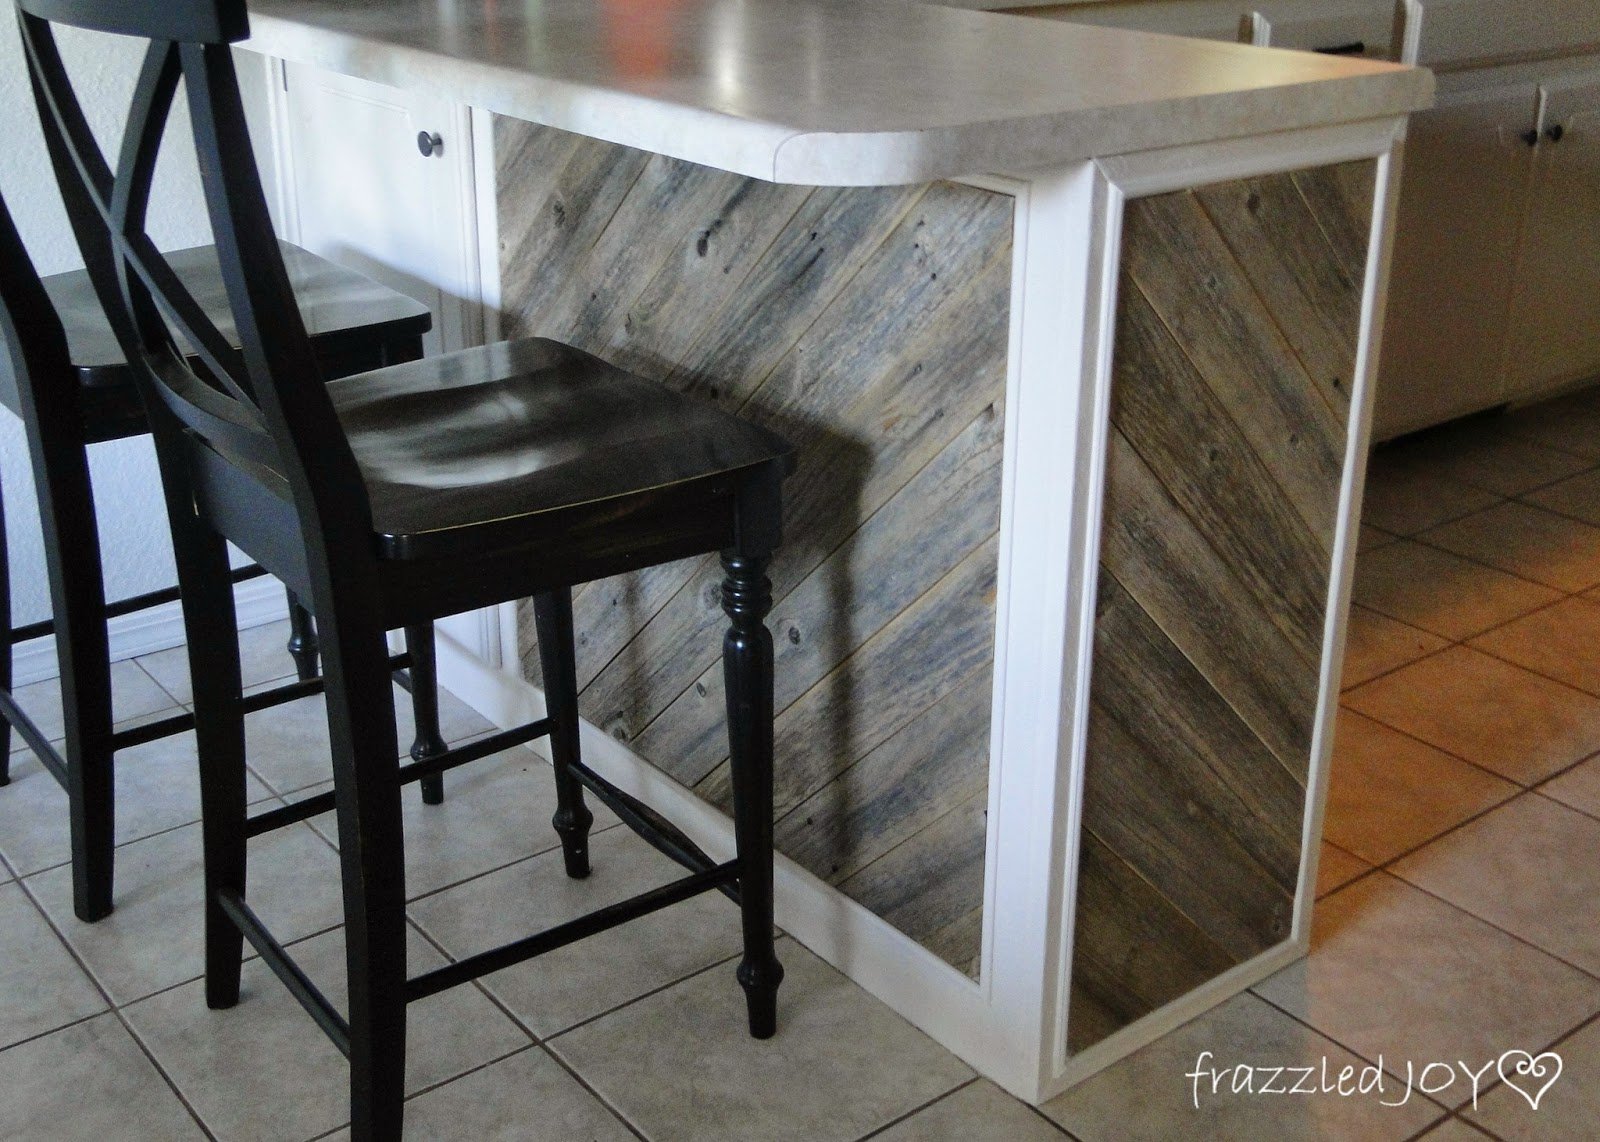
And here is another look at the finished product.
I’m so in love with the results!! It’s not perfect by any means, but that’s the rustic beauty of it. Just the touch the room needed!!
Here’s the before again just to see the difference.
The best blessing of this project is that it really only cost me around $25 – the cost of the trim ($4 for an 8ft piece – I used 4 pieces + some from a piece I already had) and the liquid nails ($4). Everything else I had or got for free!! Can’t beat that for a little rustic flare!!
Lorene has been behind the scenes here at Remodelaholic for more than a decade! She believes that planning projects and actually completing them are two different hobbies, but that doesn't stop her from planning at least a dozen projects at any given time. She spends her free time creating memories with her husband and 5 kids, traveling as far as she can afford, and partaking of books in any form available.


Thanks so much for the opportunity to share this project with your readers!! It really is everything I hoped it would be, and was a pretty easy DIY 🙂
Thanks for being our guest, Denise!!
So fun to see Denise’s fantastic rustic island featured! Such an amazing update for $25!