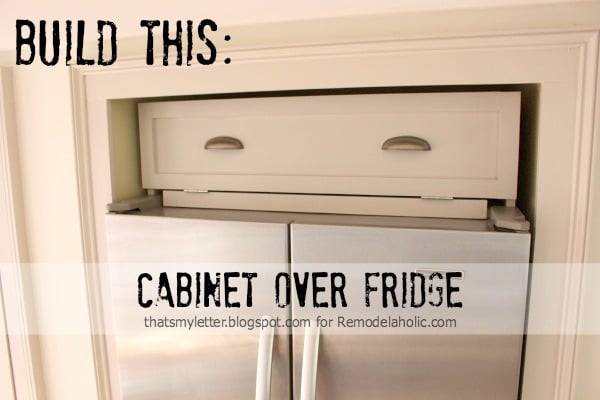
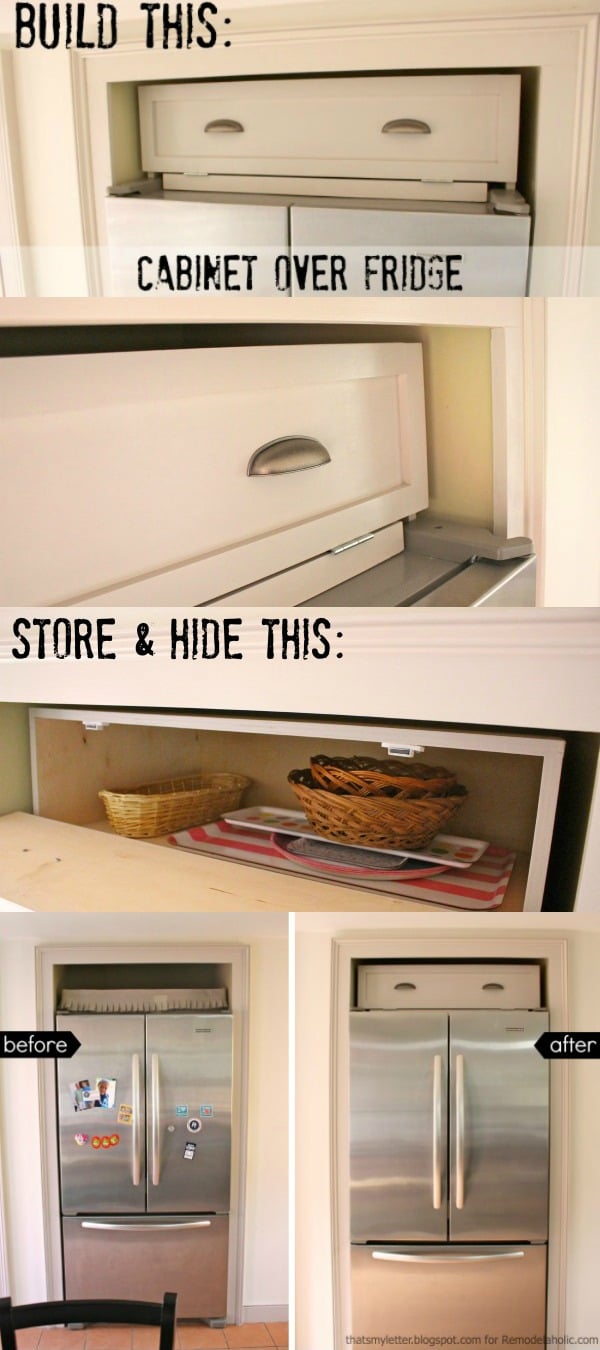
Build a Cabinet Over the Fridge
Remodelaholic readers it’s Jaime from That’s My Letter here today to share a DIY build project. I’ll show you how to build a cabinet over the fridge with a door to create storage and hide the mess!
This project is a prime example of why I have such a passion for DIY. You buy an old house with a built in spot for a refrigerator, of course the original fridge is long gone and the new fridge doesn’t exactly fit the space and you’re left with a huge gaping black hole of an abyss above the fridge.
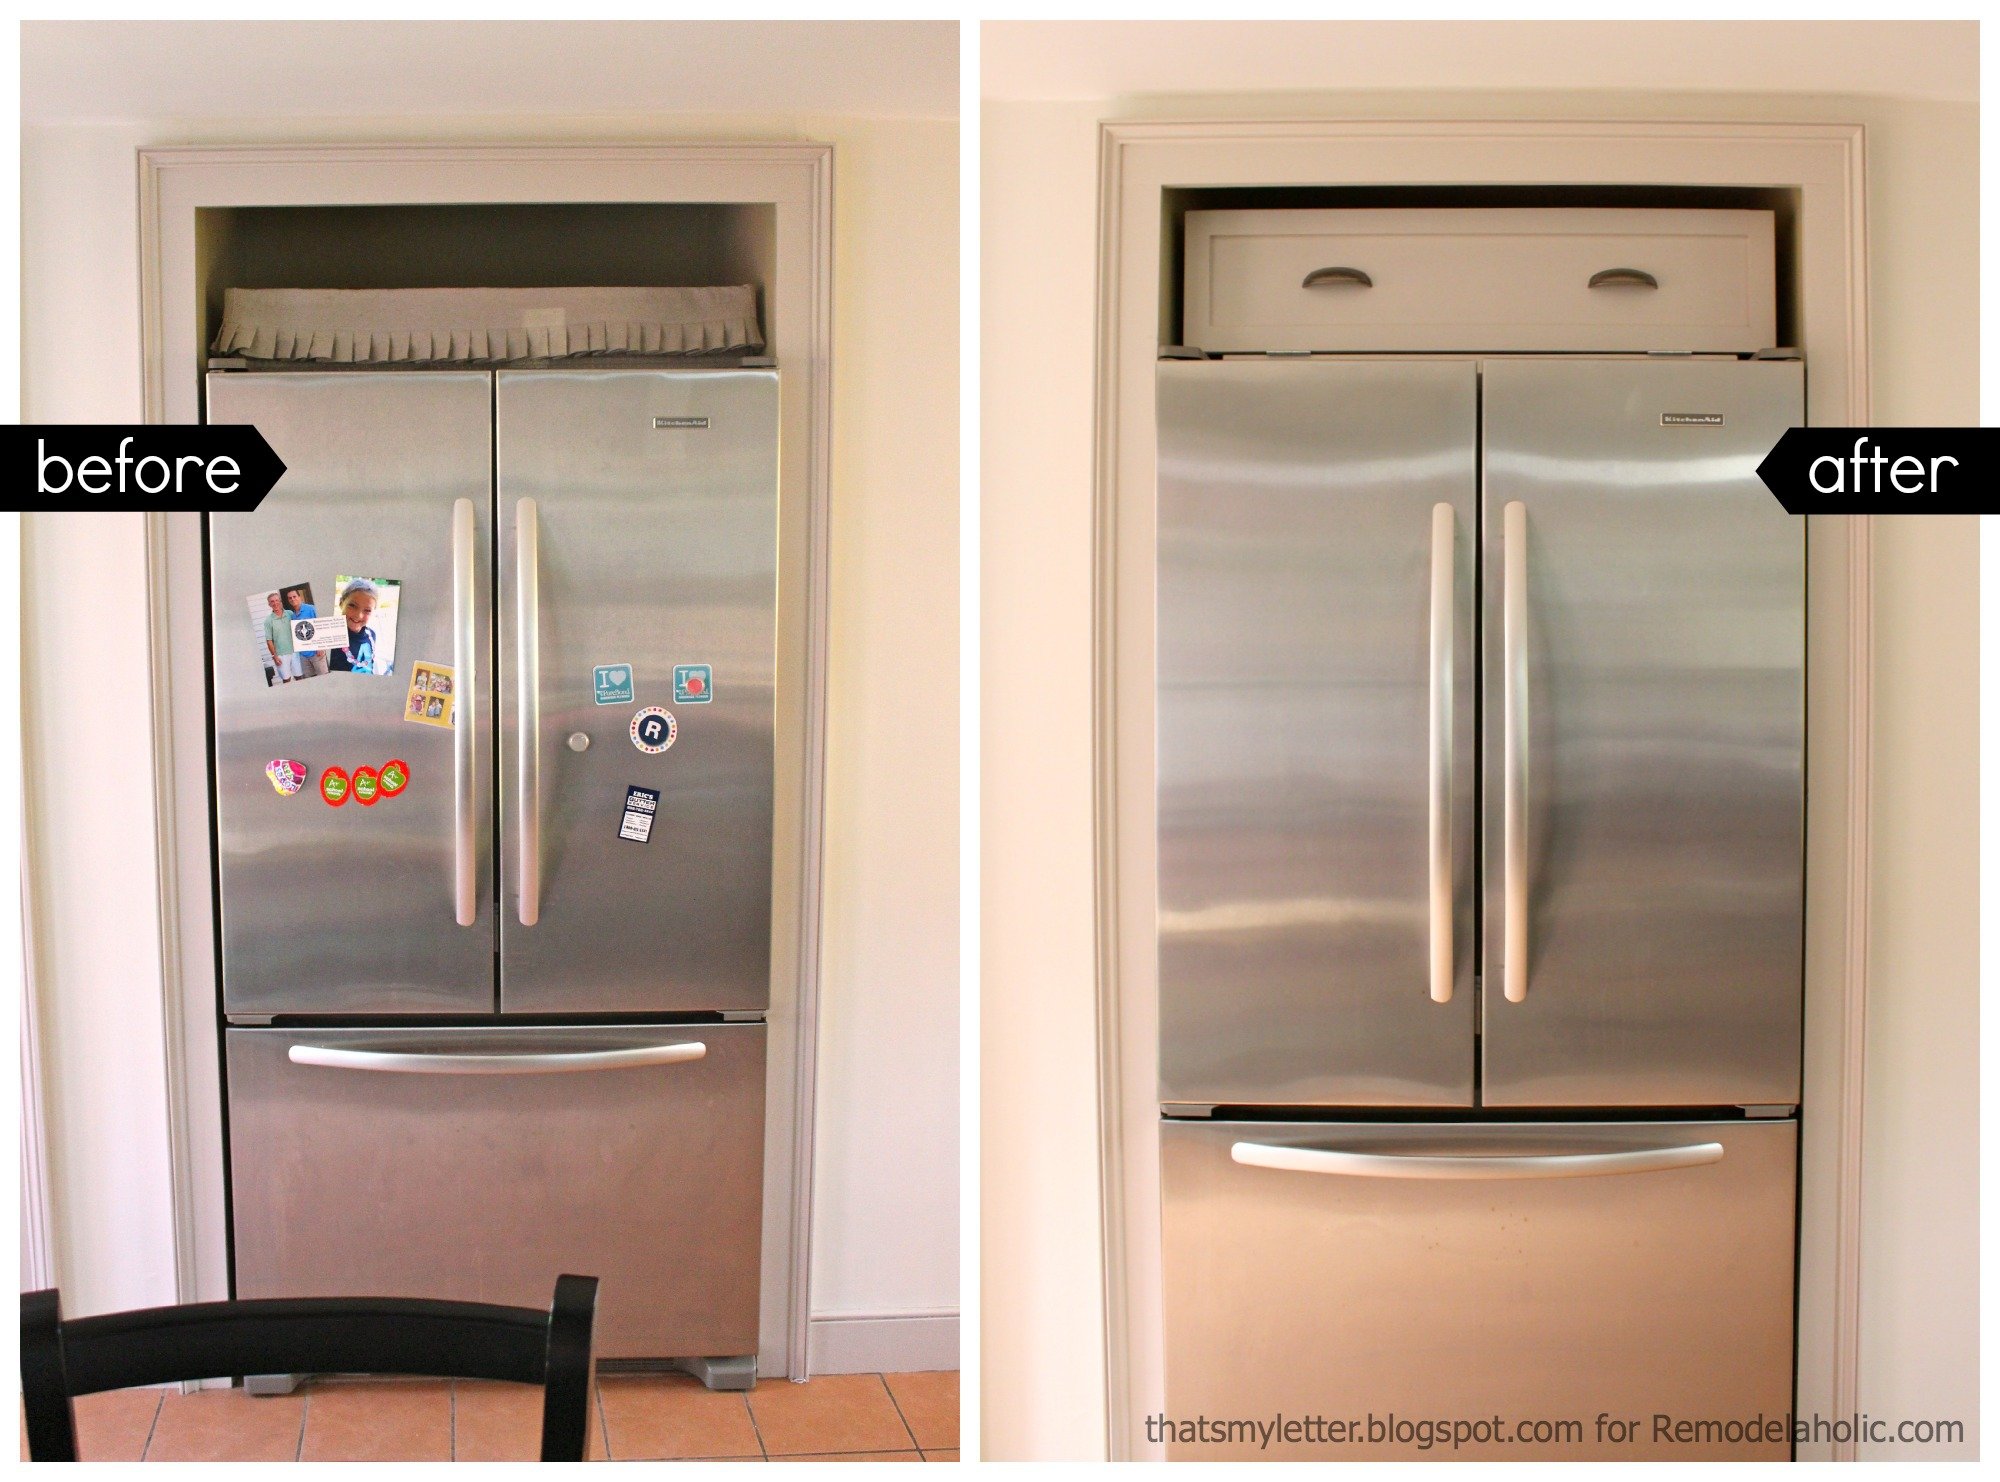
In the before picture you can see I temporarily filled the giant hole with a DIY hardware cloth basket from our old house, functional but not great. The solution: a box with a door! Yes you can build this and make it work for your fridge space.
The only real item to take into consideration are those pesky door hinge covers that peek up above the fridge. I’ll show you how to work around those covers down below. Do keep in mind that your refrigerator needs to ‘breathe’ so be sure to allow for some space on all sides of your cabinet.
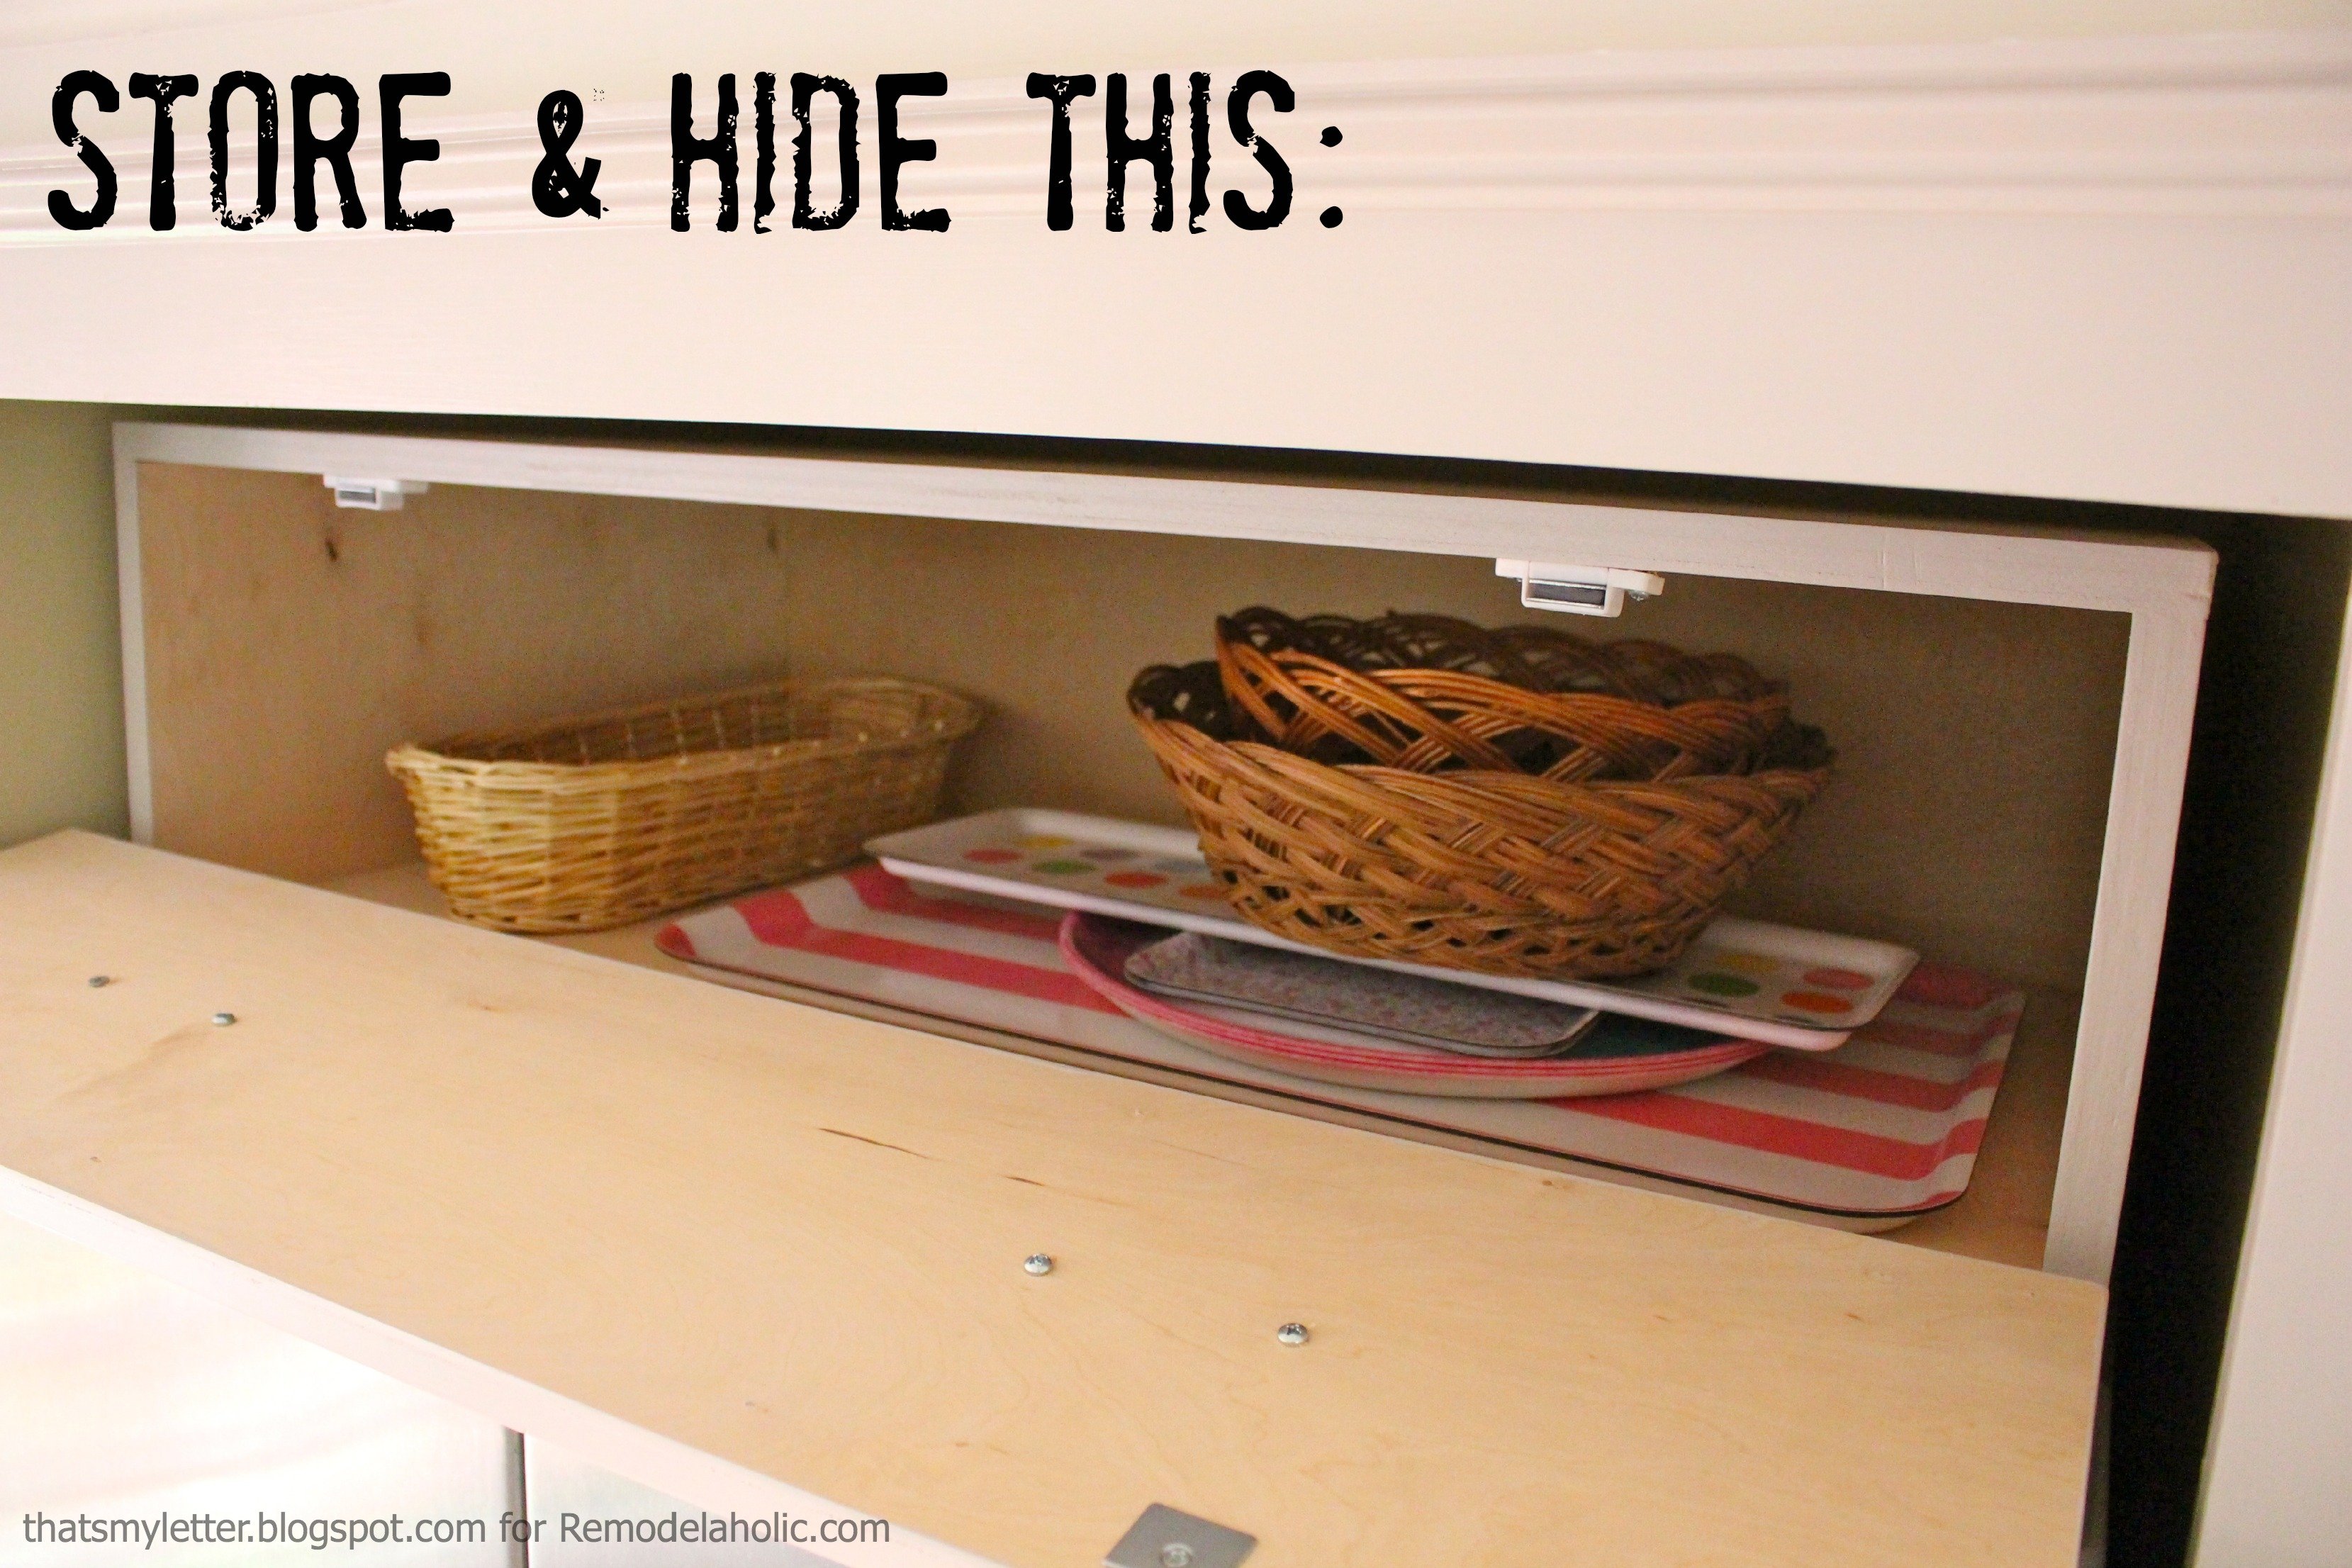
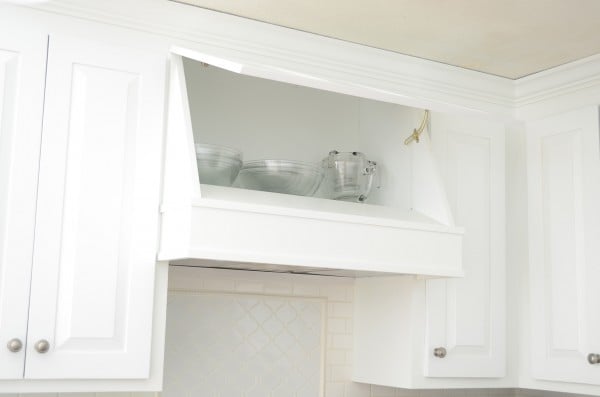
And what’s inside the cabinet? Trays and baskets of course and room for more! Really you could store anything in there now that it’s completely out of sight.
How to Build a Cabinet for Over the Fridge Storage
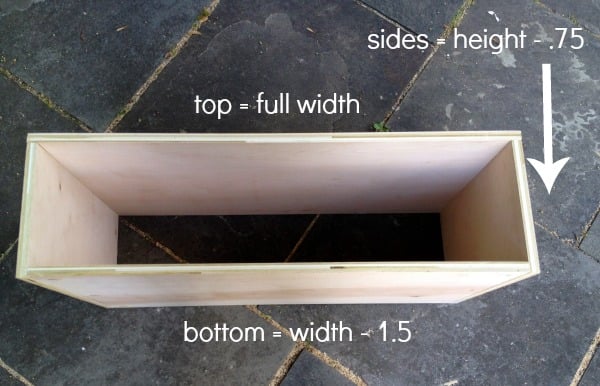
Start with your dimensions: width x height x depth. Build a box using 3/4″ plywood following the diagram above. I used my Kreg jig but you could just as easily countersink 2″ screws since everything will be hidden. Attach 1/4″ plywood backing cut to fit width x height.
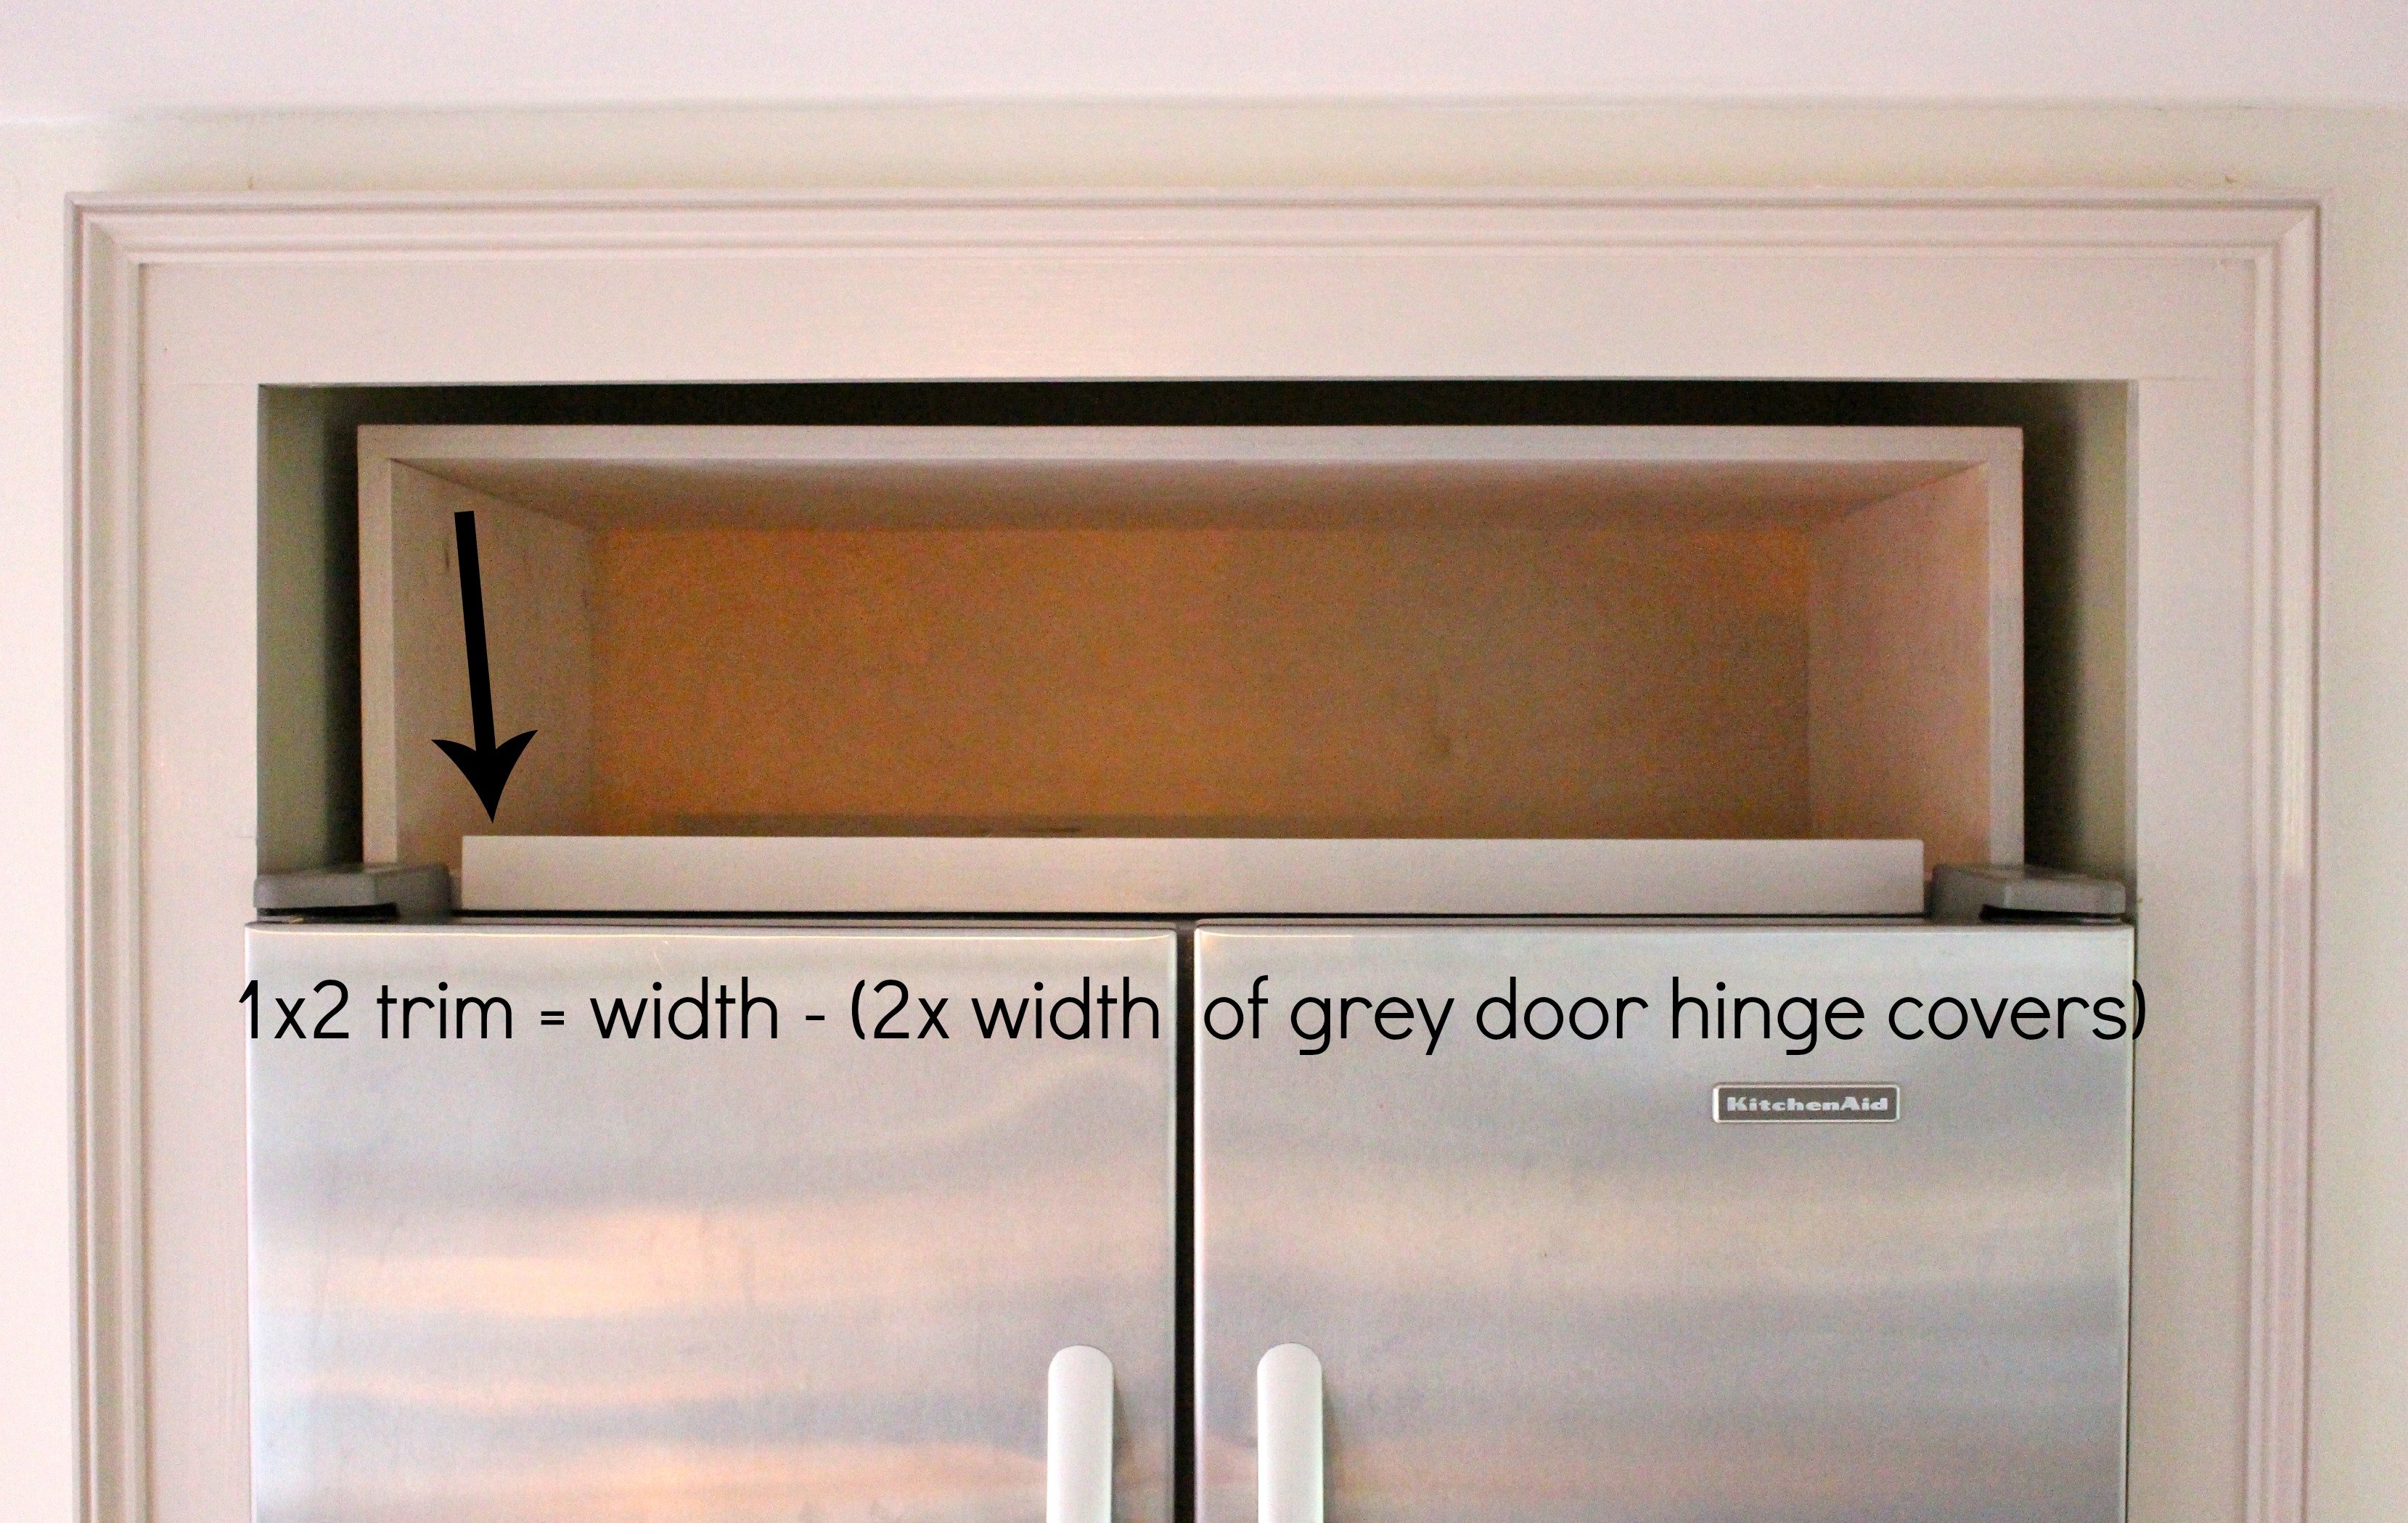
Add a piece of 1×2 pine board trim centered bottom front. Be sure to subtract the width of both door hinge covers. I did countersink and screw this piece from the front because it will support the door hinges and I wanted a firm, secure attachment. Paint the box before you place it above the fridge. (I did make my husband pull the fridge out in order to slide the box in place.)
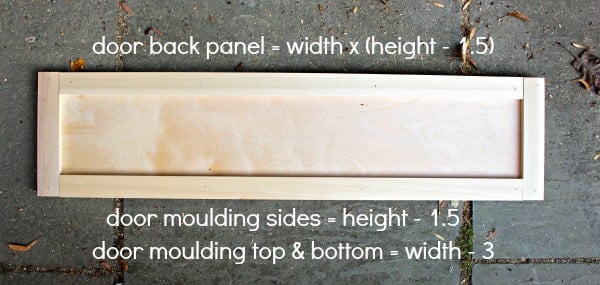
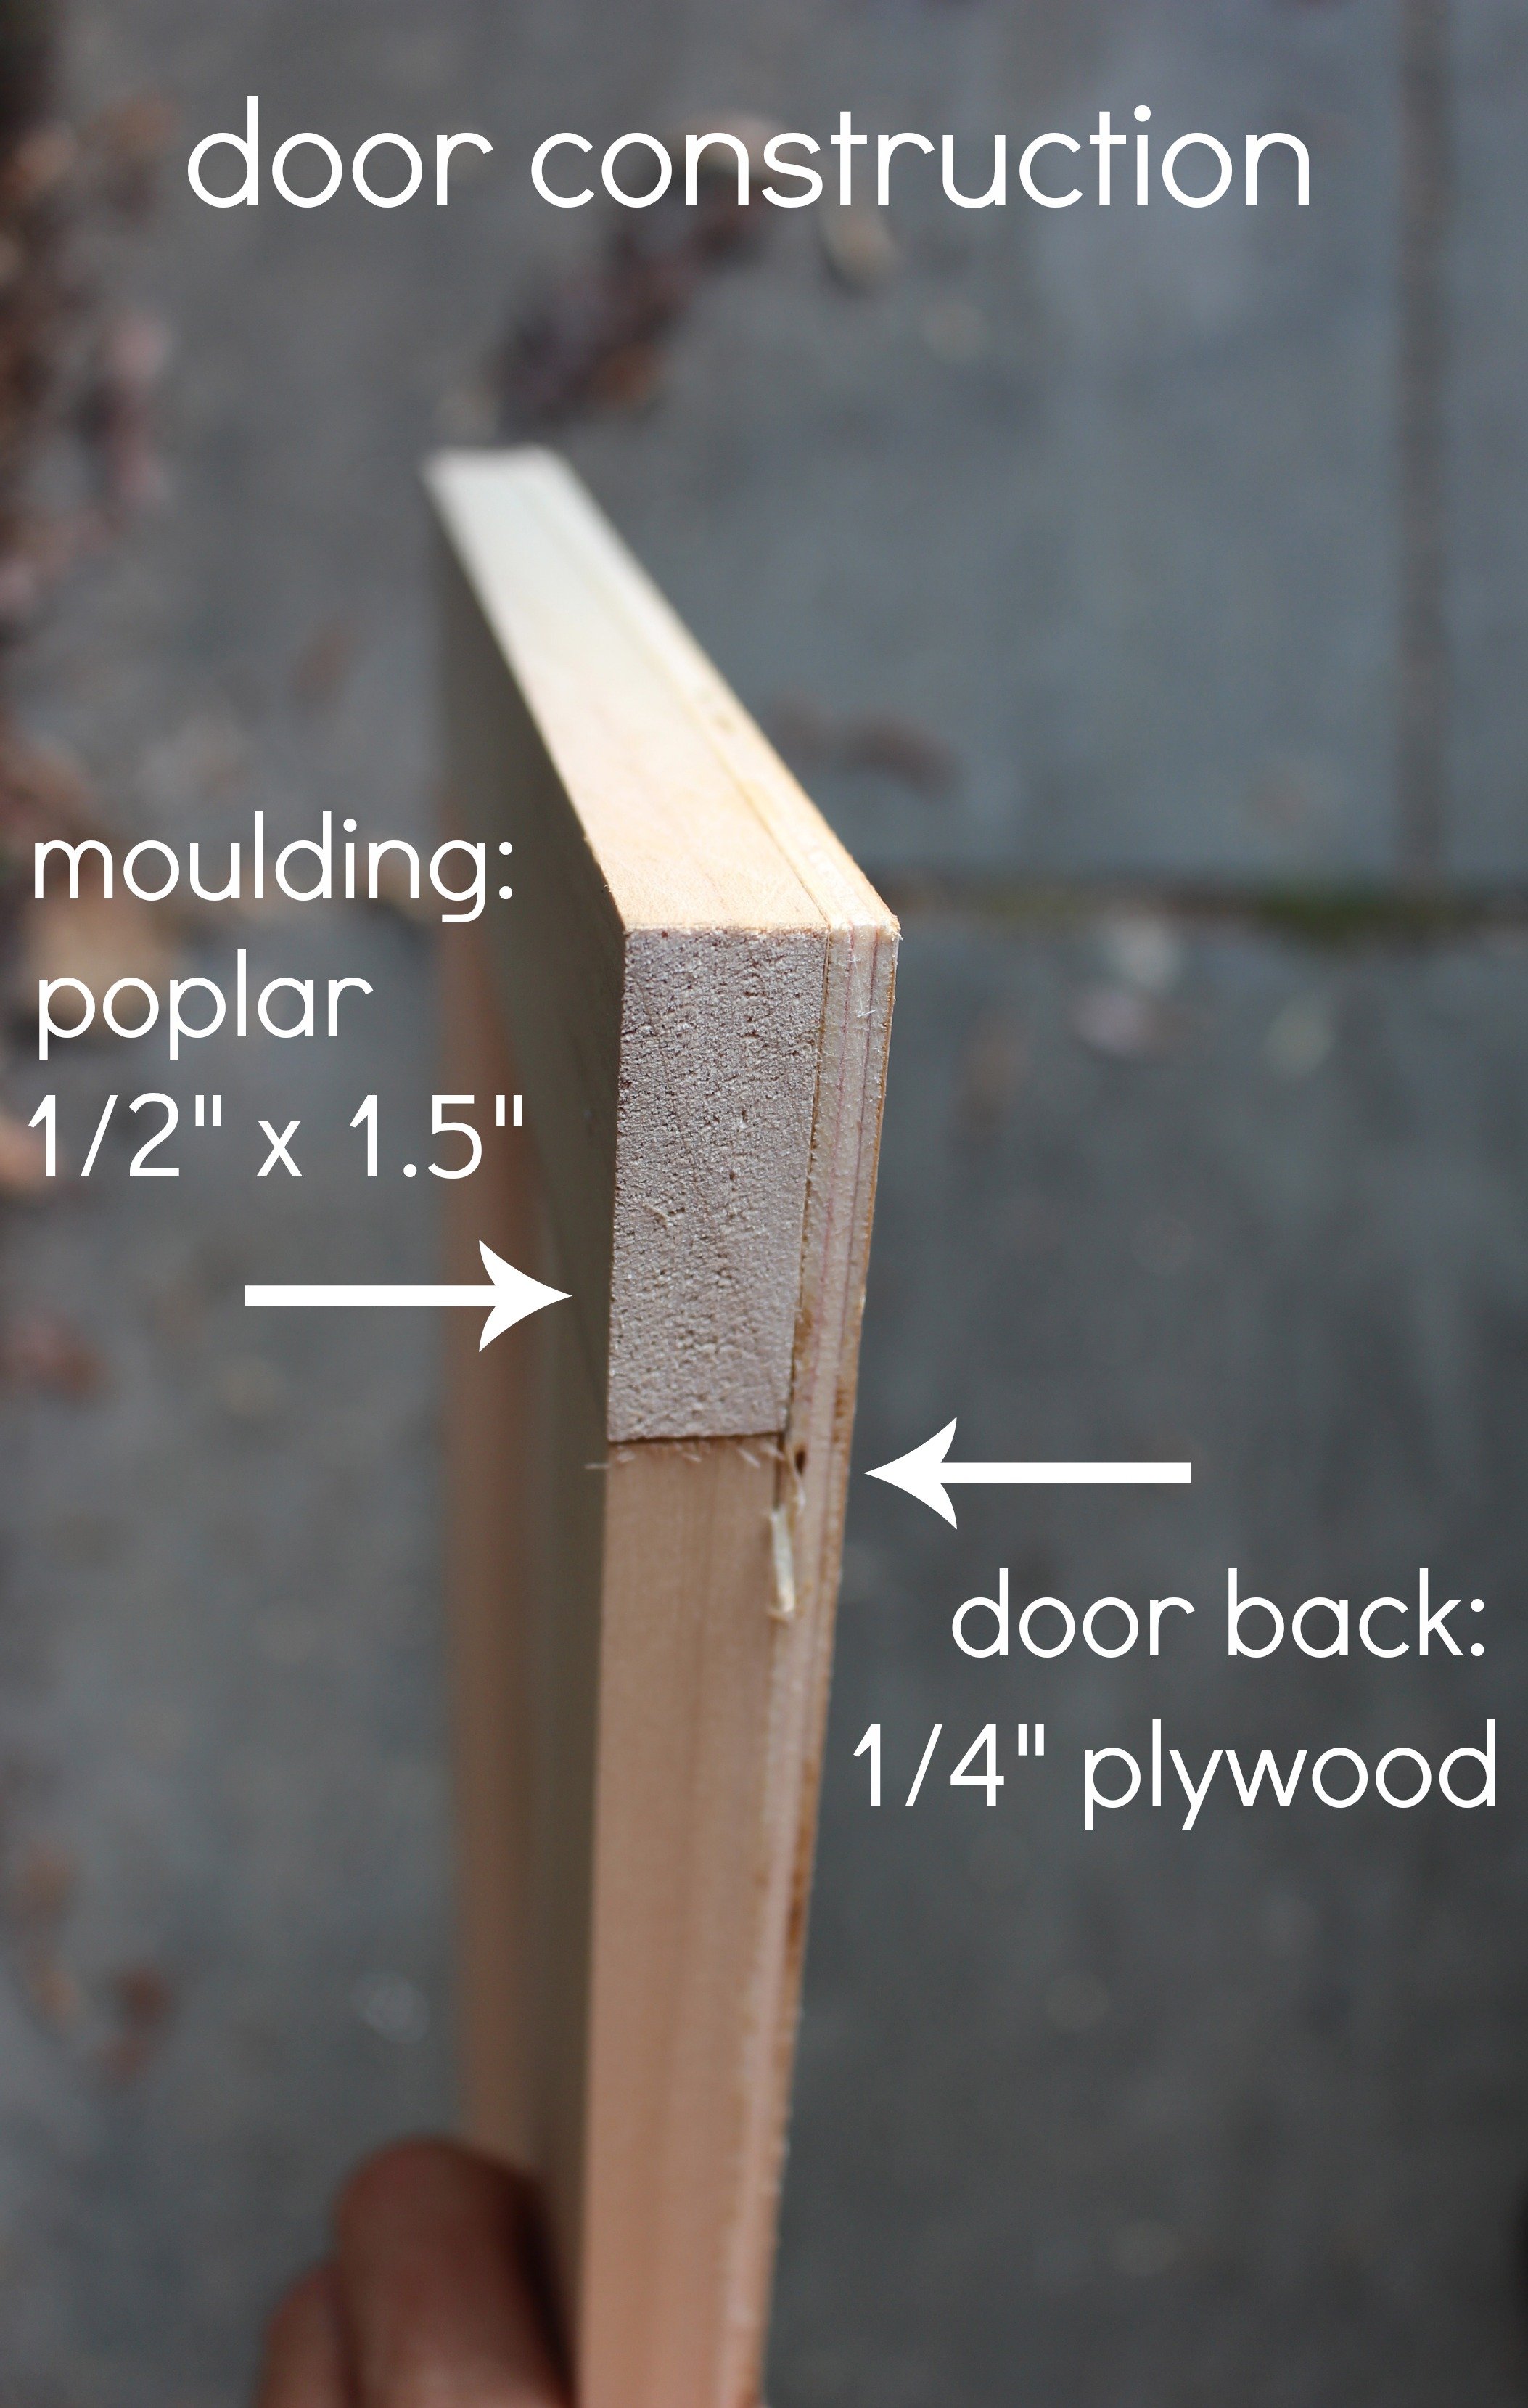
Now make the door panel using 1/2″ x 1 1/2″ poplar boards and 1/4″ plywood. Just glue and use finish nails to attach poplar moulding.
The width of the door needs to be 3/4″ in order to sit flush with the 1×2 trim piece already attached to bottom of box. Paint the door before attaching to cabinet box.
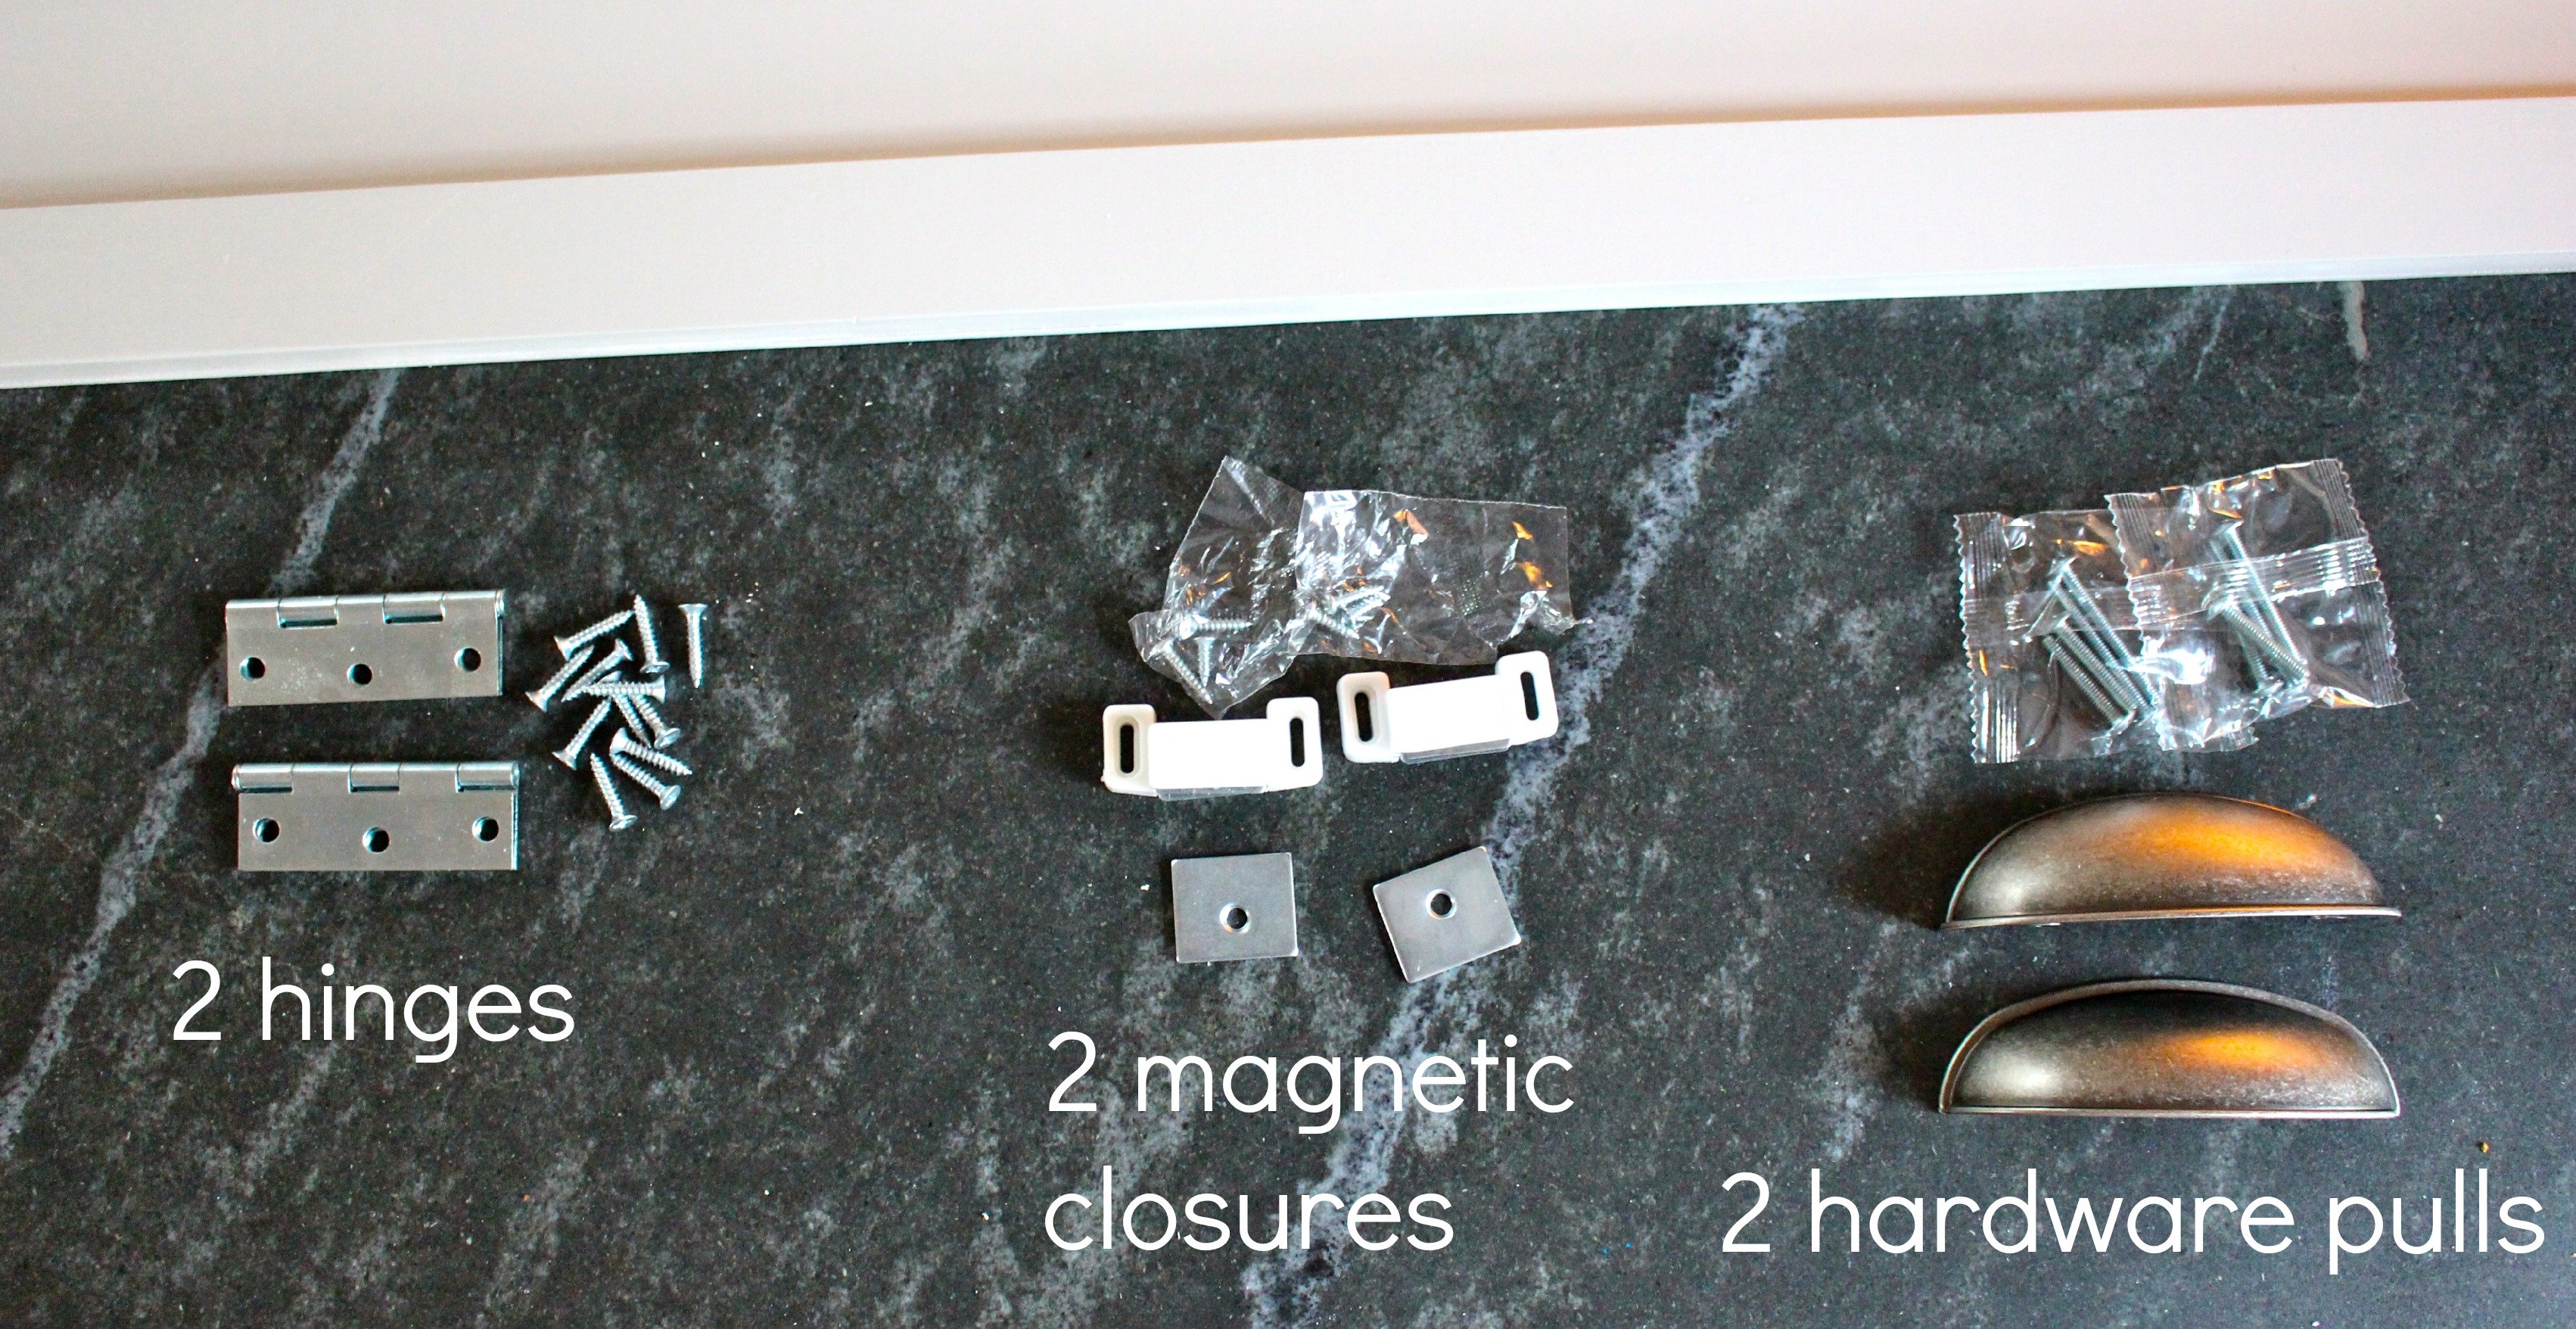
Hardware: 2 – 2 1/2″ hinges, 2 magnetic closures, 2 hardware pulls (source here).
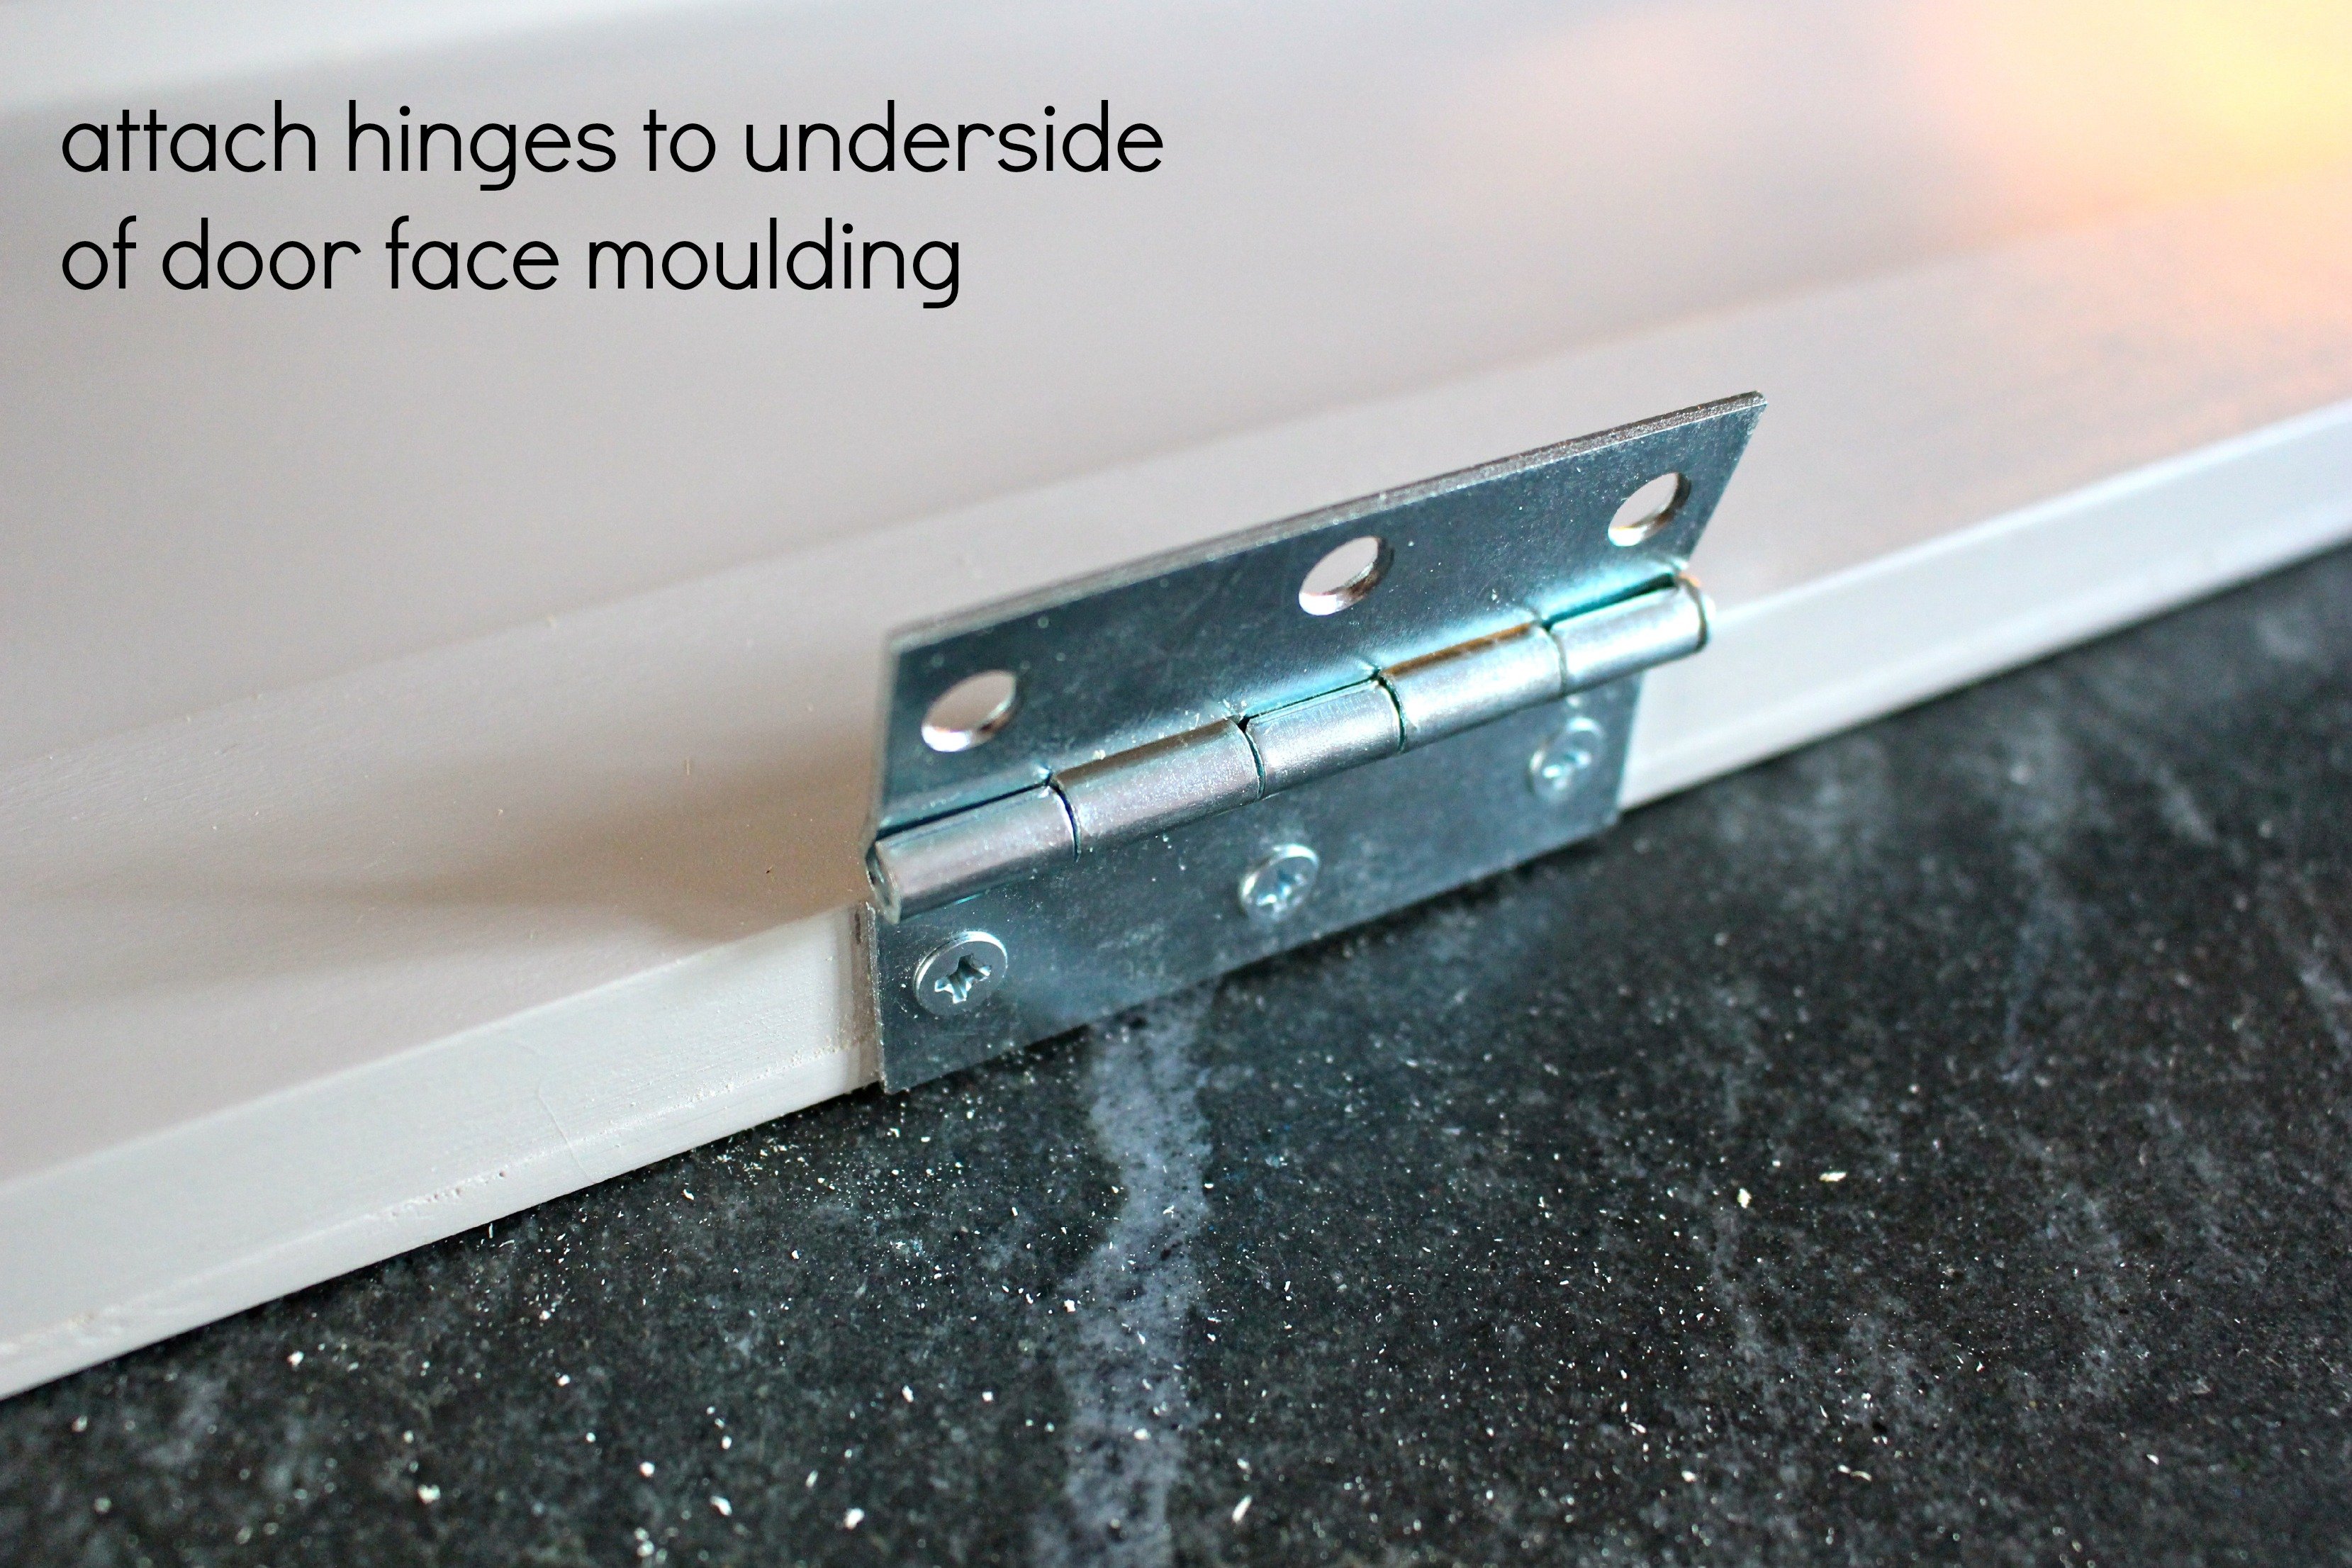
Attach hinges to bottom edge of door frame about 5″ from edges.
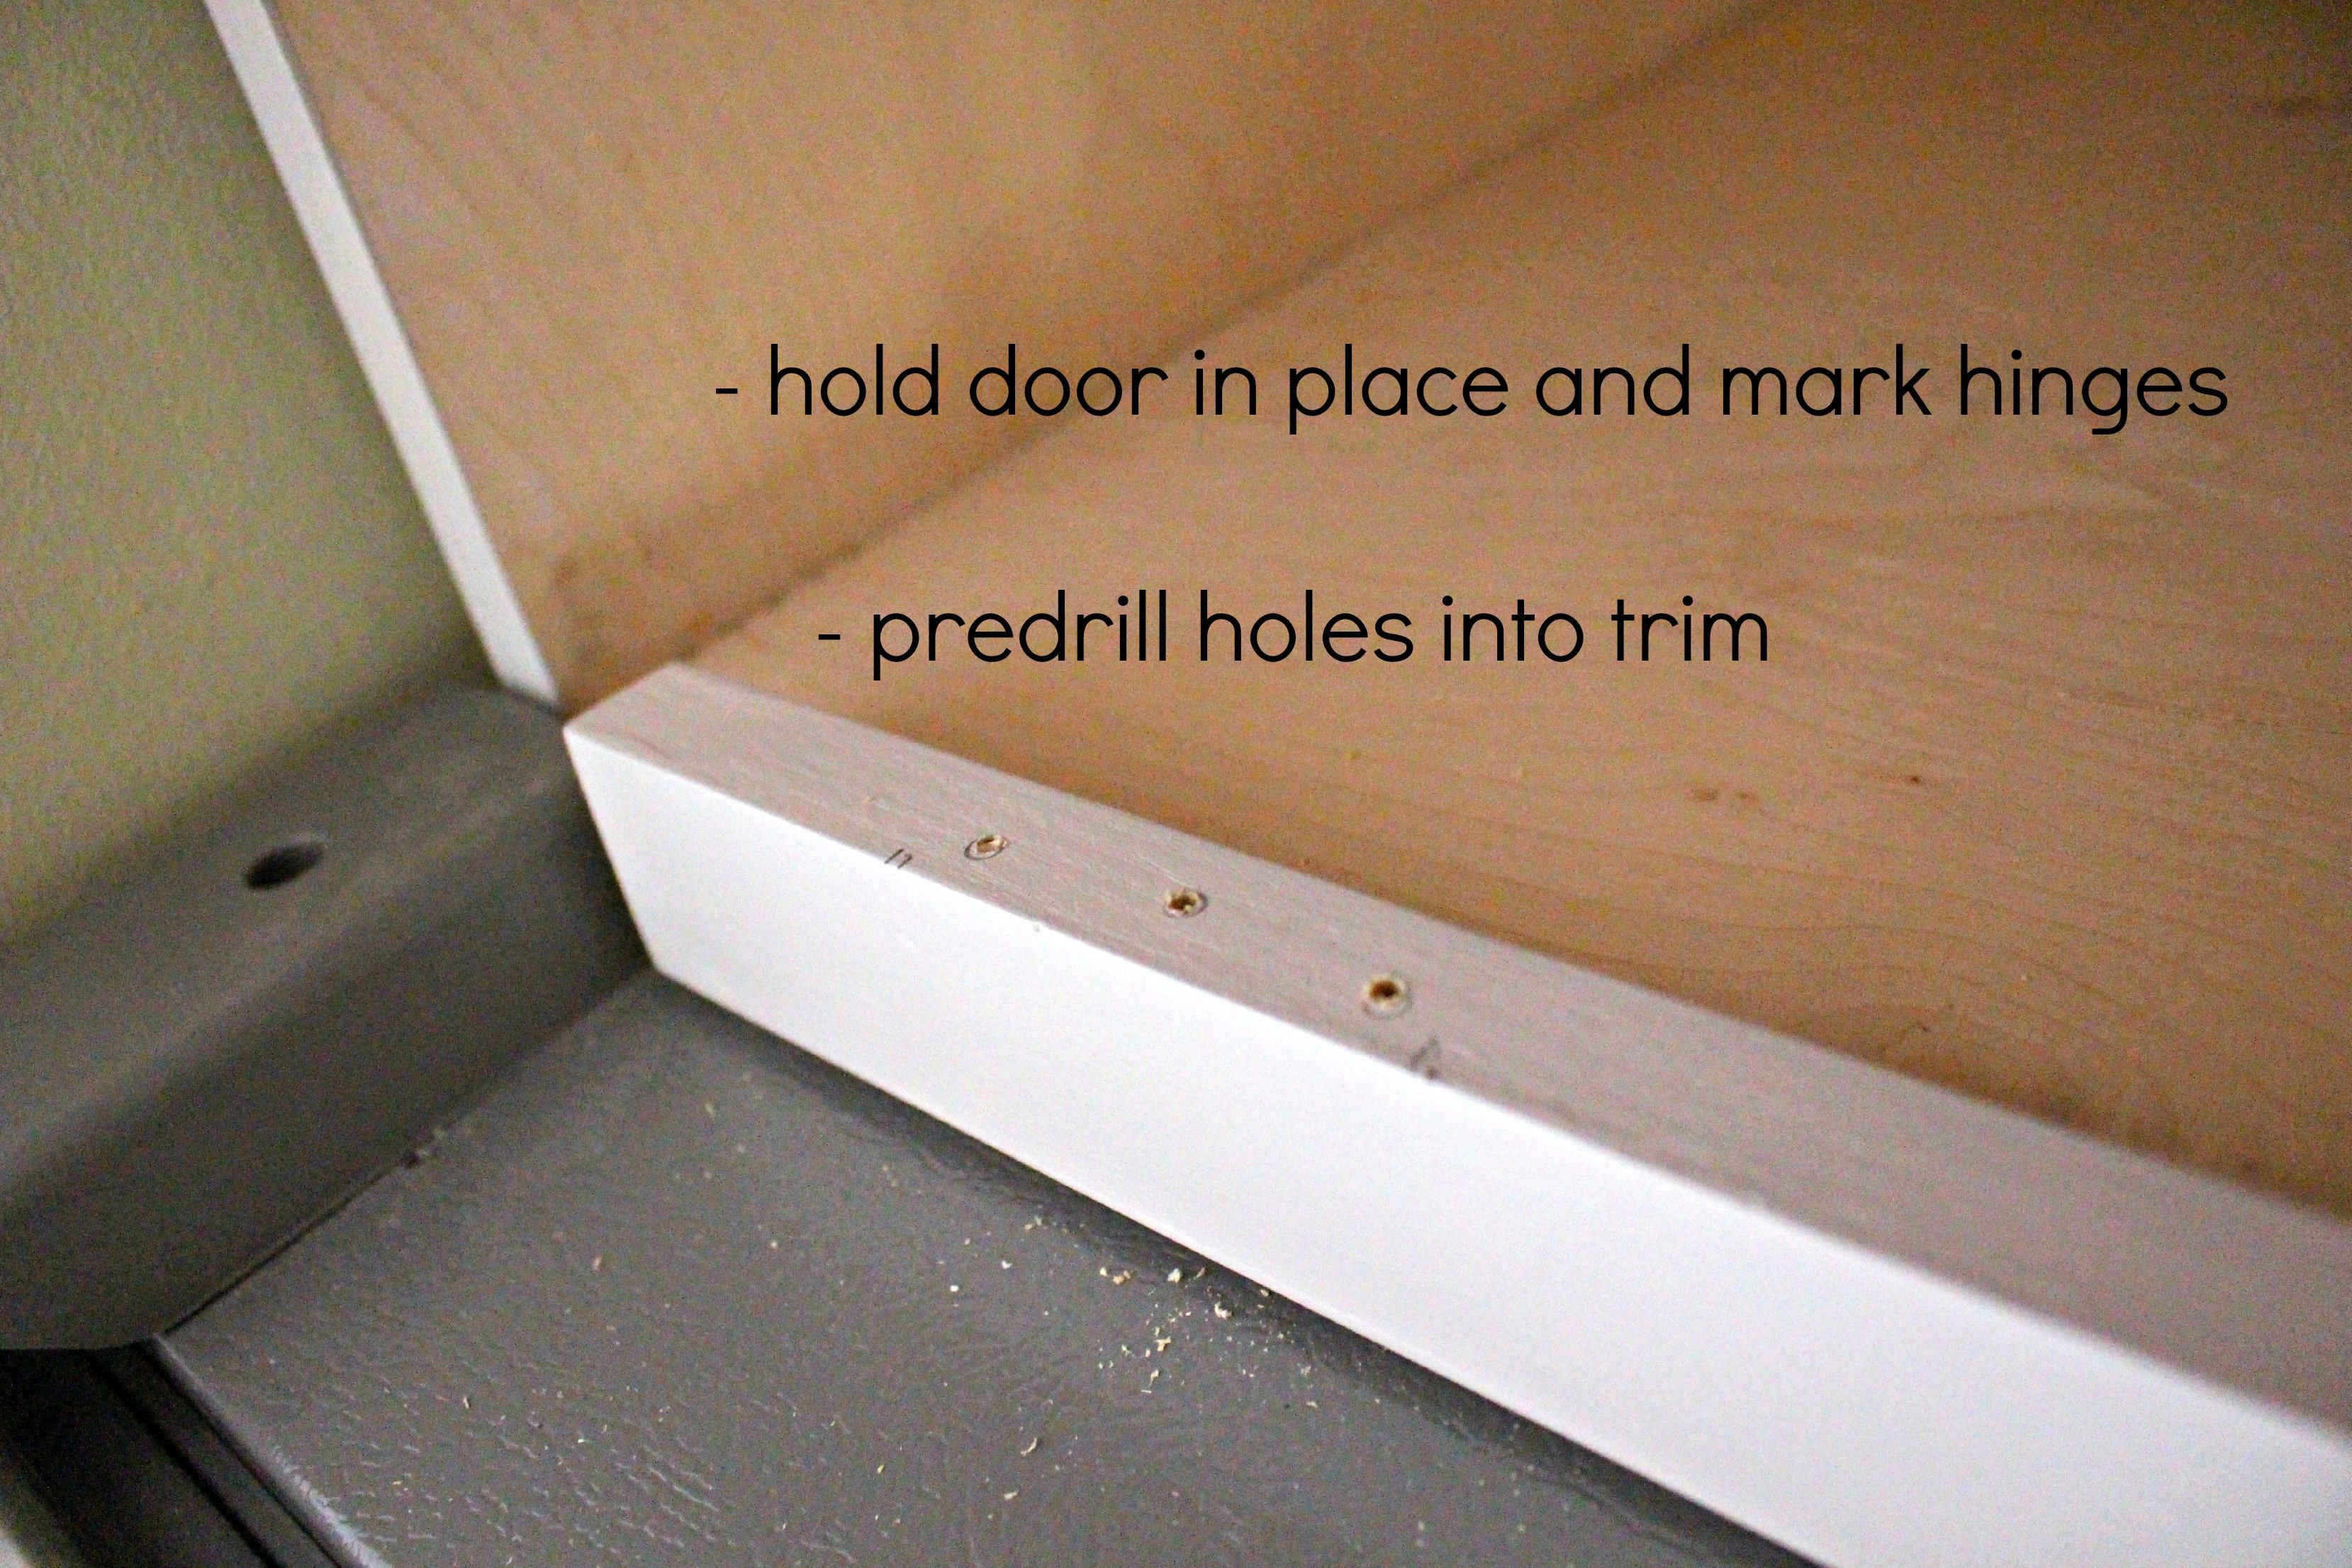
Hold the door in place and mark where the hinges rest. Predrill holes down into cabinet trim then attach door with hinges.
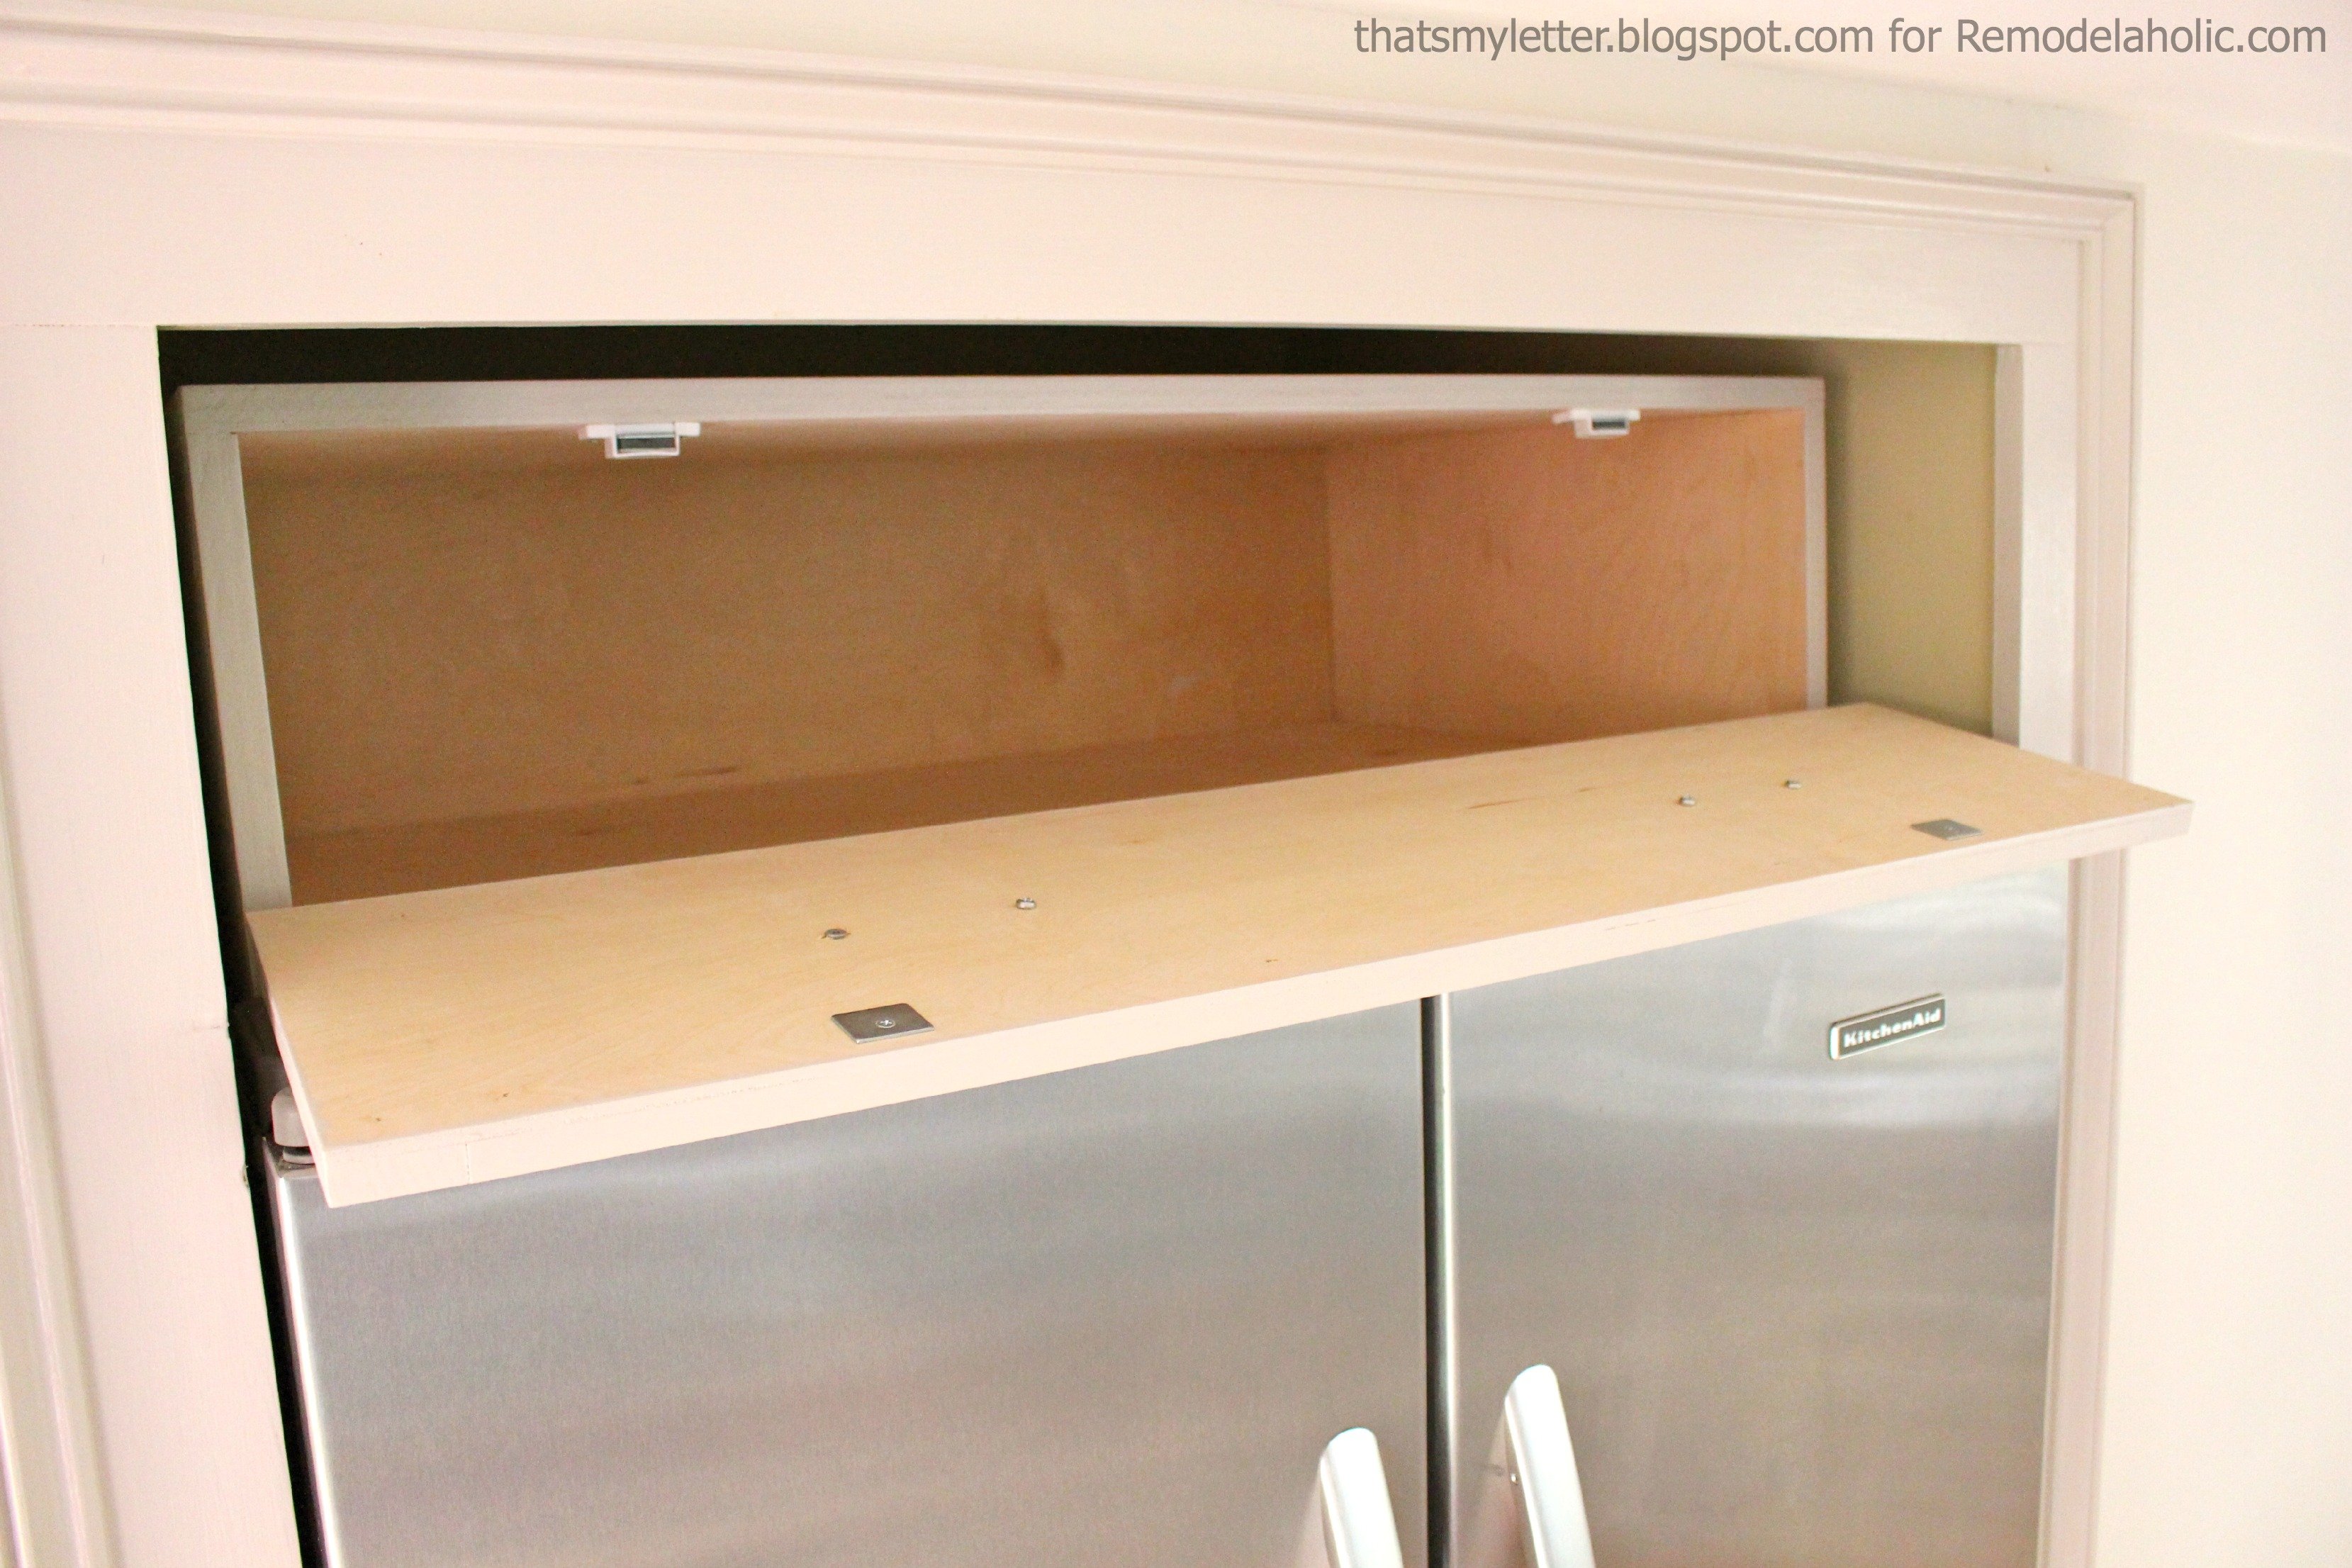
Install 2 magnetic closures flush to top of box interior about 6″ from edge. This will ensure the cabinet door never ‘falls’ open unnecessarily.
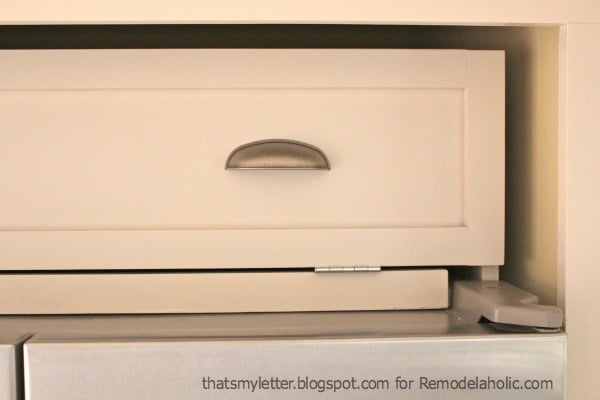
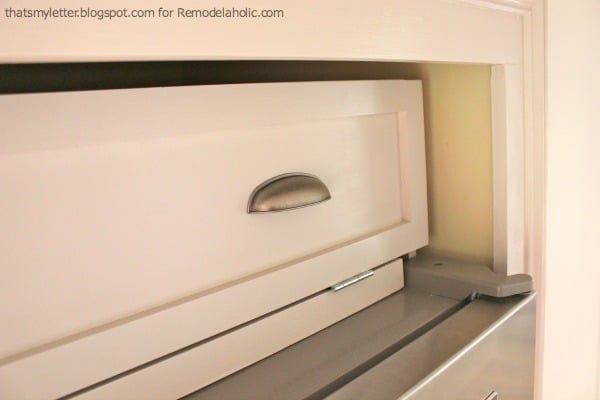
Finally attach the hardware pulls. These pulls happen to match the rest of the pulls in on our kitchen cabinets. Here you can see a 1/8″ gap between the door and trim where the hinges lie – you could inset the hinges into the door frame with a little planing but I’m okay with the gap.
Looking for other DIY furniture projects?
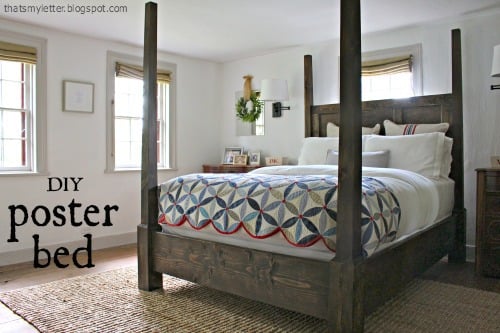
Yes you can build this DIY poster bed for a fraction of the retail price. I just did for our Master Bedroom, all the details and links to free plans are here.
Or if you prefer DIY furniture makeovers check out this dresser for my son:
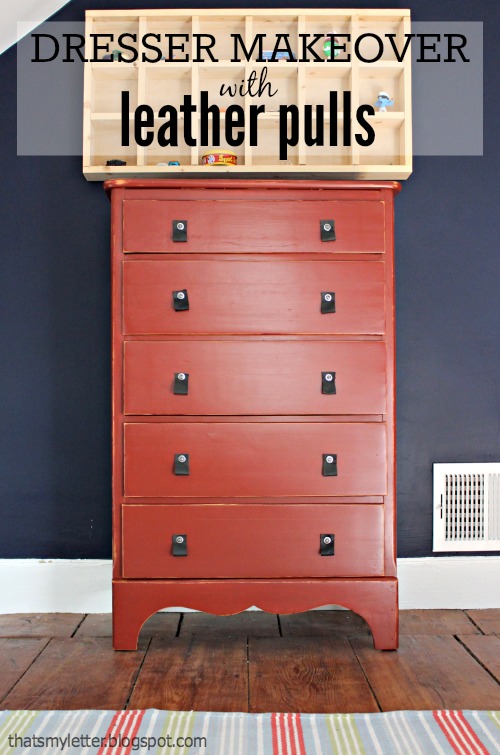
In place of hardware I used leather strips and the original screws inserted backwards to make pulls.
Now go get building and painting, DIY rocks!

——————————————————
Make the most of those unused spaces!
Store your hair tools in a hidden under-sink area

DIY a set of rolling crates for under bed storage


Always love the builds! This one adds a new dimension to the frig area… makes it look like closed eyes (handles on the storage), nose (frig door handles) and slightly smiling mouth (the drawer on the frig. Another added benefit!
The fridge is smiling now 🙂
I have the exact same fridge with the exact same space above it! I swear it was taken in my house! Thanks so much for the inspiration… that cabinet above is an excellent idea! Susan
I have a cabinet similar to yours that was installed before we moved in. May I ask why you put the hinges on the bottom instead of the side or top? That is one thing that bothers me about our cabinet is that I am just too short to see / reach what is in it and with the door opening downward, it makes it worse. So I just leave it empty.
A friendly word of advice, closing off that opening will severely limit the refrigerator’s ability to cool the motor. This can lead to reduced efficiently and a burnt out motor/condenser. Check to see if you have a model designed to be enclosed, this type is less common but will be designed to function properly with minimal air flow.
Like it