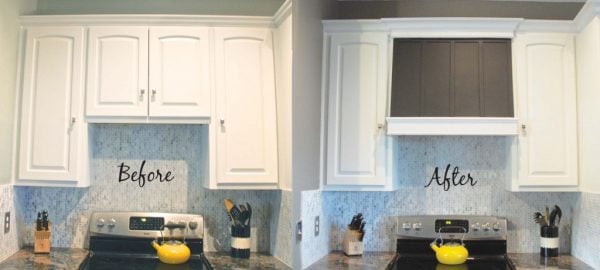
Create a Storage Range Hood
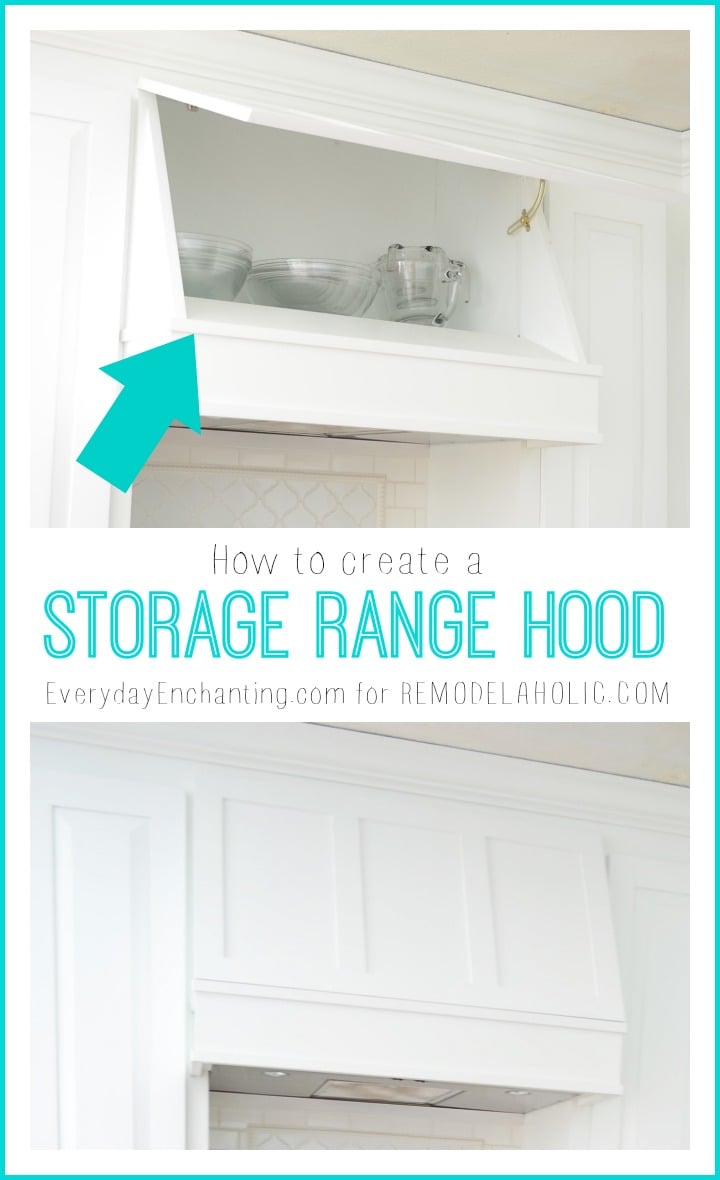
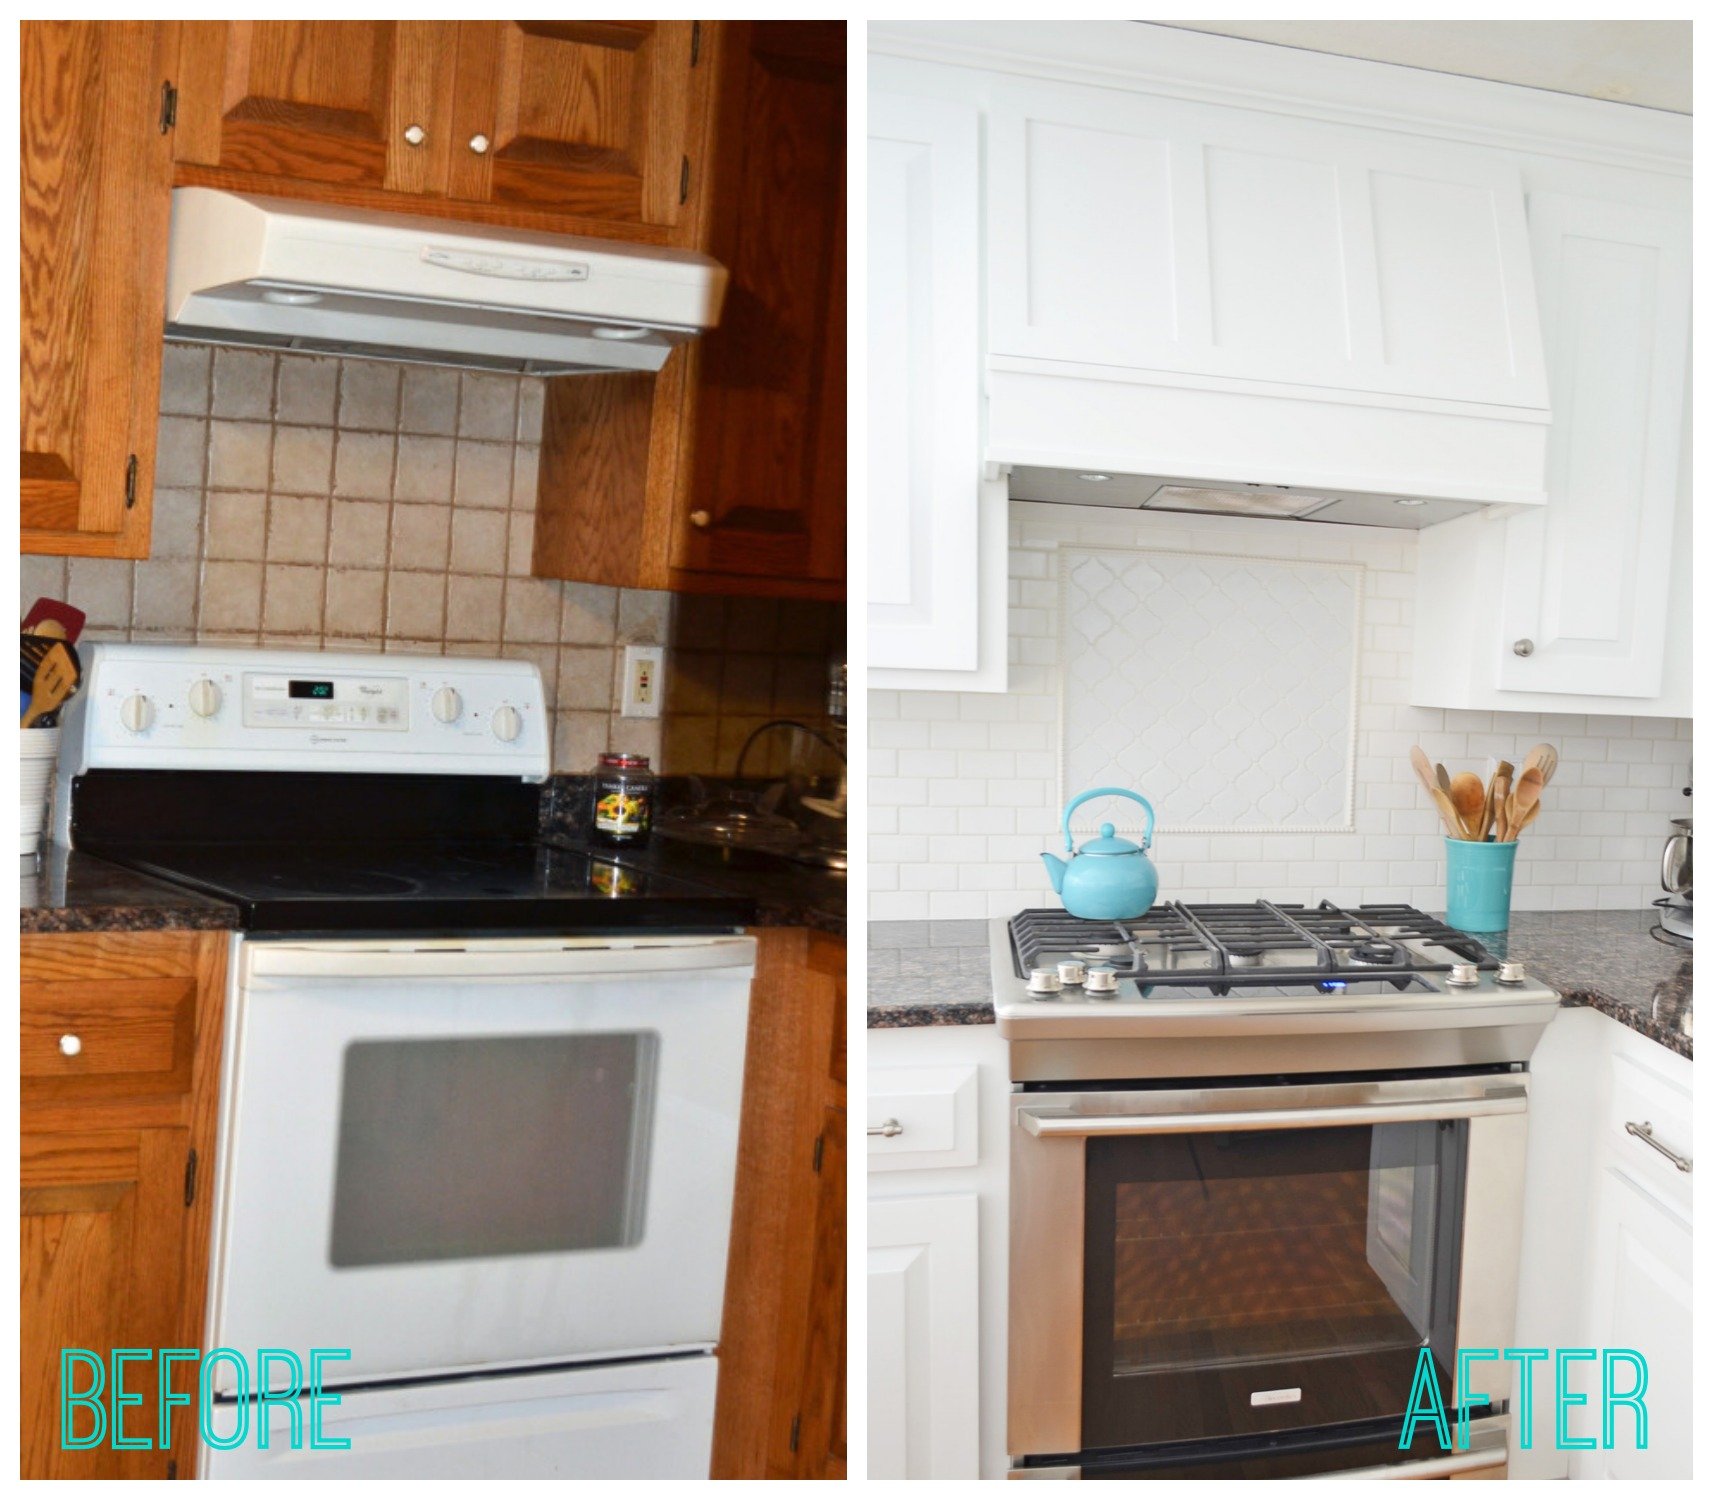
I have to give concept credit to my husband, Mack. I shared an inspiration photo with him of a range hood I loved. He looked at our existing above-the-range cabinet storage and saw a way to get the look without sacrificing our storage. It’s such a drastic difference to see the kitchen when we started, and how it looks now!
How To Build a Storage Range Hood
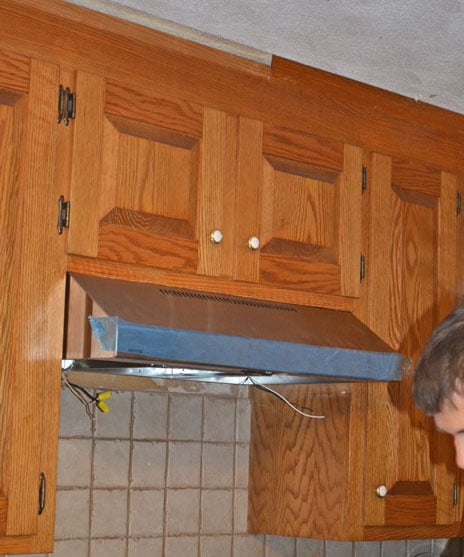
Our first step was to find the least expensive range vent possible that had the correct shape, with the buttons underneath, since the front would be covered. We went with stainless steel, to give it a more high-end look. The model was made by Broan and we found it at Lowes. It was an inexpensive option at $170- professional versions that are normally used with this sort of range hood are well over $1,000.
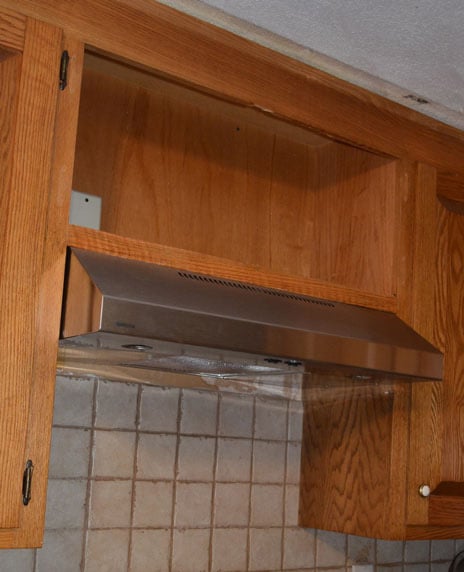
We installed the vent, which was a fairly straightforward process- it fit exactly in the space where the previous one had been. Next, we removed the doors in the cabinet. We also removed the center divider with a Sawzall. Unfortunately, it didn’t come cleanly- it created holes that would ultimately need to be filled.
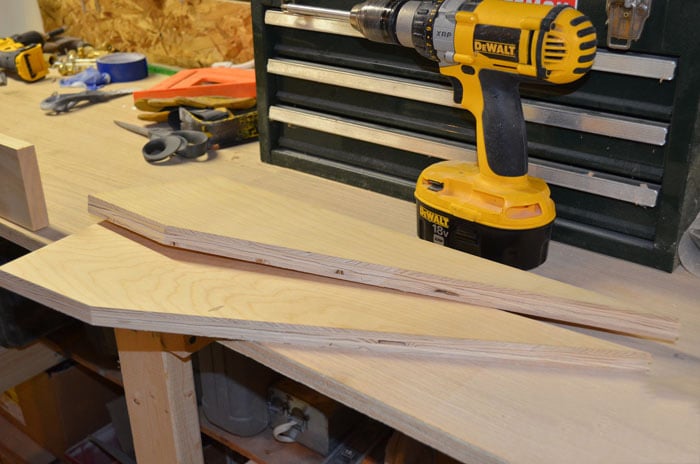
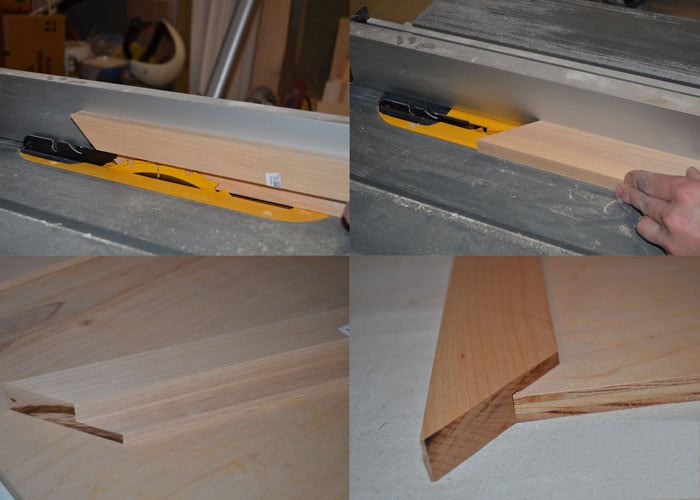
We created the two sides of the cover using 3/4″ scrap plywood. We decided on the shape because we knew we would be wrapping a 6″ piece of trim around the bottom of the cover, and then we continued the angle from there. We attached the two pieces with a front brace- a leftover 1×4. We used screws because we knew it would be covered, and we wanted it to be extra sturdy.
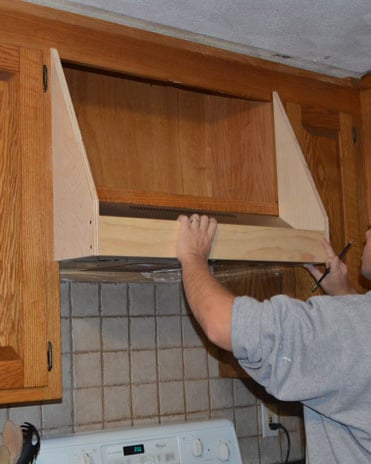
Next we measured to determine where our brace would be that attached it to the cabinet. This was actually a two person job, so I had Mack hold it up there to take a photo. In reality, you will need a second person to hold it while the other measures.
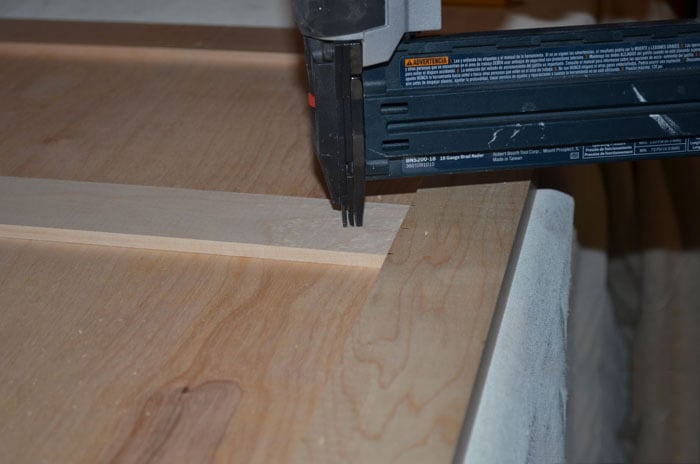
We added the brackets (a ripped down 1×4) and attached the cover to the cabinet. We used screws to attach the brackets, since one again we knew a trim piece would be covering it. We also used screws on the front brace, which would be covered by a panel. However, we used finish nails on the top brace since that would actually show.
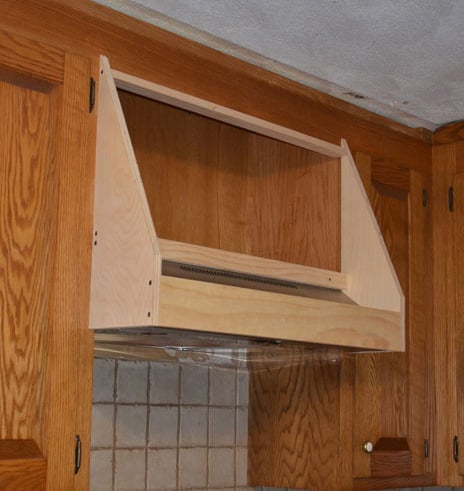
Next we added our trim. We attached the 6″ piece of trim and we ripped down more 1x4s to create thin borders that would both add details and cover up the screws effectively. A plywood panel was also installed on top of the range vent. We left enough space in front of and above the vent so that the air could still circulate (it exhausts through the back, but there are vents that pull in air on the front).
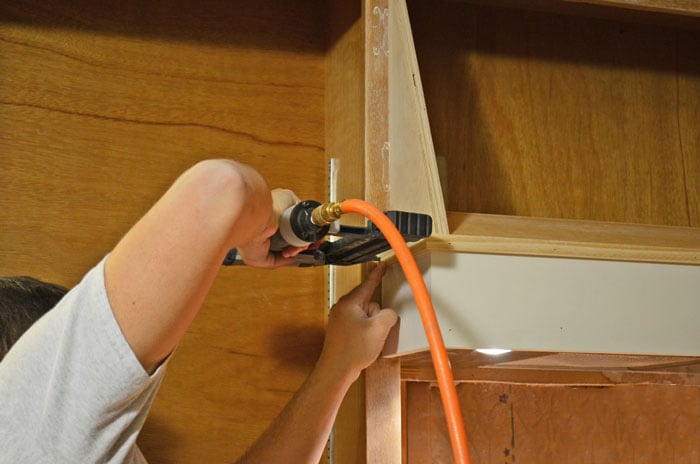
Next, we filled the holes with Drydex and painted the hood using our paint sprayer, along with the rest of our kitchen cabinets.
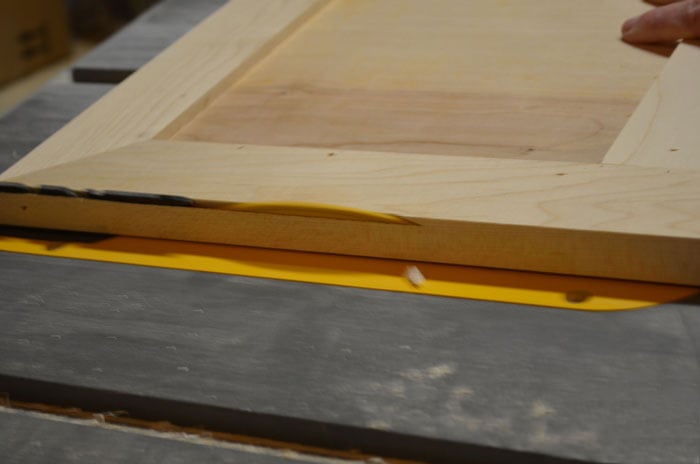
To create the door, we used more pine 1x4s ripped down to 2″ and plywood. We created a frame using the table saw and the compound miter saw (you can also use a router). and recessed the plywood into the back of the frame. This served a dual purpose- both as a decoration and to thicken the edge of a frame enough to accept the hidden hinges.
We added thin pieces of trim to the front of the frame (which we both ripped and cut down to be 2″ wide) and attached with 3/4″ finish nails and wood glue.
We ran the bottom of the door through the table saw at the correct angle, which we had determined by making a template of the hood.
Next, we did a dry fit of the door to determine where to place the hinges.
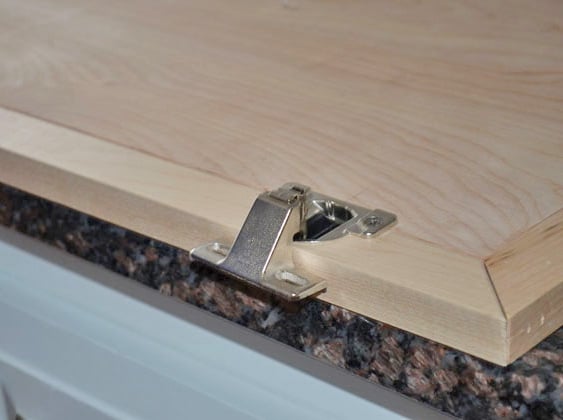
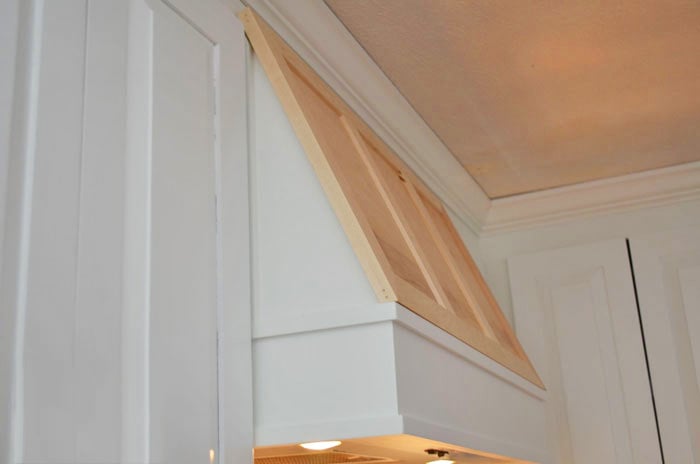
We opted to go with hidden hinges. We used a forstner bit and test fit the hinge before painting. That way, if we needed a little more wiggle room, we could re-drill without having to do another coat of paint. We also used the paint sprayer on the door, which gave it a smooth professional coat. As a final touch, we added a lid support so that the door wouldn’t shut while I was trying to get something out!

I absolutely love the unique and practical touch it brings to this space. It proves that architectural detail in the kitchen can also be functional!
Project Breakdown:
Time: approx. 4hrs
Cost: approx. $250 (including the new vent, which was $170. We actually spent much less than this because virtually all of the wood we used was scrap.)
Sources:
Range Vent – Lowes
Hinges- Part 1 & Part 2 (Amazon)
Lid Support- Lowes
Paint- untinted Cabinet Coat by Insl-x
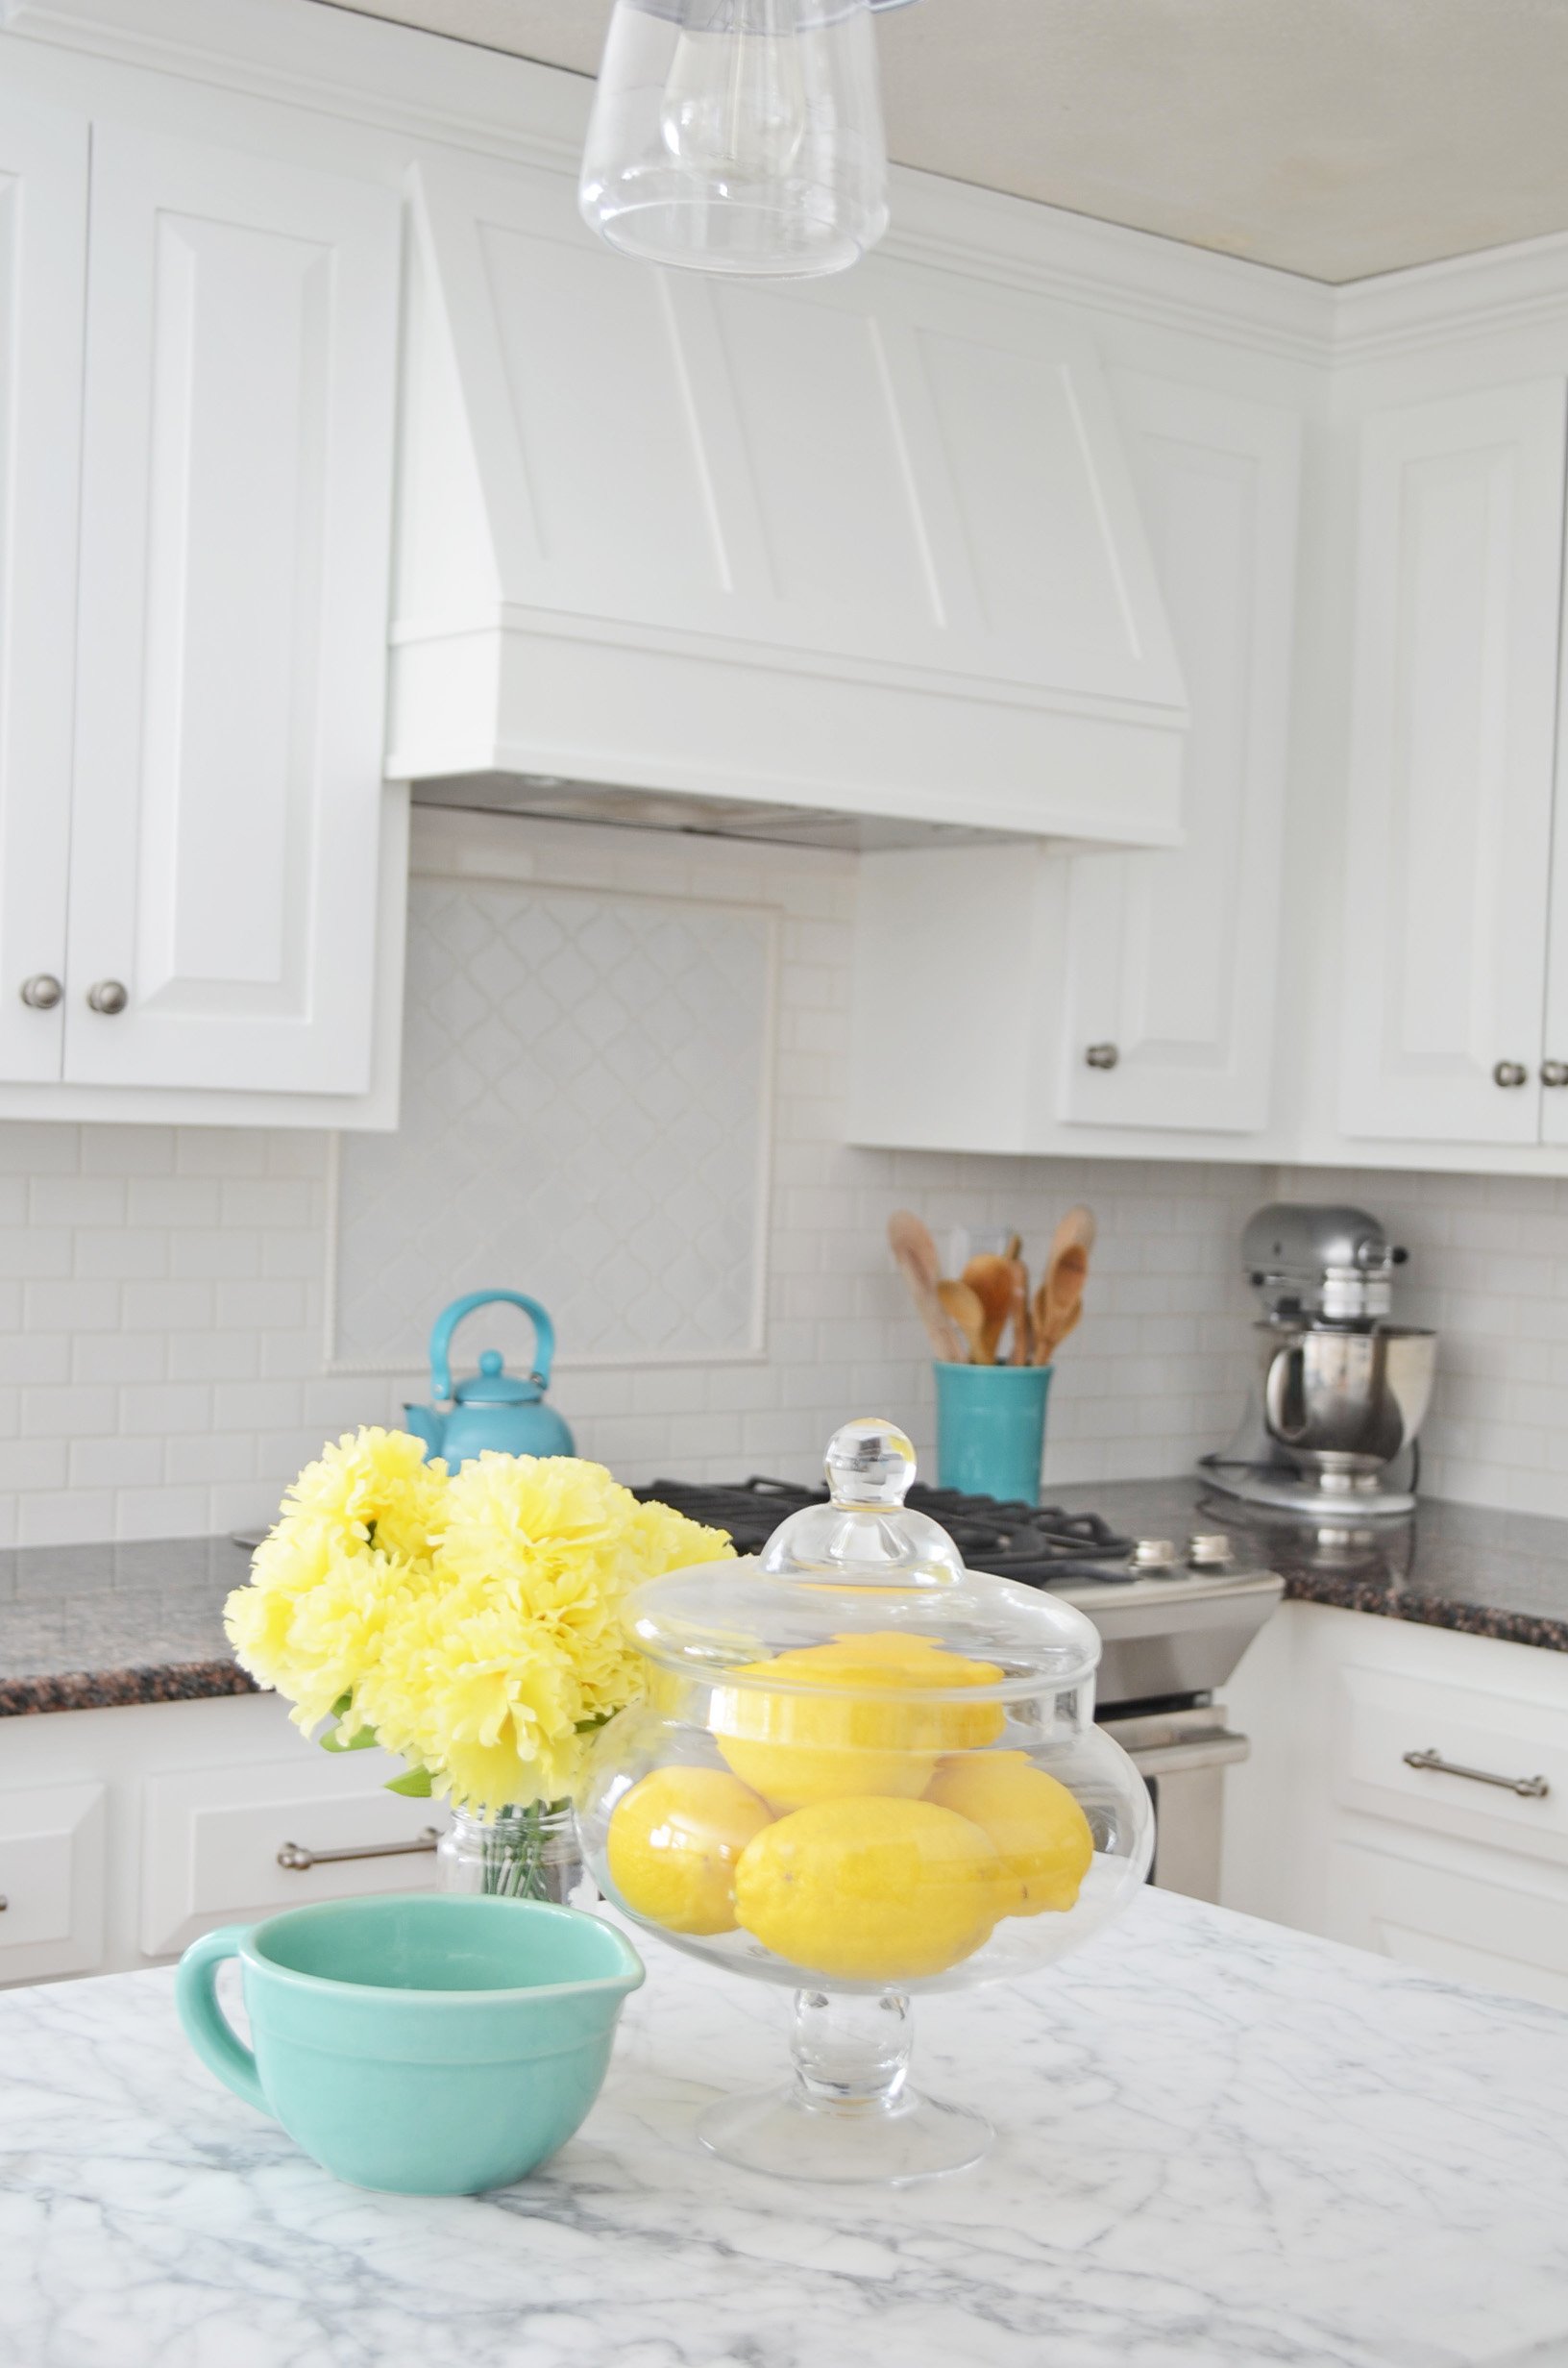
Do you want to see more photos of our kitchen remodel? You can check out our DIY marble kitchen island and the full reveal here!
————————————
Like this post? Try these other tutorials to build custom cabinets for your kitchen — on a budget!


Love this idea and it looks amazing. Great job.
Definitely a great idea! Cabinets over stoves don’t look great, but this is an awesome way for both storage and style!
Love this idea! Pinning!
So super cute. I am wanting to do something similar but am worried about covering the area of the hood where the air comes out. Yours looks covered. Is it? How is that working out for you?
I love this look! I too, must use a non-vented hood. I am being told that I cannot do this because my hood won’t be able to vent. It doesn’t look like yours is vented? How is your hood working?
Thank you!