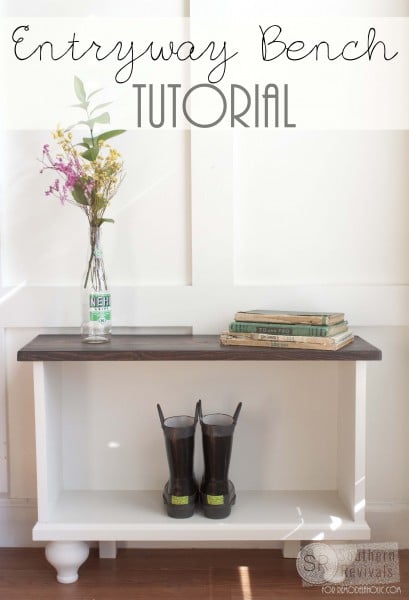
DIY Rustic Farmhouse Bench Tutorial
Hello from Ohio! My name is Larissa, and I spend most of my days over at my blog, Prodigal Pieces, dabbling in DIY projects. I am delighted to be here today with you, Remodelaholics, because I want to share my tutorial for a simple rustic farmhouse style bench.

How to Build a Rustic Farmhouse Bench
For this project, we’re using a 2″ x 12″ x 8′ pine board that you can locate at most any DIY store, and typically only costs around $10. To get started, here are the tools/supplies you’ll need:
- 1 – 2″ x 12″ x 8′ pine board (you can use any species of wood)
- protective eye wear/ear plugs
- table saw
- jig saw
- router / router bit (3/8″ & 5/16″- or bigger)
- square
- drill / drill bits (7/64″ & 3/8″)
- sander – I prefer orbital for ease of use
- 150 grit sandpaper
- tape measure
- cardboard – or something similar to make a stencil
- oval picture frame – or similar shaped item
- utility knife/scissors
- 1 1/2″ screws
- wood glue
- 3/8″ wood plugs – optional
- stain and/or paint
- wax or poly topcoat – optional
When you’re purchasing your wood, don’t just grab the first board you see. Take a second and pull it out. Look for splits, warping, too many knots, etc. Be selective so that you get what you pay for.
Let’s start building!
The finished dimensions for this bench are 28 3/8″ L x 9 1/8″ D x 19″ H. In order to achieve that you’ll need this cut list:
- 2 – 19″ boards for the ends
- 2 – 27″ boards for the seat/shelf
The design of this bench requires that the seat/shelf be a tongue & groove design to add extra durability, so those boards are actually cut longer initially because they will be inset to the side supports.
Once you’ve cut your boards, you’ll want to take one of the 19″ boards and trace the outline on a piece of cardboard (or paperboard, or piece of paper).

To create those cut-out sides I used a thrifted oval picture frame (11″ x 9 1/4″), but really you could use any shape or object you like, or even omit the cut-out all together, but note it will change the layout of the assembly. This feature is more for asthetics than anything. Just lay the oval shape 3″ down from the top edge and about 1 7/8″ in from the edge.

Next, you’ll want to make the triangular cut-out from the bottom. Find the center of the bottom of the stencil at 4 5/8″ and mark. From the center mark, measure 4.5″ up and mark.
Measure 1.5″in from the bottom corners and mark.
Using your square, connect the corner marks to the centered mark.

Your stencil should look like this after cutting out those traced shapes.

Lay your stencil on your board and trace on both sides. I trace on both sides because when using a jig saw, sometimes it can cut a bit wonky when working on a thick board and having the opposing tracing can help line things up if you need to flip it and tweak the cuts.
Next, grab your jig saw and cut out the traced shapes. (Be sure to use protective eyewear!) If you have a band saw that would be slightly easier, but a standard jig saw will do the job.

(Yes, I’m outside in 5 degree weather working, but hey, it’s Ohio!)

Now you’ve got your rough cut end pieces and it’s time to sand. Because pine is a soft wood and I’m going for a rustic appeal, I only use a 150 grit sandpaper, but typically with a hardwood I would start out at a 120 grit and work up to a 220 grit or higher finish.

Time to head over to the table saw to create a tongue on the seat and shelf. Set your blade to 1/4″ height and your rail to 5/8″. *Explanation: We are wanting a tongue depth of 3/4″, so to achieve that your rail is set to 5/8″ and then you add the width of the blade, which is 1/8″ – those added together give you the correct 3/4″ depth.
We used a standard blade, but a dado blade would be preferred if you have it – we wanted to show you that you don’t need tons of specific tools. Use several passes to “chew” away the wood. You will need to do this to all four sides.

In order for the tongue we just created to work, we need to create a groove for it to go into. On our side pieces, we’re going to measure 2 7/8″ down from the top on both sides and mark across, stopping 1/4″ from the edge. Next, draw another line 1″ above the first line to create a box.
For the bottom shelf, measure 6″ up from the bottom on both sides and mark across, stopping 1/4″ from the edge. Next, draw another line 1″ below the first line to create another box. Here’s what the finished dimensions should be:

With your router, you will want to make several passes to hollow out a notch 3/4″ deep – which is where the tongue is going to go into. When finished, lightly hand sand the edges to get a clean edge.

You’ve cut, sanded, and routed, and now it’s time to assemble.
To make things easier, you’ll need to drill pilot holes through the groove using a 7/64″ drill bit (or similar), 2″ in from each side and centered top to bottom. (No, that’s not my beefy arm, but my fantastic husband who helped me in this project – wink, wink.)

Next, flip the side over and using a 3/8″ drill bit, you’re going to create a counter-sunk hole so that your screw head will rest below the surface and create room for the wood plug to rest. Be light on drilling so you don’t go too deep. As a precaution, you can even put tape on your bit about 1/4″ from the end to be a depth gauge.

In woodworking, it’s always good to do a dry fit to make sure all pieces fit together and are snug. Once you’re sure it all fits nicely together, apply wood glue to the tongue as well as inside the notch.

Lay the side piece on the floor and then insert the seat & shelf into the notches. Then add the other end piece to the top, making sure to add glue to the tongues and notches.

While the bench is still on its side, secure it together with the screws.
Add the wood caps to finish it off and then the build is done. It’s best to let it dry overnight, but a couple of hours should suffice since the screws are holding it in place.

Onto the finish work! Now you can take it from here to whatever style you like, and as an example I’ve taken the same bench and given it two different finishes.
A rustic style with stained finish using my favorite Varathane Early American stain.


Or maybe your taste is more of a shabby chic, cottage style, and you prefer a distressed time-worn look with a whitewashed effect. For this variation, I stained as before, but this time I used my cheapo flat ceiling paint to add a washed layer.

Both will look fantastic in your cottage, shabby chic, or farmhouse style decor. You can even paint it solid with a gloss finish for a modern twist. Have fun and make it your own.
Got questions? Just let me know and I’ll be more than happy to help. If you like this project, I’m sure you’ll love my DIY barn wood shutters from weathered pallets.

Making your home your own shouldn’t make you broke! All it takes is desire and a DIY attitude. Until next time!
————————————
Build a bench for every seat in the house with these additional tutorials:


I love how this turned out. Great piece to have and can really go anywhere in the home. Thank you for sharing.
You’re most welcome, Vanessa. It is versatile and comes in handy when a shoe change is in order. 🙂
Great tutorial and I especially appreciation the detailed instructions. Can’t wait to make one.
Thanks!
Pinning
I hope you do give it a try, Patti! Send me some pics if you do. 😉
Awesome tutorial Larissa and one I’m going to pin for future inspiration! You rock with the power tools girl! Nice to see you here at Remodelaholic 🙂
Thank you, Marie! At least I can rock the tools when it’s below zero outside. 😉
You rock girl! Loved the project and the tool selection you used:) Super cute bench. Quick question, would it still be as sturdy if I made it longer, like 4 or 5 feet?
Thanks, Wendi! Absolutely you can make this longer, that’s the beauty of this project. You could even increase the height as well, but do note that the higher you go, the more tippy it will become. To adjust for that, you would need wider board for the ends. Let me know if you have any other questions! 😉
It’s gorgeous!!!! Can’t wait to try this out! Thanks for sharing.
Thank you, Debra! I certainly want to see your finished product if you want to share. 😉