Glass Vase to Painted Blue Lamp : Guest
Amanda at The Hand Me Down House found a way to make a great Pottery Barn look with a little Mod Podge.
 I saw this set of lovely lights in my PB catalog a few weeks ago (does anyone else continue to get these even though they never order anything?? Sadly, I’m just too cheap — but I’m glad I have the catalog to flip through — it makes me feel sophisticated).
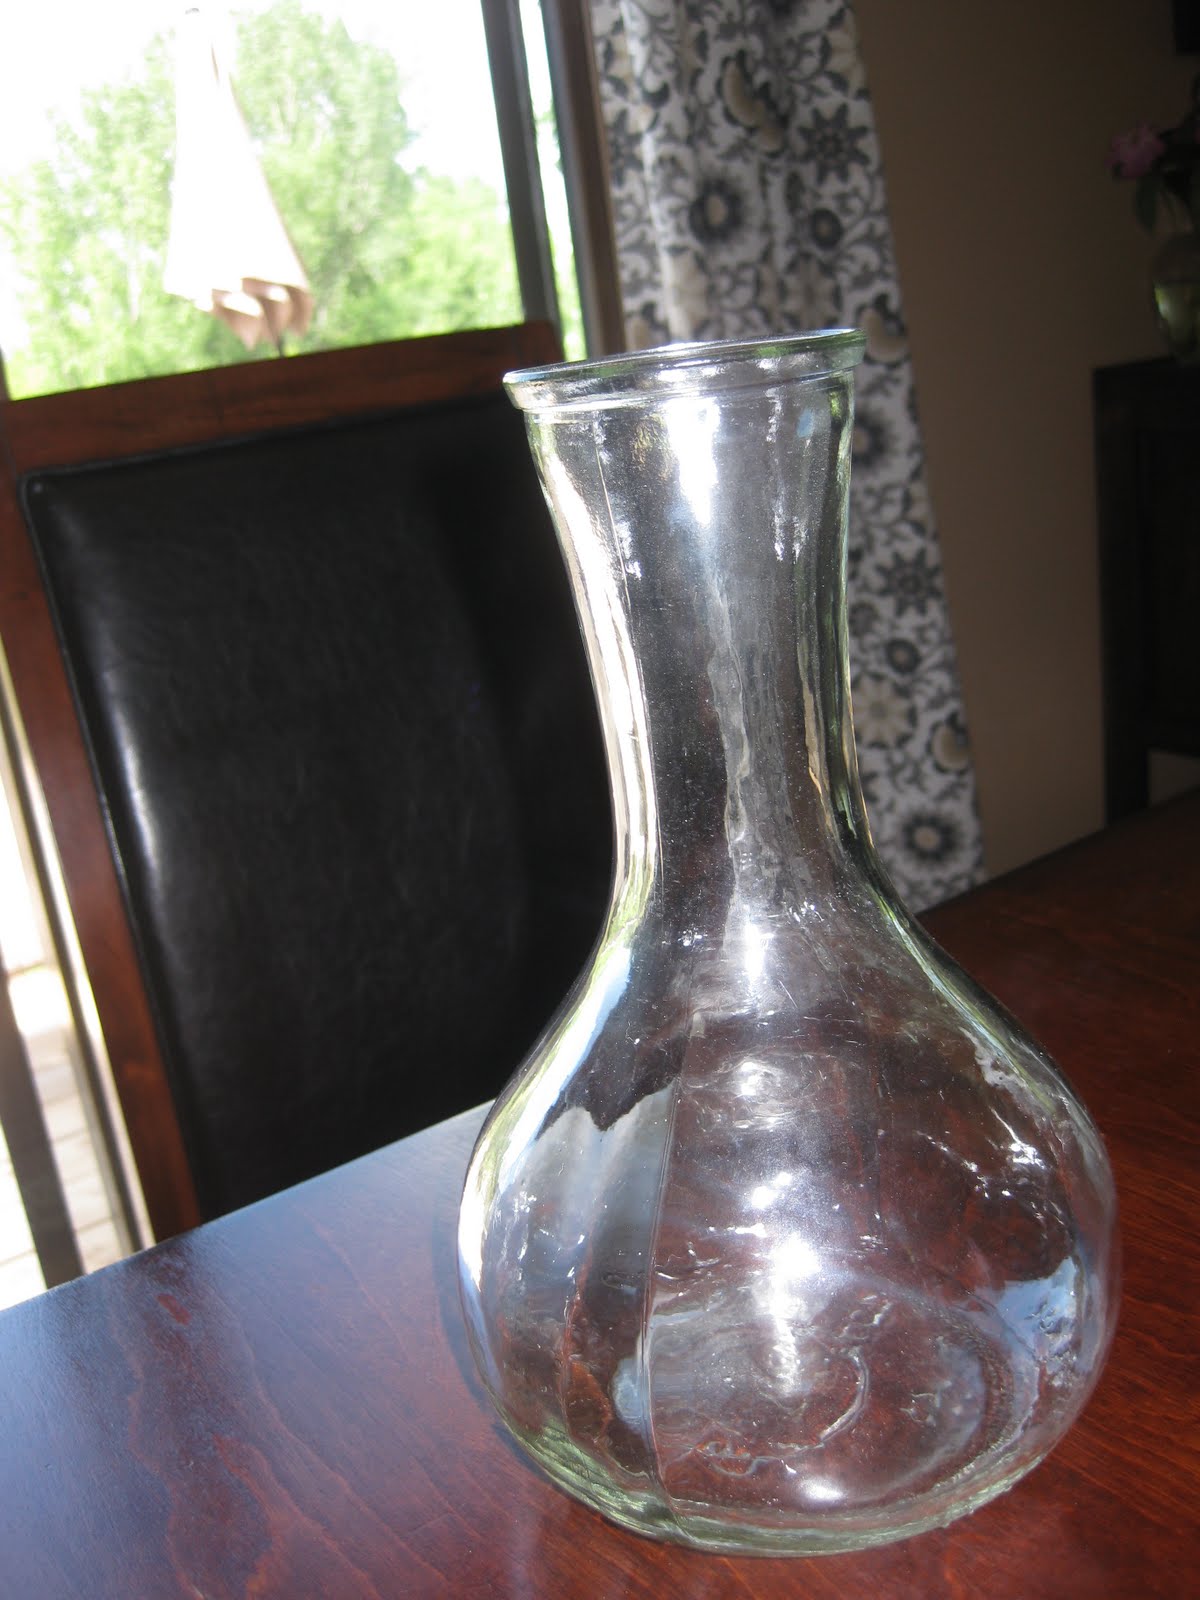 I was a little bummed that it wasn’t colored — but oh well I’ll take what I can get.
Oh, wait — it gets better – I found Pam’s blog, Gingerbread & Snowflakes with a WONDERFUL tutorial on how to “tint” glass! OMG — could not even tell you how excited I was when I found this — visit her tutorial — it’s awesome!
So the trick was to use Mod Podge and food coloring. Well first, let me say that I have NEVER used Mod Podge before — but I’ve heard AMAZING things about it and how addicting it is. So I went out and bought some (did you know Joann’s has a 50% off coupon this week?) with my coupon of course — and I L-O-V-E this stuff!

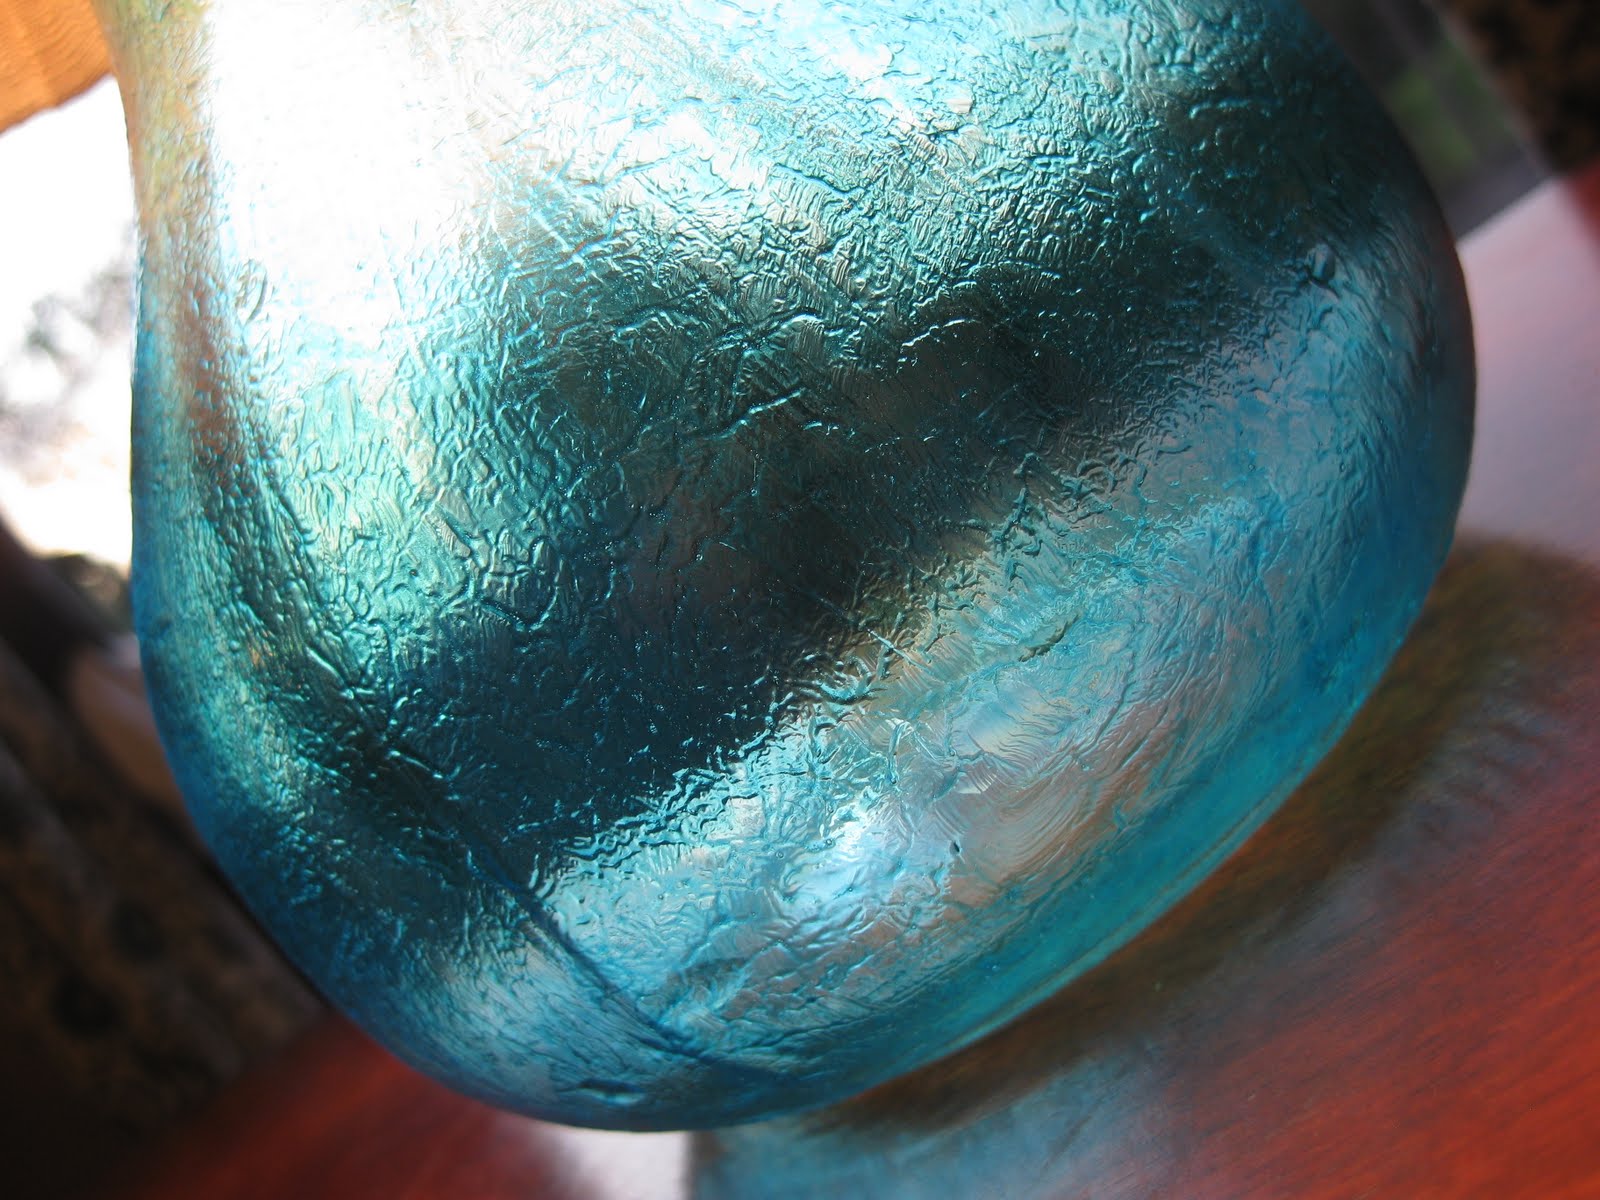
So I happened to find some Neon Food Coloring in my cupboard (no idea what I would have used this for — but it came in handy this time!). I put a few drops of the neon blue and mixed it with the Mod Podge like Pam did and painted it on. After I painted it I stippled it with a paper towel — real technical using paper towels and all, I know.
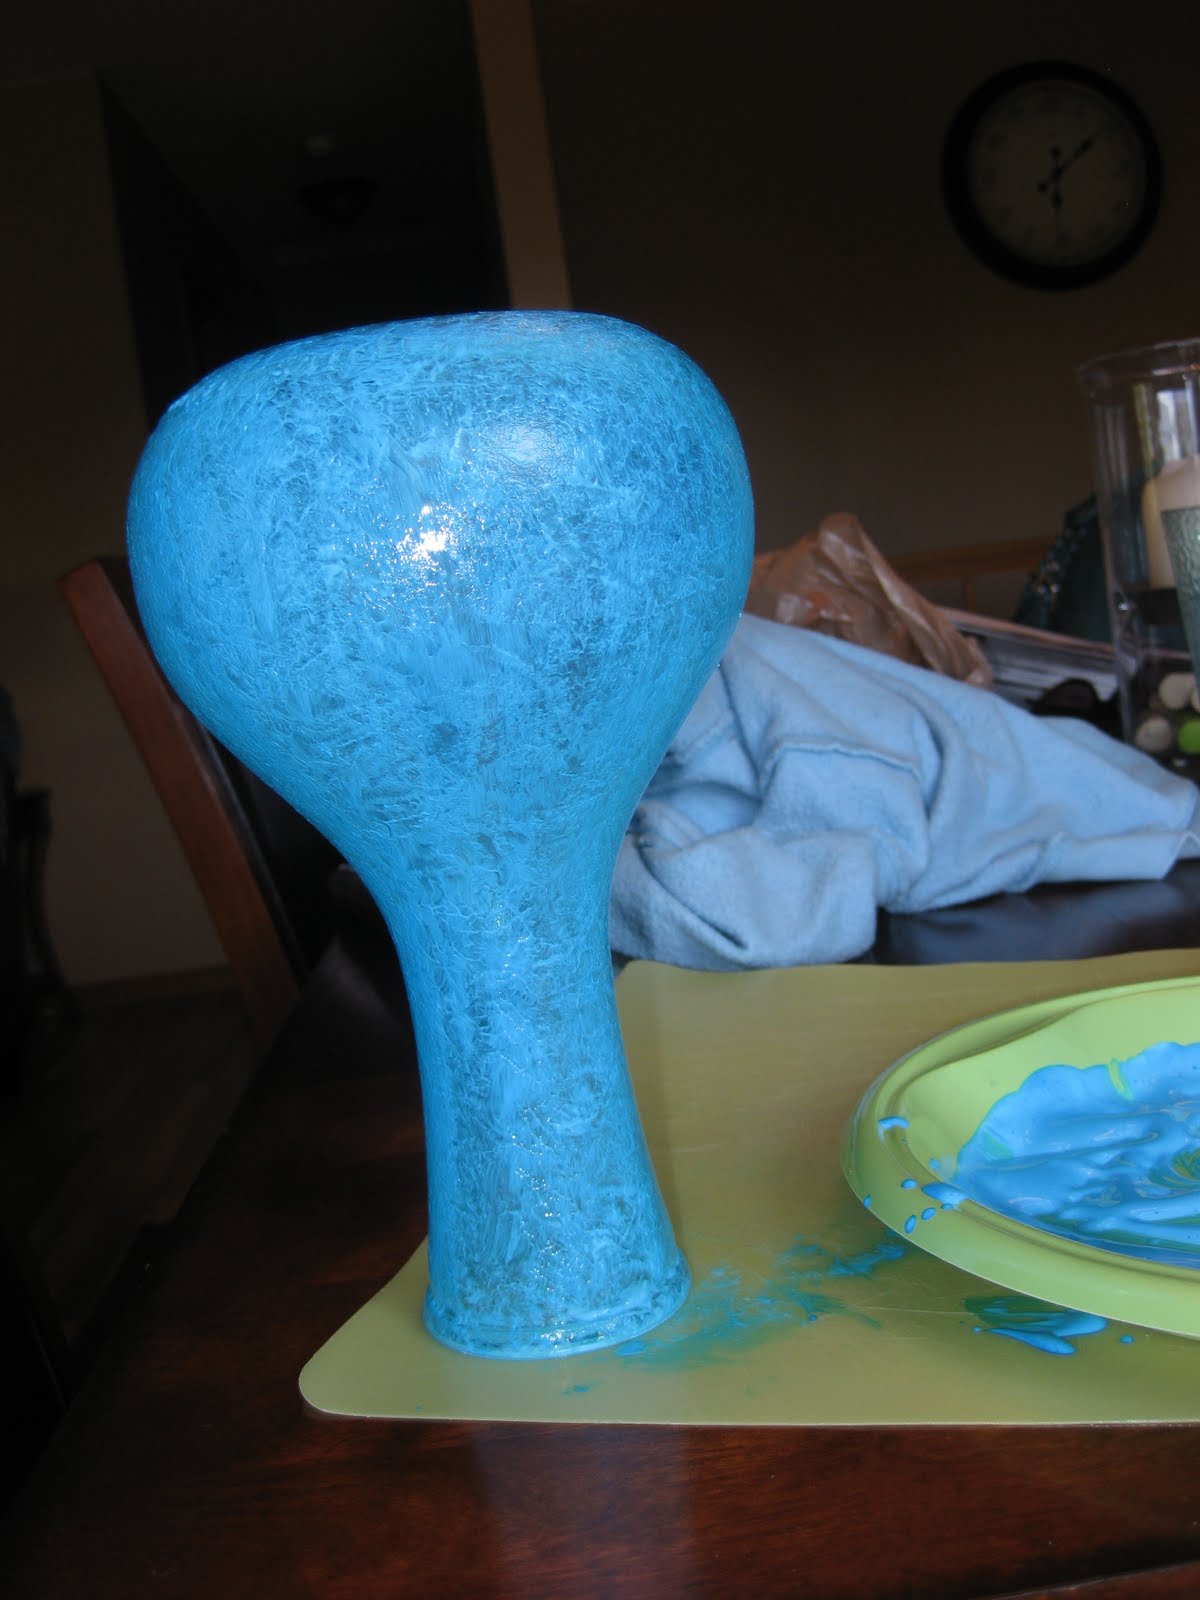
I know it looks quite electric-blue in the picture — but as it dried it mellowed out.
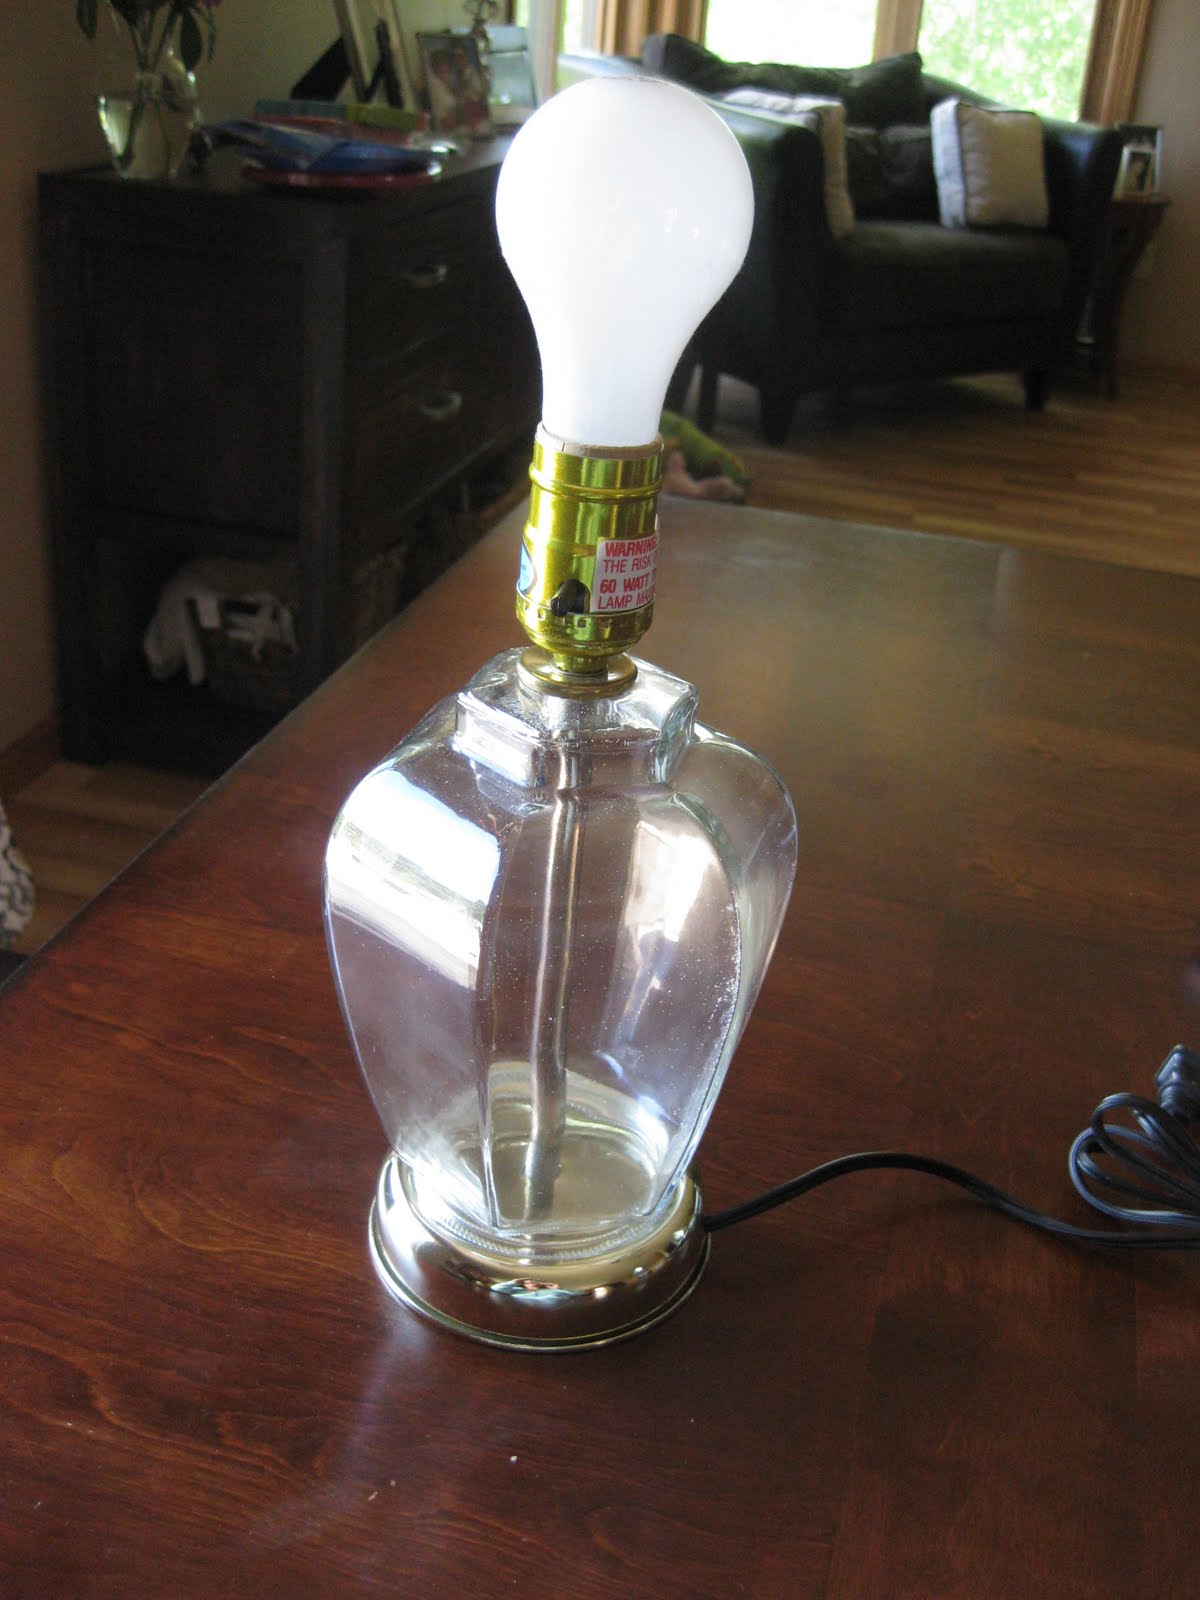
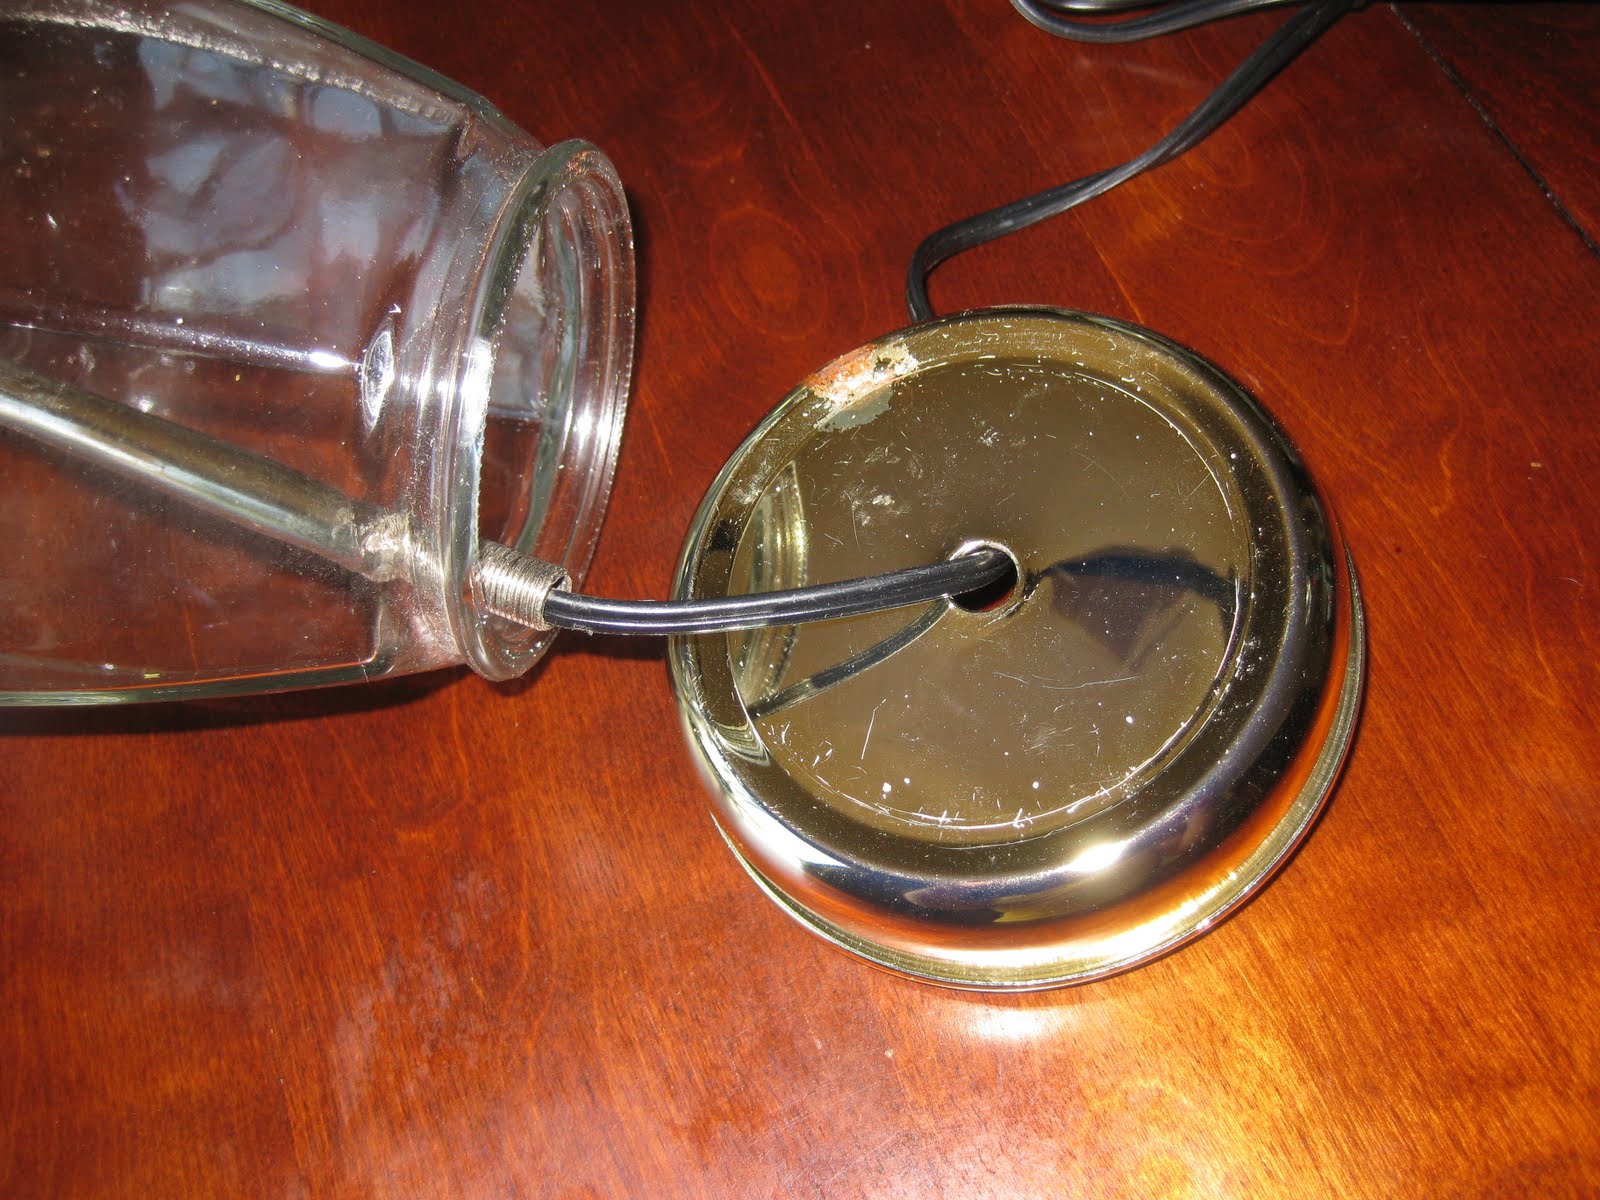
Next step was the lighting portion of it. If you look at the PB light, there isn’t a cord going through the glass — it simply gets pushed out the top. So I used the wires and switch from this light:
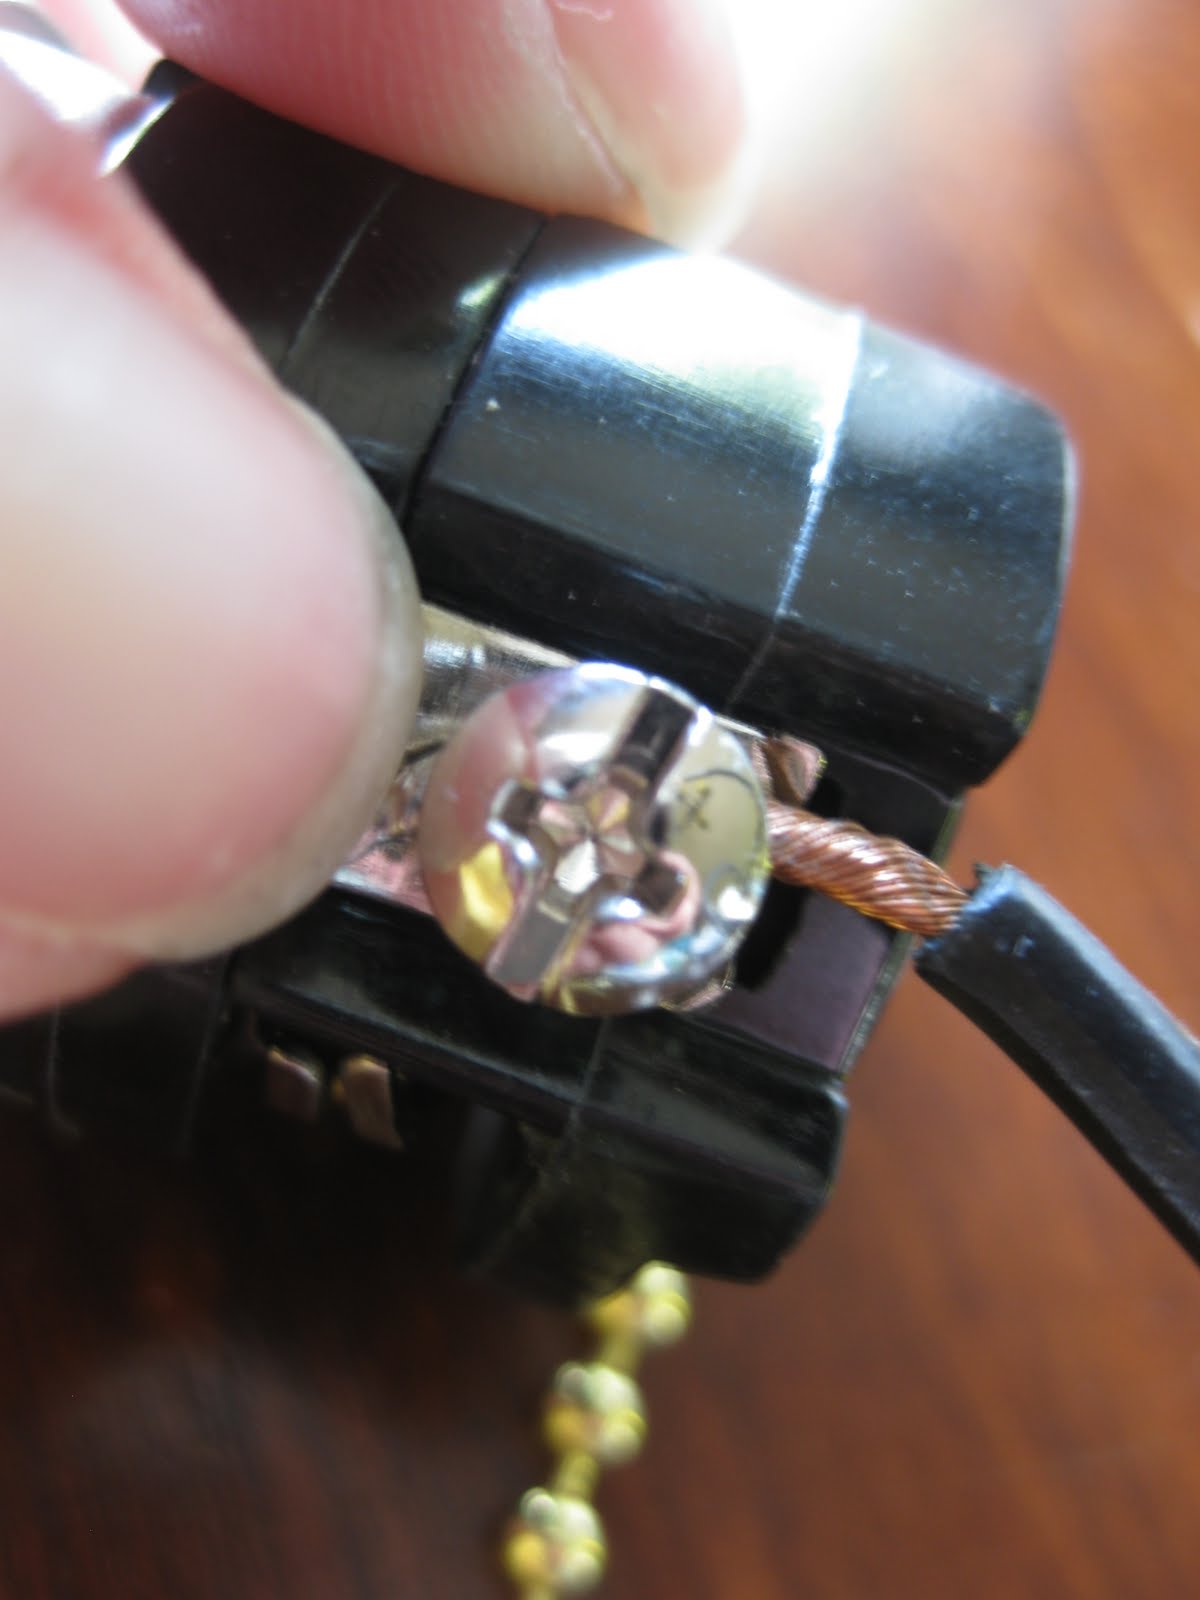
 It’s not too hard to get the wires out — just unscrew the bottom wing-nut:
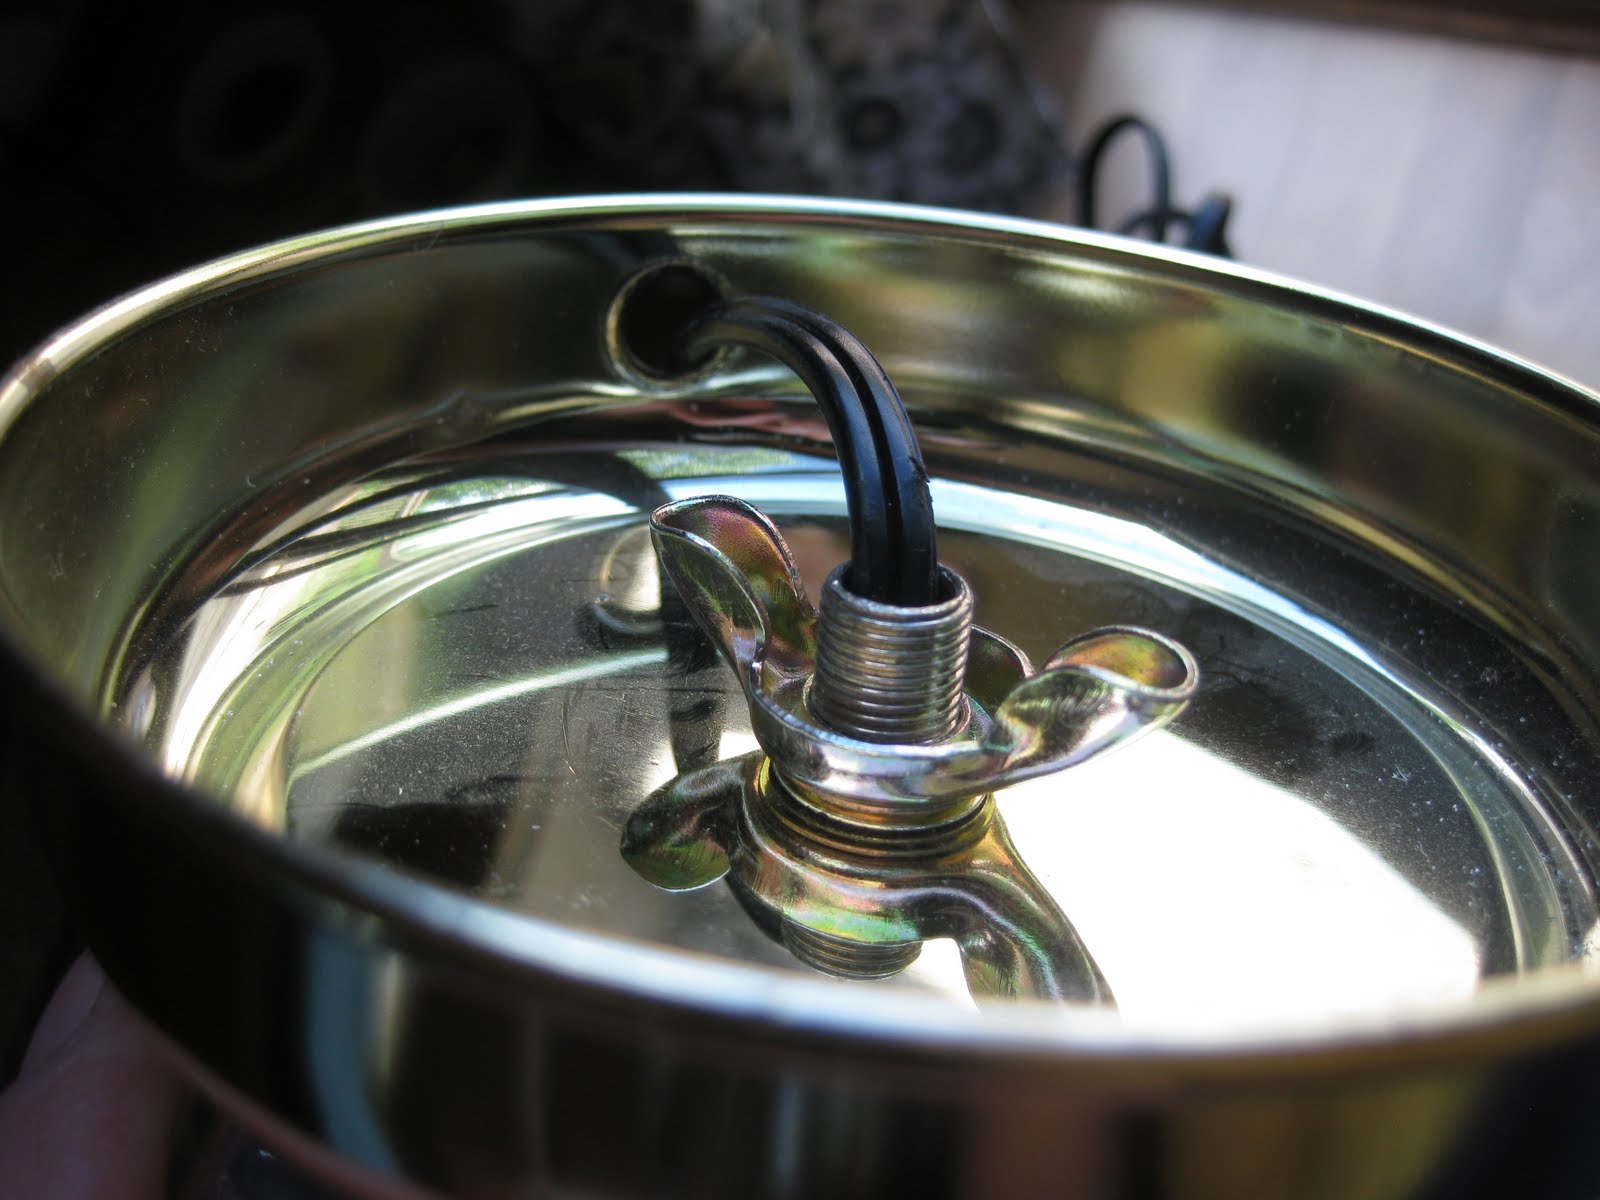
 The bottom of the lamp just comes right off and the wires can be pulled out, but first you need to detach them from the switch part at the top of the light near where the bulb goes.
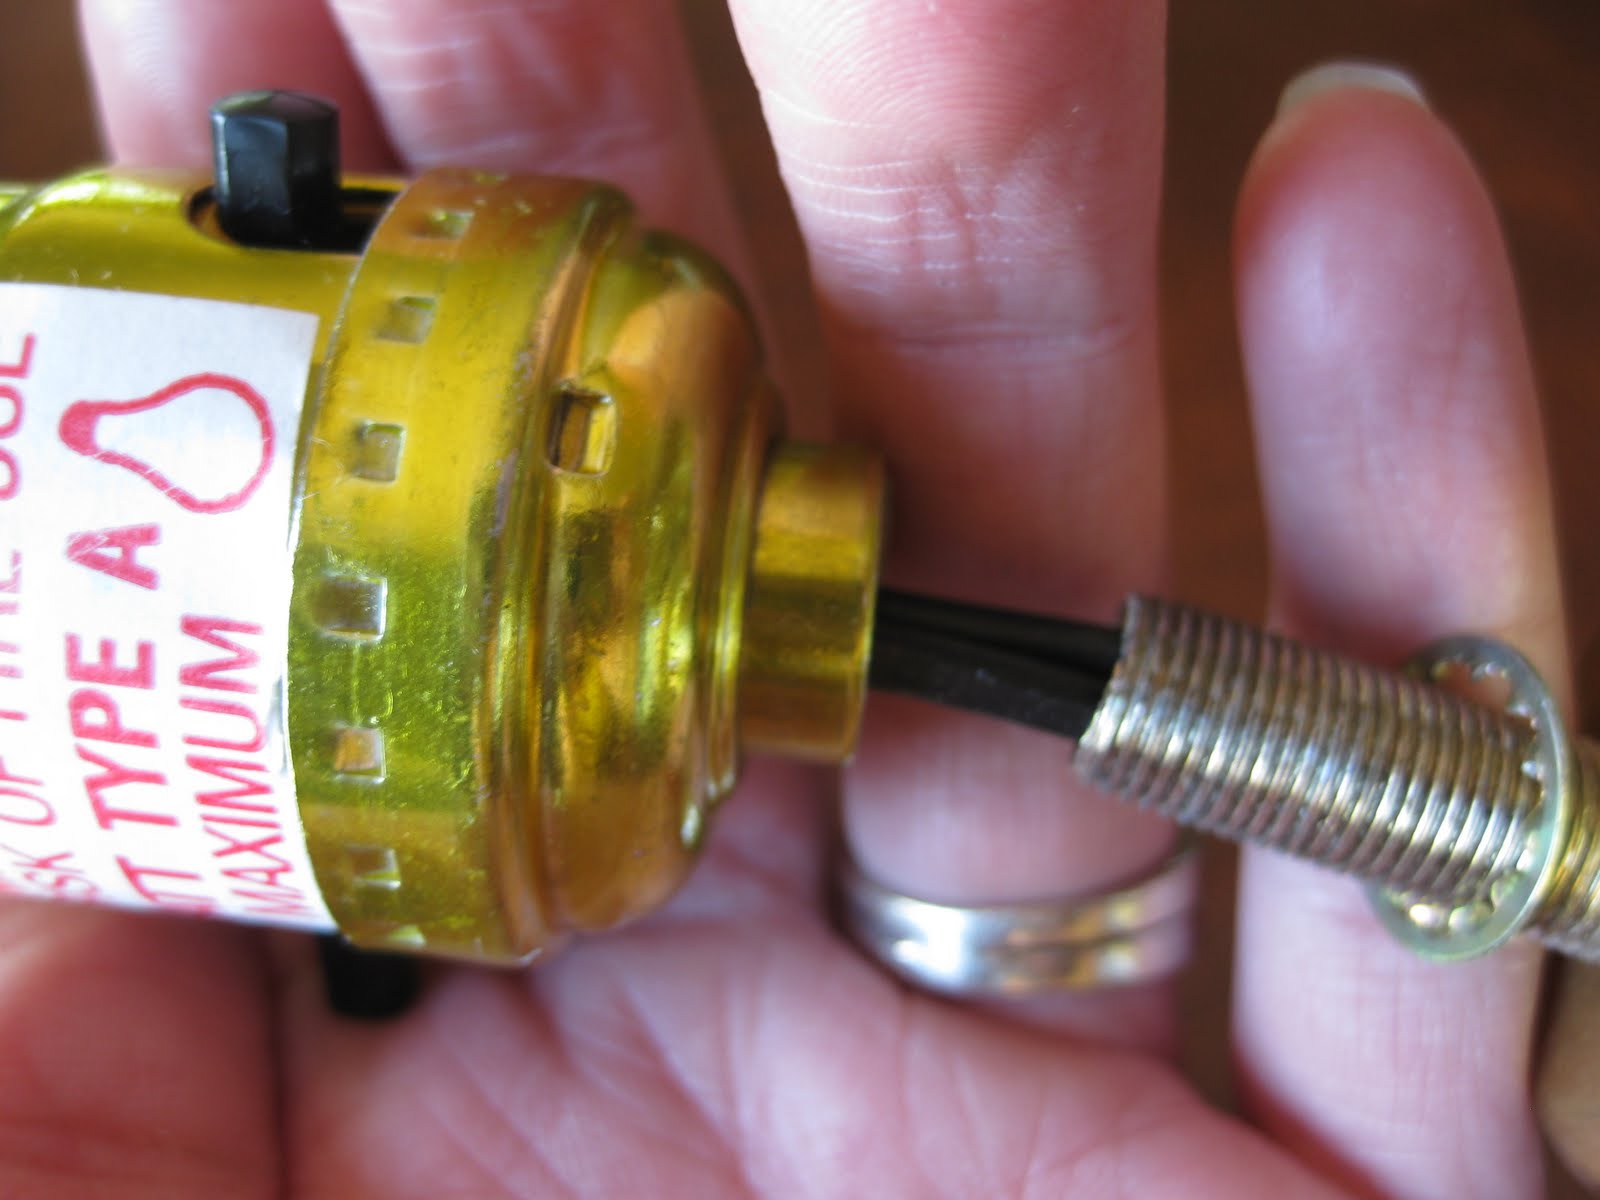
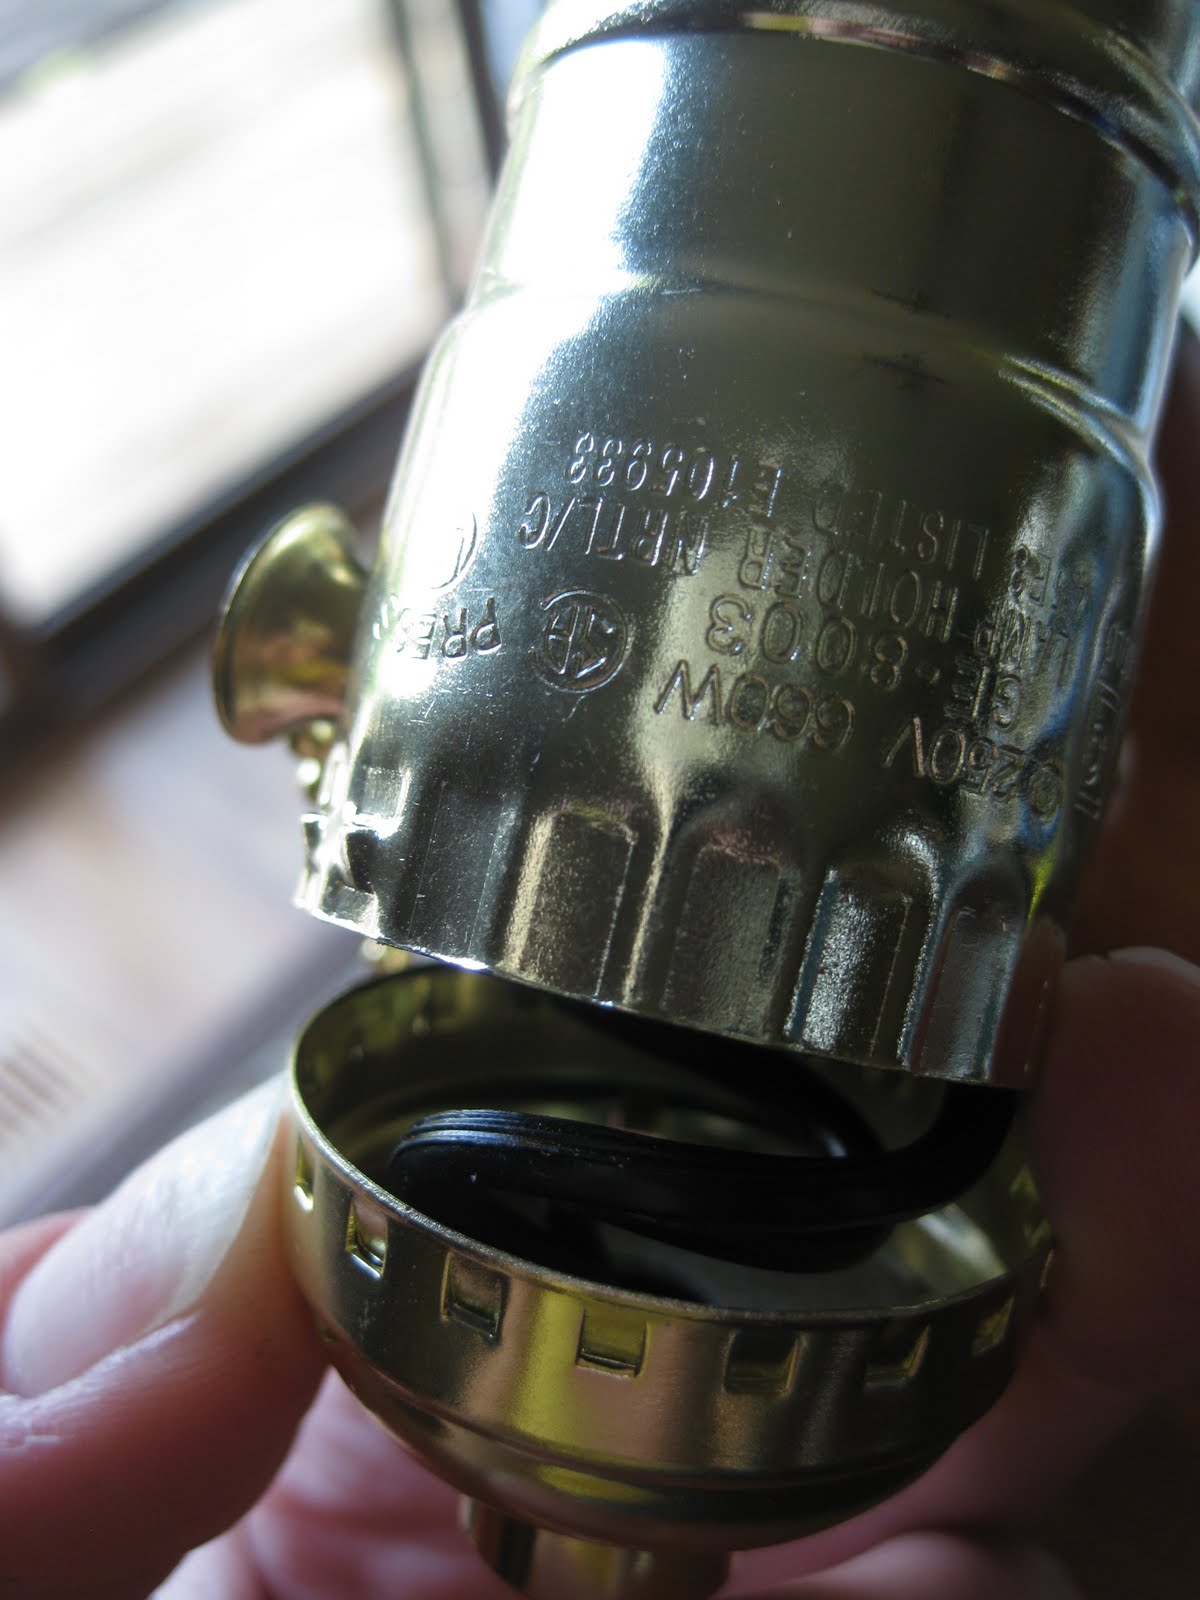
Unscrew the top by the actual switch and pull that bottom cover off.
**NOTE — You could just as easily buy a lamp kit at the hardware store instead of reusing an old lamp. It would probably be easier. 🙂
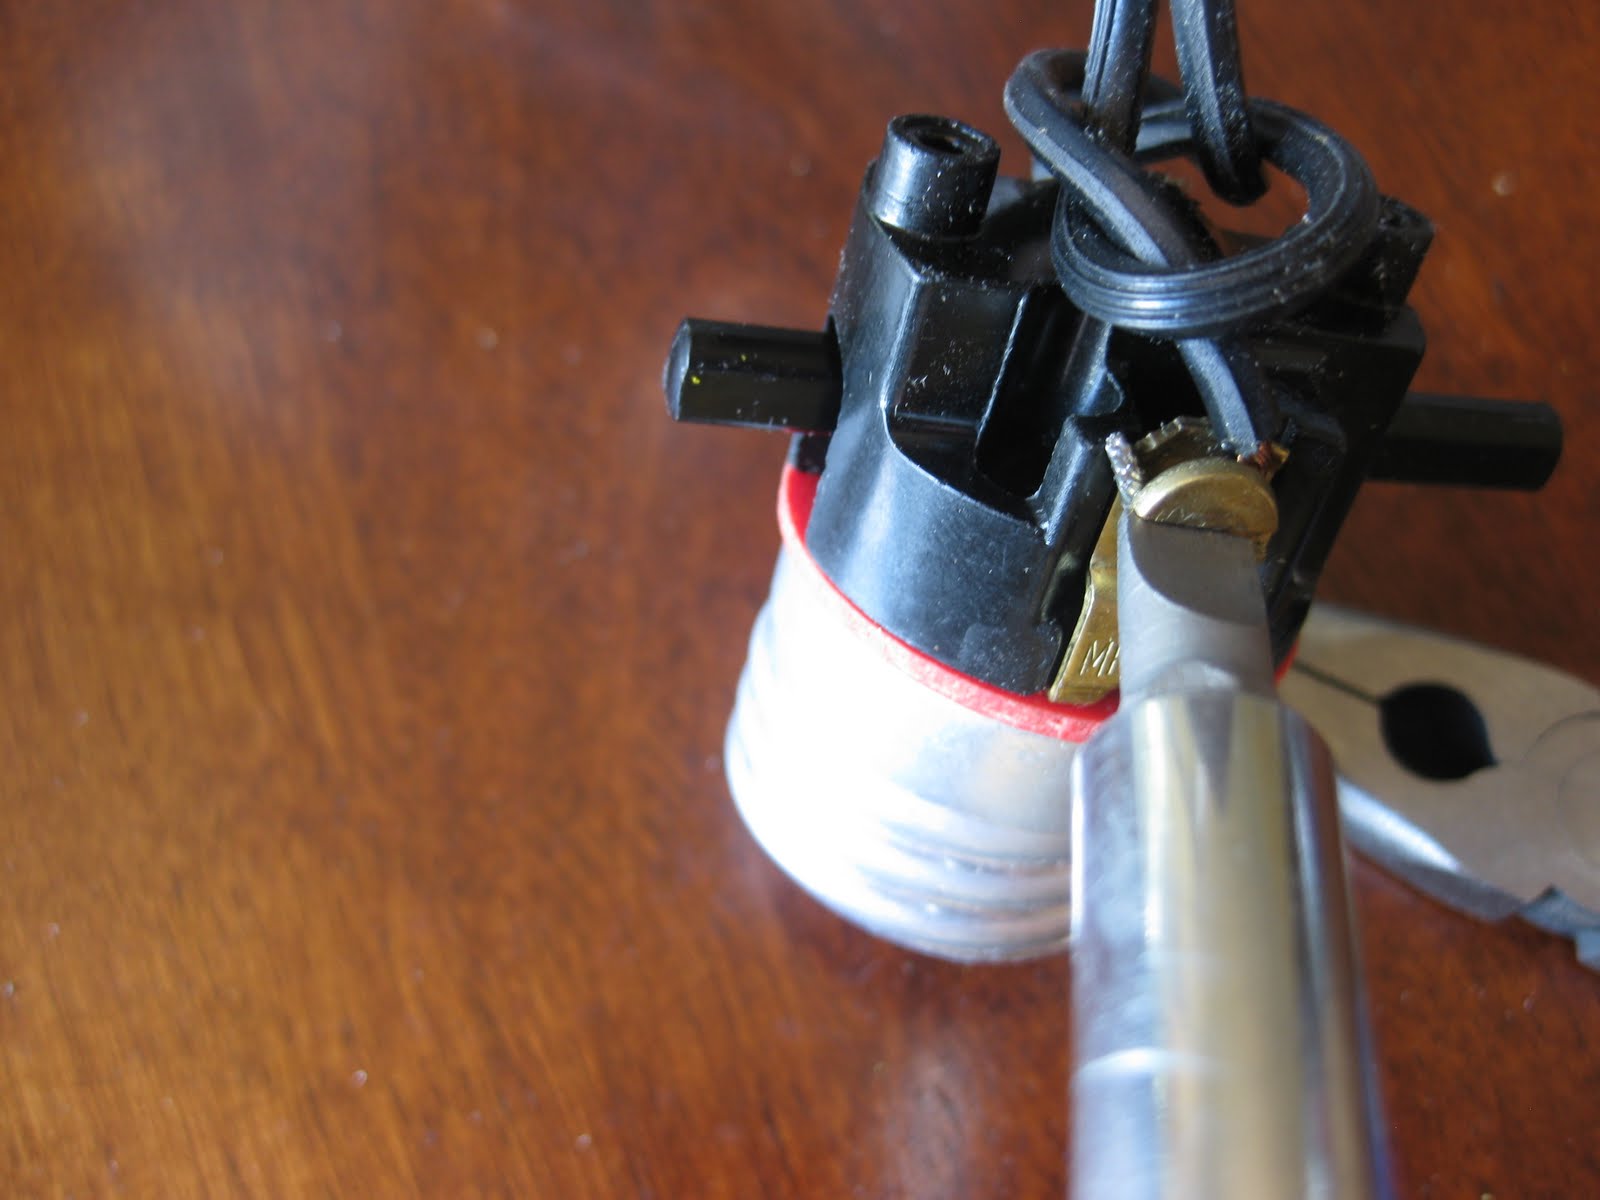
 I unscrewed the screws that were holding the wires to the switch of the light. Once the wires are unscrewed they can slide through the base of the lamp. Now all you should have are the switch part and a black plug-in cord.
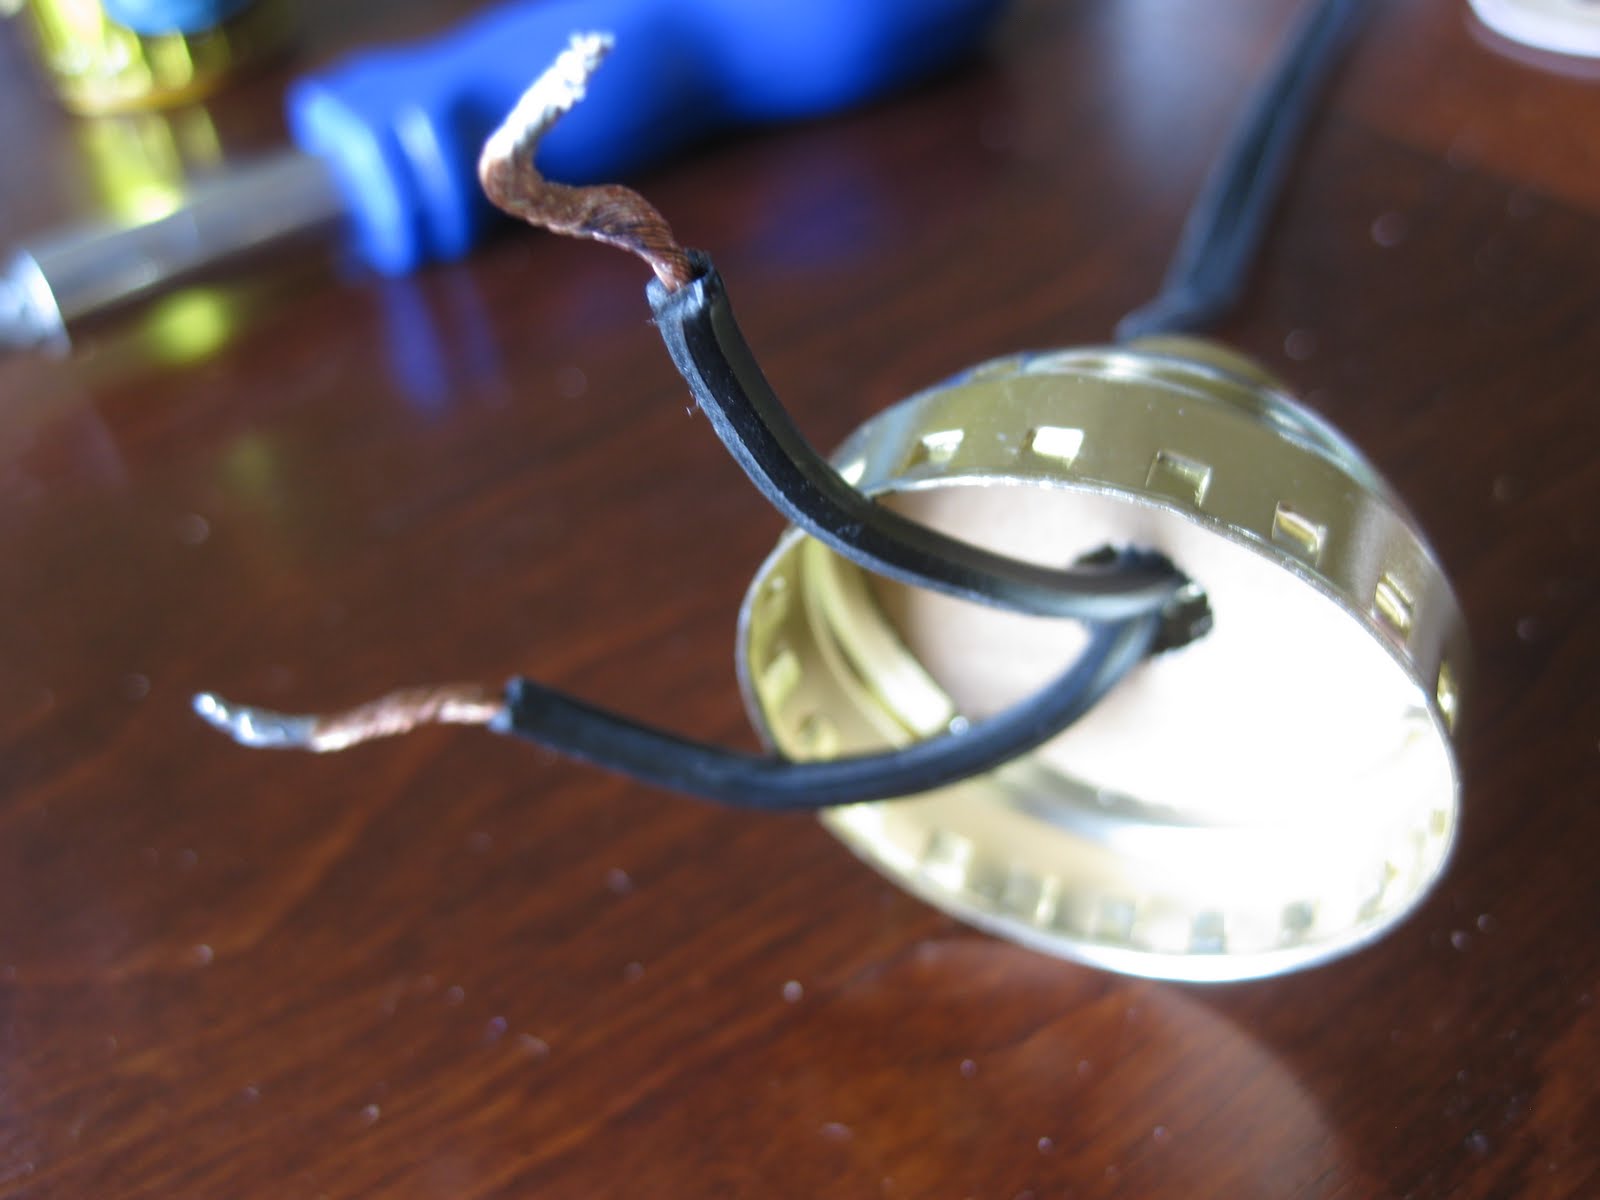
 Then put everything back together without the base or the glass part (I’ll be using the base for another project).
What you should end up with is the top part of the lamp where the light bulb goes and the black cord that you plug into an outlet.
This part will sit in the top of the vase.
For the final part of my light I had really wanted a simple round lamp shade — but I couldn’t find one in the size I wanted or in the price range I wanted. So I decided to makeover a lampshade that I had lying around the house.
I LOVED Amy’s tutorial over at The Idea Room for a Rosette Lamp Shade. She did an adorable lamp for her daughter that had a TON of the cutest little flowers on it. I didn’t do as many as she did but I did take her idea in using one of my hubby’s old t-shirts he was going to throw away.
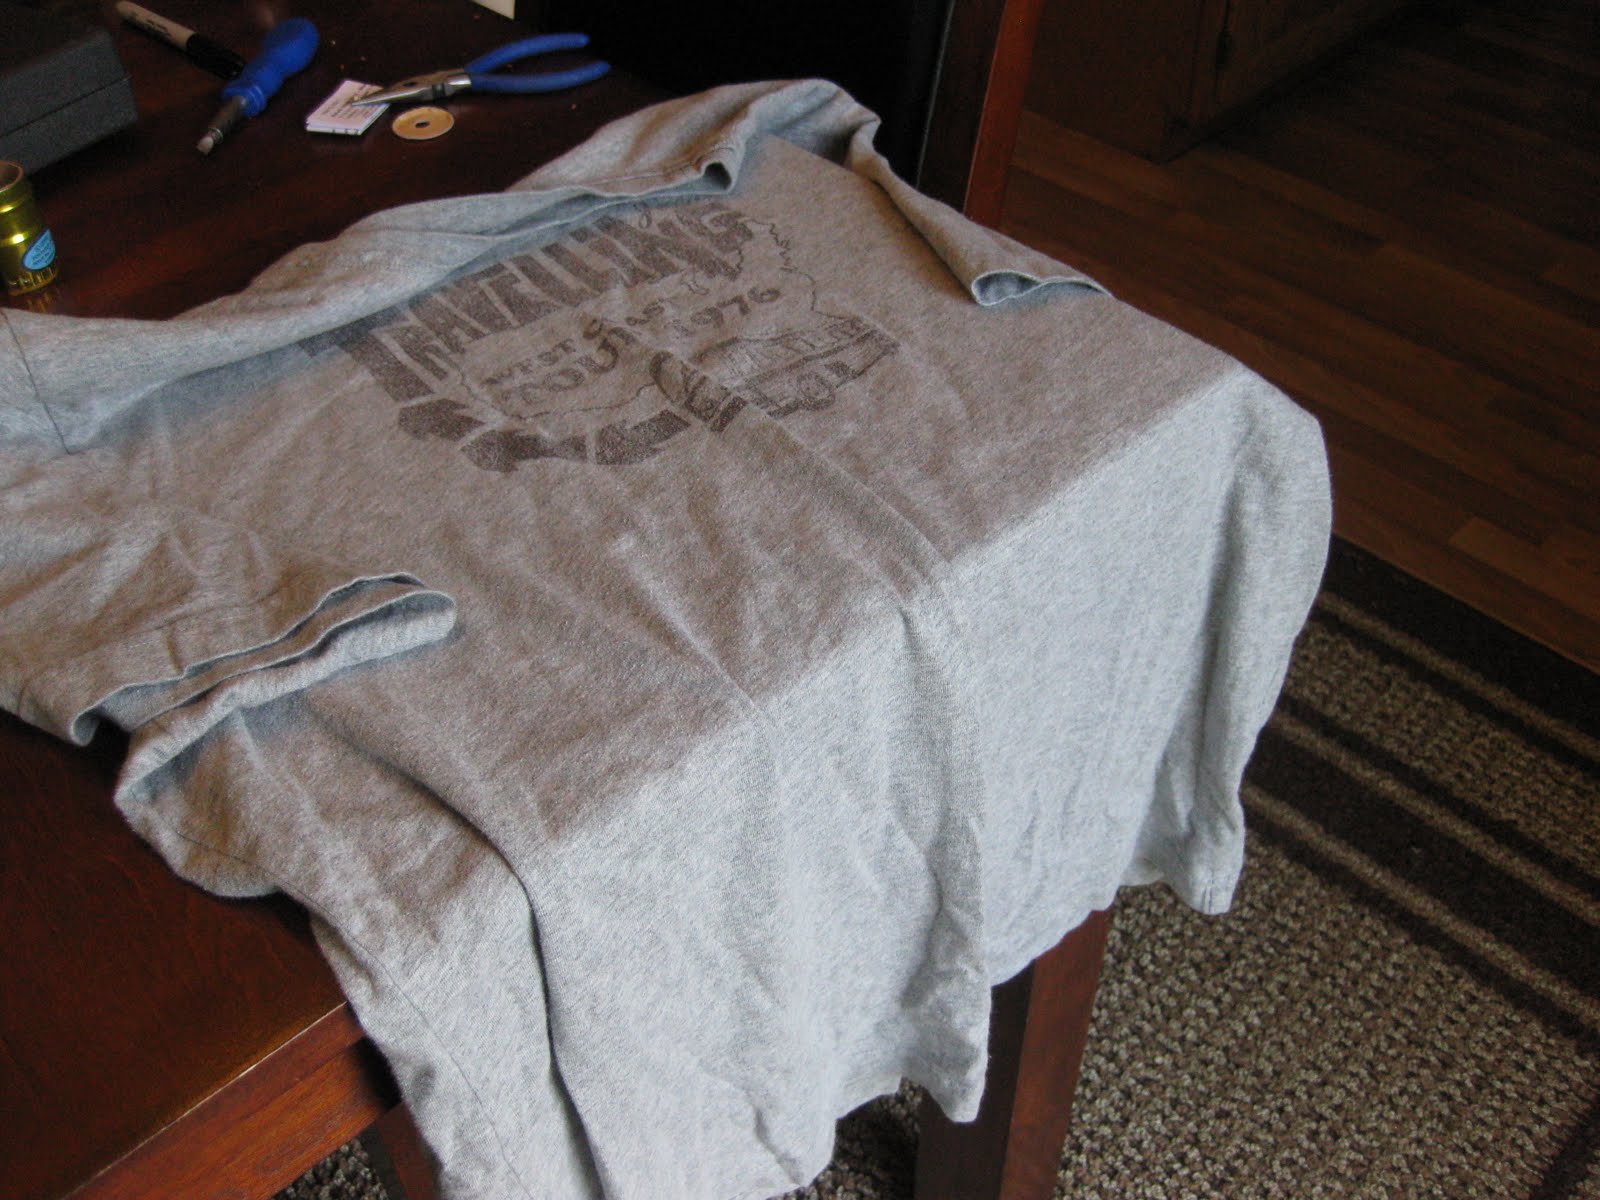
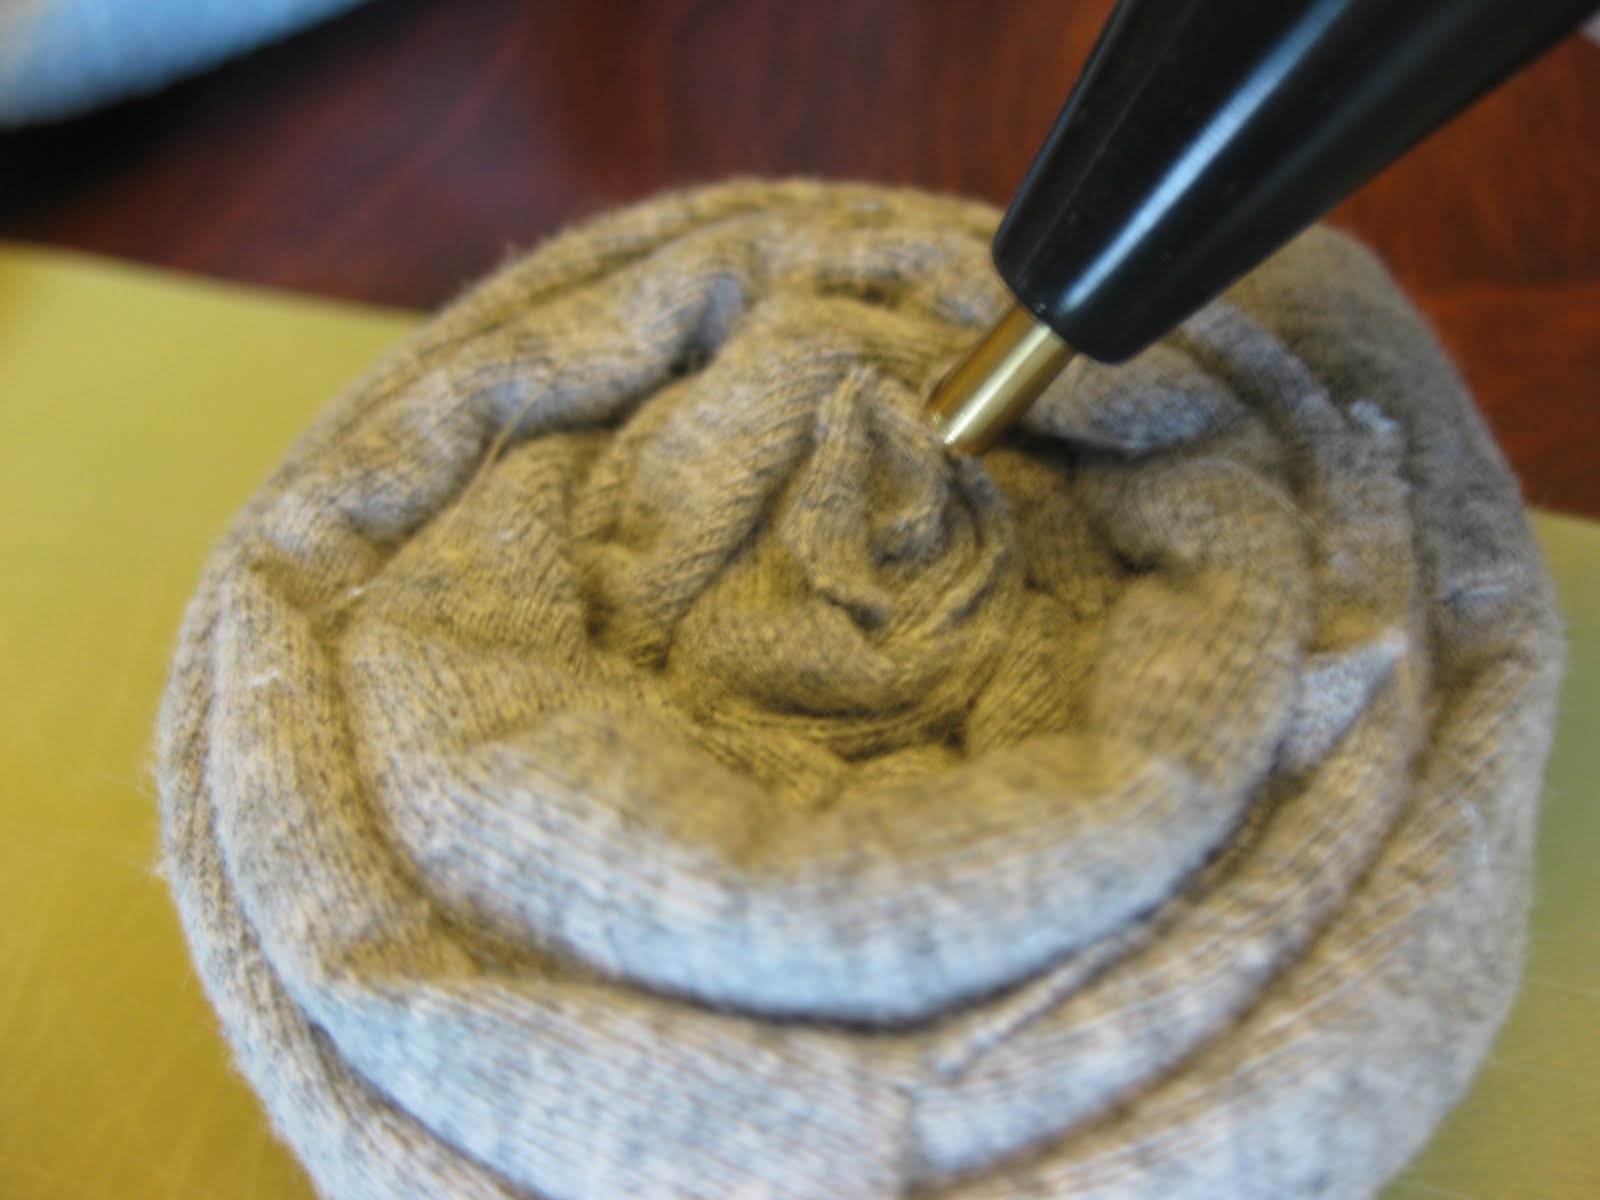
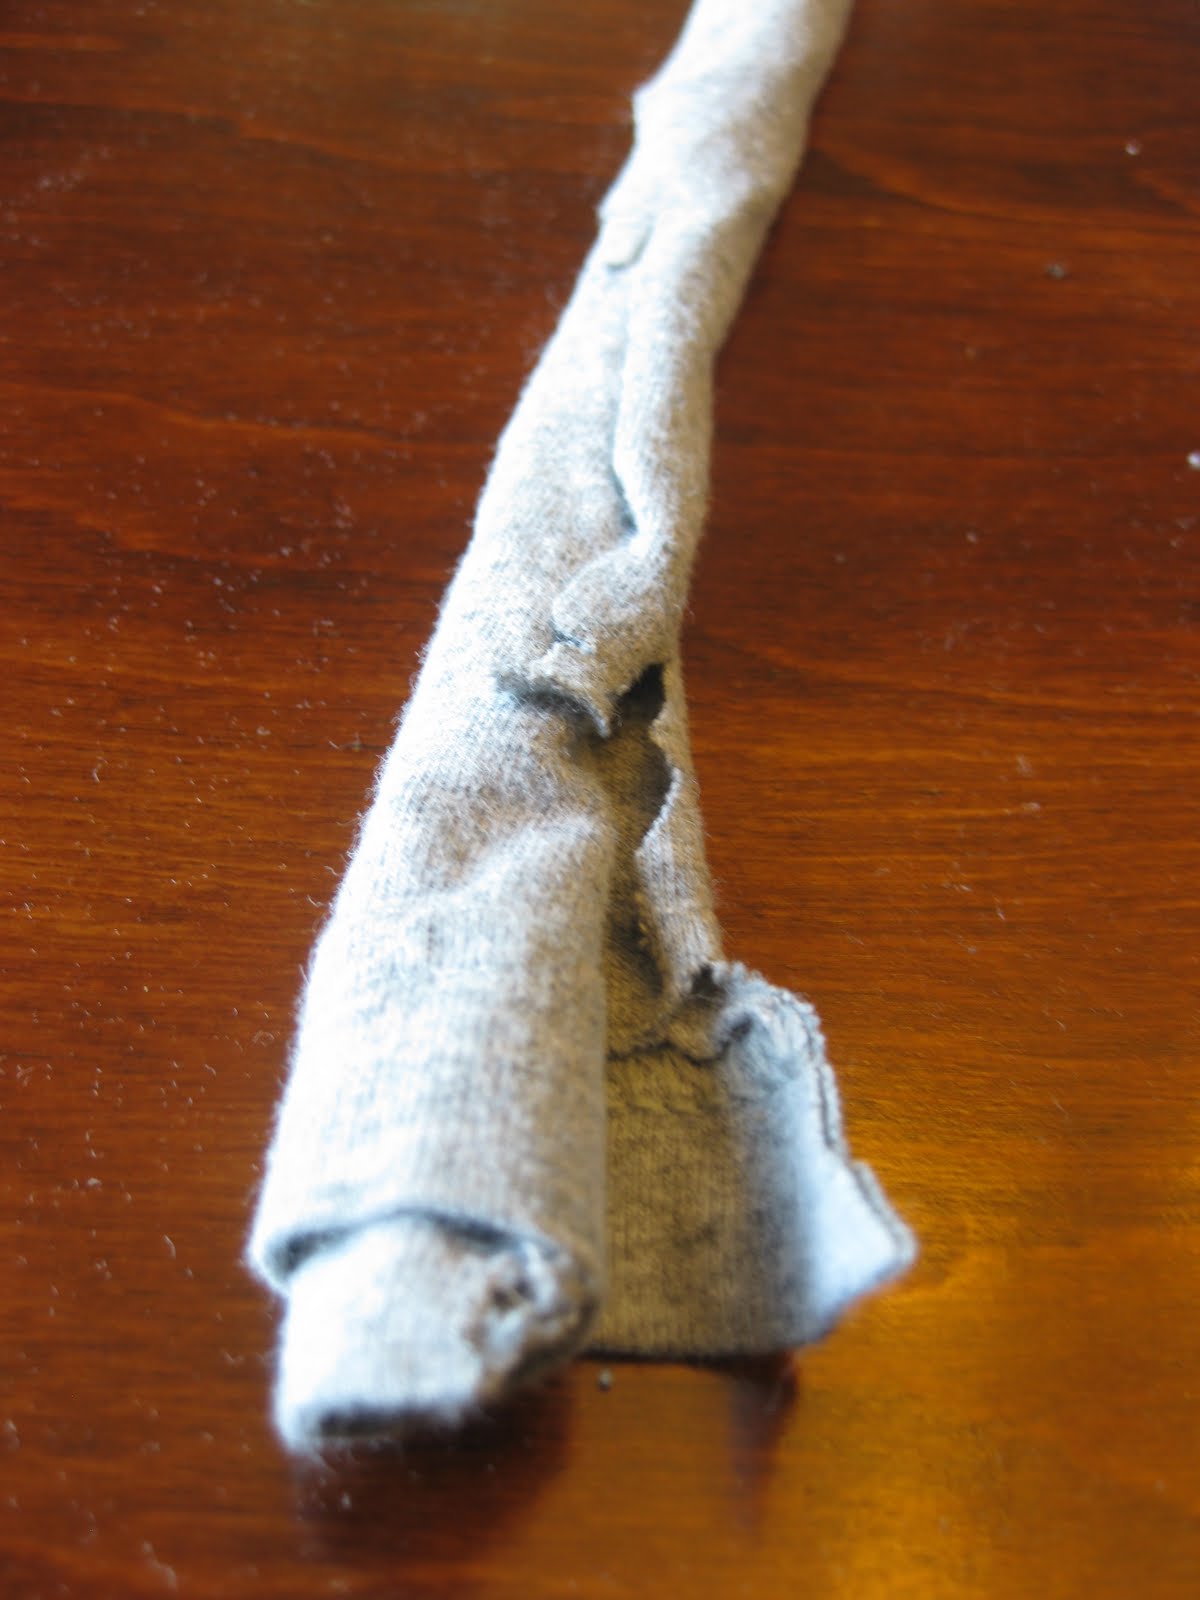 I cut it up into strips and rolled away!
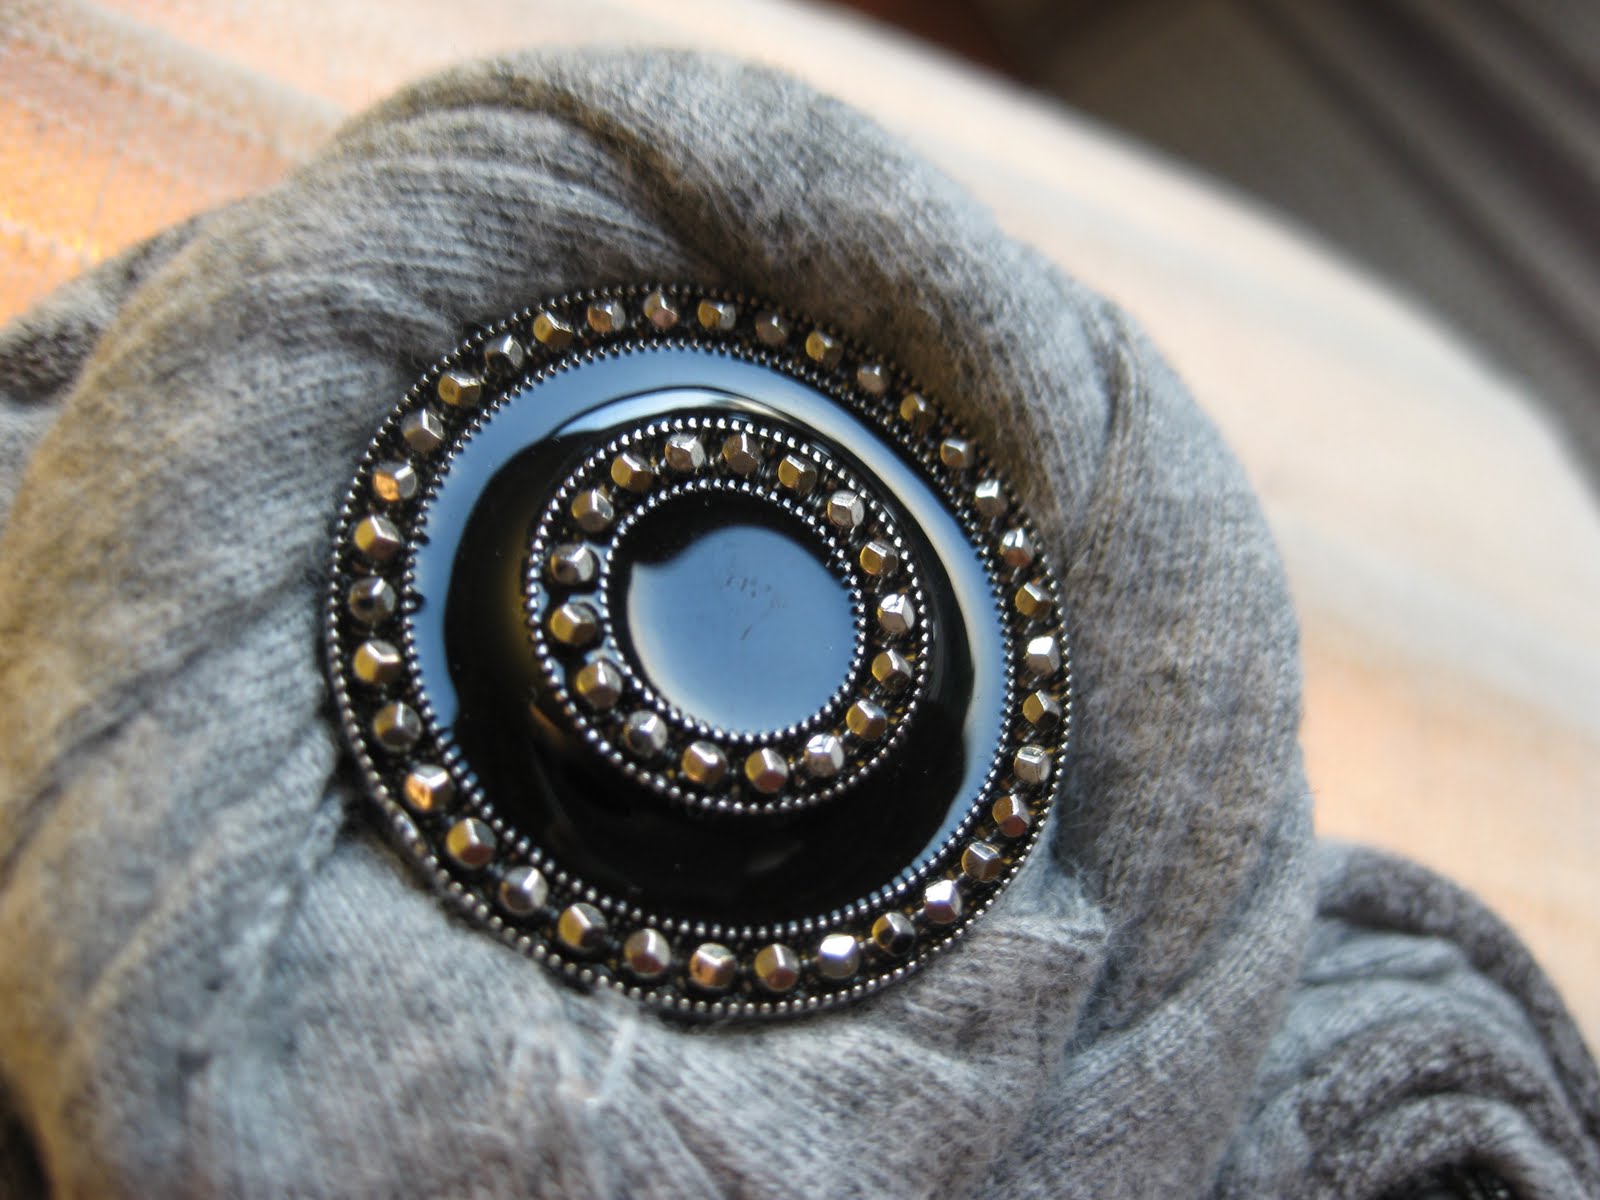
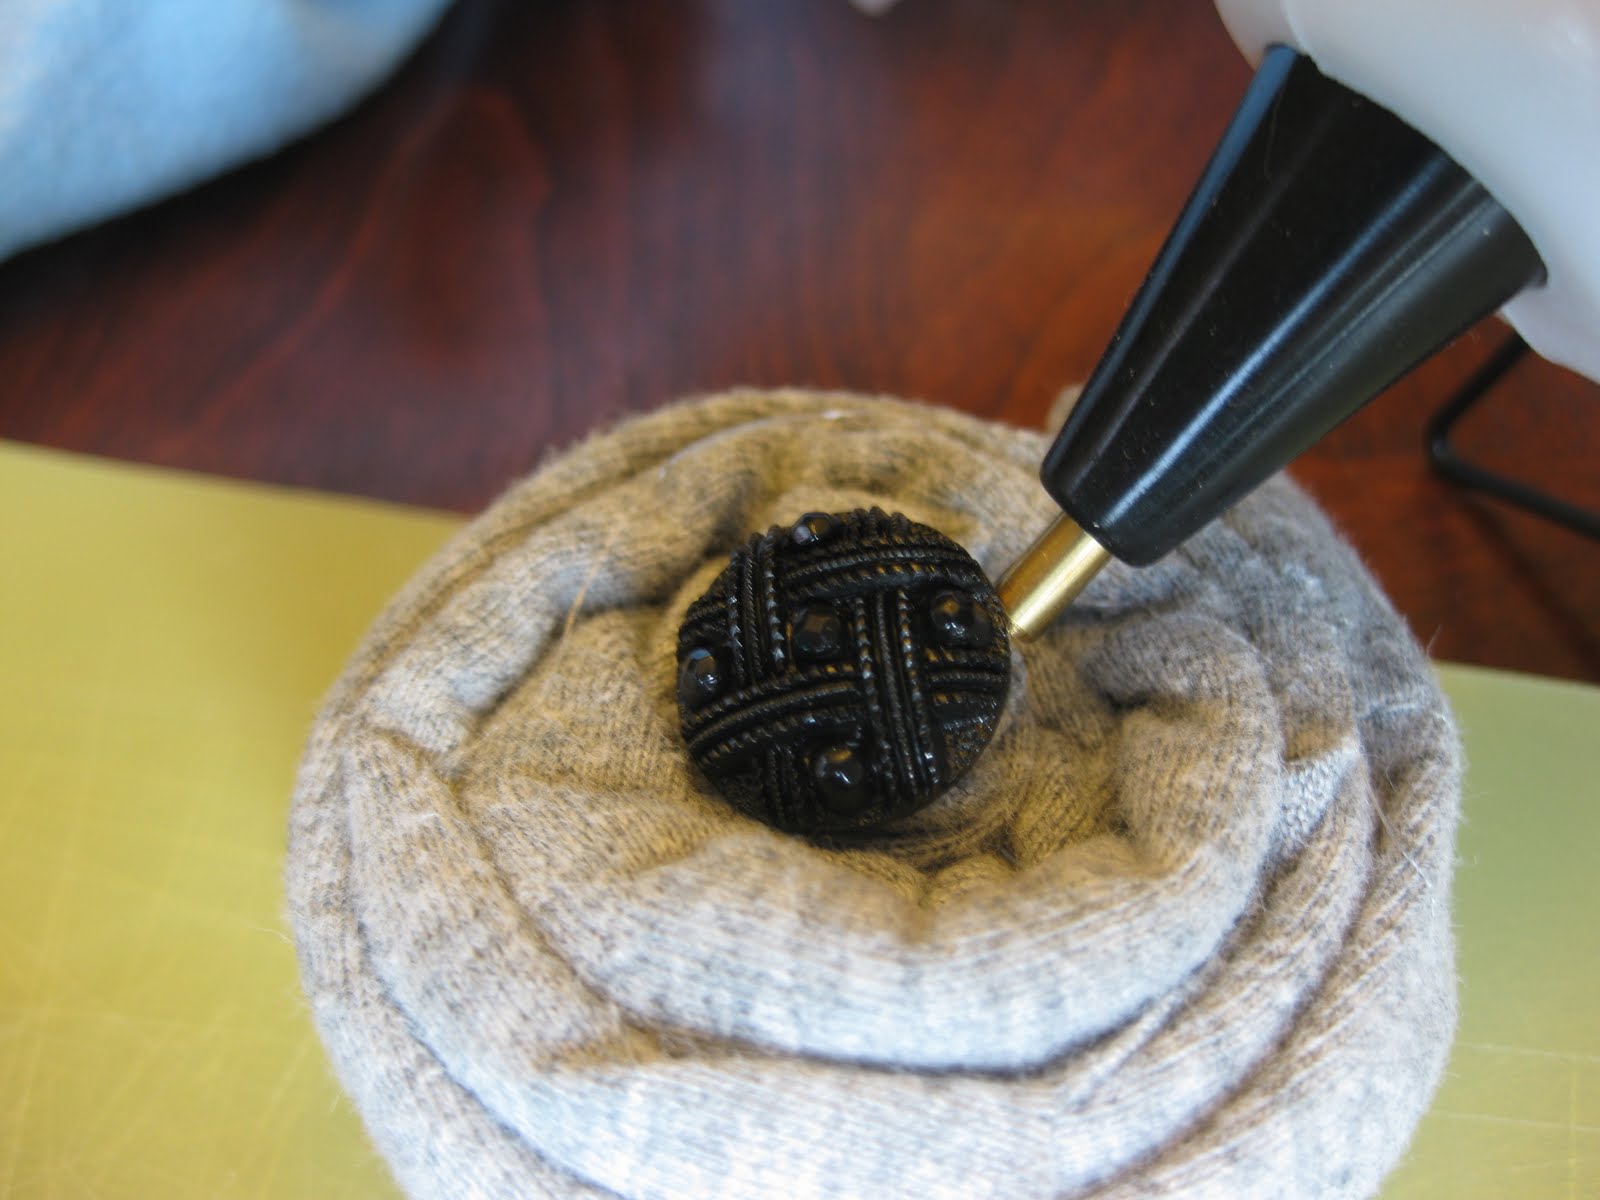
I only did five and put buttons in the middle of each one.
The buttons were ones I found at Joann’s for $1.50.
I think they turned out pretty good for my first try.
And are you ready for our lamp reveal!?!
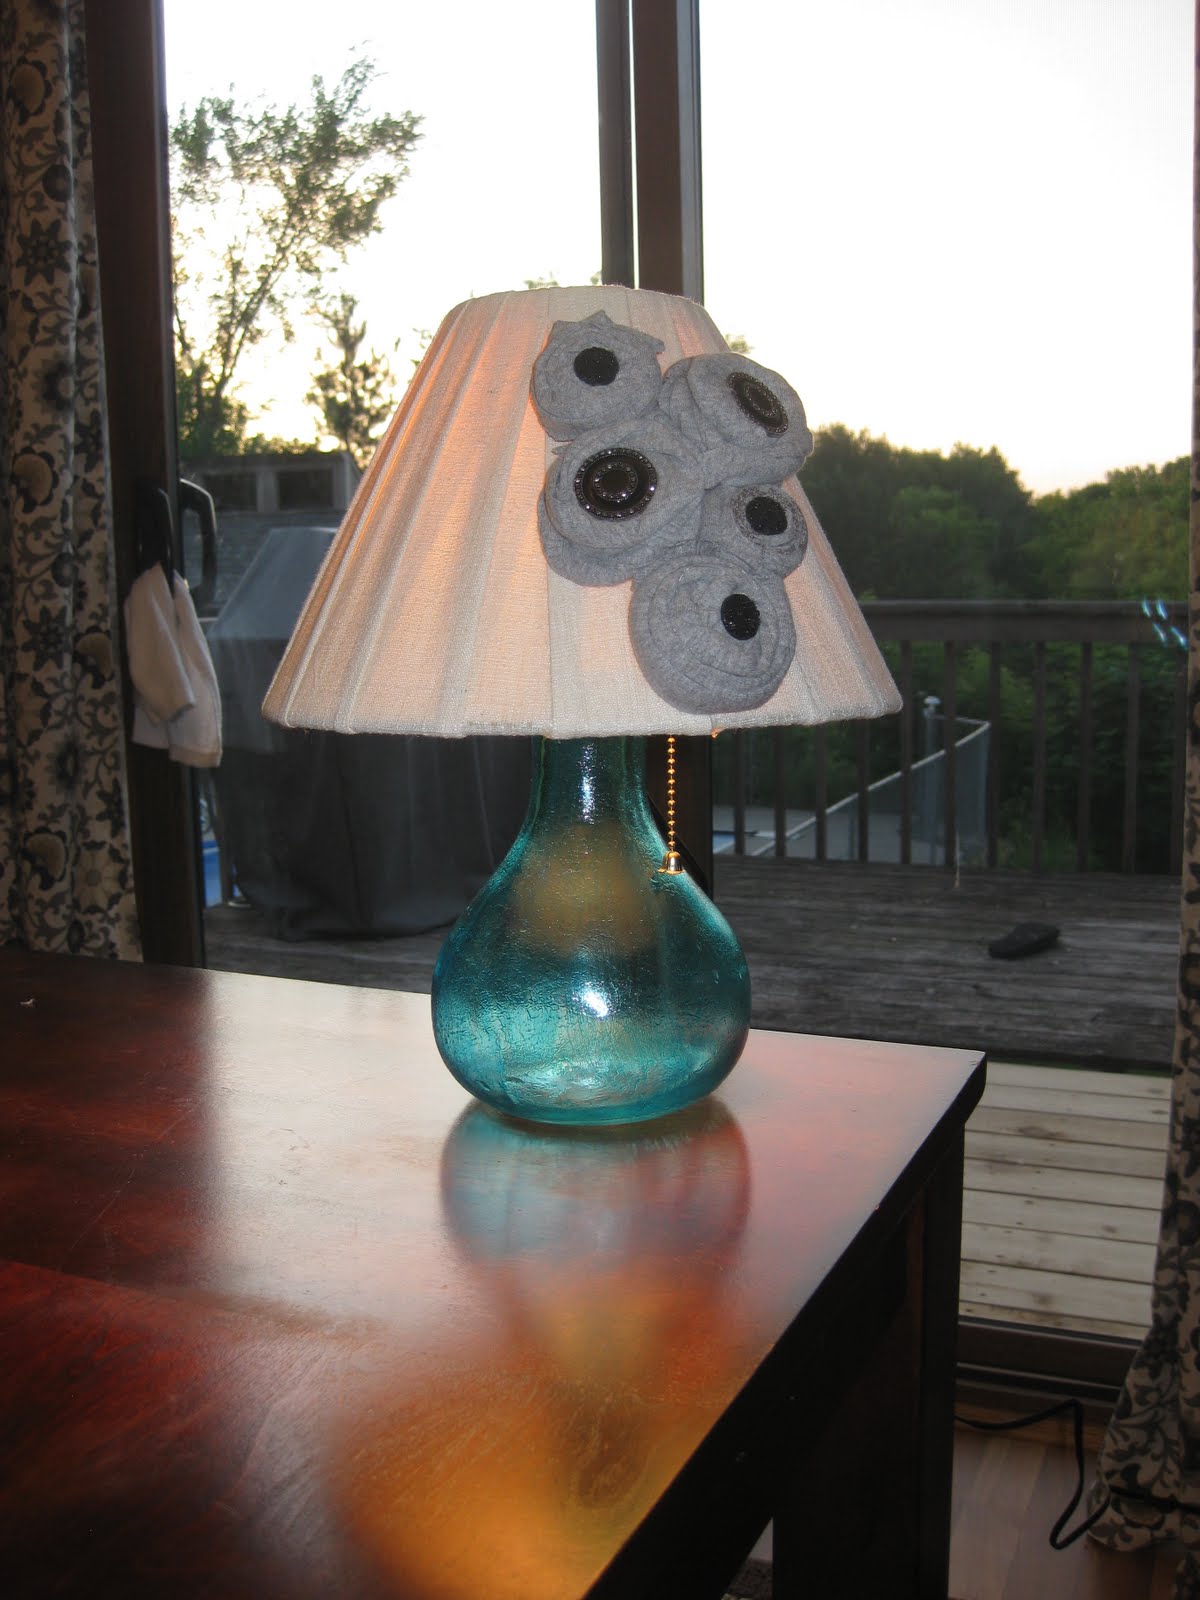
I’m in love with how the glass turned out. Pam is an absolute genius!
I’m definitely going to be using the glass-Mod Podge-food coloring on other pieces.
Total for my lamp:
Vase: $1.50
Light: $2.99 (plus I can reuse the base for another project)
Buttons: $1.50
Mod Podge: $3.49 (and I’ll be reusing this – a lot!)
TOTAL: $9.48 (compared to $99.00 for the PB one!)
Cassity Kmetzsch started Remodelaholic after graduating from Utah State University with a degree in Interior Design. Remodelaholic is the place to share her love for knocking out walls, and building everything back up again to not only add function but beauty to her home. Together with her husband Justin, they have remodeled 6 homes and are working on a seventh. She is a mother of four amazing girls. Making a house a home is her favorite hobby.


>Wow!! I love it…I never would have thought Modge Podge & Food Coloring!! You did a fantastic job.
I'm linking your post on FaceBook right now!
Love the color also!
Thanx for a wonderful post!
>that is AWESOME!!! i love it!! goingf to check out her blog. i have been looking for lamps, and i love this idea!
>My mouth seriously dropped to floor when my own post came in my "reader" from you! Thanks so much for the feature — you're too sweet!
>What a great post…I was just telling my husband that I wanted a clear lamp for my buffet.
>WOW! how great! I'm in!
>So pretty! Turned out fabulous.
>This is my kinda project!!
>FANTASTIC!!!!
I actually found a glass lamp at a yard sale a few weeks ago for $3!!
I need to color it, I think–that will be the hardest part!
Thanks for the tutorial–i love lots of pictures!
Blessings to you as you make your home!
~me
>Oh this is so pretty! My mind is whirling with the possibilities. No glass will be safe anymore!
>THAT IS GENIOUS! Love love that color too! But I'm a bit dense…does the plug come from the top of the lamp then? Sorry, I really should be able to figure that out. …maybe I need another coffee. hmmm
>okay, Ms. Ditz here re-read it and I see now that the cord does come from the top. I also see that I can't spell genius in the morning either.
>Love this! I cant believe how the color turned out. When I saw the electric blue, I was skeptical, but the end result is positively lovely!
>This is fantastic! I'm excited about the mod podge food coloring thing too!!
>GENIUS!! I love the idea of coloring the glass. I will definitely have to try it!
>Holy crap. That is brilliant.
>That is just beautiful. Thank you for the link as to where you did that. Never heard of that stuff before, but I'm getting it this weekend. I just was thinking a bit ago and started googling to see how I could paint some old vases and turn them into things to hold my kitchen utencils, and misc. Love, love love what you did, and hope I can make mine look that good.
>I LOVE how the vase turned out! I passed up several @ the thrift a few days ago. I'll totally have to go back and snag one. I had no idea you could do that with mod podge!
I love it, and will include a link to it in my little post about painting glass! Yours look waaay prettier then mine, I need to practise more.