How to Make Your Own Rustic Candle Outdoor Chandelier
We hope you all had a merry Christmas! Continuing on our Holiday Guest Series, today we have Sarah here to show you she made this beautiful battery operated outdoor chandelier for her perfect pergola dining area!

DIY Rustic Candle Outdoor Chandelier
by Sarah of The Created Home
Hi everyone! My name is Sarah and I blog at The Created Home. I am super excited to share with you how we made a Restoration Hardware inspired chandelier for our outside dining area. We recently built a modified pergola and rustic salvage dining set, and this chandelier was exactly what was needed to make the whole thing pop. It’s lovely, inexpensive, and can easily be built in a day.
Here is the inspiration for my chandelier. This beauty has never left my mind since I first saw it some time ago. But at nearly $1200 it is four times the value of my first car. (No, really.)

I wanted to create a version of this chandelier that would work outside and not involve electricity. I use reclaimed wood whenever I can because I love repurposed wood and think it is gorgeous. However, it would work every bit as well with fresh lumber.
Right then, let’s do this!
How to Build a Restoration Hardware Inspired Chandelier
This post contains affiliate links for your convenience. Learn more and see our full disclosure policy here.
Materials:
- 1″ x 6″ x 6′ board
- 4-eye bolts
- 8-1 1/2″ Kreg screws
- 10′ decorative chain
- stain (optional)
- 2 sets of these candles
- screw hook
Tools:
- miter saw
- Kreg Jig tool
- pliers
- drill
- sander (if using reclaimed wood)
- 2 1/8″ hole saw (optional)
*I built this chandelier to the proportions that felt right for our space. Read these instructions through and decide what side would work best for you, and adjust your wood sizes accordingly. This tutorial works for pretty well any size of chandelier you build and is extremely easy to customize.*
Step 1:
Determine your size and cut matching sides. Ours is 35″ long and 18″ wide. So you will want to cut 2 boards at 35″ and two at 7″. I joined the boards with pocket holes. Remember that your chandelier will be visible from the underside, so your pocket holes will need to be on top.
If you are using reclaimed lumber be sure to put the side you want people to see on the bottom. If you are using newer lumber you will want to stain it at this point.

Step 2:
Plan the layout of your candles. We used the candles linked above because they look good and they come with a remote. It required two sets of lights, and the remote works for all of the candles.

![]()
Step 3 (optional):
My first thought was to attach the lights with a bit of velcro on the bottom of each. I think this would have worked just fine, as long as the piece attached to the board were glued in place. However, I elected to create a groove for each candle by drilling down about 3/8″ of an inch or so with a hole saw and then routering out inside the circle.
Guys, this is seriously glamorous work.

Okay, laugh, but that is some messy stuff right there. Really, velcro is not a bad option.
If you do elect to router out a place for the candles just know that the circles don’t have to be the picture of perfection.

Step 4:
Drill an eye bolt in each corner. The best position is the inside of the corners so the chain doesn’t interfere with the candles. You probably don’t need them to go all the way through and attach a nut on the other side, but we liked the extra security. It does mean the nuts show on the bottom (visible) side. We will cover that next. Split the 10′ long chain evenly in two by bending a chain open with pliers. Attach the two chains diagonally to the eye bolts.


Step 5:
Hook the chandelier in place using a screw hook. I disguised the nuts at the bottom by painting them black.

Step 6:
Add the candles.

Step 7:
Enjoy your chandelier!


If you have the lights on hand this is a simple project to complete in an hour or two. Probably less if you don’t have two toddlers like we do! The total cost of this was about $105. You could save money opting for less expensive candles, but the remote is a great feature.

We sure love what the chandelier has done for our new outdoor dining area. It really is the wow factor of it all. You can read more about the pergola here and the outdoor dining table and benches here.
Thanks for reading, and happy building!
Sarah, your outdoor dining area is so lovely! I need to invite myself over 😉
Remodelaholics — hop over to The Created Home to see more from Sarah– you’ll love the simple beauty of her pieced woodwork star, and your kids will love her amazing cabin playroom (yes, that is a rope bridge, and it also has a climbing wall!)

Make your backyard picture perfect with these other DIYs:
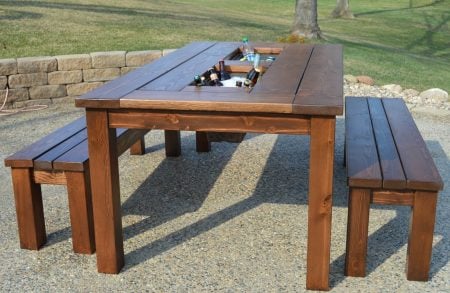
Build a patio table with built-in ice boxes
String up some Edison string lights like this

Build a firepit pergola with swings and a movie screen


and add an outdoor movie screen!

Lorene has been behind the scenes here at Remodelaholic for more than a decade! She believes that planning projects and actually completing them are two different hobbies, but that doesn't stop her from planning at least a dozen projects at any given time. She spends her free time creating memories with her husband and 5 kids, traveling as far as she can afford, and partaking of books in any form available.


Thanks for sharing!
Thanks for being awesome, Sarah! <3