Oh-ho ho Pretty Beads… Craft Room Organization

What movie is the first part of that title from? Anyone?
Cinderella, can’t you just see Gus-Gus getting all excited about the beads for Cinderelly and the big fat Lucifer running over to sit on the necklace?….
Anyway, I have been trying to organize my craft rooms for months. A while back, I decided that all interior items(meaning not tools in the garage) that have anything to do with creativity needed to be in one space. So, I started collecting from around my house. It is amazing how far the paintbrushes and watercolor paper have been from each other for so long.
Well, it is not like I work on the space everyday, or even every other day but I have been working on my craft room for MONTHS now. It has been whipping me good! I go in there to clean it and end up making a bigger mess than I started with, get discouraged, shut the door and leave it for another week or two. (obviously, I haven’t been using it for crafting, let alone using any of the junk I am storing…)
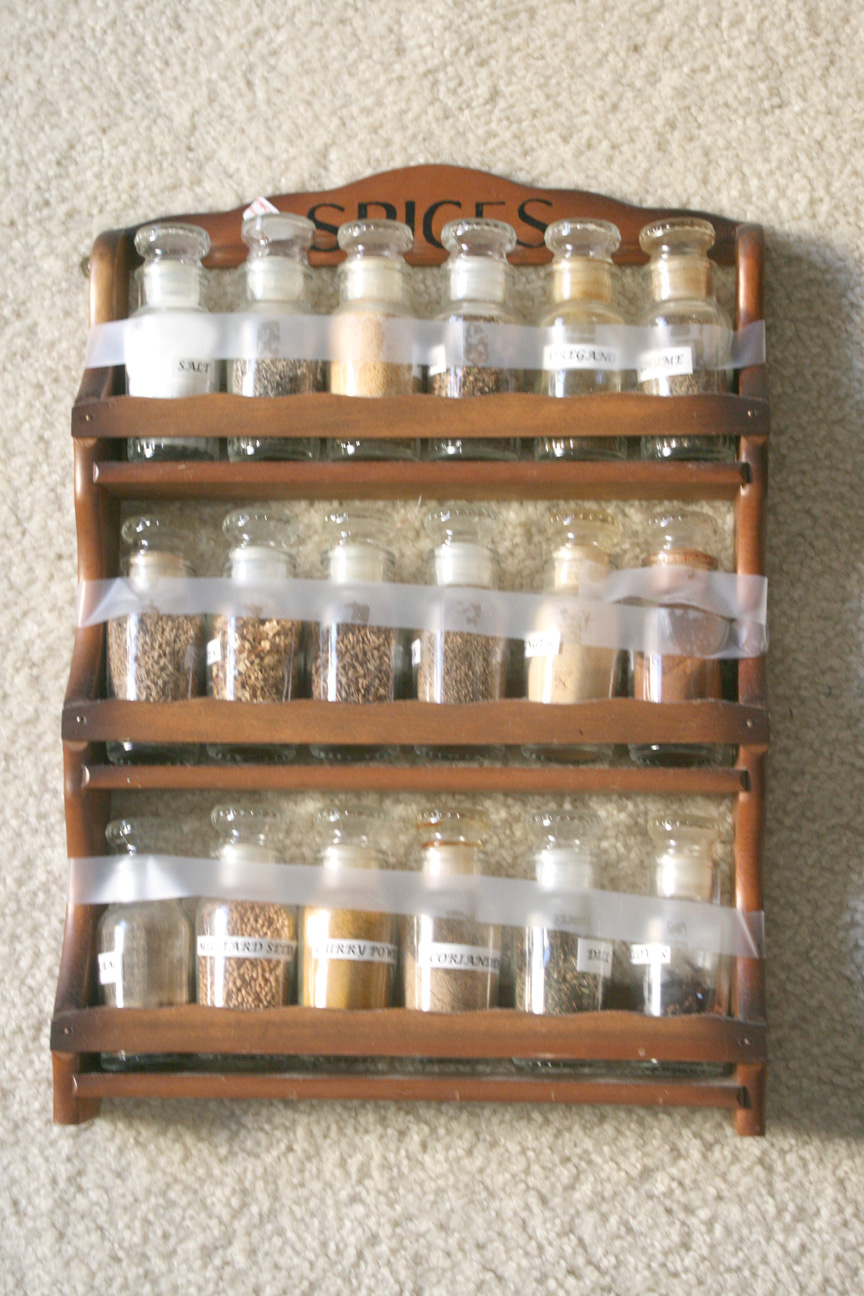
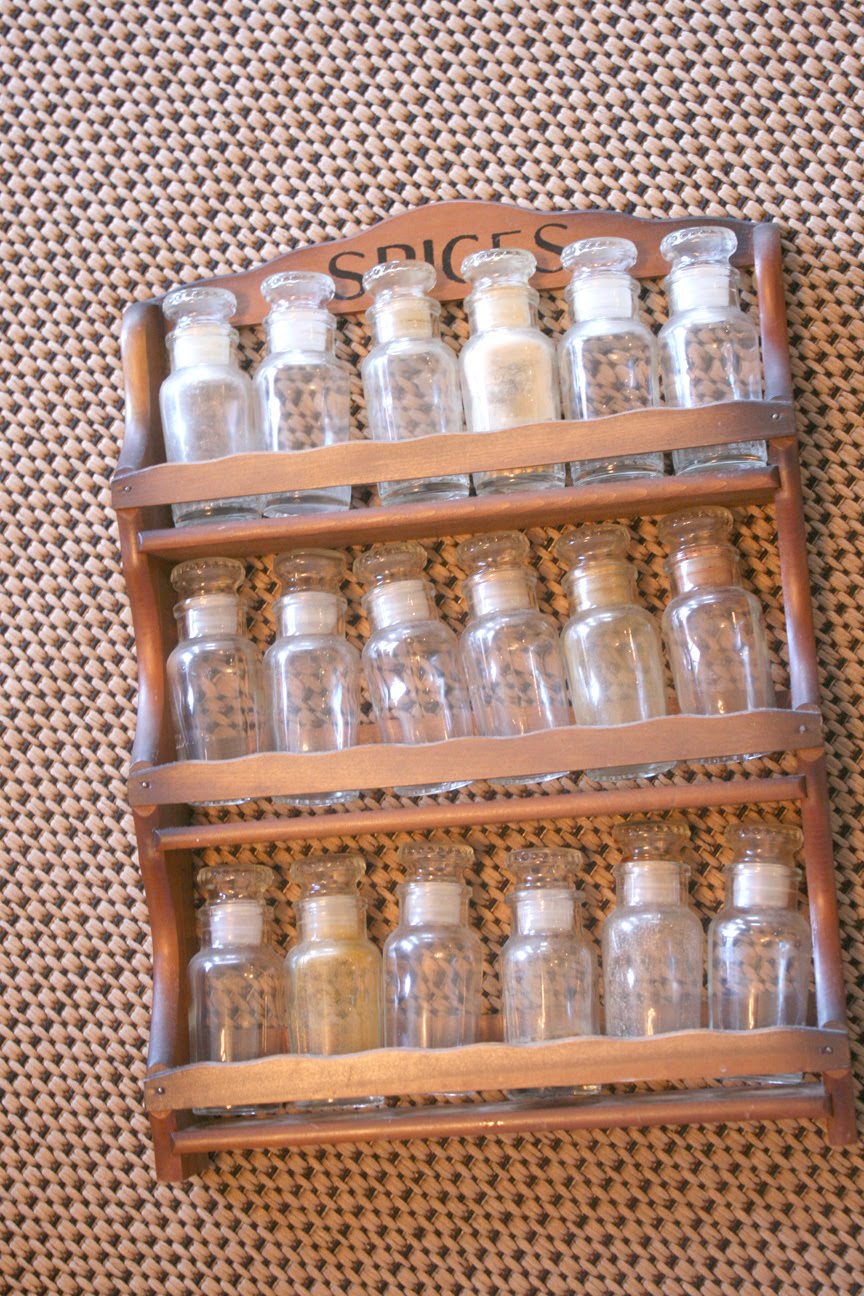
I am all over the place with this post, and I am about to go even further. A few weeks ago, I went to a thrift store and found this great 3 leveled spice rack with the cutest little glass bottles, with glass stoppers. (I already have two similar spice racks unused at my house- I may have a problem!, no I don’t have time to see a counselor!) And I thought I could use it for my craft room. Here is what I did.
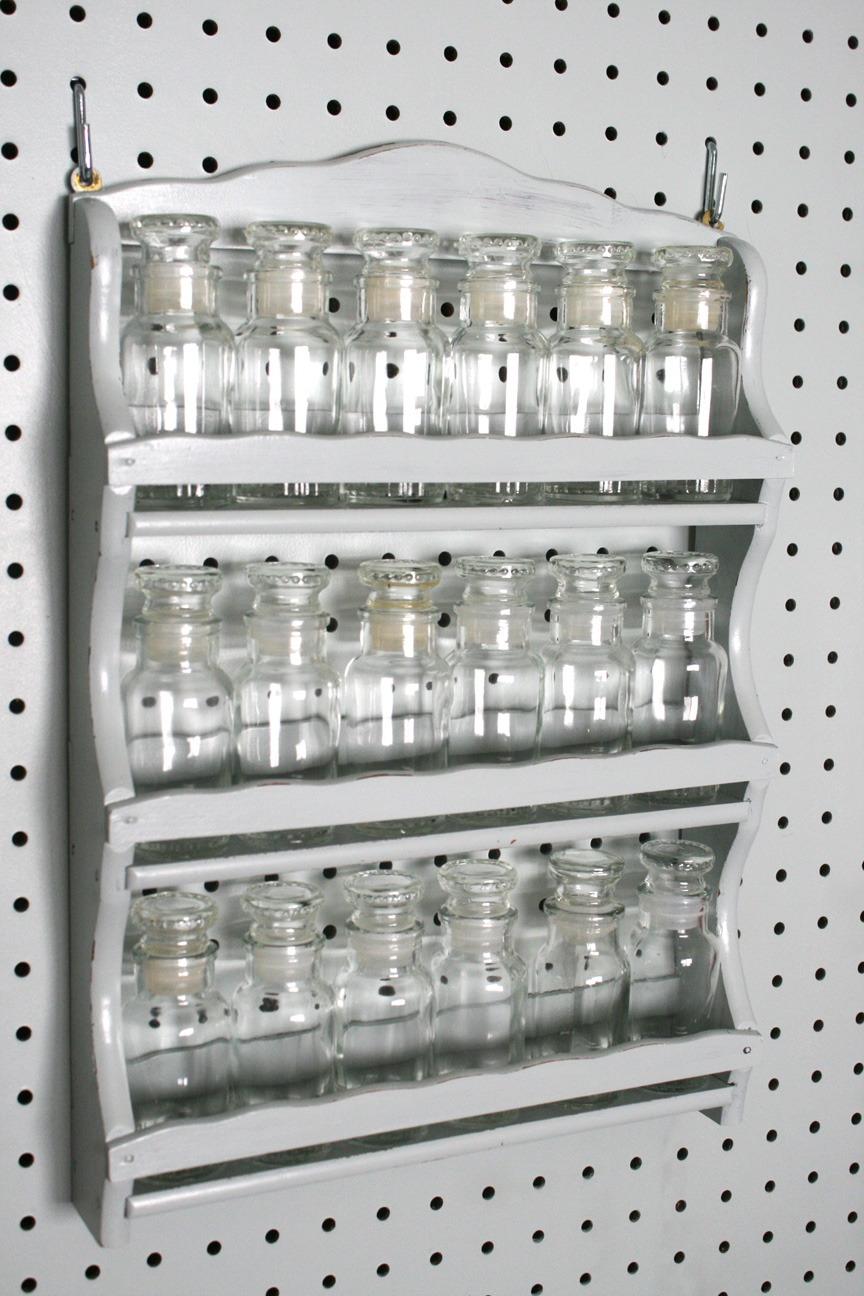

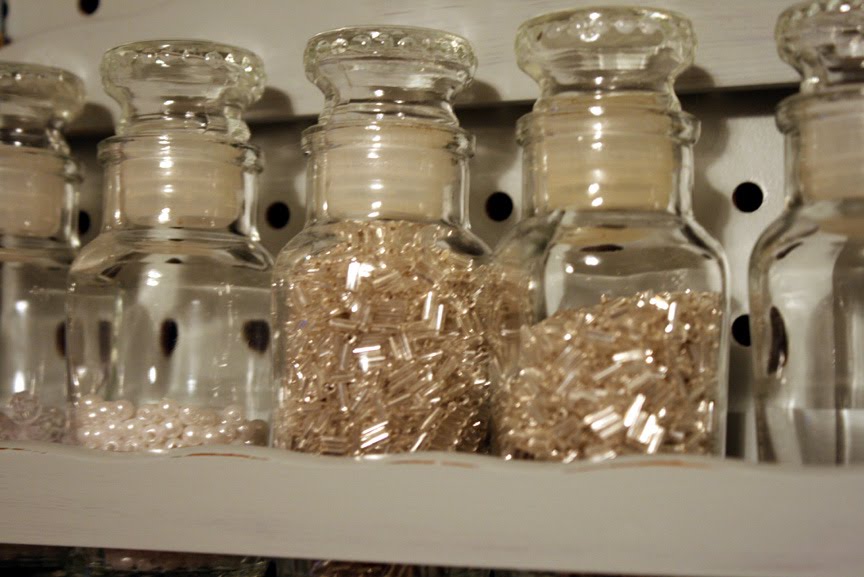

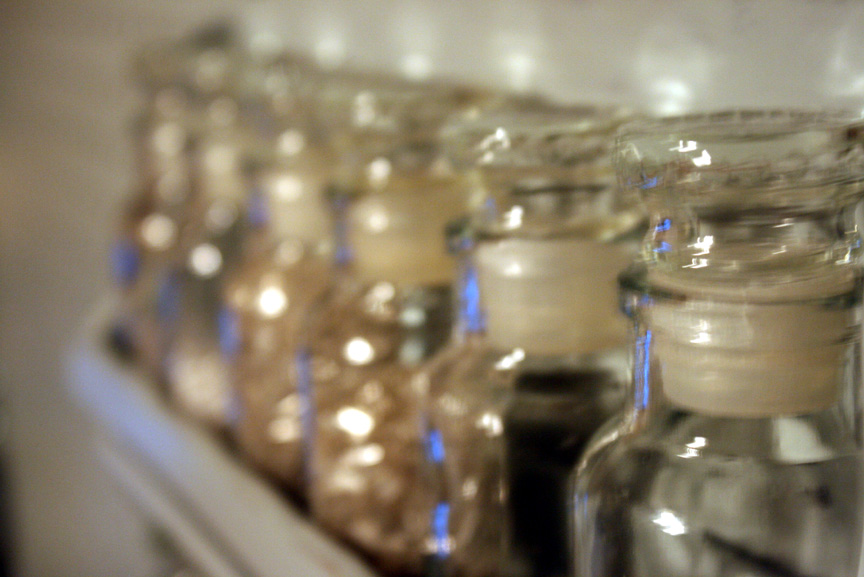

What do you think?
P.S. Sorry that I have been sorta absent from my blog lately. I had an emergency family trip come up about 2 weeks ago and have been out of town for those 2 weeks, I just barely got back. It was unplanned and I was unprepared, so my blog has suffered a little, and honestly it may take me a few weeks to catch up with projects to show you. But I will have a ton of great guests so please keep coming by.
If any of you have any tutorials you would like to share with everyone, send me a link! I would love to show off your work, and I could really use some help. Also, I will be featuring more of your party projects with the help of the Mr. R.
Cassity Kmetzsch started Remodelaholic after graduating from Utah State University with a degree in Interior Design. Remodelaholic is the place to share her love for knocking out walls, and building everything back up again to not only add function but beauty to her home. Together with her husband Justin, they have remodeled 6 homes and are working on a seventh. She is a mother of four amazing girls. Making a house a home is her favorite hobby.
get the reader favorite
Cleaning Binder & Custom Cleaning Calendar
This 18-page editable cleaning binder printable pack will help you establish a cleaning schedule based on the custom tasks you actually need for your home. From the spring cleaning checklist to everyday cleaning recipes, this printable set is great for kick-starting a cleaning routine and staying on task with annual and semi-annual tasks, too.


>I found the exact same thing at a garage sale! I'm using it for a slightly different purpose though.
Check it out!
https://learnandgopollyco.blogspot.com/2010/04/garage-sale-treasure-makeovers.html
>Wow! FANTASTIC makeover! Well done! = )
>you freakin' rock…everything you do is amazing! I have to do this now for my mom who is into beading. Maybe I can find one by June 5th and give for her birthday. TFS!!
>Great! I love it. What a good alternative to a spice rack!
>Great idea!!
Stopping by from Coastal Charm…
I want to invite you to my first Shop Your House party at DirtyHands,BeautifulLife starting Wednesday April 28th!
-tenneil
>How funny I did this same thing! I like your hint about the wax on the edges before painting that was great!
>Hello – I'm a new follower via Tip Junkie! I am really kicking myself now that I think back on how many spice jar racks just like yours I've passed up at garage sales and thrift stores! What a clever idea you've come up with! I love all the little bottles just glimmering with lots of shiny things. And a great way to store/display your craft supplies. Now I'm going to keep my eye out for one!
Blessings,
Marie
https://emmacallsmemama.com
>Such a cool idea. Organizing a room like this always takes time, but the end result is usually always so worth it. By taking your time you will find the solutions that really works for you and that you will really love.
>Just perfect…great transformation..I've got to watch for these!
I'm visiting for Three or More Tuesday..would love to have you drop by when you have a chance.
Have a wonderful day…
Hugs,
Stephanie ♥
>Nice new view of those little bottles on the rack… nice idea!
Sandy
https://thewondersofdoing.blogspot.com/
>Great thinking! I have a spice rack just like that except when I bought it, it didn't have bottles with it. What kind of luck do I need to find some to fit? 🙁 Thanks for sharing with us @ ANYTHING RELATED!
~Rebekah
>Great solution! Thanks for the tip.
>Beautiful idea! I have the shelf but not the bottles so they are on my "hunt" list. Love the way this came out!
>That blends in perfectly! I have some of those same jars that I bought at a garage sale…just no rack to put them in – guess I will have to keep my eyes peeled for one.
>I love it. It looks beautiful. Thanks for sharing the post.
Blessings!
>Great minds must think alike. I just did something similar with a spice rack I found thrifting. 🙂
>What a neat idea! It looks great!
>I think it looks great! I love the idea of using old spice jars like these to hold little crafty supplies. Usually they get lost in a bigger one and I like that you can actually see what's inside each jar.
>I just came over from sugarbee. Wow! I love your idea!
>As a jewelry designer beads are always at a premium at my studio, and this is a fabulous way to corral some. Love what you've done and think it is way cool the way you finished treated it. Stop by and check out my blog if you have time. I did a mannequin make-over for the blog party.
Gretchen