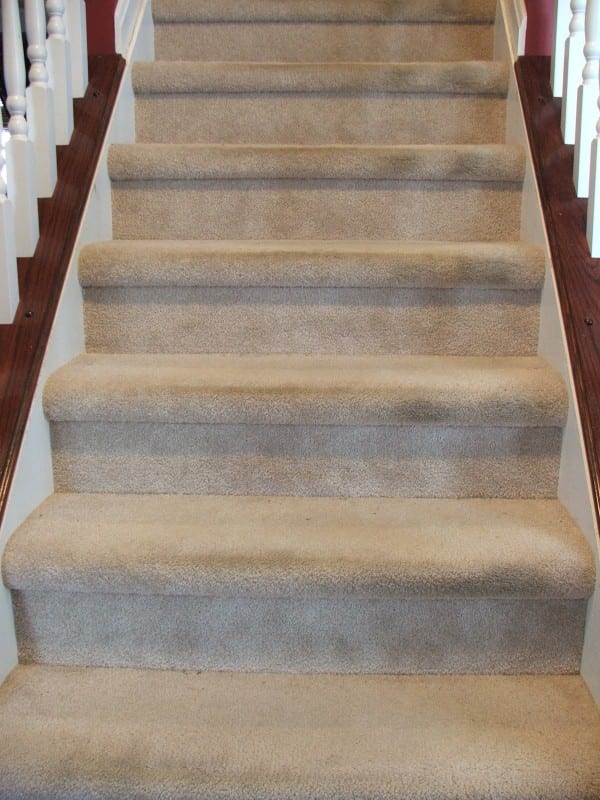
Hey there! Do you have a staircase that could use some help? Sure, new carpet would be great, but, wow!, it’s not cheap. And carpet on stairs gets so many stains and wears out so quickly! Find the answer to your problems here with this tutorial from Tracie at Cleverly Inspired. Transforming your stairs from carpet to wood treads will be a project to be proud of and you’ll be so glad you did!
This post contains some affiliate links for your convenience. Click here to read our full disclosure policy.
Carpeted Stair To Wooden Tread Makeover: Phase 1
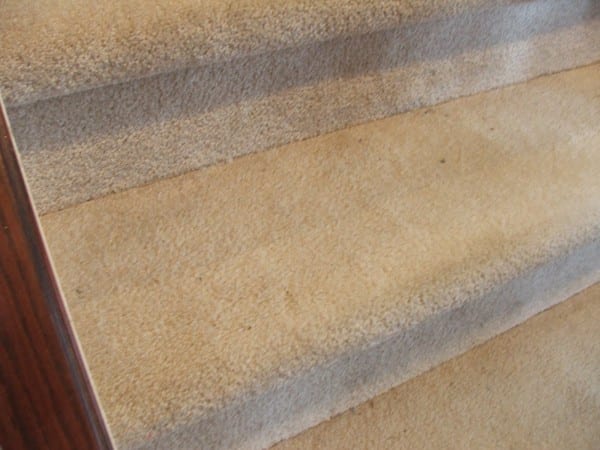
For about a year I have been thinking about redoing our stairs. Should I?Can I? Would I dare? Rip up carpet??
Almost 7 years of wear….stains that can’t come up…
I just don’t know. It would be the largest project I have ever done. The hubs was completely behind me.” you can totally do that. It is just carpet. If the wood is bad we will deal with it. Go for it!”
So I did. And here is how it went down…. By the way, thanks for the support. It sure does make a girl feel good!!
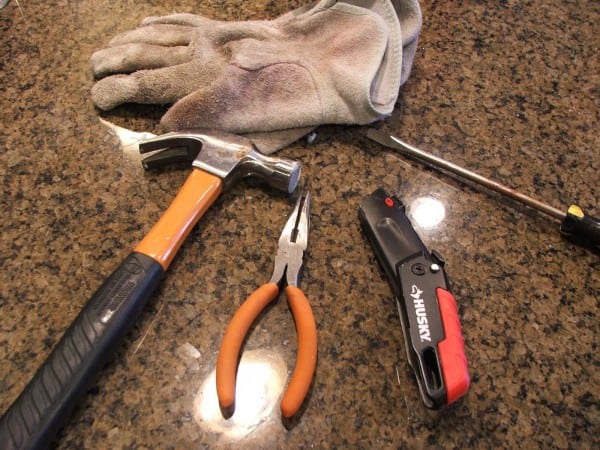
Tools needed for ripping the carpet….
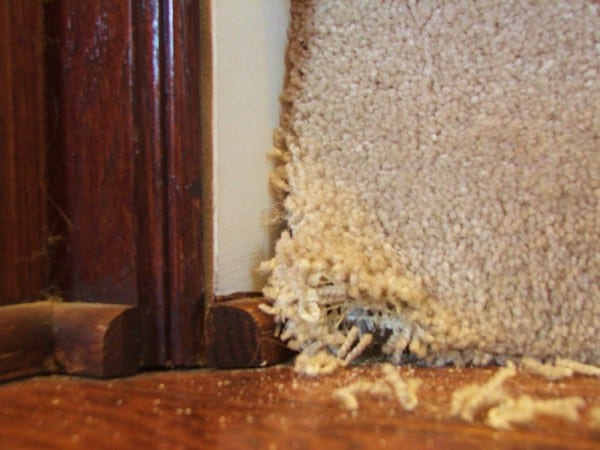
Needle nose pliers are your best friend for getting carpet off of steps….
Starting at the corners and pulling with all your might…
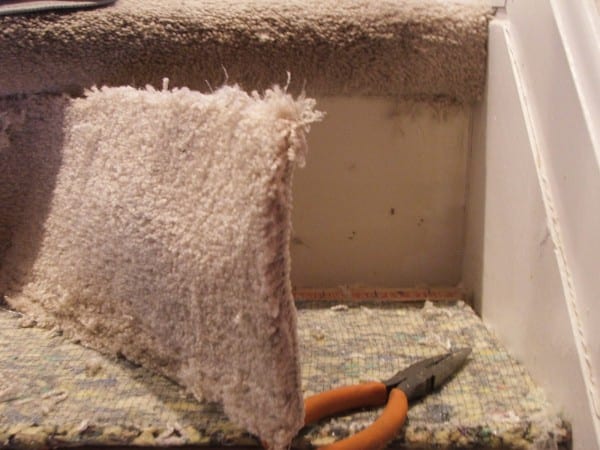
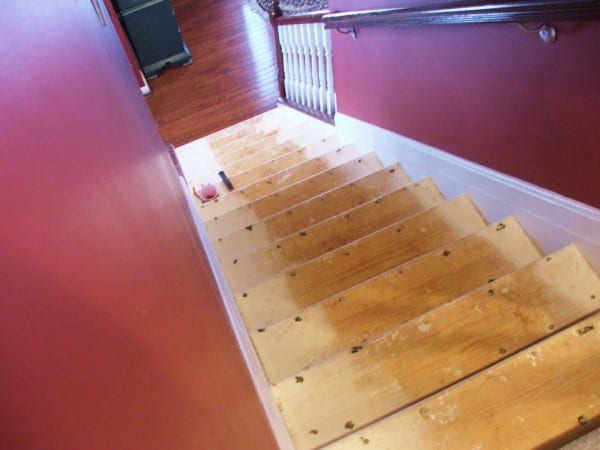
I pulled about 3 steps at a time, rolling the carpet as I went up the stairs. Then I used a sharp razor knife and cut the carpet and took it outside. Continuing on this way until I got to the top….
At the top, I cut the carpet with an extra sharp razor knife…leaving the carpet on the rounded part of the top thread where the upstairs hall starts. Pull up all the carpet pad….
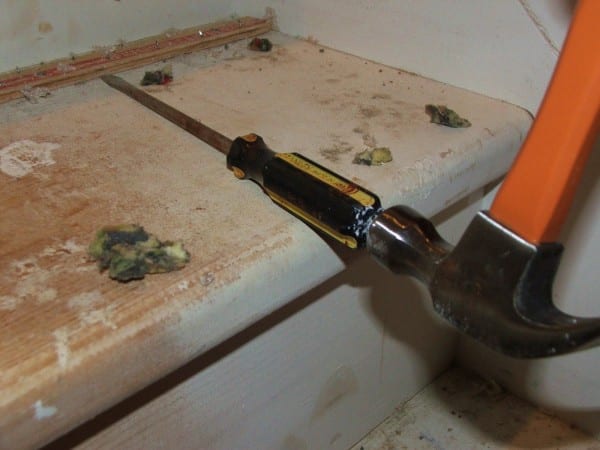
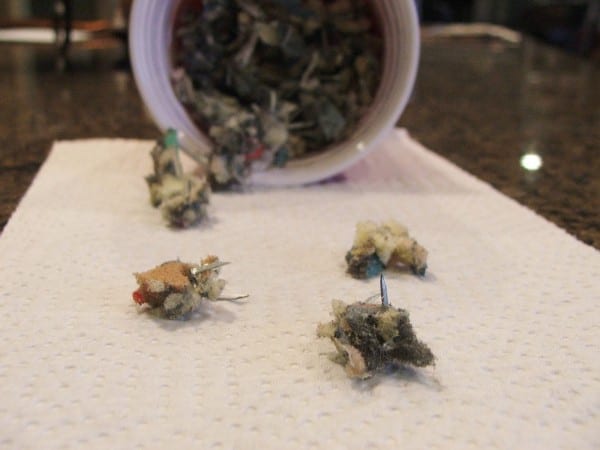
To take up all the carpet tack strips, just place a flat head screw driver under the strip—tap in with the hammer and gently pry it up. Keep moving the screwdriver until the tack strip comes up. Do this same technique with all the 3,567,987 million staples….
Ok, maybe not quite that many….but it sure felt like it! I saved them in a solo cup…then I sat with a nice glass of red wine and admired my hard work!!! Phase one complete! Money spent during phase one…ZERO—besides a little blood, sweat and tears….I joke,I joke….
Stay tuned!!!
Carpeted Stair To Wooden Tread Makeover Phase 2
So if you were here yesterday…you saw that I decided to take the carpet off my stairs….Phase One–Operation Stairs Makeover and here we continue…..
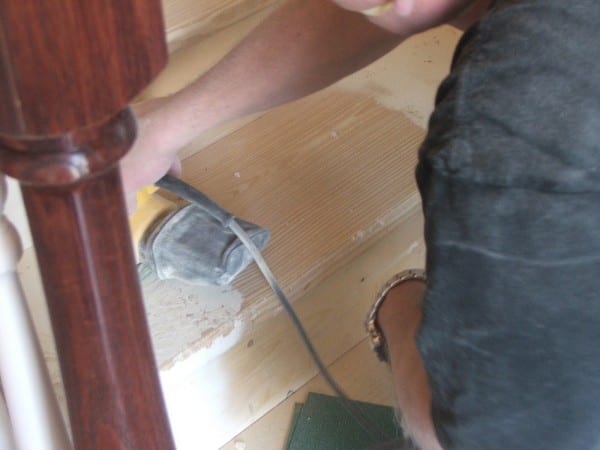
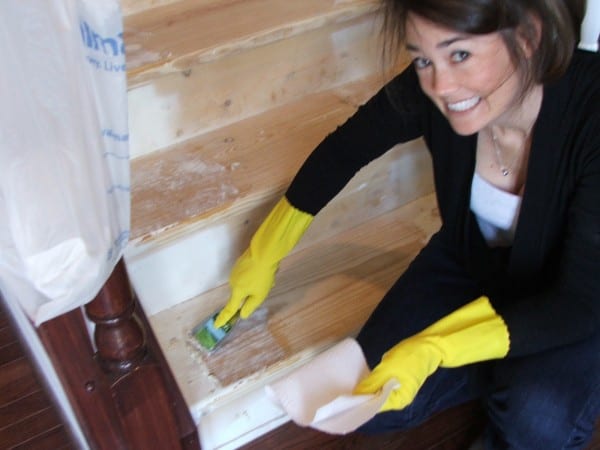
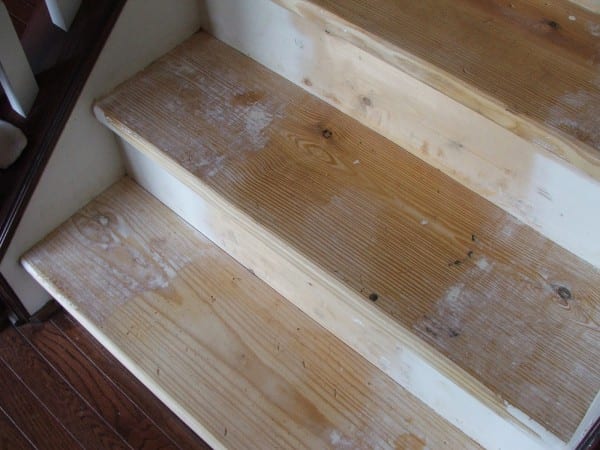
The project continues with a day of sanding and scraping up the paint and caulk that was on the stairs.
Plastic was hung up from every doorway to help the dust…which there was a bunch of …dust!!
We used my Dad’s quarter sheet sander….and we got course (60) grade sand paper. I bought 2 packages.
We ended up using about one little quarter sheet per step…
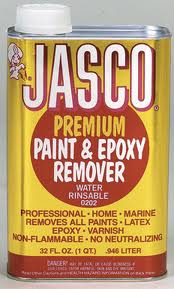
After all the steps were sanded there was still some junk on some of the steps. So for the stubborn parts I used a stripper (you can find it at Home Depot or Amazon). This stuff is awesome!
Please follow the directions though…be careful please.
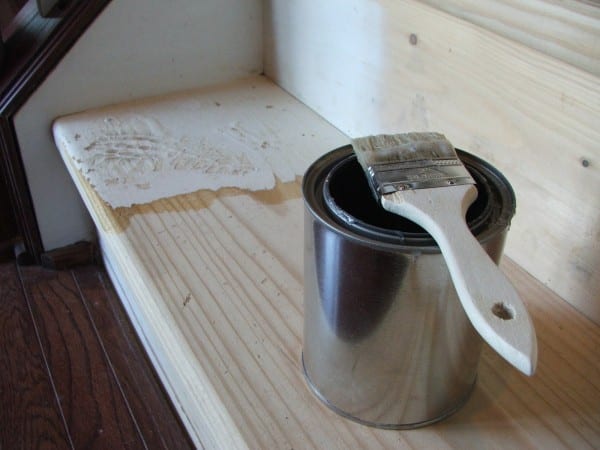
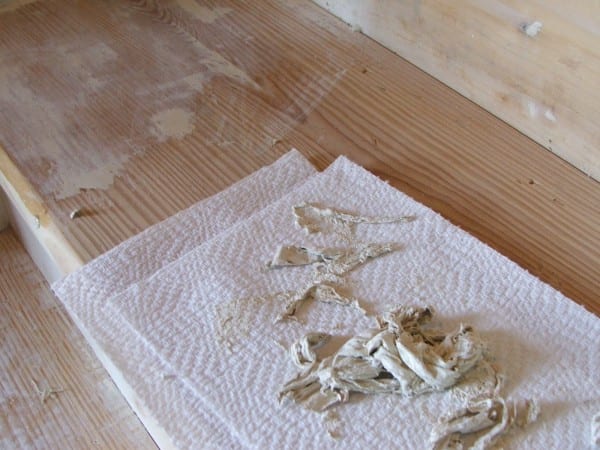
You basically brush it on, let it sit 20 minutes and take a metal scraper to it and the paint and gunk just shrivels right off!
So satisifying
When you are finished getting all the gunk (for lack of a better word, sorry) You need to clean the steps gently with some mineral spirits to remove any residue from the sander and the epoxy remover. We decided instead of staining we wanted to paint the treads a deep chocolate color and the risers a semi-gloss white. We could have stained….but a couple of stairs really had paint built in…and we loved the color of the paint. It looks really rich…but also has a lot of character. Love that!
Sneak peek at sample board…..so pretty!
Phase 2 we spent:
$3.94 for 2 drop cloths
$5.97 air-masks
$5.05 for 2 packs of 60 grit sandpaper
$2.68 small metal can for epoxy remover
$8.97 Epoxy and Paint remover
$2.00 for 2 chip brushes
$2.94 jar of sample paint
$31.55 spent….
Stay tuned for Phase 3!
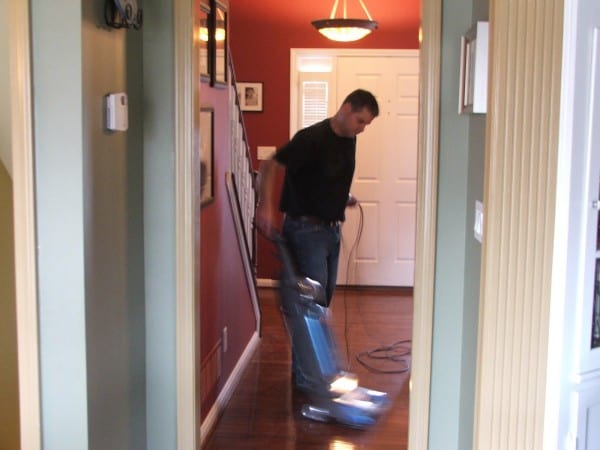
such a good guy….he vacuums more than me! Love you babe!
Carpeted Stair To Wooden Tread Makeover Phase 3
Here is where we started this project if you are just joining me….Phase 1 and Phase 2 of Operation Stairs Makeover…..
Putter has lost all patience with me by this point. Poor dog…if he could talk, he would be saying “could you please just put back the carpet and end this nonsense woman…” oh no….no carpet for you!
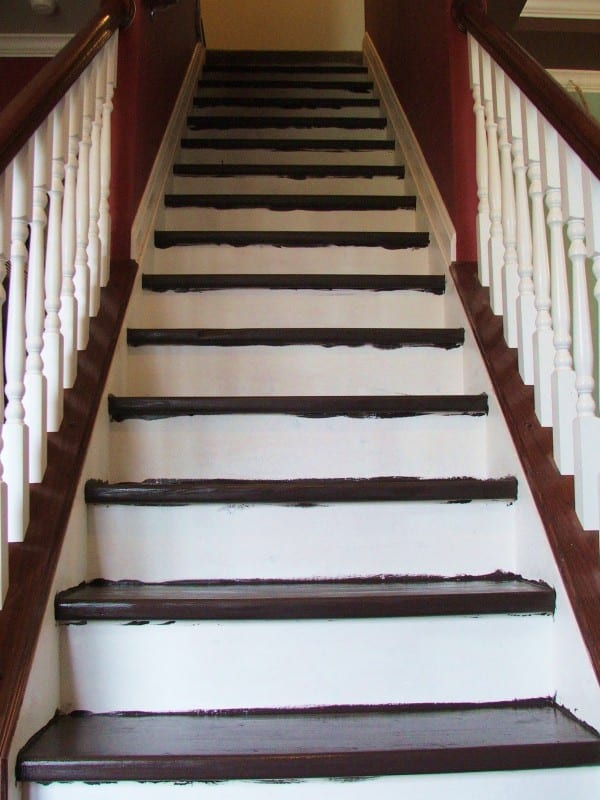
After stairs were all cleaned up good, I could start painting. I primed the risers with a white primer.
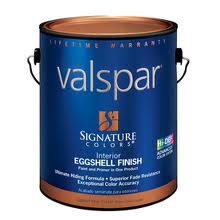
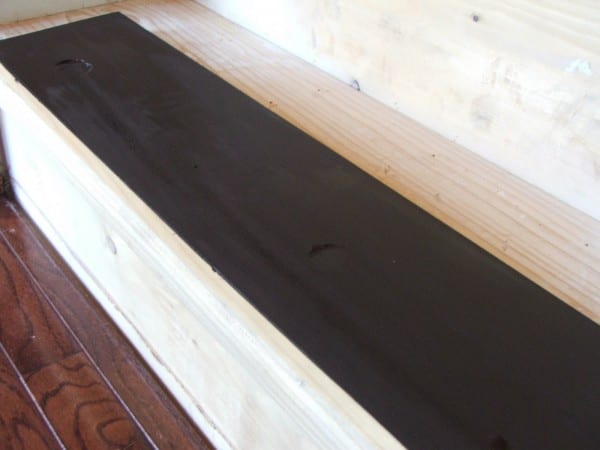
Then I painted the treads with the brown. We loved the color Behr Sweet Molasses, it is a true chocolate color–rich and warm and has lots of character. I bought a quart of eggshell finish.
Valspar Signature is a paint and primer in one. I chose Eggshell finish because I am going to be putting 3 coats of polyurethane on the steps and I didn’t want the paint to be so glossy the poly wouldn’t adhere. Perfect for this project. You can find it at Lowes. A quart was plenty for 2 coats on just the treads.
Purdy is really a great brush to use! You can find them at most home improvement stores including Lowes, Walmart and Amazon.
I didn’t bother taping since I have to paint all the white anyway. I painted a coat on…let it dry 2 hours (can said I could recoat after 2 hours) and then put on the 2nd coat. We were able to go up the stairs at night. I painted while the kids were at school so it really wasn’t an inconvenience at all.
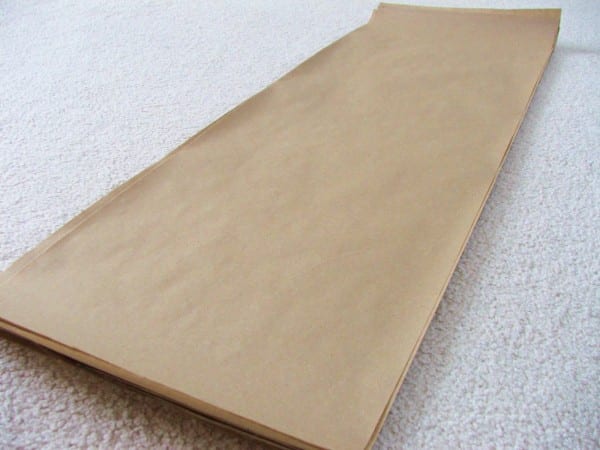
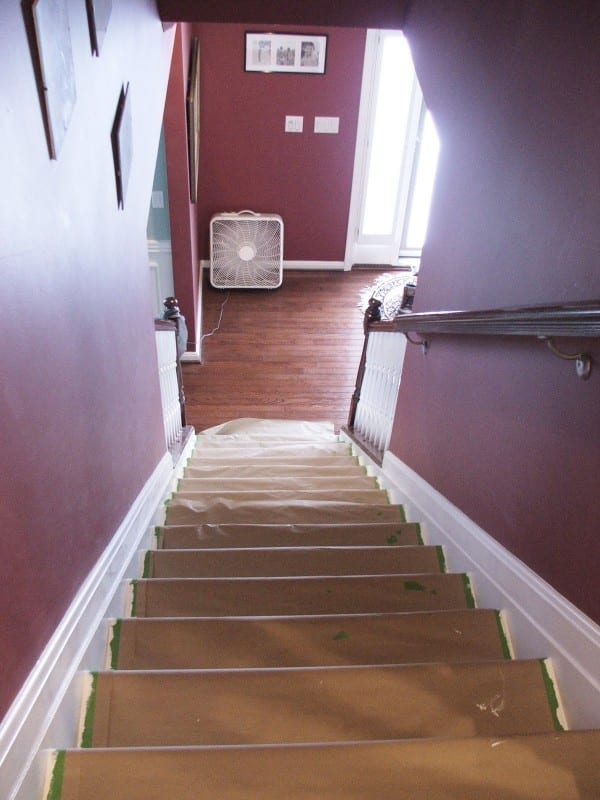
The next day I was able to cover the treads with some craft paper and tape the sides so that I could paint the trim white and the risers. Craft paper is sold in rolls near the paint supplies. I cut it to fit on the stairs.
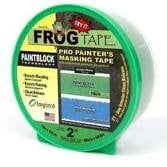
Frog tape really seals nicely—when you go to take it off it has a nice clean edge.
I used a semi-gloss quart of Valspar Signature in White Umber (the color of my trim). I put 2 coats of white on and let dry overnight before taking the paper and tape off. Placing a fan at the bottom of the stairs helps the drying process.
You’ve been so patient….so encouraging…so excited for me. Thanks! I am still in the middle of polyurethane all the coats on the treads….but you can see the final product.
A few of you have asked how many hours this project has taken me…well the first phase (clearing out the carpet and pulling all staples and tacks) took me 2.5 hours–mind you I did this by myself on a Friday. Phase 2 took Bill and I from about 11:30 on Saturday morning till about 4:30 (that includes prep work, sanding, and cleaning up all the dust!). And on Sunday I took about an hour and did all the scraping with the stripping remover stuff. Phase 3 was the painting process and that took about an hour per coat…then I would let it dry for 3 hours and a re coat. So I think you could accomplish this in one weekend (minus the polyurethane step…because that requires some dry time).
If you haven’t seen the first few post on these stairs you can read all about it here….Phase 1, Phase 2, Phase 3 …..
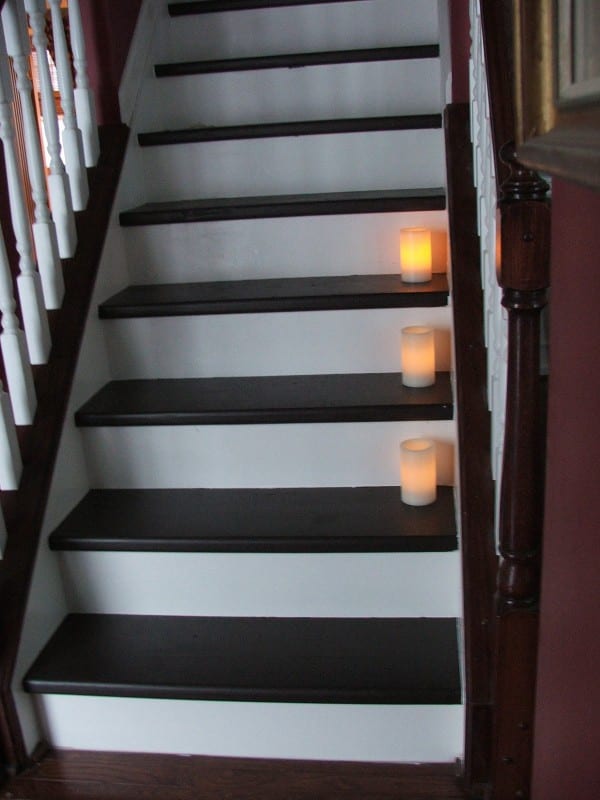
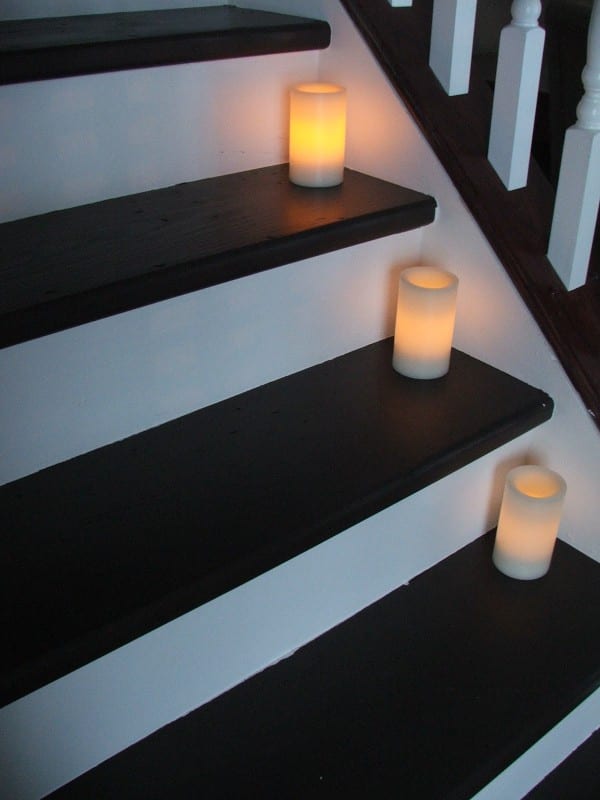
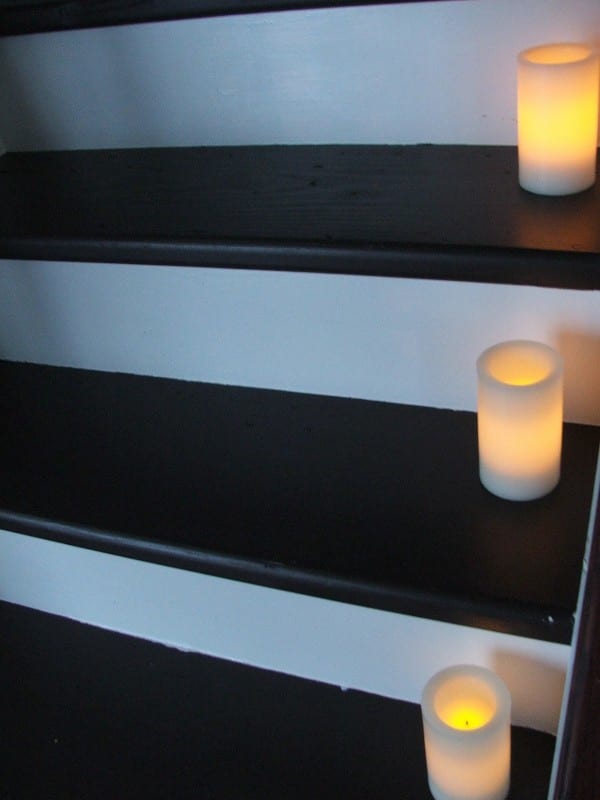
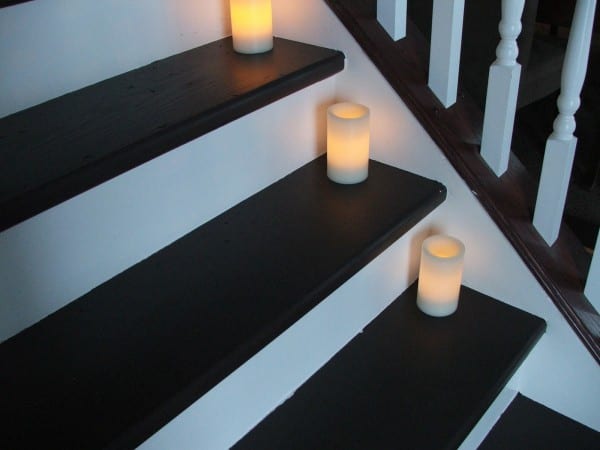
Electric candles people…not to worry—wouldn’t advise real candles on newly lacquered stairs…just sayin
Ta Da!
BOOYAH!
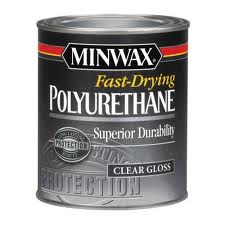
I am coating the stair treads with Minwax Fast-Drying Satin. I am doing every other step. I put one coat on, let it dry 4 hours; then placed another coat. I am doing 3 coats on just the treads. I placed a small piece of tape on the steps that I was allowed to step on (just a mental note for me!) I am using a foam brush. Place a fan at the bottom of stairs to aid in quick drying. It is about $11 for a can.
I know they look dark here but I wanted to show how pretty they look at night with these electric candles on…
He’s impressed….my biggest supporter 😉 We feel so satisfied knowing how much we saved and that fabulous feeling that comes from doing something with your own bare hands.
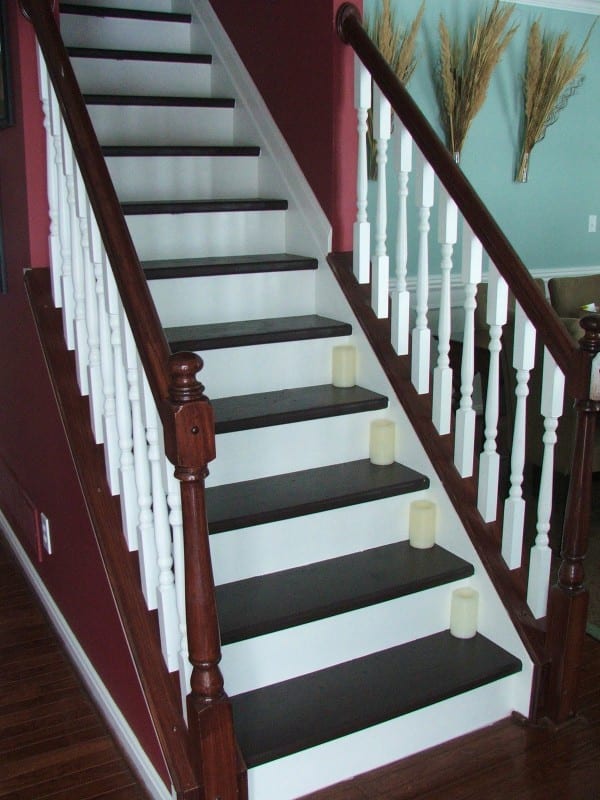
Goodbye worn out carpet….HELLO pretty wood stairs!
I would say they look like a million bucks—-but then again….I only used $81…and a bit of sweat—but that is always a good thing!!
[pinit align=”center” url=”https://www.remodelaholic.com/under-100-carpeted-stair-to-wooden-tread-makeover-diy/” image_url=”https://www.remodelaholic.com/wp-content/uploads/2011/02/Redo-stairs-with-this-tutorial-for-changing-from-carpet-to-wood-by-Cleverly-Inspired-featured-on-@Remodelaholic-533×800.png” description=”Update your stairs with this tutorial for removing carpet and finishing the wood beneath”]
Cassity Kmetzsch started Remodelaholic after graduating from Utah State University with a degree in Interior Design. Remodelaholic is the place to share her love for knocking out walls, and building everything back up again to not only add function but beauty to her home. Together with her husband Justin, they have remodeled 6 homes and are working on a seventh. She is a mother of four amazing girls. Making a house a home is her favorite hobby.
Hi Charlotte! This was a guest post, so click over to the original blog (linked at the top of the post) and she can help answer your questions there. Thanks!
What was at the top of your stairs? Mine is carpet, where would I stop the carpet? Would I have to pull up the carpet at the top of the stairs as well?
Many thanks!
Thanks for a fantastic solution to saving over $2500. I am doing my foyer and upper and lower hallways in wood laminate and planned to do my stairs in wood but now I will follow your lead and save my money for another home remodeling project.
very inspiration and I need to do mine asap. I pulled up some carpet and found I have something totally different, can someone help? please? i have pics
Hi Asia! Come find us on Facebook and you can send us a picture there and we’ll see what we and the other Remodelaholics can do to help! https://www.facebook.com/Remodelaholic Thanks!
I saw this project about 4 months ago and decided to give it a go while the rest of the family is on holiday, I am halfway done and feeling very proud of myself 🙂
I’ve looked at this post several times over the last year (the stairs look AMAZING!), and I’ve finally convinced my husband that IT’S TIME . . . but we really want to know how the stairs are holding up now. Are you still happy with the products and the process?
Hi Holly! This post is from a guest, so I can’t report on the durability… But if you’ll click over to her blog (linked up towards the top of the post) then I’m sure she’d love to give you more information. Thanks!
Looks great, however they scraped off the “gunk” and had amazing looking wood underneath.
Not many stairways have solid wood like that under carpeting. Not the case for 99% of homes, so before you attempt this check out the wood underneath first. Most stairs nowadays are framed with plywood or OSB particleboard, and not beautiful pine boards. This makes for a whole different ballgame.
I peaked, looked like wood, pulled carpet & disappointment: the landing was particle board!!! I sanded, stained the treads, painted the risers, but what do I do with the landing??? do they have a subfloor under the board? if that’s the case, I could remove 3/4″ particle board & replace with hardwood….if not…. I’m stuck….H E L P !!!
Thank you
Hi Sadia, I can’t give you a definite answer since I don’t know all about your project, but when we redid our stairs, we laid flooring over the top of our particle board landing and it worked out really well! You can see that here: https://www.remodelaholic.com/2011/08/walnut-stain-at-last-stair-update/ Hope that helps!
Thank you for responding. My question was, is there a subfloor under the particle board, or is that the subfloor? because the bullnose, which is wood, is at the same level as particle board, & I’m afraid if I put hardwood floor on top, it would end up being higher than bullnose….. tried to send you picture but didn’t know how
It is really hard to tell you what to do since I cannot see the space and honestly, this is just all guess work. So whatever I might offer as ideas, has to be taken with good thought and care as to what is the safest and strongest option for your stair treads.
We left our OSB sub floor in place, and we had to create our own 2×4 bull nose for the edge, (shown https://www.remodelaholic.com/2011/08/walnut-stain-at-last-stair-update/). You could take a skill-saw and cut off the bull–nose edge? But it might be safest to just remove the particle board, (IF it is over a strong sub floor that is in good condition) and replace it with a thinner plywood (maybe 1/4-3/8 inch) and thin engineered wood flooring about 3/8 inch thick. I don’t really know what tools you are familiar with, or own which also plays a part, in what you can actually do.
Basically you just have to get creative, with what you have BUT for utmost safety, you MUST keep the keep the stairs a nice flat surface and keep the step even heights from step to step. When we added the wood floor over our particle board, it was only about 3/8 of an inch thick so it kept the stairs pretty even through-out.
You could even paint the particle board and bullnose to match the stain you are doing and even use a faux wood graining tool to make it sort of match even more… or just keep it painted plain and finish with the same polyurethane over the paint. Check out these posts for painted options:
Maybe consult some handy and smart friends who can actually look at your space and help you decide what to do that would work best and be safest and smartest! Because I can’t really give any more advice without being in the space.
Okay,this is so weird that you have a photo of my nasty carpeted stairs on your web-page. HaHa.
You have inspired me to do this project. I have a couple questions. Did you notice that the stairs were roomier after you removed the carpet and padding? My stairs feel so shallow. Now, that you have been living with the stairs for a few years, how often have you had to wax them?
Hi Linda,
This post is from a guest, so you’ll have to click over to her blog (linked toward the top) to ask her more about the specifics like that. Thanks!
We just had sewage in our basement, carpeting will not be going down there again. Thinking about tile, or wood laminate. Stairs is what I trying to work out before I have to decide.
How have they weathered with foot traffic? Any maintenance needed?
Your work looks great. Nice your husband is so supportive.
How do your stairs look now? I painted my 3 years ago, and they look awful! However, I didn’t cover with poly. Anyway, if yours still look nice, I’m going to redo mine and follow your directions.
Hi! Great job–wanting to do this also, but I believe the treads that I have under my carpet are builder grade..do you think I could paint them and it would turn out ok? If not, I guess I could replace them?
Thank you


What you done is fantastic i would like to do that but can’t because we rent and are not allowed :0)
Love it! Do you have carpet upstairs? How did you finish that edge?
Hi Charlotte! This was a guest post, so click over to the original blog (linked at the top of the post) and she can help answer your questions there. Thanks!
What was at the top of your stairs? Mine is carpet, where would I stop the carpet? Would I have to pull up the carpet at the top of the stairs as well?
Many thanks!
Thanks for a fantastic solution to saving over $2500. I am doing my foyer and upper and lower hallways in wood laminate and planned to do my stairs in wood but now I will follow your lead and save my money for another home remodeling project.
very inspiration and I need to do mine asap. I pulled up some carpet and found I have something totally different, can someone help? please? i have pics
Hi Asia! Come find us on Facebook and you can send us a picture there and we’ll see what we and the other Remodelaholics can do to help! https://www.facebook.com/Remodelaholic Thanks!
I saw this project about 4 months ago and decided to give it a go while the rest of the family is on holiday, I am halfway done and feeling very proud of myself 🙂
Yay! We’d love to see pictures when you’re done, Evelyn! You can message us over on Facebook: https://www.facebook.com/Remodelaholic. Thanks!
I love this. Gives me some hope I can do mine . I am going to try this. Asap
We would love to see when you do! Thanks for reading!
I’ve looked at this post several times over the last year (the stairs look AMAZING!), and I’ve finally convinced my husband that IT’S TIME . . . but we really want to know how the stairs are holding up now. Are you still happy with the products and the process?
Hi Holly! This post is from a guest, so I can’t report on the durability… But if you’ll click over to her blog (linked up towards the top of the post) then I’m sure she’d love to give you more information. Thanks!
That’s amazing!!! You did such a great job!
Looks great, however they scraped off the “gunk” and had amazing looking wood underneath.
Not many stairways have solid wood like that under carpeting. Not the case for 99% of homes, so before you attempt this check out the wood underneath first. Most stairs nowadays are framed with plywood or OSB particleboard, and not beautiful pine boards. This makes for a whole different ballgame.
So true! There are still lots of options, even if you don’t have lovely wood underneath, thankfully! Thanks, Patrick!
I peaked, looked like wood, pulled carpet & disappointment: the landing was particle board!!! I sanded, stained the treads, painted the risers, but what do I do with the landing??? do they have a subfloor under the board? if that’s the case, I could remove 3/4″ particle board & replace with hardwood….if not…. I’m stuck….H E L P !!!
Thank you
Hi Sadia, I can’t give you a definite answer since I don’t know all about your project, but when we redid our stairs, we laid flooring over the top of our particle board landing and it worked out really well! You can see that here: https://www.remodelaholic.com/2011/08/walnut-stain-at-last-stair-update/ Hope that helps!
Thank you for responding. My question was, is there a subfloor under the particle board, or is that the subfloor? because the bullnose, which is wood, is at the same level as particle board, & I’m afraid if I put hardwood floor on top, it would end up being higher than bullnose….. tried to send you picture but didn’t know how
It is really hard to tell you what to do since I cannot see the space and honestly, this is just all guess work. So whatever I might offer as ideas, has to be taken with good thought and care as to what is the safest and strongest option for your stair treads.
We left our OSB sub floor in place, and we had to create our own 2×4 bull nose for the edge, (shown https://www.remodelaholic.com/2011/08/walnut-stain-at-last-stair-update/). You could take a skill-saw and cut off the bull–nose edge? But it might be safest to just remove the particle board, (IF it is over a strong sub floor that is in good condition) and replace it with a thinner plywood (maybe 1/4-3/8 inch) and thin engineered wood flooring about 3/8 inch thick. I don’t really know what tools you are familiar with, or own which also plays a part, in what you can actually do.
Basically you just have to get creative, with what you have BUT for utmost safety, you MUST keep the keep the stairs a nice flat surface and keep the step even heights from step to step. When we added the wood floor over our particle board, it was only about 3/8 of an inch thick so it kept the stairs pretty even through-out.
You could even paint the particle board and bullnose to match the stain you are doing and even use a faux wood graining tool to make it sort of match even more… or just keep it painted plain and finish with the same polyurethane over the paint. Check out these posts for painted options:
https://www.remodelaholic.com/2011/02/under-100-carpeted-stair-to-wooden-tread-makeover-diy/
https://www.remodelaholic.com/2013/08/painted-wood-stair-remodel/
Maybe consult some handy and smart friends who can actually look at your space and help you decide what to do that would work best and be safest and smartest! Because I can’t really give any more advice without being in the space.
Good luck!
Thank you, opted for calling a handyman to do my landing.
at least I did most of it. Thanks again
Sometimes that is really the best idea, to let a professional handle it! Less stress and then it is DONE! 🙂 Thanks!
Okay,this is so weird that you have a photo of my nasty carpeted stairs on your web-page. HaHa.
You have inspired me to do this project. I have a couple questions. Did you notice that the stairs were roomier after you removed the carpet and padding? My stairs feel so shallow. Now, that you have been living with the stairs for a few years, how often have you had to wax them?
Hi Linda,
This post is from a guest, so you’ll have to click over to her blog (linked toward the top) to ask her more about the specifics like that. Thanks!
Yippee. Doing mine now. JASCO first then sanding … will poly after. It is so good looking – not even done yet.
Yay! Send us a picture when you’re done! https://www.remodelaholic.com/share-brag-post/
We just had sewage in our basement, carpeting will not be going down there again. Thinking about tile, or wood laminate. Stairs is what I trying to work out before I have to decide.
How have they weathered with foot traffic? Any maintenance needed?
Your work looks great. Nice your husband is so supportive.
How do your stairs look now? I painted my 3 years ago, and they look awful! However, I didn’t cover with poly. Anyway, if yours still look nice, I’m going to redo mine and follow your directions.
Did you sand in between the polyurethane coats?
Loving your stair remodel gonna try mine the spring with your great help instructions.
Hi! Great job–wanting to do this also, but I believe the treads that I have under my carpet are builder grade..do you think I could paint them and it would turn out ok? If not, I guess I could replace them?
Thank you
Hi Marise,
You could always try, but if it’s particle board, it won’t paint up very well. You could replace them like this: https://www.remodelaholic.com/carpet-hardwood-stair-remodel/
Those stairs look great! Out of curiosity, what did you use to fill in the nail holes from the staples and tack boards?