Up-cycled Table Top to Chalkboard
** Special thanks to Sarah of Thrifty Decor Chick for featuring me today!! It made my weekend. Check out the post here.
Up-cycled Table Top to Chalkboard by Sherry
Up-cycled Table Top to Chalkboard by Sherry
I’ve read several guest posts, but I never thought I would be asked to do one. I was both humbled and delighted when Cassity asked me to visit here today at Remodelaholic and share a project with you.
I’m Sherry and I blog over at Back 2 Vintage. I’m a treasure-hunter, junker and sometimes a rescuer. I love to search yard sales, estate sales and thrift stores for vintage treasures to sell in my booths at a local antiques mall. Occasionally my treasure-hunting uncovers a diamond in the rough and I have to do a bit of polishing to expose the inner beauty of an object that looks like trash on the outside.
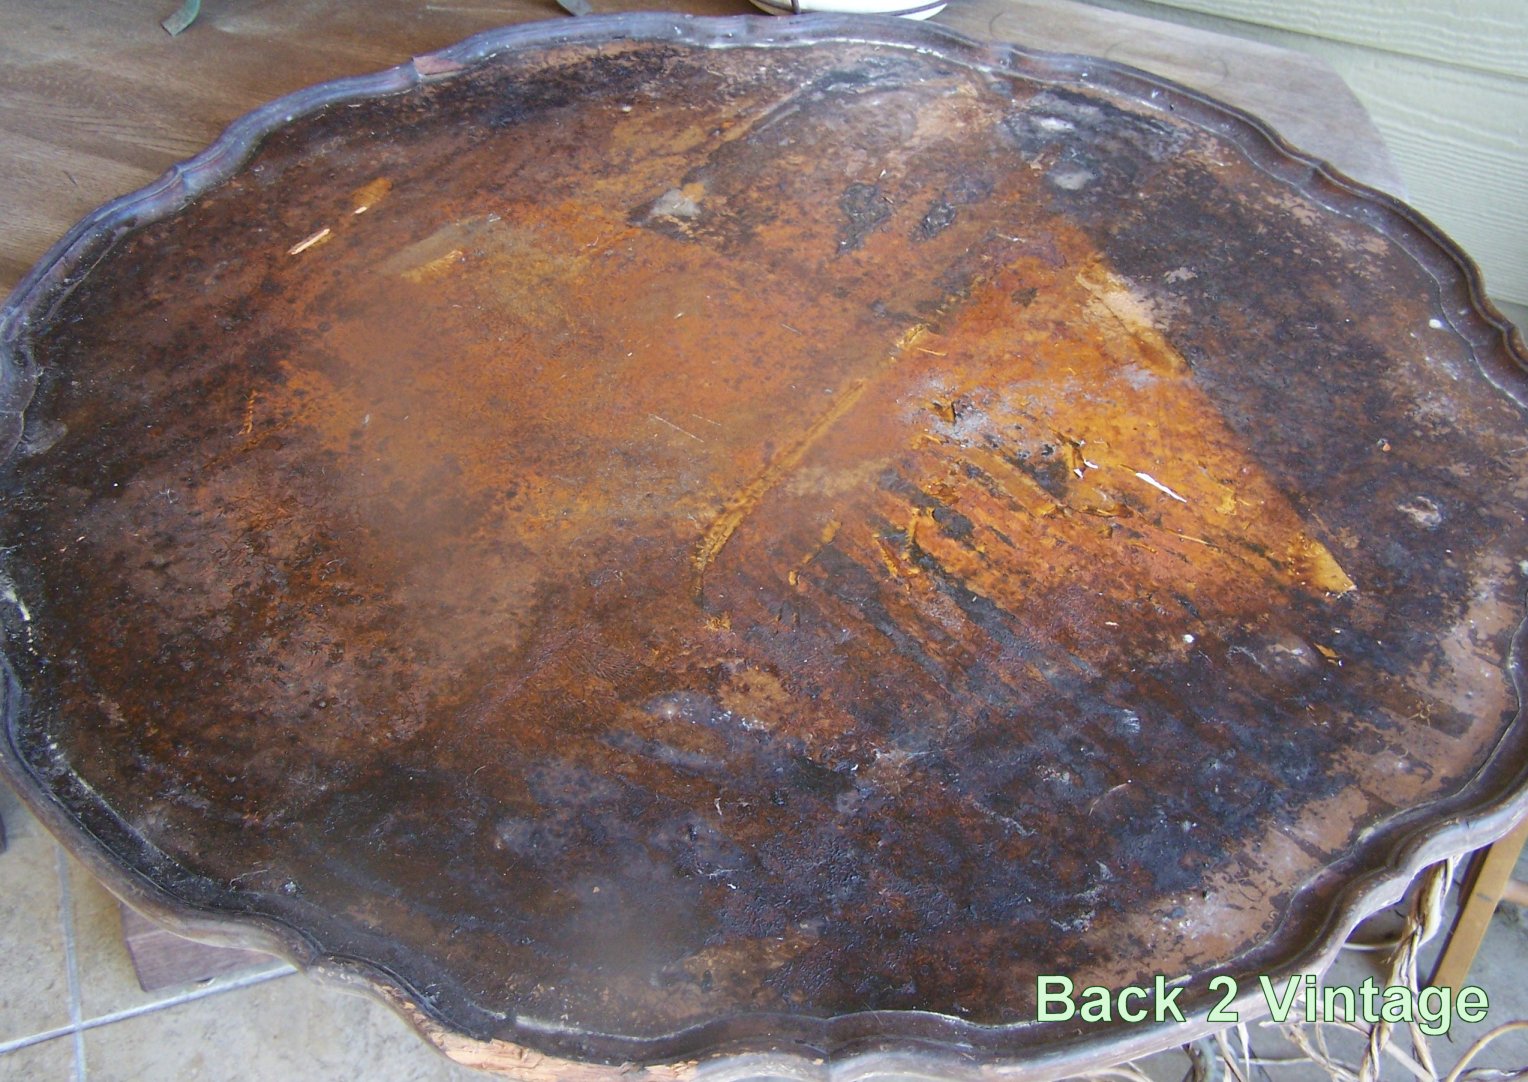
That’s just what happened recently when I discovered this:
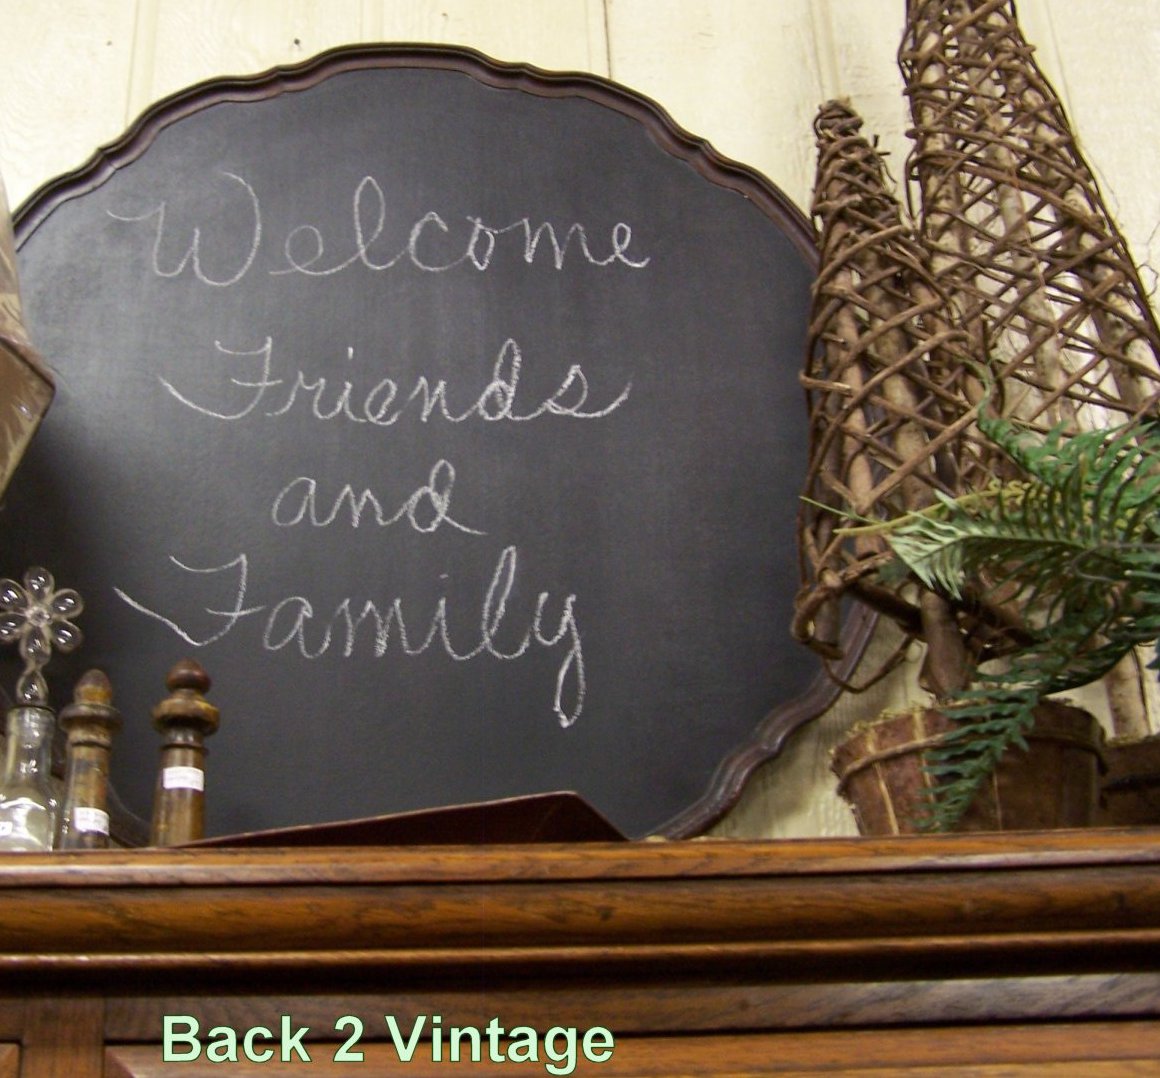
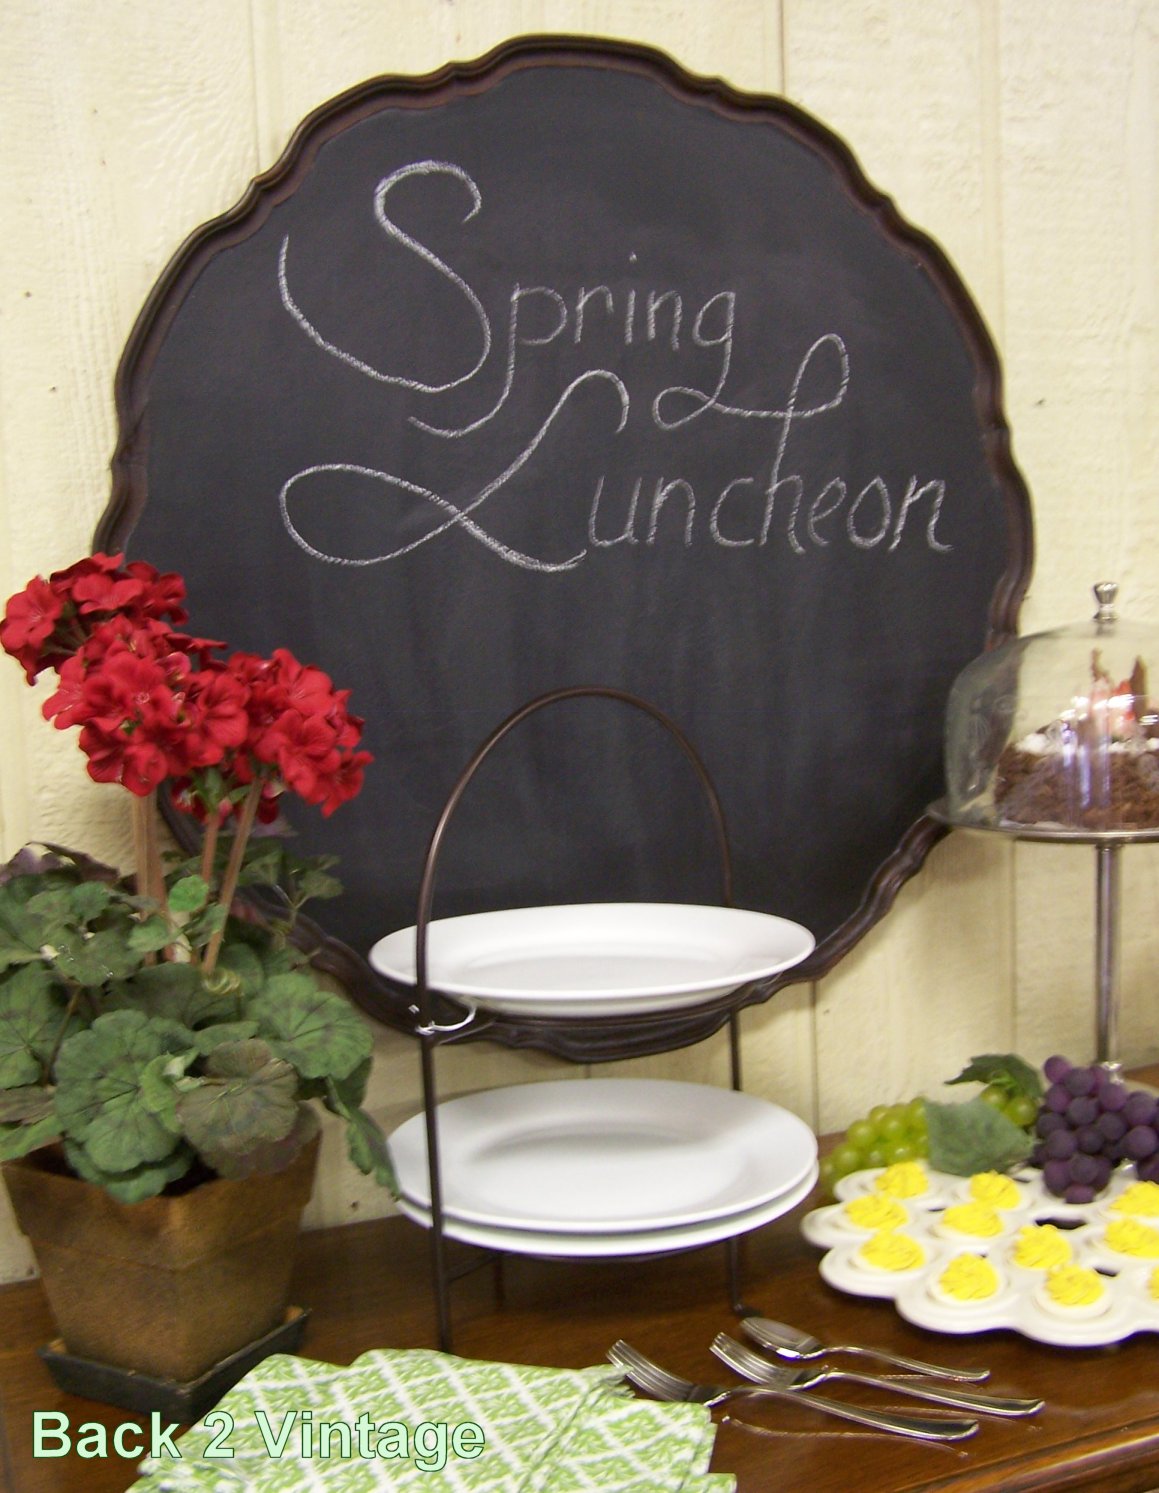
And turned it into this:
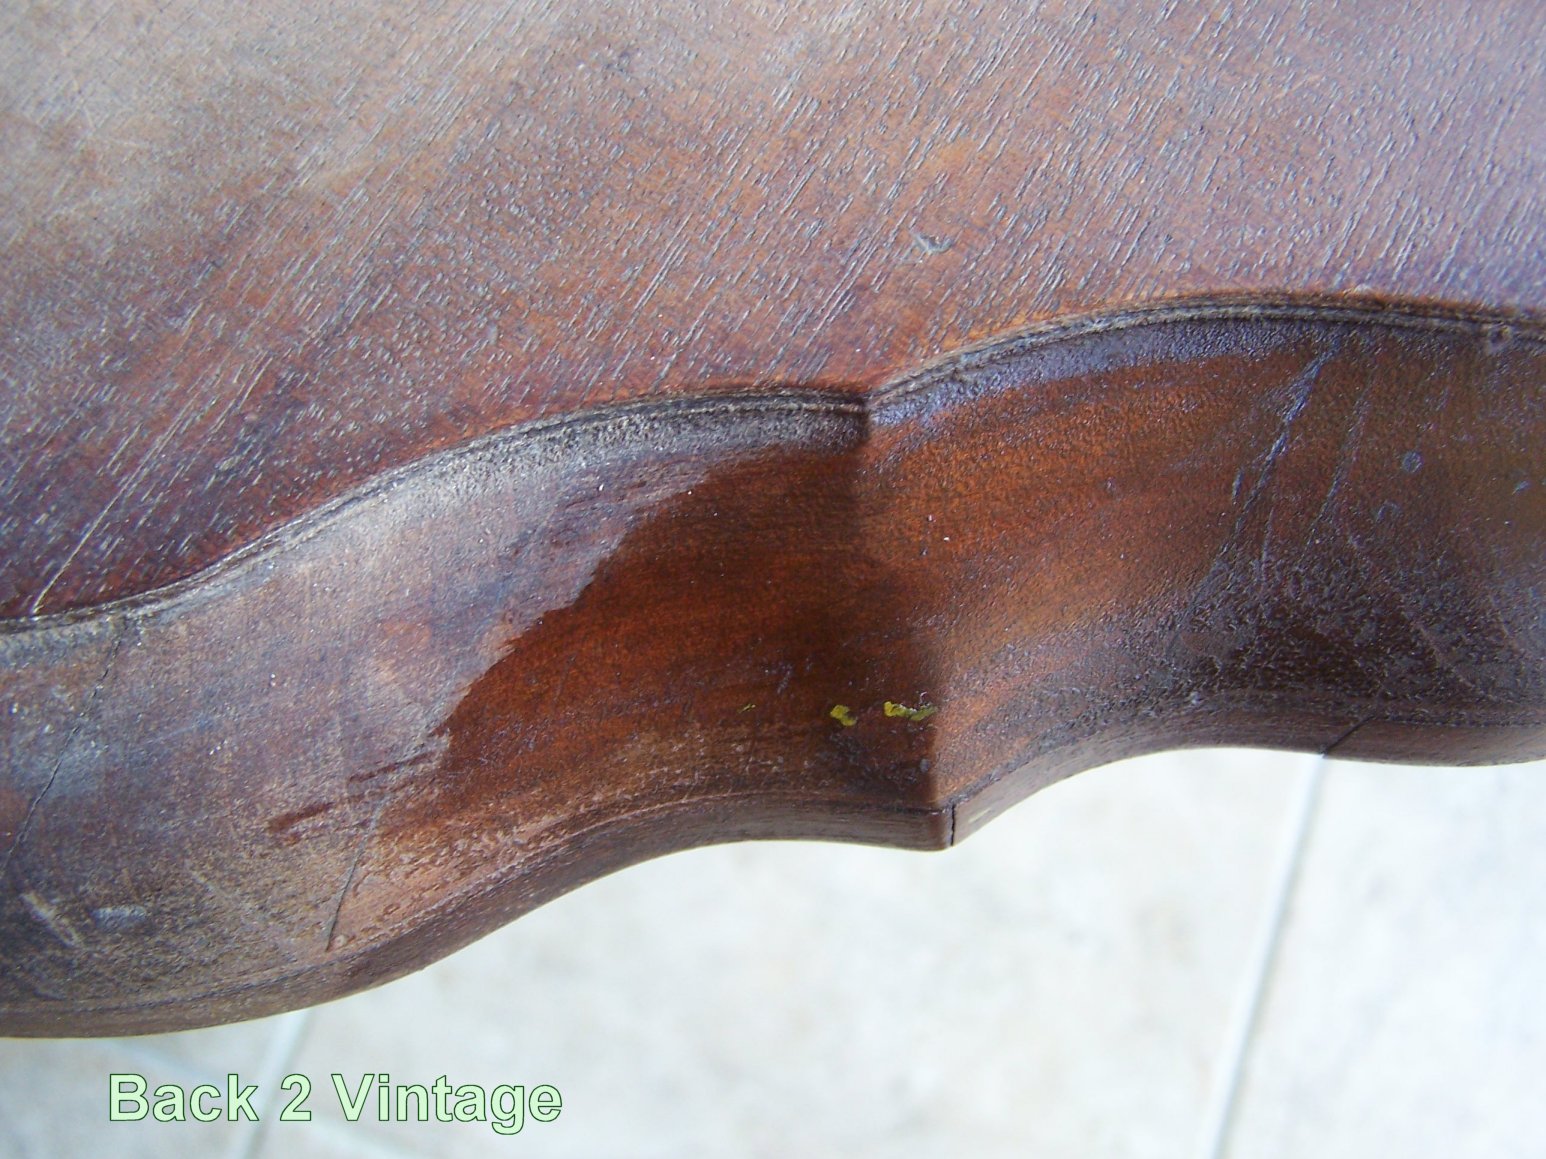
While attending an estate sale back in January, I looked through the offerings in the carport and spotted something large on top of a table. As I got closer, I realized that it was a badly damaged pedestal table with a leather-covered piecrust-edge top. The pedestal was still attached to the top, but the four legs were either damaged or broken off entirely. How sad! This was once a beautiful mahogany table….too bad it was beyond repair….but wait, it was not beyond repurposing! It would make an awesome chalkboard! Since this was the second day of the sale, everything was half-price…..it cost me $1.50.
Here’s the table turned upside down in the back of my vehicle. My husband is taking the broken pedestal off the bottom of the tabletop. See the broken legs sticking out of the end of the pedestal?
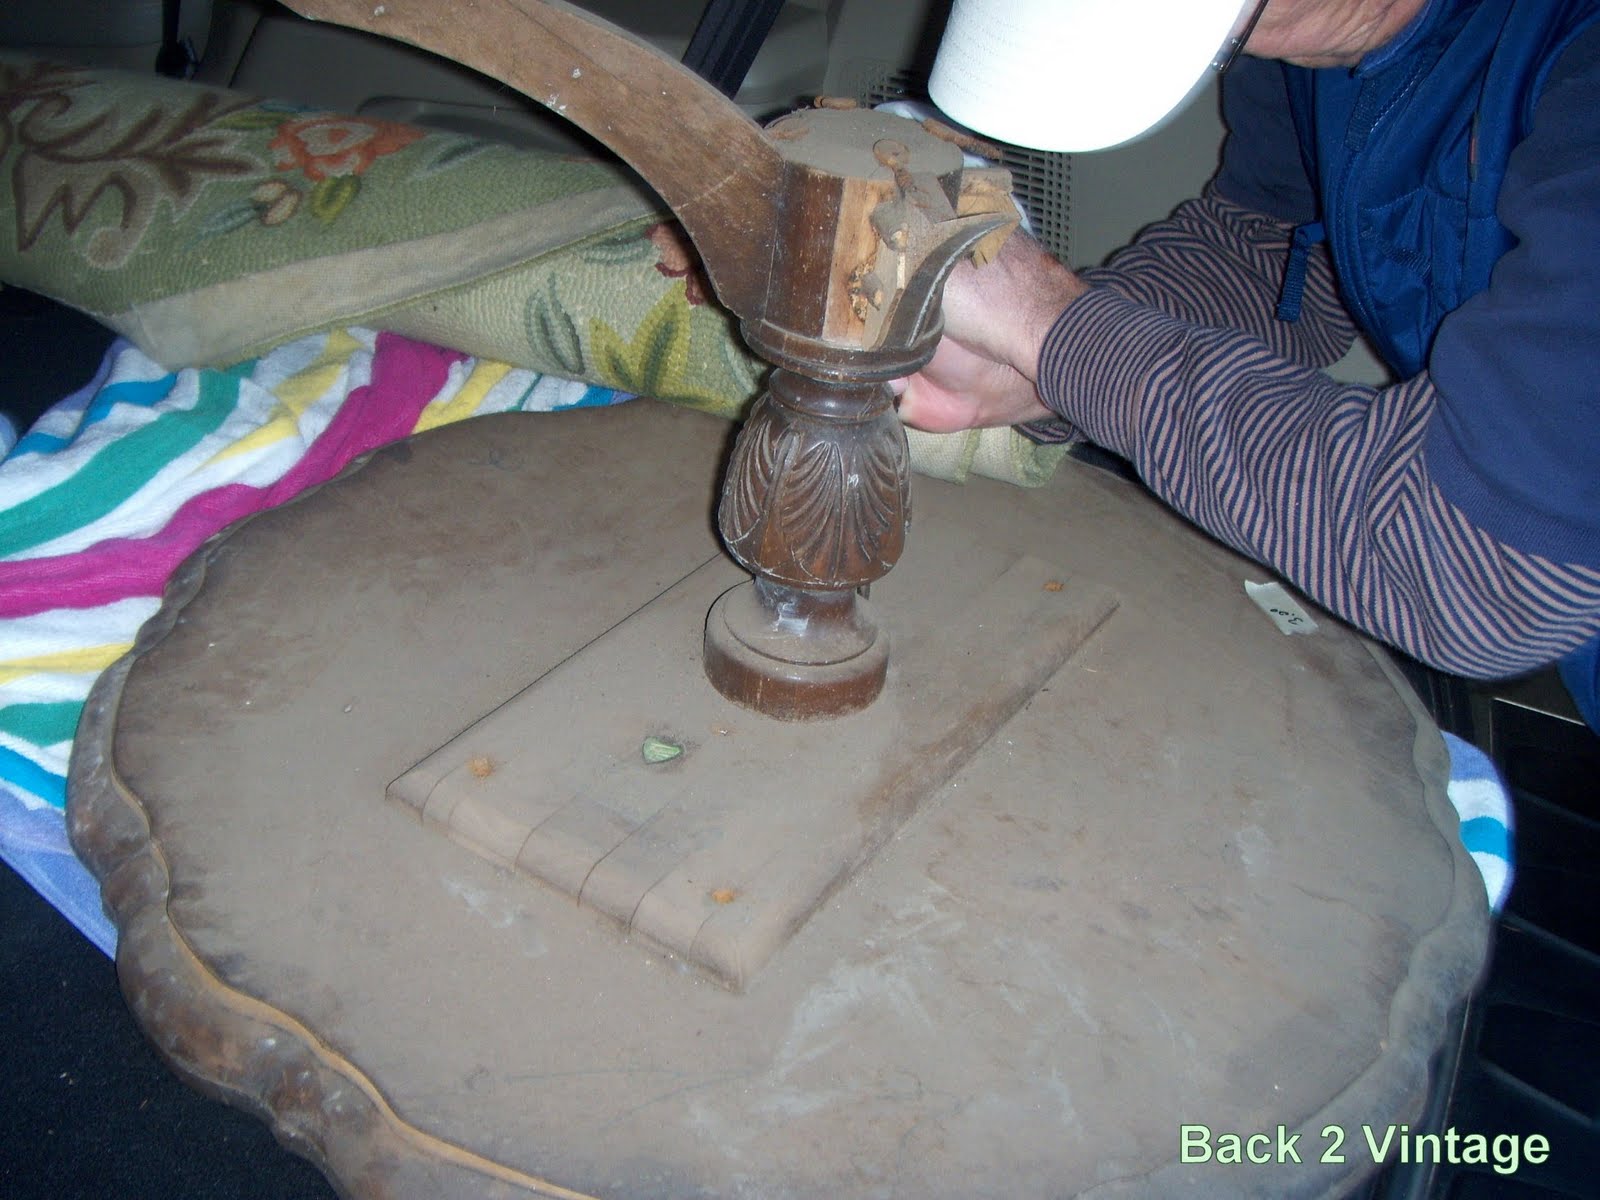
Once he got the pedestal off and I got the table top out of the vehicle and into some decent light, this is what I had to work with.
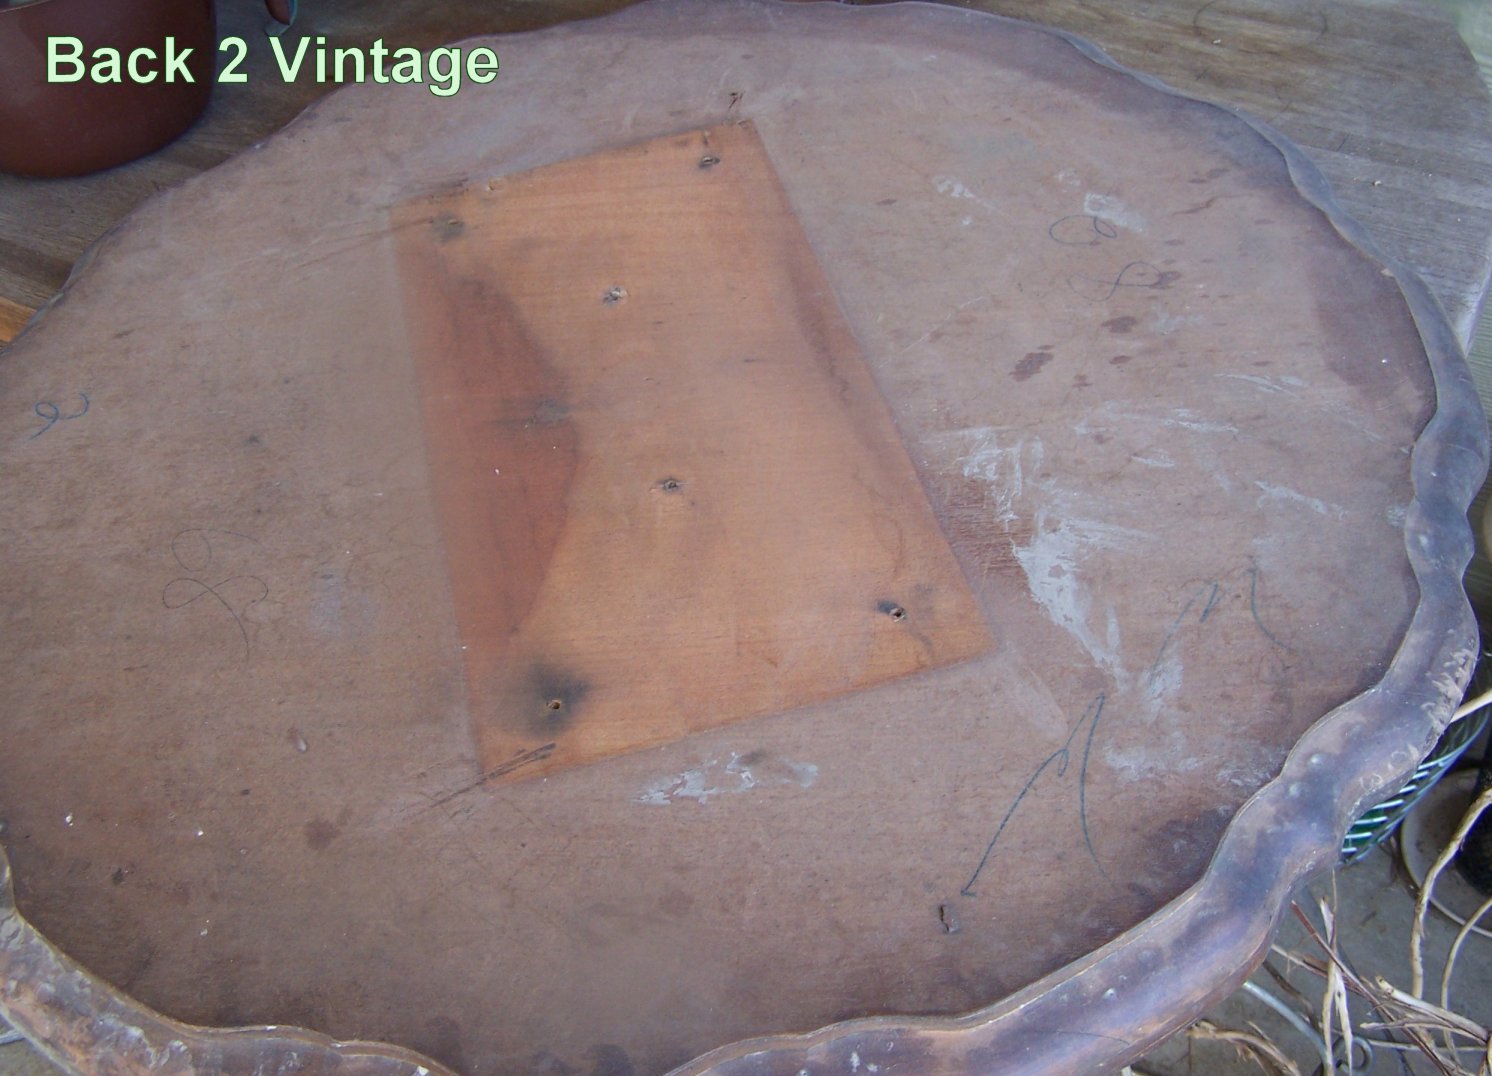
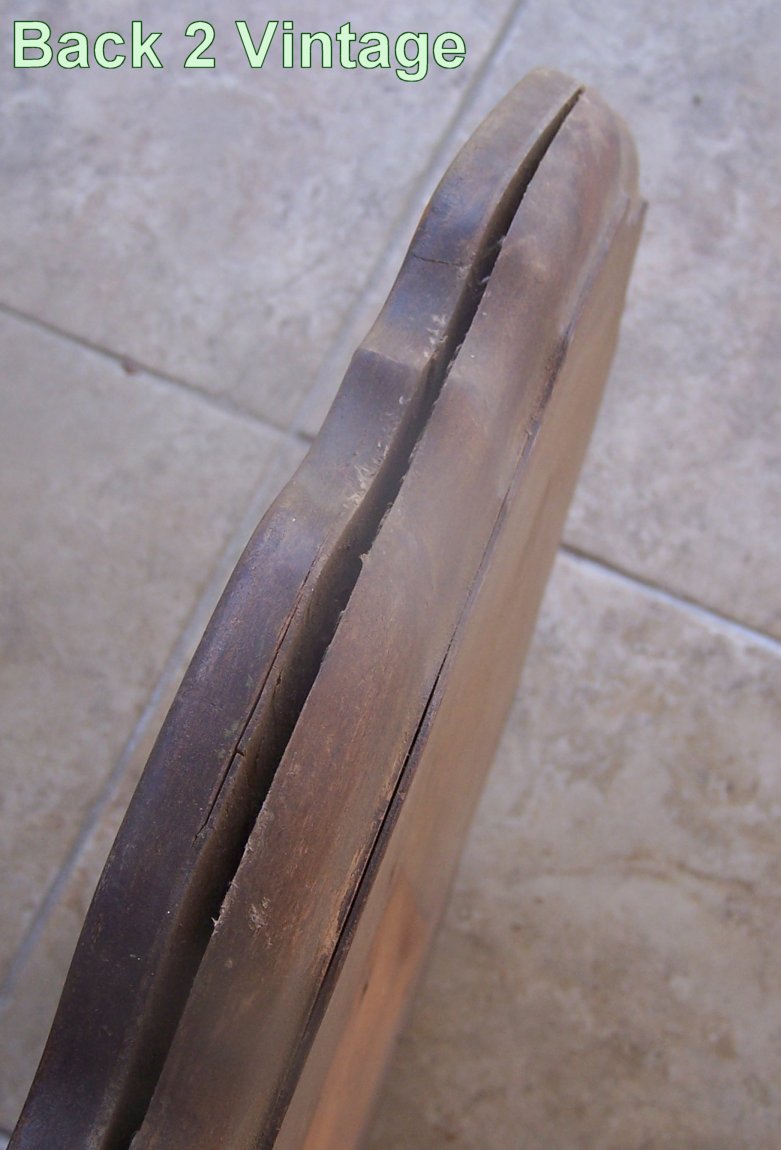
The wood was extremely dry, there was a bad split on the edge and the leather was beyond dirty.
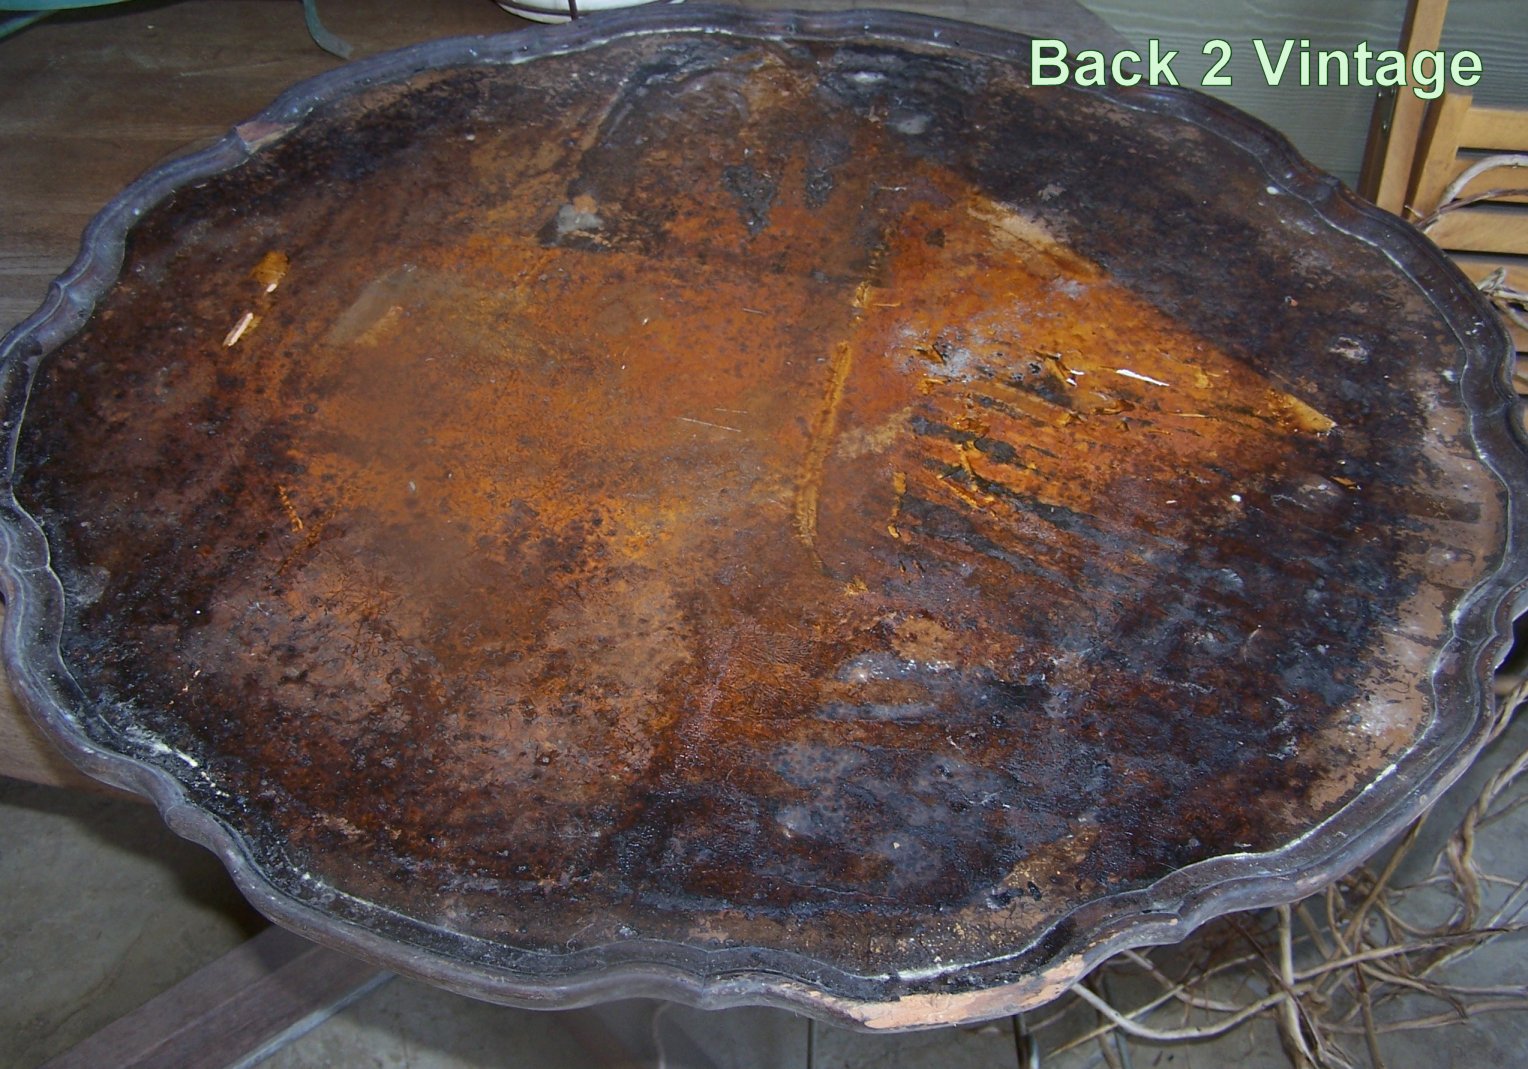
Pretty sad, huh?
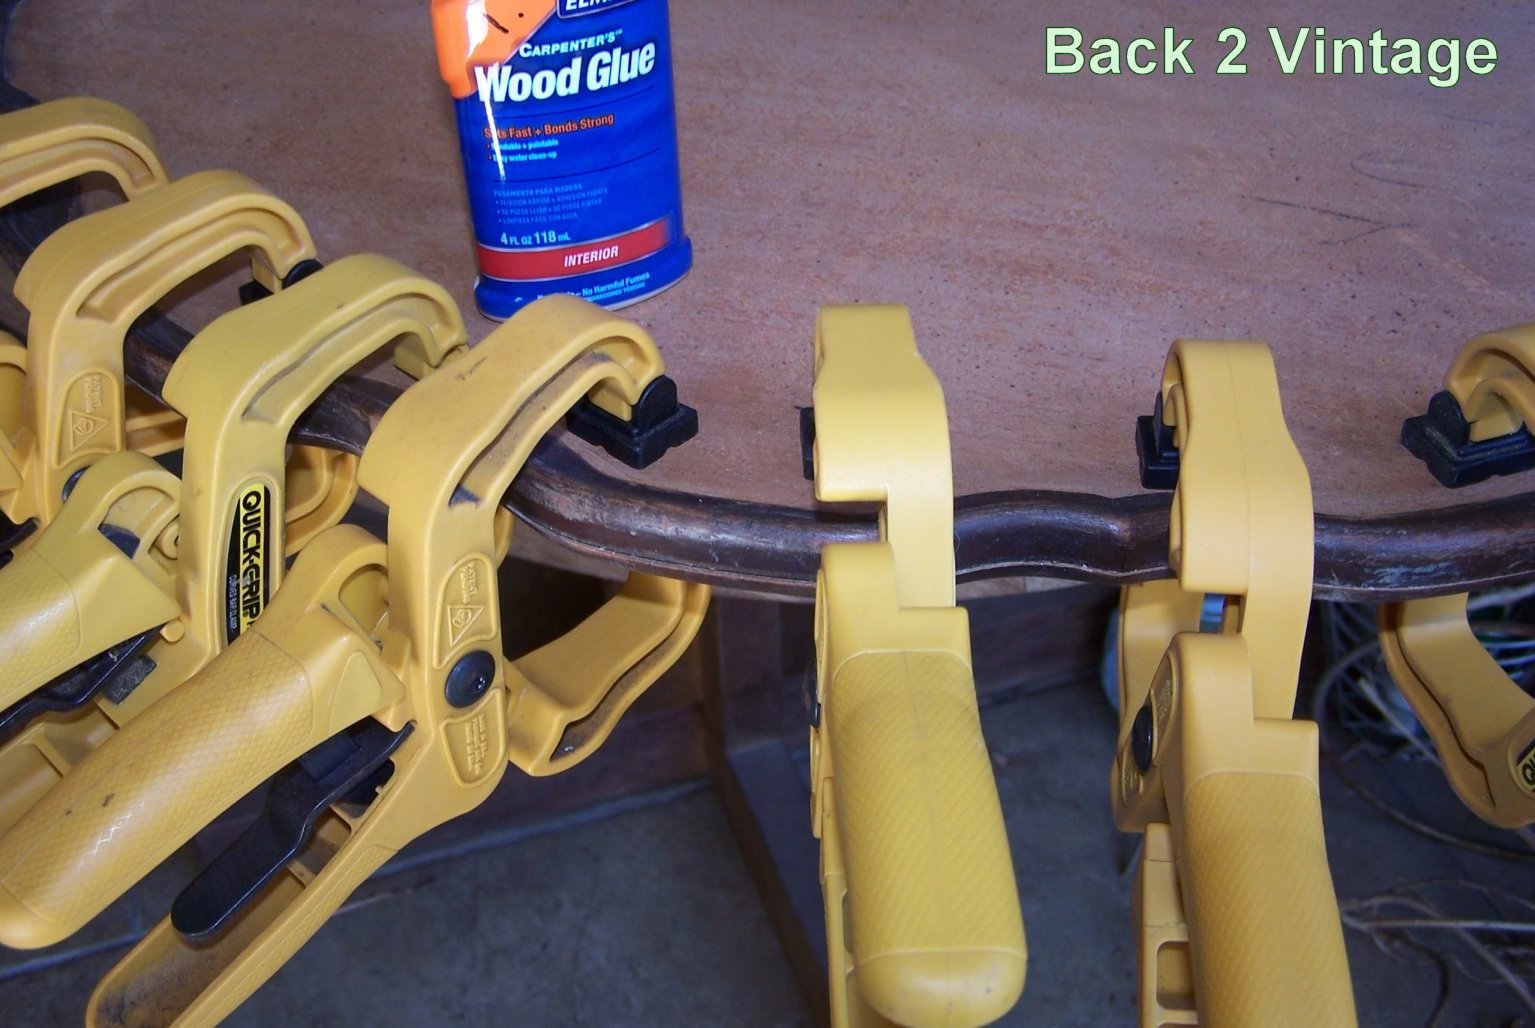
I glued and clamped the split edge.
Then I addressed the dryed-out wood by re-staining the edge. See what a difference the stain is making?
Originally I thought that I would apply chalkboard paint directly over the leather, so I tried to clean the leather. Nothing worked! Since the leather was already trying to peel off, I just decided to take it off completely. That left me with raw wood. The chalkboard paint directions said that raw wood would need to be primed….. I sanded and primed…..
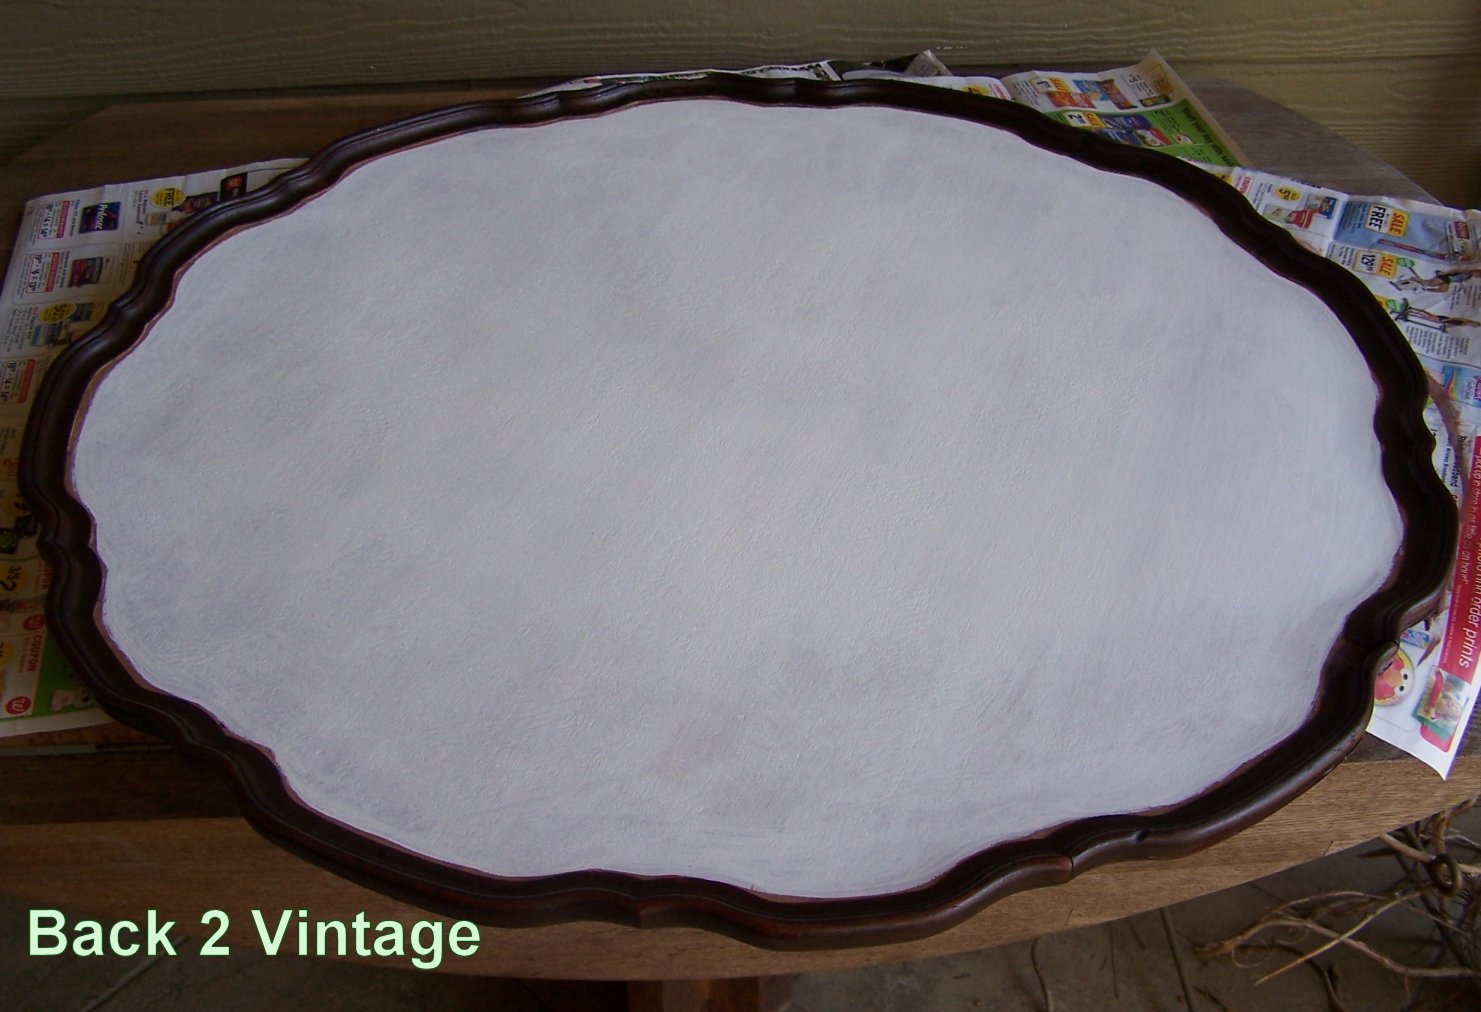
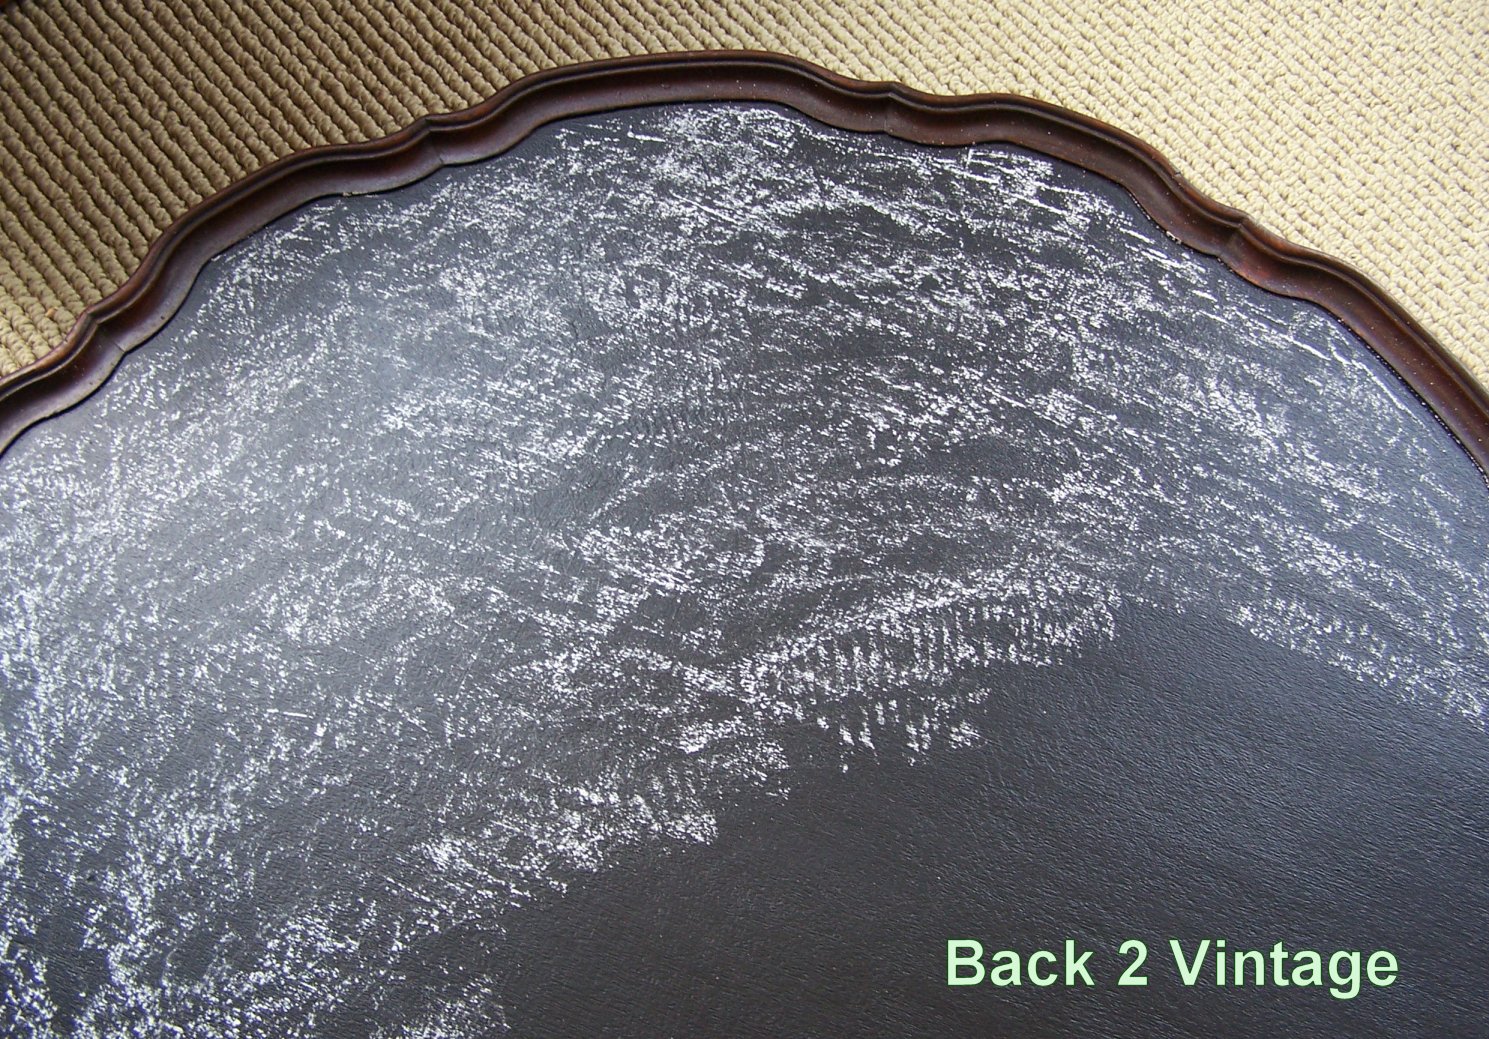
Finally I was able to apply the chalkboard paint….I brushed on three coats, letting each coat dry thoroughly before applying the next. Then I broke-in the surface by rubbing it with the side of a piece of chalk and then erased.
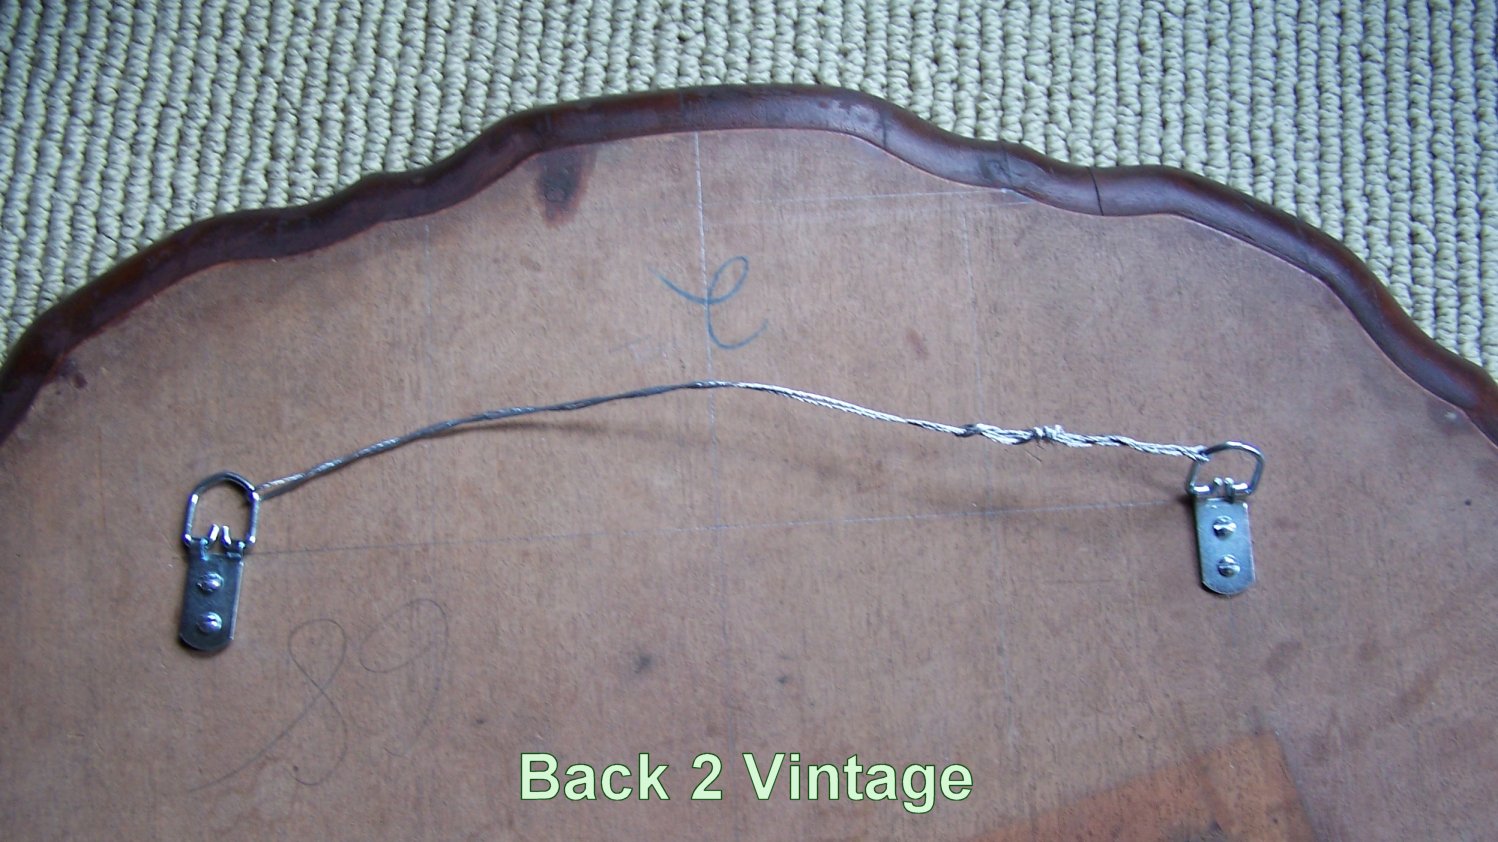
I added a wire hanger system to the back, making sure that the wire would support the 12-pound top and that the screws weren’t so long that they would penetrate the front.
So a badly damaged mahogany piecrust-edge pedestal table…..
Became a beautiful Piecrust Chalkboard……..
I hope my project has inspired you and that you’ll visit me at Back 2 Vintage.
Cassity Kmetzsch started Remodelaholic after graduating from Utah State University with a degree in Interior Design. Remodelaholic is the place to share her love for knocking out walls, and building everything back up again to not only add function but beauty to her home. Together with her husband Justin, they have remodeled 6 homes and are working on a seventh. She is a mother of four amazing girls. Making a house a home is her favorite hobby.