How to Build a Modern Industrial Wood and Metal Coffee Table
One of the very best parts of DIYing is creating something that *looks* high-end but that cost a fraction of what you could have purchased it for. Our guest today wanted her own modern industrial style wood and metal coffee table like she’d seen at the designer stores — so she made her own and saved a few hundred bucks!

DIY industrial wood and faux metal (you’ll never believe what it is!) wall letters
Quick and easy trick to age new metal for a magnet board
Easy rustic industrial photo frames
How to make your own industrial pipe curtain rods
Build a custom industrial shelving unit (using budget-friendly PVC!)

Give Sage and her colorful style a very warm welcome back!

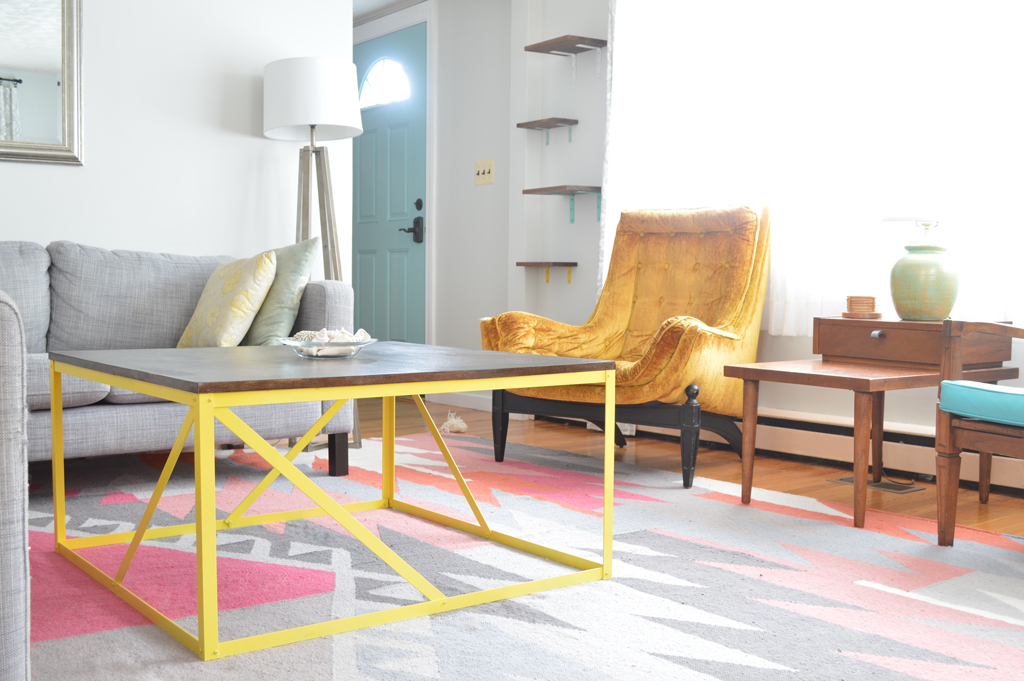
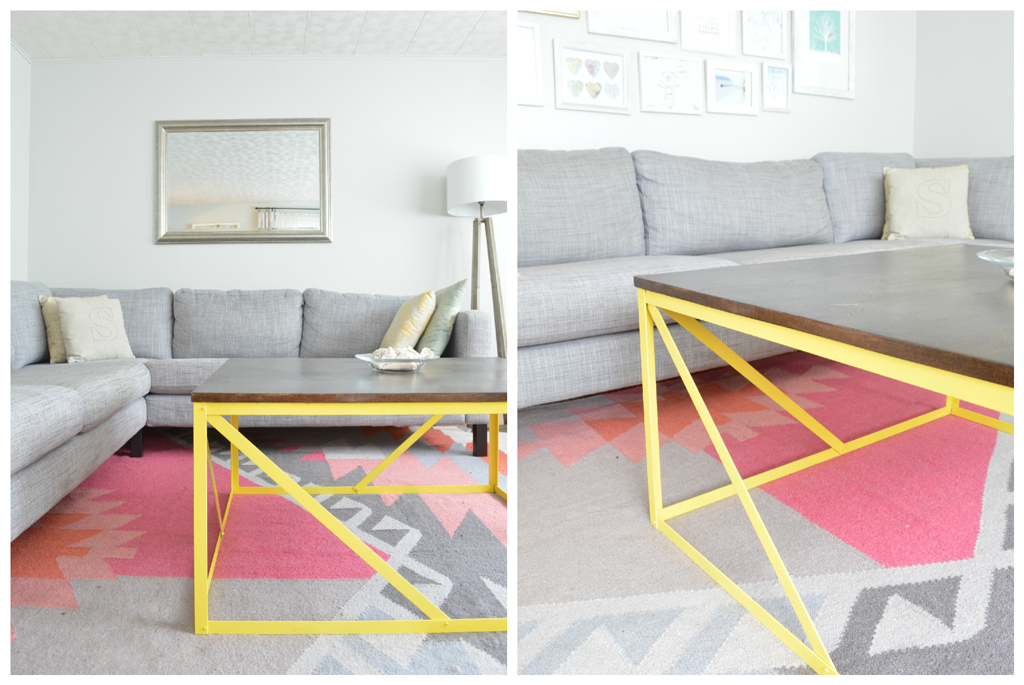
How to Build a Modern Wood and Metal Coffee Table
by Sage from Plaster and Disaster
It’s been awhile since I was last on Remodelaholic, sharing my colorful stairwell makeover using fabric and mod podge. Usually you can catch me over at Plaster & Disaster, where my better blogging half — Naomi — and I share our (mis)adventures as first-time homeowners in our fixer-upper houses, without prior experience and with a hefty dose of other responsibilities (like full-time jobs). From small crafts to major home improvements, we chronicle our numerous and incredible successes (while relying heavily on hyperbole), but also the inevitable disasters that happen along the way. Be sure to check out some of our favorite projects and fondest disasters!
Today I’m here sharing a DIY wood and metal coffee table I built out of steel and plywood. Think you can’t DIY your own metal table because you don’t know how to weld? Think again! Today I’ll share how I made this coffee table for $156:
This post may contains some affiliate links. Please see our full privacy policy and disclosure here.
 I was inspired by some amazing sleek, industrial, modern, metal, polished wood pieces that I loved but that were totally out of my price range:

Even though I was intimidated, I decided to try taking on this project myself. First, I need to give a shoutout to Sarah Dorsey, who has an amazing blog full of incredibly adventurous and creative projects. When I started investigating how I might construct a metal coffee table, everything I saw either involved creating a faux metal look out of wood, or enlisting your welder friend to help out. I was not interested in either of these options, and then I remembered the gorgeous herringbone coffee table that Sarah made a few years ago:

Sarah used 1″ wide steel pieces to construct her table base and bolted them together, so I thought maybe — MAYBE — it was something I could accomplish. However, I encountered some challenges along the way that caused me to alter the original design (adding cross pieces for structural support), and my table turned out looking pretty different.
Please note that I’m going to do this tutorial as though I built the coffee table correctly the first time around, but in reality I made it one way first and discovered that it was not as structurally sound as it needed to be:

Please don’t think I’m trying to gloss over my mistakes, it’s just that I wrote three posts totaling more than 6,000 words about this project (making the original frame, making the tabletop, and fixing the frame), and I obviously wanted to condense that into one comprehensive post for your viewing pleasure today.
So! Let’s pretend that the plan all along was to construct a square metal box with cross supports, with angled steel forming the vertical supports and straight steel forming the horizontal segments around the top and bottom and the diagonal cross supports. I picked my dimensions by marking it out in my living room, but also by looking at the common dimensions for the lengths of steel I was buying to figure out how I could make as few cuts as possible since I was nervous about this part (in retrospect, unnecessarily so).

First up was an epic Home Depot run. Here’s the full supply list:
Supplies:
- Horizontal and diagonal pieces of frame: 6 lengths of 72″-long x 1″-wide straight steel (To have four segments around the top and four around the bottom each 36″ long, I needed four 72″ inch lengths of steel each of which I cut in half; plus I needed an additional two pieces to make my four 25.5″ cross pieces) — $58.32
- Vertical pieces of frame: 1 length of 72″-long x 1″-wide angled steel (To create an 18″ tall table, I needed to cut a 72″ length in quarters) — $12.97
- 14 short bolts, 2 medium bolts, and 4 long bolts and hex nuts: I selected #6 machine bolts at 3/8″ long for the short ones, 1/2″ long for the medium ones, and 3/4″ long for the long ones. The longest ones are the four that will also go through the brackets that attach to the table top plus the cross supports (so need to go through 3-4 thicknesses of steel), the medium ones are for the joints that have only brackets but no cross supports, and the shorter ones are for the rest of the joints. Make sure to get rounded head screws rather than flathead– these will actually sit more flush against the hole unless you have a sunken screw hole, which I was obviously not going to be drilling myself. — $9
- 4 angle brackets to attach the frame to the tabletop — $1.97
- 3 cans yellow spray paint, 1 can clean metal primer, 1 can clear gloss topcoat (all Rustoleum) — $19.13
- White vinegar (this is to soak the coating off the metal — I’ll get to that later) — $4
- Scrap wood (to put under the metal when drilling)
- Pack of metal cutting blades for the jigsaw– $8.97
- 2x multi-pack of black oxide drill bits — I really only ended up needing one size (1/8″), so in retrospect I could have just bought a few of those as singles rather than multi-packs. (To figure out what size you need, you can look online to see what bit size you should use for the bolt size you’ve purchased — just make sure to test out a hole before you drill all of them to make sure it’s right.) — $9.94
- Plywood: We found a really nice piece of birch plywood that was 3/4″ thick — $24.99
- Veneer edging — $6.50
- Minwax stain(I used “Espresso”) and water-based poly: already owned
Tools required:
- Jig saw (I own a very reasonably-priced Ryobi model that cost $60 and was a great investment
- Orbital sander (you can sand by hand if you need to)
- Drill
- Dremel
- Needle-nosed pliers
- Phillips head screwdriver
- Clamps/vice
- Safety goggles
- Clothes iron
Total: $156
With the supplies in hand, here’s how I did it:
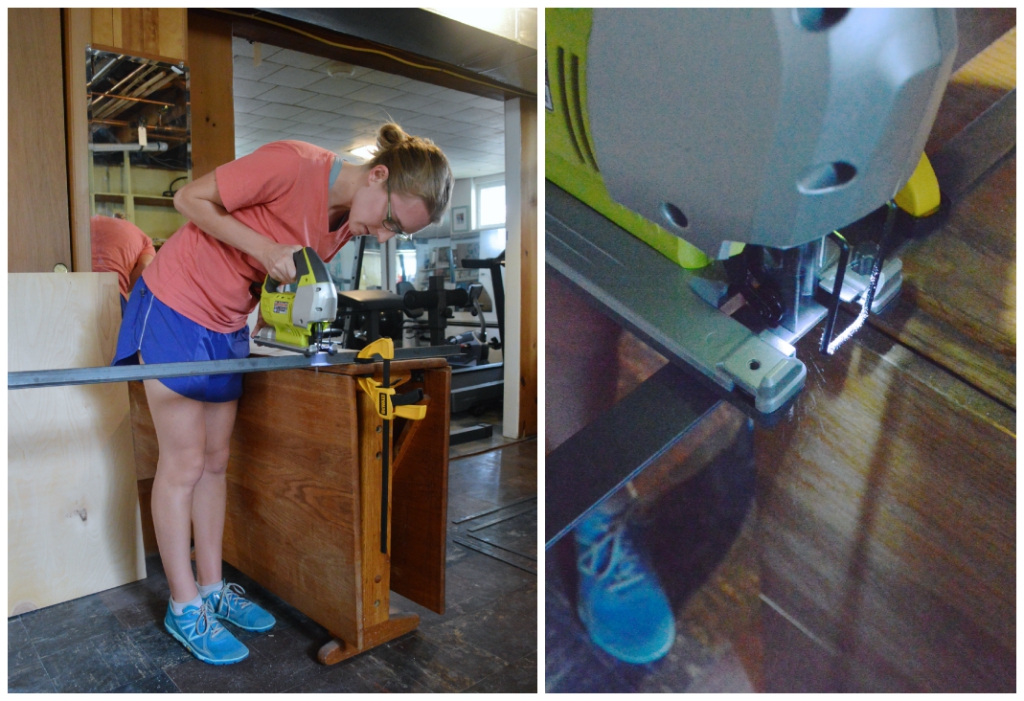
Step 1: Cutting the frame
This is the part I was most nervous about, but it was pretty easy. I started with the flat pieces, and marked each one with a sharpie where I wanted to cut.

Then I put two tables a few feet apart from one another, and clamped a single piece of steel across the divide with the cutting mark very close to one of the table edges. That way, right where I was cutting was pretty tightly secured to the table, but the other end was clamped to the adjacent table so it wasn’t vibrating everywhere.

Then I got cutting! The jigsaw was so easy, it was just a matter of going slowly and taking brief pauses so the blade wouldn’t overheat. I didn’t break any blades, but I did switch it out halfway through all the cutting since the first one was getting dull (which I could tell because the saw started to jump a little). Each cut took less than a minute.

The trick for cutting the angled pieces was to clamp them with the angle enveloping a table edge, cut through the top edge, then flip it over and cut through the other. I learned this from much trial and error.

You may not be able to cut through the corner, but at that point you can easily bend and break the piece. This is where the dremel came in handy — this technique left a few rough corners, so I grinded those down quickly:

I arranged the pieces on the floor in a rough approximation of the frame, and used this shape throughout to keep track of the pieces and move methodically.

Cutting the cross pieces for the diagonal supports required whipping out a little something known as the pythagorean theorem, ie middle school math. I knew that I wanted the pieces to hit the bottom of the frame at the midpoint of each piece, which essentially meant I was creating a triangle that was 18″ high (the corner angle pieces) and 18″ long (half of the bottom steel pieces), with the new piece constituting the hypotenuse. To figure out its length, I just needed to solve for “x” where x2 = 182 + 182. My calculations revealed that “x” needed to be about 25.5 inches, so I marked and cut those four pieces using the same jig saw technique.
Step 2: Drilling the holes
Next up was drilling the holes. Every flat piece needed a hole in each end, so I marked and drilled those first. To get the right location, I set them inside the angle pieces where they would ultimately go and marked a hole approximately in the middle with a sharpie. I made sure not to push the straight piece all the way into the corner, since when it’s assembled there will be a straight piece coming from both sides and they couldn’t both be pushed all the way into the same corner.
Below is not a good example of what I just described — this is before I decided to use that technique, and indeed this particular corner made for a very snug fit when it came time to assemble everything.

To drill, I clamped each piece to the edge of a table on top of a piece of wood:

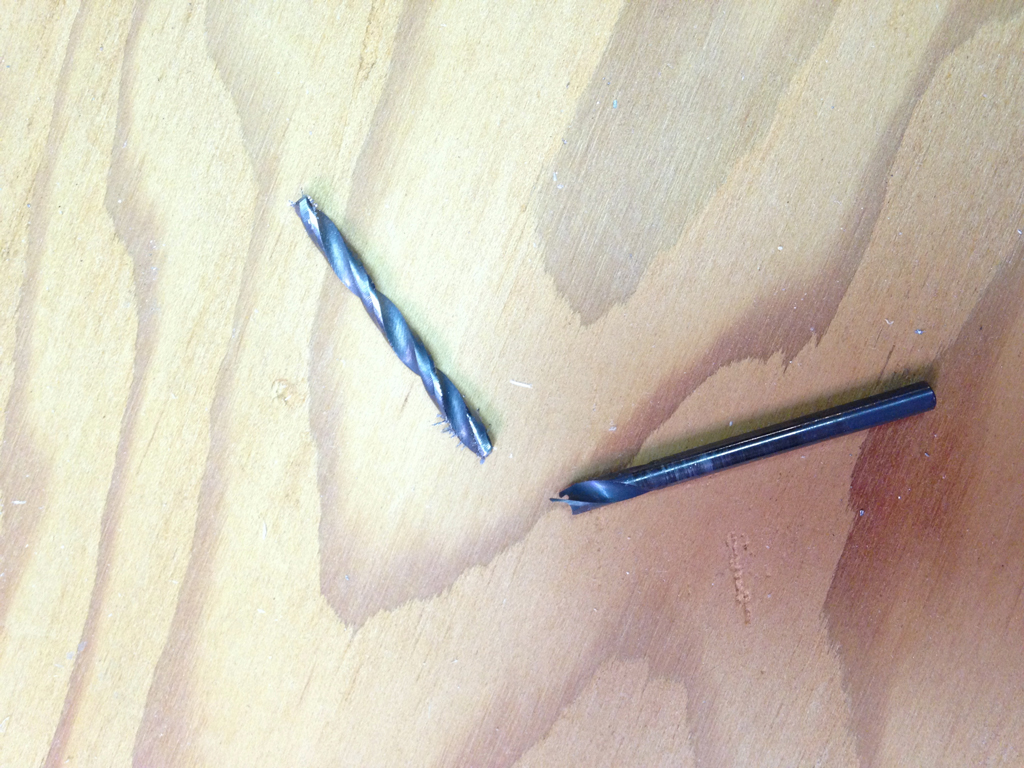
My tips for drilling are just to go nice and slow (but apply enough pressure that you’re making progress), and take breaks to wipe away the metal you’re churning up and let the bit cool.

You may break a bit or two — I broke one about halfway through the process.
Drilling the angle pieces was a little harder. I wanted to make sure that each of those holes lined up exactly with the holes in the straight pieces that they would be attached to so that they would be exactly flush — I didn’t want one sticking out more than the other, which would create an uneven surface on the bottom or along the top of the frame.
When you’re drilling, the bit can jump a little as you’re getting started and the hole ends up being a tiny bit shifted from where you intended. To make sure I drilled in the exact right place, I actually clamped the two pieces together to drill into the angled piece through the existing hole in the straight piece:

As I went, I numbered each set of holes so it was clear which ones lined up with each other. In the cases where it was a hole that would also have one of the four attaching brackets, I numbered that too.

I worked my way around the configuration on the floor, keep everything arranged in the right order.
To drill the holes in the diagonal cross pieces, I marked the correct location on the top where the piece would attach at each corner, and at the bottom of each length where it would attach to the bottom section of the frame. I also had to drill a hole halfway across each bottom horizontal piece where the cross-support would attach.

Step 3: Cleaning the metal
I found that there was some coating flaking off of some of the steel, especially the angle pieces.

Sarah had the same problem and had good luck soaking hers in white vinegar overnight, so I decided to do the same. Even though I planned to paint mine, I wanted to be sure the paint was adhering to a clean, smooth surface.
This presented a bit of a challenge, since my straight pieces were each 36″ long and I didn’t have a container that could accommodate them. Instead, I had to have them sticking out the side and then flip them the next morning. I did add a little water as well to increase the level of the liquid to get as much of the steel submerged as possible.

It made it hard to get the very middle section, but I did a lot of scrubbing and basting. It ended up being good enough for my painting purposes, but if you want a raw steel look you should be sure the whole thing is submerged overnight.
Before submerging them, I tied on paper tags with the holes labeled, since I assumed the vinegar would take off all my careful sharpie labeling (Naomi’s genius idea).

In the morning, I had this lovely sight:

Mmmmm. I took a scotch bright pad to the part that had been submerged, and it was like a whole new piece of metal. The different between the raw steel and the coated steel is so striking, even on the straigt pieces where the coating wasn’t flaking to begin with:

I also used steel wool to get some of the tougher spots — the coating in the places that were fully submerged overnight just rubbed right off super easily, so if I had been able to fully submerge the whole thing I don’t think I would have needed to scrub hard at all.
Once I was done scrubbing the pieces, I washed each one thoroughly with water and then dried them.
Step 4: Assembling the frame
Next it was FINALLY time to assemble the frame! This would be much easier if you had two people, but I was on my lonesome so it took some finagling to get the first pieces together and balance correctly. I suggest working your way around the frame attaching the bottom pieces to the angle pieces in each corner, then go back around doing the top pieces, then do the cross supports. It’s as simple as putting the screw through the right holes and tightening the hex nut — you can use a pair of pliers to hold the nut while you tighten the screw with a screwdriver.


One hitch was that due to the angle at which the cross pieces needed to sit, on some of the pieces the corners stuck up above the surface of the frame and would have prevented the tabletop from sitting flush with the frame:


I fixed this by using the grinding attachment on my dremel to patiently grind down the corners to the right level. It took awhile, but it worked.

I also attached the cross supports to the middle of each bottom piece using 3/8″ screws:

Step 5: Painting the frame
I had visions of a bright yellow frame, so once the frame was together I brought it outside on the dropcloth to paint. First I gave it a coat of primer, then two coats of yellow gloss spraypaint, and then finally a coat of a protective gloss topcoat. I did use scrap wood to lift the frame off the dropcloth so the bottom of the frame wouldn’t get stuck to the dropcloth by wet paint.

 Step 6: Cutting the tabletop
I still needed to build the tabletop, which is made of plywood if you can believe it. We found a really nice piece of birch plywood that was 3/4″ thick and felt nice and solid. It came in a 4′ x 8′ sheet, and I had them cut it to 38″x38″ in the store so I could fit in in my car (I wanted to cut it precisely from home once I had the exact dimensions of the frame, and sometimes they can be a little off when they cut roughly at the store so I always leave a little extra). That cut left more than 50% of the original piece, and the guy who cut it was super nice and offered to take the unused part back and only charge me 50% of the original price. It’s always worth asking about this if you buy a much bigger piece and have it cut.
I picked which side of the plywood I wanted to be the top by just looking at both sides and deciding I liked the grain on one side better.

Next I needed to cut the wood to the exact right size, so once I had the frame assembled I marked the final dimensions onto my wood and cut it down with my jigsaw.

The jigsaw definitely chewed up the wood a little along the top edge of the cut, so it was good that I had picked which side I wanted to be the top for the final product and placed this facing down when I made the cut.
With the cuts made, I used my orbital sander with an 80 grit sanding pad to sand both sides of the plywood as well as around all the edges. Lots of sanding was essential to getting the glossy look I wanted at the end.

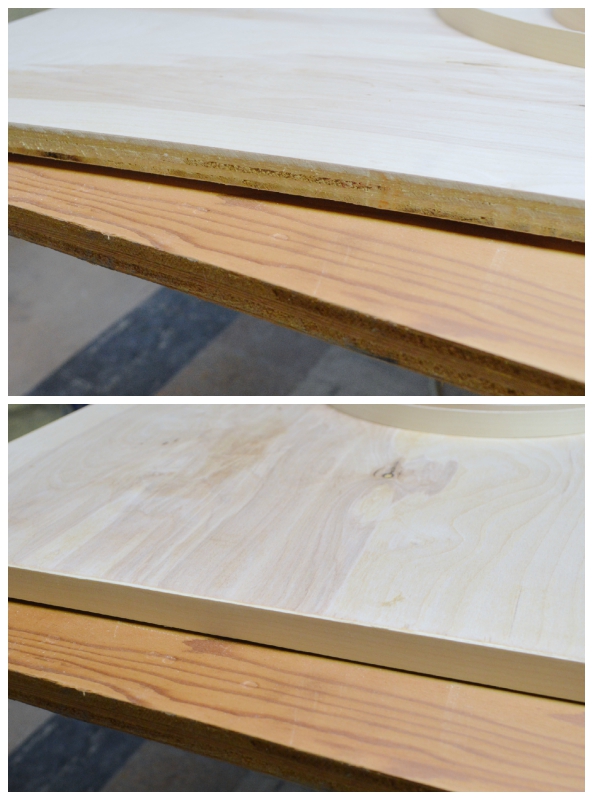
Step 7: Iron-on veneer
To cover up the unattractive plywood edges of the tabletop, Naomi found this awesome “veneer edging” that gets ironed on and then stained to match. They don’t seem to have it listed on the Home Depot website, but here’s a photo:


To use it, I just followed the directions on the packaging, which were very clear. I won’t go into the full details here because man this post is getting long, but for the blow-by-blow you can check out my detailed post on Plaster & Disaster.
What a difference the veneer makes from the raw plywood edges!
 Step 8: Stain and seal
Next it was time to stain! I applied a first coat of my minwax stain with a brush, allowed it to penetrate for 15 minutes, and then wiped off any excess.

I let it dry for four hours, and then repeated with a second coat. The following morning, I flipped the top over and stained the bottom. This time I just did one coat, since the bottom won’t be visible.
After letting that dry for 30 minutes, I flipped it over again. Since I didn’t want to wait for it to dry 100%, I actually used paper cups to create a base that I placed the wood on, that way the slightly-sticky bottom wasn’t flush against my dropcloth but I could still work on the top of the wood.
I applied a first coat of the Minwax wipe-on poly, letting that dry for a few hours.

Then I sanded the whole thing with my orbital sander, which is definitely a little scary because it looks like you’re messing up the finish. But this is the key to a smooth, glossy final product.

After sanding and wiping the tabletop clean with a cloth, I applied another coat of the poly. Once it dried, it looked so shiny!
Step 9: Support pieces
Of course, I realized that I had forgotten to do a little reinforcing that I wanted to do to prevent sagging over time, so once the top was totally dry I flipped it over and screwed three pieces of scrapwood across to back to add some support (I just cut them to size on my tablesaw):

Then I did a fresh coat of stain over the support pieces so they blended in.

Step 10: Assemble!
Finally it was time to attach the top to the frame! Enter the handy brackets I had secured to the frame when I built it. First I carried the frame and tabletop upstairs (separately, as it would have been way too heavy with them screwed together already), where I set it them place upside down and screwed the tabletop to the brackets.

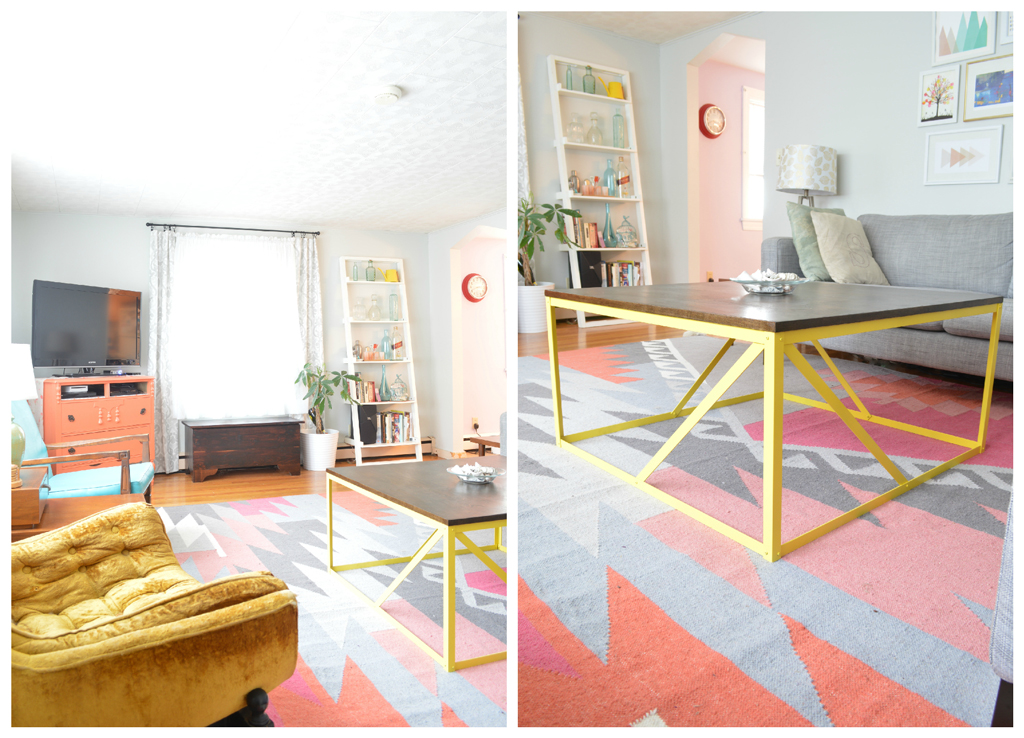
Then I flipped it over and stepped back to admire my handiwork!

This is by far the biggest furniture project I’ve ever taken on, and involved learning a lot of new techniques. Hurray for new challenges and the satisfaction that comes from conquering them!


———————————————–
Thank you so much for sharing with us, Sage! The end product looks great, even if it took a few revisions to get there (been there, done that!)
Remodelaholics — hustle over to Plaster and Disaster for more of Sage (and Naomi’s) colorful style and DIY tutorials — you’ll love their real-world posts and their beautiful projects (like how to turn a boring dresser into a midcentury beauty)! I love the map mural in the attic guest room and their wall-mount desk and shelving unit (which was, coincidentally, inspired by the same office as our office makeover!)
And, if you’re in LOVE with the rug like I am, Sage shared some info about it here.

Lorene has been behind the scenes here at Remodelaholic for more than a decade! She believes that planning projects and actually completing them are two different hobbies, but that doesn't stop her from planning at least a dozen projects at any given time. She spends her free time creating memories with her husband and 5 kids, traveling as far as she can afford, and partaking of books in any form available.


i love the coffee table! I think I’m going to try my hand at one. But just curious, does she know that those brown tiles are asbestos? It should be reasonably safe if it is sealed properly but that doesn’t look sealed at all and furthermore, the presence of tools that could be dropped heavily and chip the floor is terrifying. Mesothelioma has no cure, please have your floor seen to by professionals!
Thank you for the info and concern, Christina!
Thanks Christina! This is something we’re currently working on 🙁
Thanks for the chance to share our project!!
Thanks for sharing, Sage! I love how it turned out, even if it was a learning process to get there 😉
Wow, that’s amazing! I can’t believe you made it. Congrats on all of that problem-solving and hard work–it was worth it!
Thanks so much, Rachel! Totally worth it in the end, even if I wasn’t sure it would work out 🙂
You did a long, hard and great job, I really love your coffee table. I was not so brave when I did mine… You are a pro!
Anne.
Thanks Anne! Sometimes I’m up for a big challenge and sometimes not to much, this was one where I embraced the uncertainty! I think DIY is all about building on your skills and comfort zone, so where you are now may look easy compared to where you are next year!