On reflection…Making a Mirror
About a month ago my friend Em called me asking about remodeling. Her husband was going out of town for the weekend, and she had HUGE plans for the master bed and bath. She was wondering if she could do it all, and she was very hopeful. Since she knew that Justin and I have been doing things like this for almost 8 years now, she was hoping to get an idea of time and cost.
I went over to have a look. While the ideas were fabulous, the time was short. So, I talked her into a few basic changes, for the moment. She is after all, the busy mom of three and had only three days. Instead of the huge design, we talked about painting each room, the vanity, a piece of furniture or two, adding curtains, hanging art, and accessorizing.
One thing she really wanted to do was get rid of the huge double vanity mirror. She was worried though about having to repair the wall. While looking at the mirror I was immediately struck with a genius idea. I asked for a screwdriver and climbed up on her counter top, yeah, we are that good of friends, in my defense, I wasn’t wearing shoes… I think, I could be wrong.
Anyway, I unscrewed the little mirror clip at the top of her huge bathroom mirror, and found out that it was not glued to the wall (score definitely no repair). Once I was sure, I had to share my genius idea (that I have now been planning on using for my own similar mirror at home).
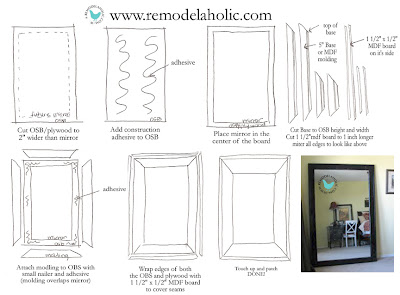
If she removed this mirror and glued it to a sheet of OSB approx. $5.00 (cut to size at Home Depot or Lowes) with some builders adhesive approx $4.00 and then wrapped it with some molding approx $1.00 per linear foot, it could be leaned against one of the walls in her huge bedroom.
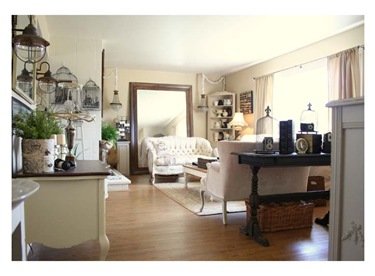
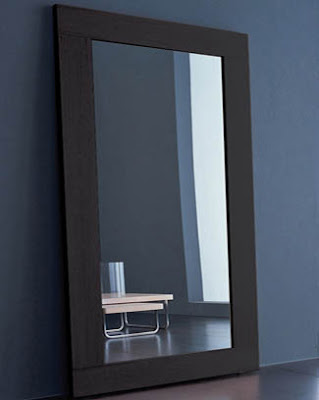
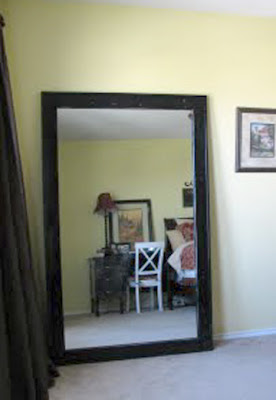
In essence, for a total of no more that $30 dollars she could have a $300.00+ mirror not unlike these examples:
Here is the printable instruction sheet. Just save the image. You may have my permission to use this for your own home projects but not on your personal blog without first contacting me. Thank you!
Cassity Kmetzsch started Remodelaholic after graduating from Utah State University with a degree in Interior Design. Remodelaholic is the place to share her love for knocking out walls, and building everything back up again to not only add function but beauty to her home. Together with her husband Justin, they have remodeled 6 homes and are working on a seventh. She is a mother of four amazing girls. Making a house a home is her favorite hobby.


>My parents saved the huge wall mirror that had hung in their bathroom. NOW I know what to do with it! Thanks for the great idea and inspiration!!
>How did I miss this? Thanks for putting it on Tatertots and Jello so I could catch up! I thought I'd gone through all of your projects.
>Hi! Stopping over from Tatertots and Jello. I love the mirror, and think it would work great from sliding glass doors.
-Mama E
http://www.homeandheartsblog.com
>Hi:
Just recently found your blog and love it. Wouldn't you know I had an old bathroom mirror hanging out on my back patio from when we redid our guest bathroom. I got to work. I have a question for you. When you glue the mirror onto the OSB board, the mirror sits higher. When you glue the molding onto the OSB board, the molding doesn't lie flat with the mirror, it sits at an angle. What did you do about the gap?
Thanks!
Kimm
>Kimm, it has been a while since we built this, but if you nail the inside molding to the outside wrapped molding with the mirror space intact it should sit flat.
This is hard to explain, (if you were to cut through the side would look like a "T" not just an "L") I hope that helps, if you need more help just email me and we can try to figure it out.
I hope that helps, I would still add the adhesive behind this, so that it hold together!
Good luck!
>Very cool..
Thanks for joining Get Your Craft on Thursday. Please join me next week for another great party!
>I never would have thought of this! You are a great friend and a bit of a genius. I always love visiting this blog. Thanks for joining in on Finished for Friday.
>Great tutorial- mirrors are SO expensive to buy already framed, and for what? Some wood and glass?
Your post was tied with another one for the most clicks during last week's Talented Tuesday at My Frugal Family, and is on of this week's featured projects!
Thank you for participating in Talented Tuesday! I look forward to seeing more projects!
>Love this! Such a nice, modern mirror 🙂 Great job!
Thanks for linking at Lucky Star Lane!
>Interesting! Great idea! Thanks for linking up for Friday Favorites!
>Very cool project! This is such a great way to get that look for less. Great idea.
>Excellent job! And – a much nicer price tag! Love it!
Thanks for planting your creative seed at Plant a Punkin Seed Party! Come plant again on Friday!
Kristi
Punkin Seed Productions
So I too like Kim am having a time trying to get the molding to lay flat. I put my mirror on the board, tried the molding in the side and there is just no way to get it flat. Just wobbles back and forth. I could just put it on th Osb board but I would rather not. Any suggestions? thx
I think in the near future I will make an updated tutorial. One suggestion that I could make would be to making a spacer with a material the same thickness of the mirror. That will allow the molding on top of the mirror to lay flat on the mirror and on the spacer. You can then nail the molding into the spacers as well. Another option would be to leave the gap and nail the outside molding perpendicular to the molding on the mirror. Let me know if that helps. Like I said earlier, I might just need to update the tutorial.
Justin
I came across this site looking for a mirrored dresser. I’m so excited to find you!! I absolutely love what you have done in your homes. Thank you I truly enjoy your site. You guys are fantastic!
Thanks Liz! What a nice comment that just made my day!
Your so welcome and Thank you!! I’ve told everyone at work about this site a few of us are going to tackle remodeling our fireplaces now!! LOL!
GOOD LUCK! And thanks again!